Turn WSDL Into Connector With Mulesoft SOAP Connect
One of Mule's powerful features is SOAP Connect, which turns your WSDL into the connector and install in the Mule design palette within less than a few minutes.
Join the DZone community and get the full member experience.
Join For FreeSOAP Connect is a feature of DevKit that enables users to turn multiple WSDL files or fetch them dynamically into a reusable connector. This is one of the best innovative features provided by Mulesoft and is one of fastest and easiest ways of converting WSDLs into connectors. This makes life easier for developers and allows them to come up with reusable components just a few minutes.
There are certain scenarios where we need to call the same web service again and again in various integrations. Instead of consuming the web service every time, it is better to have some reusable components. Mule provides SOAP Connect to achieve reusability. Apart from reusability, it turns WSDLs into connectors within few minutes without writing any code.
SOAP Connect vs. Web Service Consumer
This is one of the questions that arises in the mind of each developer. If there is already a pre-installed Web Service Consumer connector, then what is the need for SOAP Connect?
Web Service Consumer is a preinstalled connector with Anypoint Studio. It is an existing connector that you can configure to point to a WSDL location for consuming a SOAP web service.
SOAP Connect is a DevKit wizard that creates an Anypoint connector that connects to a specific service that can expose multiple WSDLs of the service. It provides re-usability.
For more details on Web Service Consumer, please refer one of my articles on how to consume SOAP-based web services with Mulesoft Anypoint Studio.
Let walk through how to turn WSDL into a connector.
Installing Maven and DevKit
Download and unpack Apache Maven and set the path variable M2_Home to unpack the folder.
To use DevKit, Apache Maven must be installed on your local drive.
To confirm if Maven is properly installed on your computer, click Window > Preferences and navigate to Anypoint Studio > Maven > Test Maven Configuration.
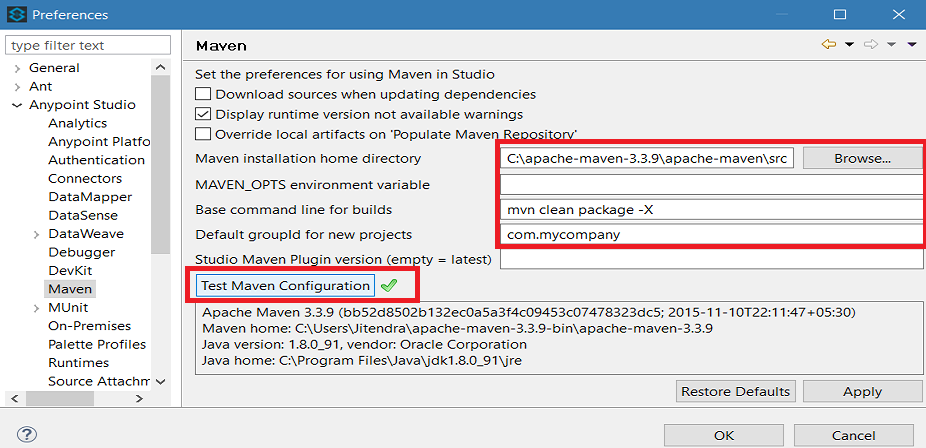
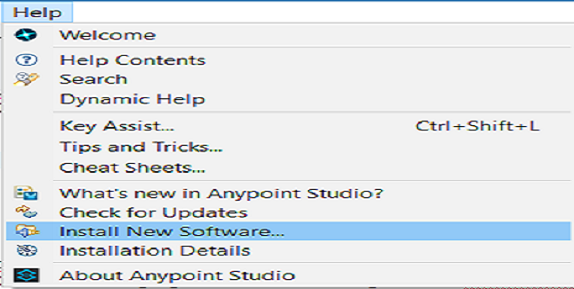
To install DevKit, click Help > Install New Software....
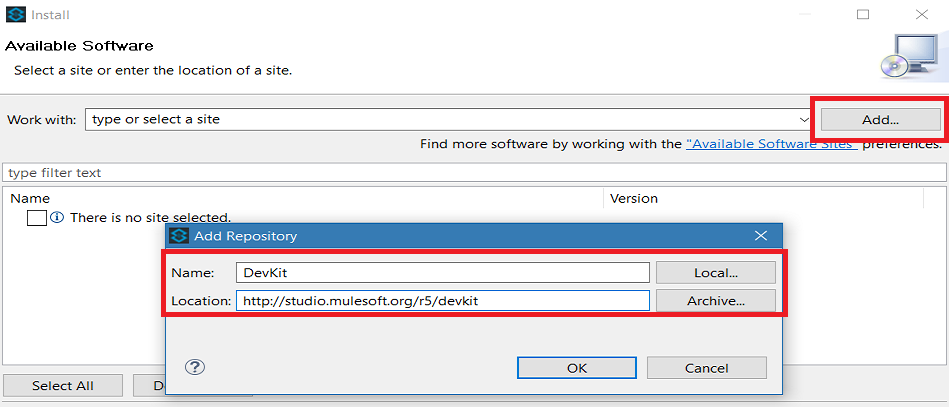
Now, it will navigate you to a new screen. Click Add. Provide the Name and Location from where you have to download and install DevKit.
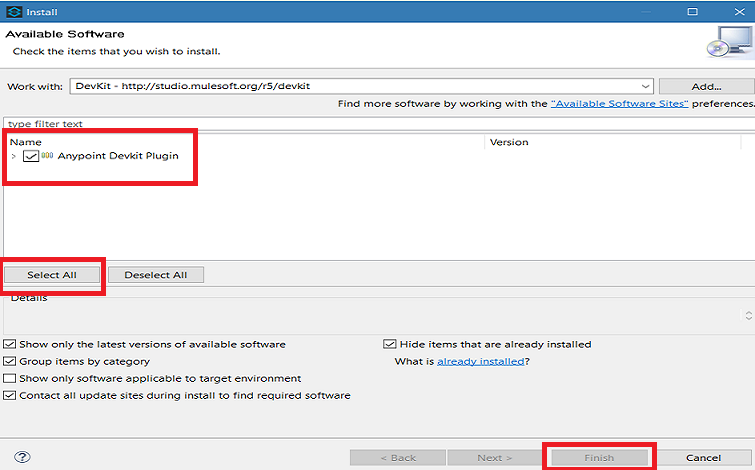
Click OK and then Select All. Finally, click Finish, and it will install DevKit for you.
Creating Anypoint Connector Project
Once Maven and DevKit are installed, then you are all set to turn your WSDL into a connector.
Click File > New > Anypoint Connector Project.

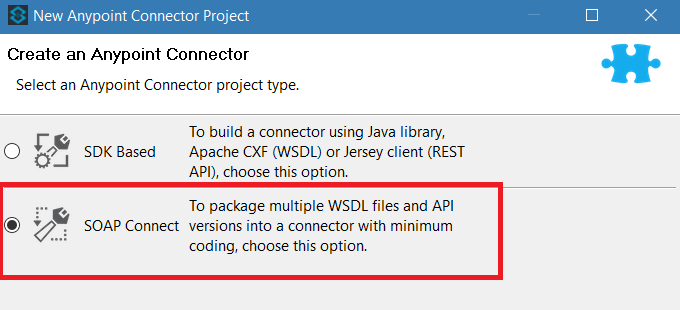
Now, it will open a new screen. Select SOAP Connect and click Next.
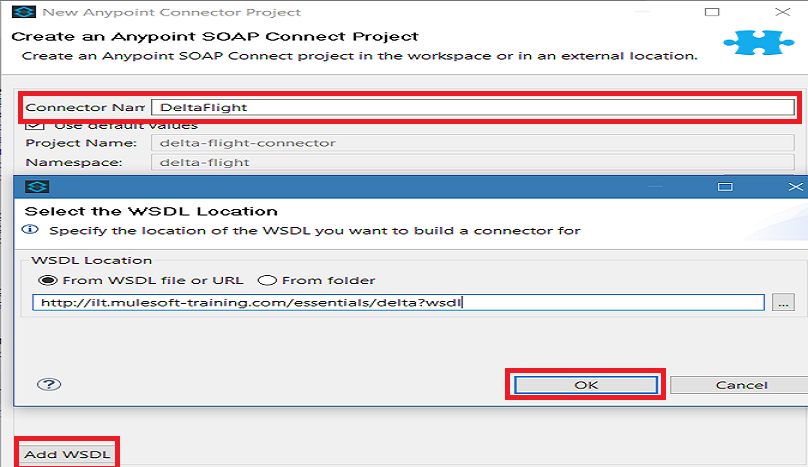
Now, you will be navigated to a new screen. Provide Connector Name as per your requirements and click Add WSDL. Once you click that, it will open a pop-up window. You can see two options: From WSDL file or URL (i.e., you can dynamically fetch the WSDL) and From Folder (i.e., local folder path to WSDL). Click OK.
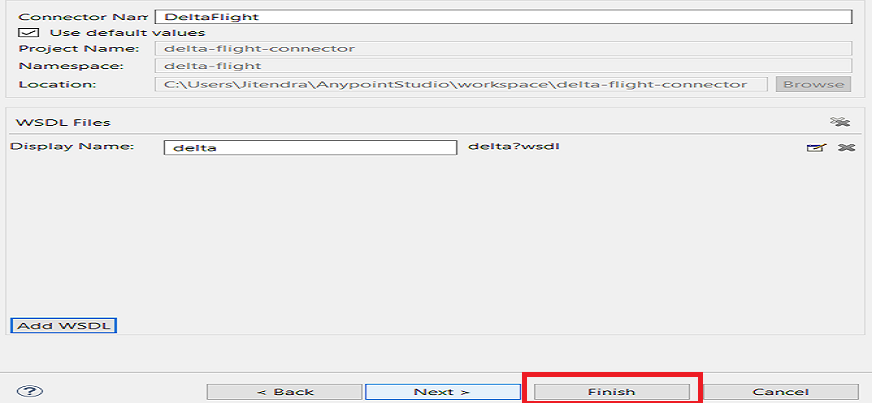
Finally, click Finish and it will generate all code for you depending on WSDL.
@Connector code:
package org.mule.modules.deltaflight;

import org.mule.api.annotations.Config;
import org.mule.api.annotations.Connector;
import org.mule.modules.deltaflight.config.ConnectorConfig;

@Connector(name="delta-flight", friendlyName="DeltaFlight", minMuleVersion = "3.7")
public class DeltaFlightConnector {

    @Config
    ConnectorConfig config;

    public ConnectorConfig getConfig() {
        return config;
    }

    public void setConfig(ConnectorConfig config) {
        this.config = config;
    }

}
@WsdlProvider code:
package org.mule.modules.deltaflight.config;

import org.mule.api.annotations.Configurable;
import org.mule.api.annotations.components.WsdlProvider;
import org.mule.api.annotations.ws.WsdlServiceEndpoint;
import org.mule.api.annotations.ws.WsdlServiceRetriever;
import org.mule.devkit.api.ws.definition.DefaultServiceDefinition;
import org.mule.devkit.api.ws.definition.ServiceDefinition;
import org.mule.api.annotations.param.Default;

@WsdlProvider(friendlyName = "Configuration")
public class ConnectorConfig {

    @Configurable
    @Default("http://training.cloudhub.io/essentials/delta")
    private String endpoint;

    @WsdlServiceRetriever
    public ServiceDefinition getServiceDefinition() {
           return new DefaultServiceDefinition(
                "TicketServiceService_TicketServicePort",
                "delta",
                "http://ilt.mulesoft-training.com/essentials/delta?wsdl",
                "TicketServiceService",
                "TicketServicePort");
    }

    @WsdlServiceEndpoint
    public String getServiceEndpoint(ServiceDefinition definition) {
         return endpoint;
    }


    public String getEndpoint() {
        return endpoint;
    }

    public void setEndpoint(String endpoint) {
        this.endpoint = endpoint;
    }

}
Install or Update Connector
In explorer pane, right click on the project then select Anypoint Connector > Install Or Update. This will install your connector into Mule design palette.
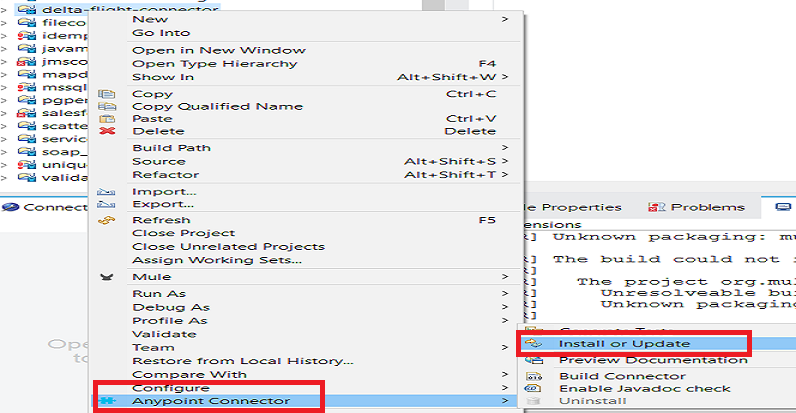
Now, you can use the connector into your flow. You just need to follow this simple steps to turn your WSDL into the connector. This will hardly take a few minutes.
Conclusion
Mulesoft provides various powerful features. One of the features is SOAP Connect, which turns your WSDL into the connector and install in the Mule design palette within less than a few minutes. This can be reused across many applications. It is a very easy and intuitive way of converting the WSDL into a connector.
Opinions expressed by DZone contributors are their own.

Comments