Send JMeter Test Reports by Email Automatically
Learn how to use a simple plugin to receive automatic test reports by email when using the JMeter tool for functional and load testing.
Join the DZone community and get the full member experience.
Join For FreeJMeter is an open-source, Java-based functional and load testing tool which was initially developed for web but has since extended to support all major protocols, like FTP, SMTP, JMS, and JDBC.
This article expects that you're familiar with the basics of JMeter and you can configure and run load tests using JMeter.
Objective
When running a prolonged load test, you might want to receive the test reports automatically via email upon test completion, or you might be running scheduled tests and want to get test reports by email. Whatever the case, our goal is to configure JMeter to send the generated test reports automatically by email.
There are two ways you can achieve this using JMeter. The first method doesn't require any external plugins but depends on JMeter's configuration to overcome the inherent problem (described below) while sending test reports via SMTP sampler.
The second method requires you to install JMeter Standard Plugins (via Plugins Manager or via external jars) but provides more flexibility in the reporting section.
Prerequisites
The test has been performed with Apache JMeter v4.0, which requires JDK 8. The test script consists of a basic HTTP sampler with SMTP Sampler and "Summary Report" listener for the first method and "jp@gc Flexible File Writer" for the second method.
Using SMTP Sampler and Default "Summary Report" Listener
Add a Thread Group to the Test Plan.
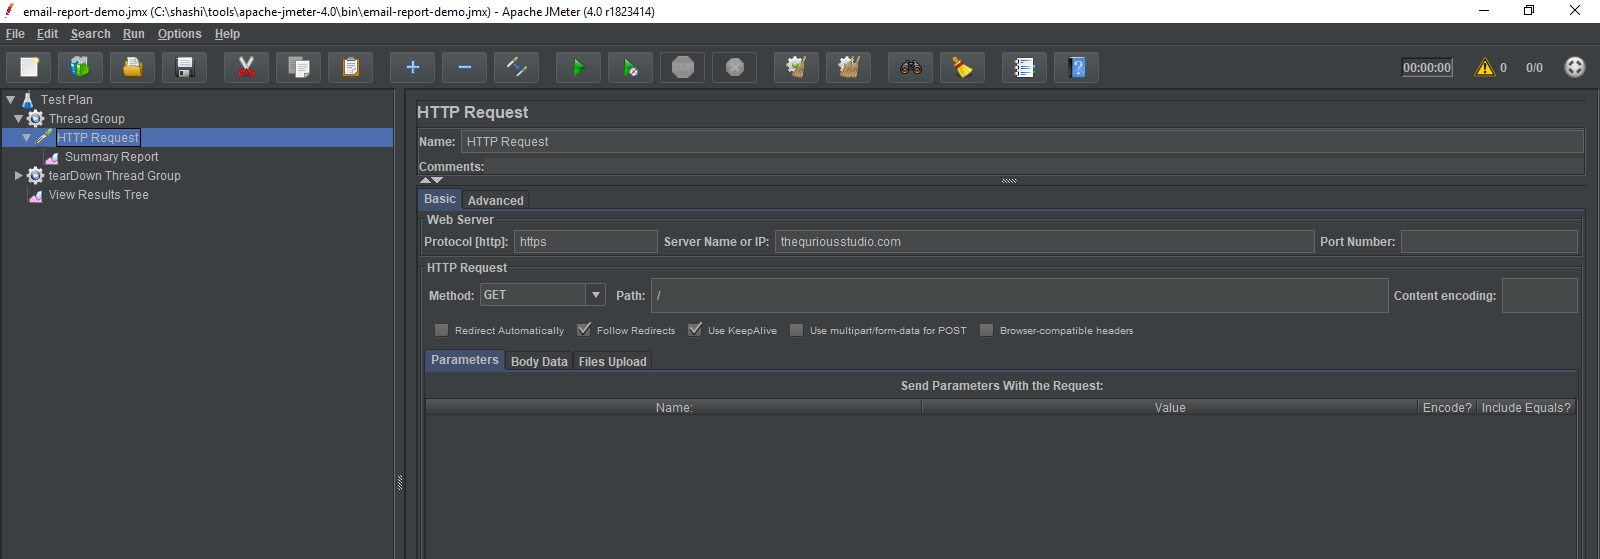
Add an HTTP Sampler and set up the required parameters, like Server Name, Method, Path, etc.
Add the "Summary Report" listener to the Thread Group. Configure the File Name parameter to define the file where reports will be saved (the default file path is JMeter's bin directory). The File Name parameter is important as it will be referenced by the SMTP sampler.
Add a tearDown Thread group to the Test Plan. The tearDown thread group will run only after the test has been execute, so it will run after the first Thread Group is completed.
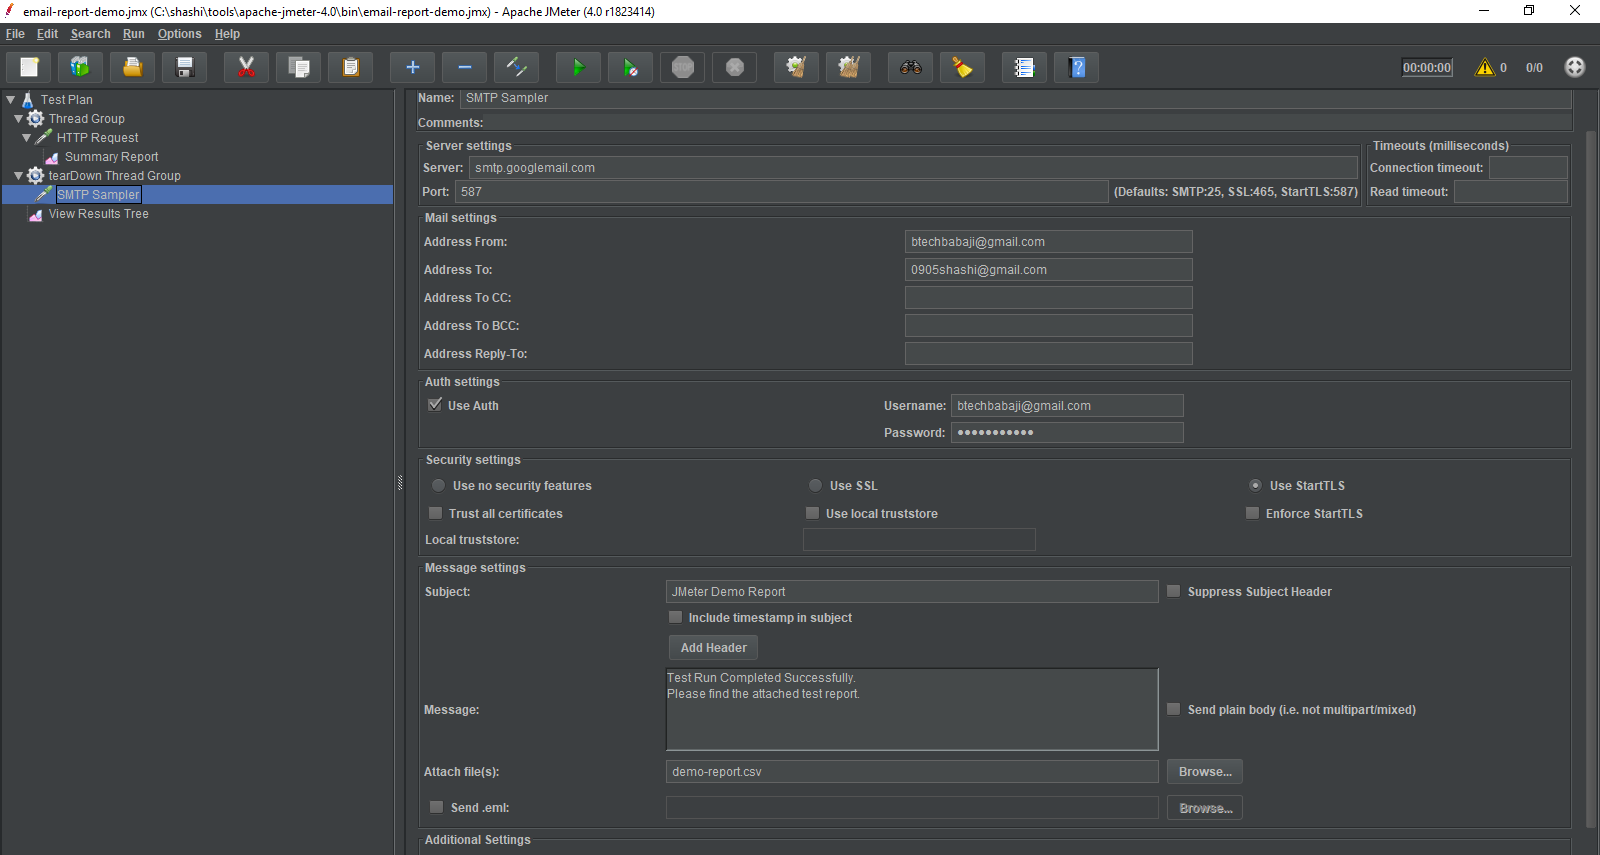
Add the SMTP Sampler to the Tear-Down Thread group and configure the mail server parameters. A demo configuration using Gmail. The SMTP server would use the following parameter values:
- Server- smtp.googlemail.com
- Port- 587
- Address From - sender@gmail.com
- Address To - recipient@gmal.com
- Auth Settings
- username - sender@gmail.com
- password - sender's Gmail password
- Security Settings - Use StartTLS
- Message Settings -
- Subject - Email Subject/Title to be used
- Message - Email body goes here
- Attach File(s) - enter the filename used in the Summary Report Listener in Step 3
When using Gmail as an SMTP server, you might need to configure Gmail's settings to allow "Less-Secured" apps to sign in; otherwise, Google may block JMeter from sending any emails.

Now your test plan is almost complete, but if you run the test now, you will get an empty file in the mail without any data. This is due to the fact that the report file is written only after the test script has finished execution (which includes our tearDown Thread Group). When the SMTP Sampler is executed, it gets only an empty file without any data. The reason JMeter does this is to provide better performance — instead of executing write operations on a per-line basis, it is done all at once after test execution.
However, this property of JMeter can easily be controlled by modifying the "user.properties" (or "jmeter.properties") configuration file located in JMeter's bin directory.
Find and modify (or add, if not present) the following section in the file, setting the autoflush parameter to true:
# AutoFlush on each line written in XML or CSV output
# Setting this to true will result in less test results data loss in case of Crash
# but with impact on performances, particularly for intensive tests (low or no pauses)
# Since JMeter 2.10, this is false by default
jmeter.save.saveservice.autoflush=true
Now, restart the JMeter and run the test again. You should be able to get the test report on mail with complete data.
Using SMTP Sampler With jp@gc Flexible File Writer
The jp@gc standard plugin set for JMeter can be used to extend its capabilities, including features like writing test results in flexible formats, enabling server monitoring, and recording performance metrics.
The standard plugin set can be installed via Plugins Manager or by directly downloading the jar and putting it into the /lib/ext directory. However, Plugins Manager provides easy-to-use plugin management capabilities via UI. To install Plugins Manager, download its jar.
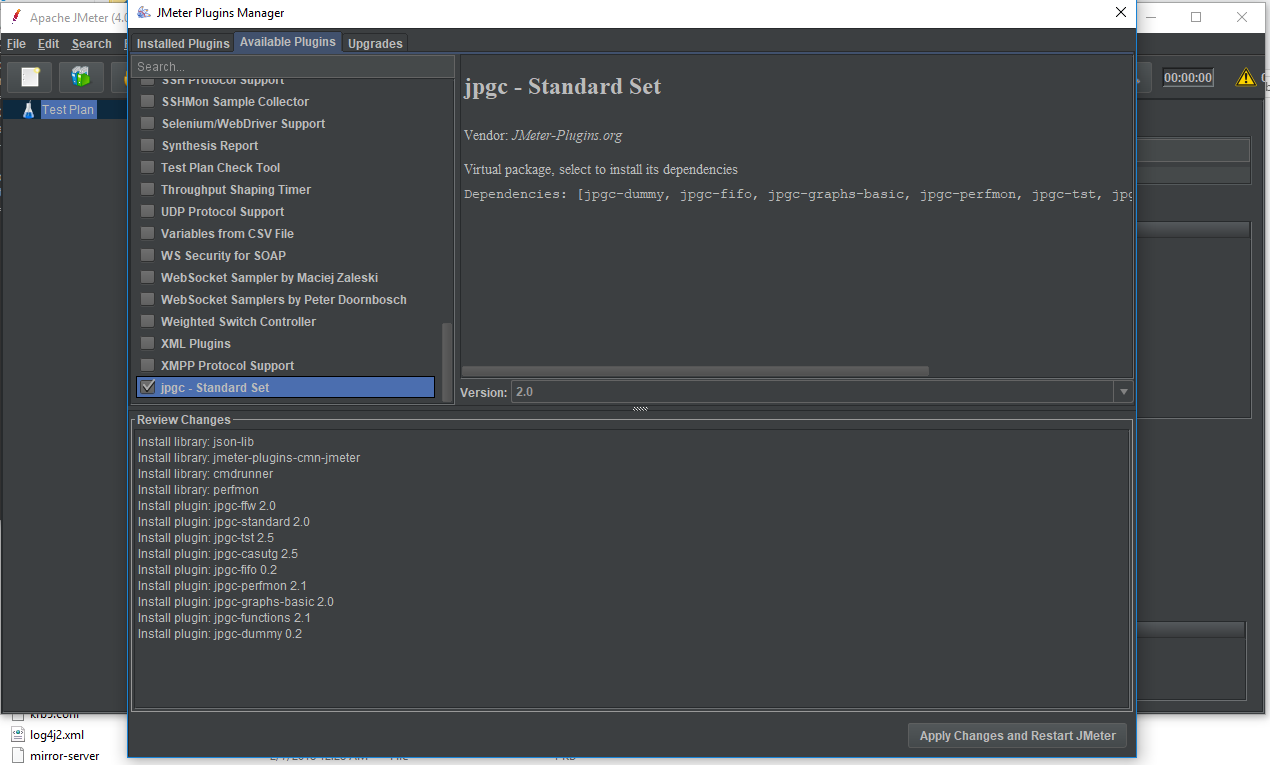
Once installed, you can access the Plugins Manager via File Menu in JMeter (under the "options" tab). To install the jp@gc Standard Plugin Set (which includes Flexible File Writer), go to the "Available Plugins" tab and mark the checkbox for "jp@gc Standard Set." Click the button in the bottom-right corner to "Apply Changes and Restart JMeter."

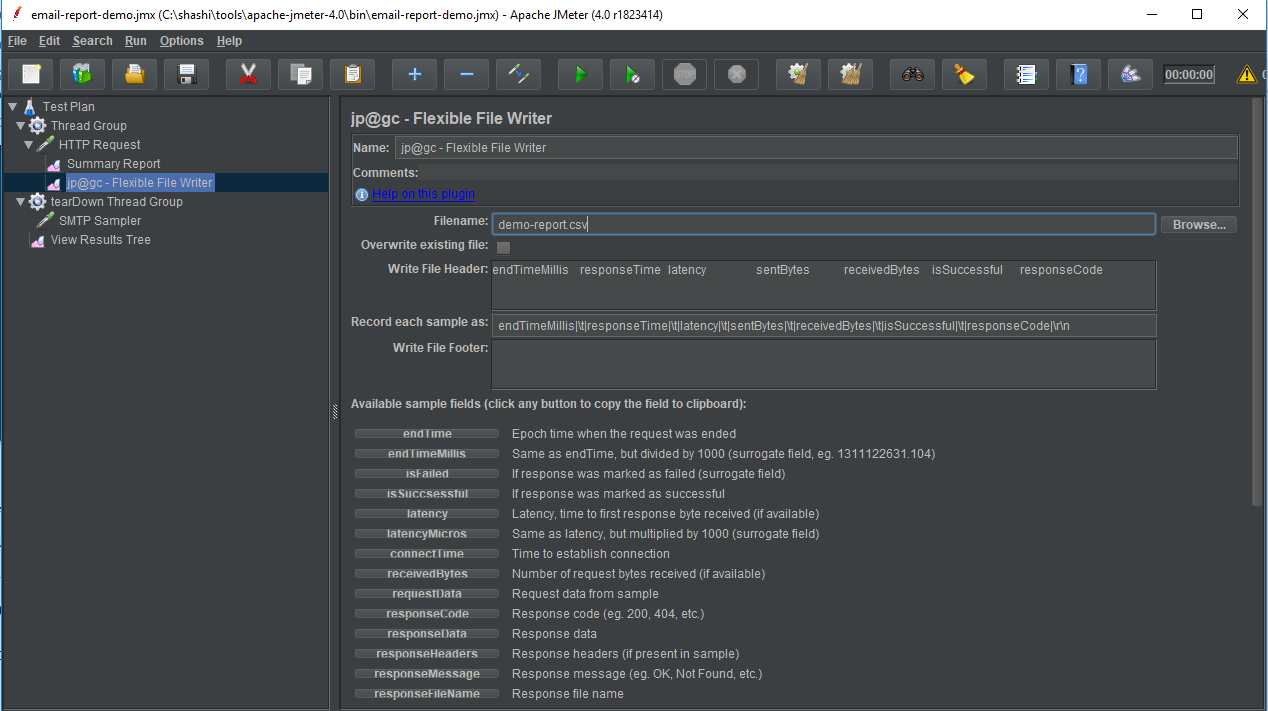
After restarting JMeter, you can find Flexible File Writer in the list of Listeners. Now, replace the "Summary Report" listener in our test script with the "Flexible File Writer."
When you use Flexible File Writer, you don't have to modify the configuration file to enable Autoflush (done in Step 6) as it keeps writing the report file during test execution.
Notice the flexibility with the Flexible File Writer Listener. You can select the parameters to be included in the report by just selecting them from the list. You can also specify the format in which the data is written in the file.

You can read more about the usage and features of Flexible File Writer.
The choice between the two methods above depends solely on your test requirements. If you only need a basic summary report, you can go with the inbuilt Summary Report Listener.
In case you need more flexibilities or control over the reports and want to explore more new features, then try out the jp@gc set of plugins.
Opinions expressed by DZone contributors are their own.

Comments