Selenium Automation Script With JavaScript
In this article, we are going to discuss how to create selenium automation scripts with JavaScript language.
Join the DZone community and get the full member experience.
Join For FreeSelenium is an open-source automation framework initially introduced in 2004. Using this framework, we can validate web applications across different browsers and platforms. Java, C#, Python are mostly used for developing test scripts. Testing performed using Selenium are generally referred to as Selenium testing.
The initial version released is just a single tool, but the latest version is now not only a tool — it’s a software suite with a pack of IDE, RC, and WebDriver.
To make automation scripting easier, even for testers not experienced with OOP, we're going to create automation scripts with JavaScript.
The following components are required to kick start with automation:
What is JavaScript?
- JavaScript is a scripting and programming language.
- It is majorly used for client-side validation for creating network-centric applications.
- The implementation of scripts will be easy because it is integrated with HTML.
- JavaScript is an open-source programming language. It's also cross-platform.
- Validation of user inputs can be done before sending the page off to the server so that load and traffic on the server will be reduced. This will result in faster execution times.
- Selenium WebDriver scripts can also be written using JavaScript language.
What Is Node.js?
- Node.js is an open-source server environment.
- Node.js runs on different operating systems (Windows, Linux, Mac OS, etc.).
- It is a server-side platform, built on JavaScript Engine V8.
- It is an event-driven I/O model that makes lightweight and efficient real-time applications that run across distributed devices.
- It povides a rich library of various JavaScript modules.
In our context, we use this Node.js for executing the automation scripts developed using JavaScript language.
What is Visual Studio Code?
- It an IDE built for programming with languages like Java, JavaScript, Go, Node.js, etc.
- It works on the Electron framework and in almost all operating systems (Windows, Linux, and Mac OS).
Installations and Configurations:
The following are the configurations are required to develop and execute the automation scripts using JavaScript language.
Step 1: Node.js Installation:
- Download the Node.js from https://Nodejs.org/en/download/ and install it on your machine.
- Ensure not to change any options during installation. On successful installation, verify the version that got installed via command prompt using the command,
node -v.

Step 2: Selenium WebDriver installation:
- Install Selenium Web Driver by typing the command:
npm Install Selenium-webdriver.
Step 3: Visual Studio Code installation:
- Download and install from the site: https://code.visualstudio.com/download.
Step 4: Let’s make the final configuration before we make start automation:
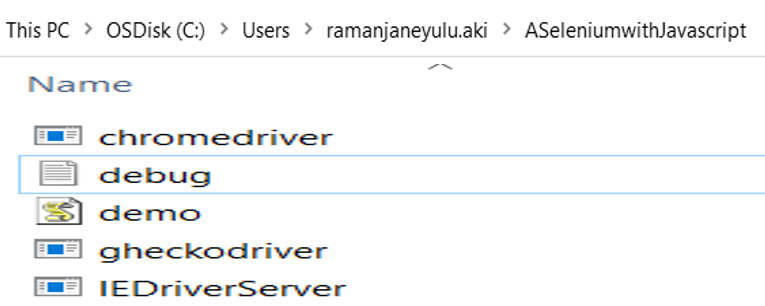
- Create a folder with the desired name anywhere in your machine.

- Download browser executable files (Chrome, IE Driver, etc.) from https://www.selenium.dev/downloads/ and place those files in the above-created folder.

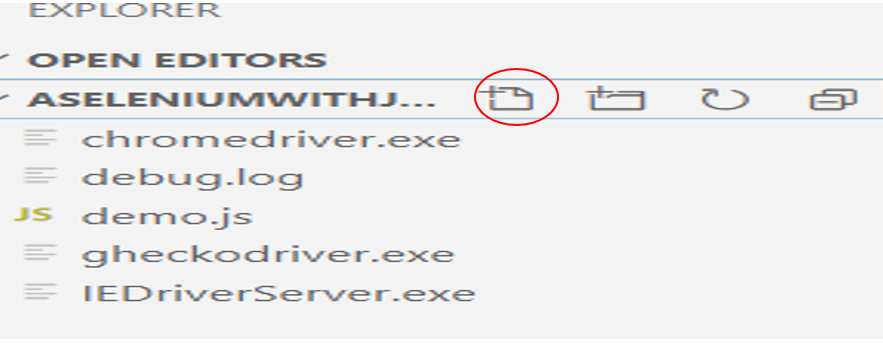
- Launch Visual Studio Code, click on File ---> Open Folder and select the folder path of browser executable files.

- Select the folder which was created earlier. (Here, we are selecting ASeleniumwithJavascript folder according to our configuration).

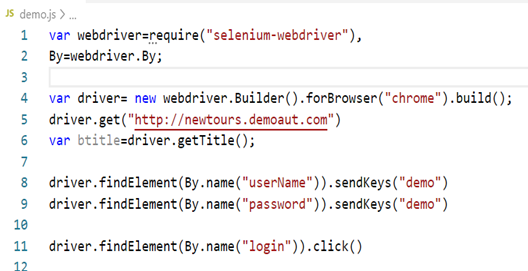
- Now, select and click on new file against folder and name it and save it with the extension ‘.js’ (here demo.js).

- Double click on the file (demo.js) and write the Selenium automation script in the editor panel.

- Click on the terminal window from the menu bar.

- Type
node filename.jsin your terminal and hit enter to run.

- You will be able to see a successful message/error message in the terminal window once the code has executed.
Conclusion
Similarly, we can write other automation scrips, as per the business requirements and run the scripts with the same configuration.
Opinions expressed by DZone contributors are their own.

Comments