Screen Sharing in Java
Learn how to build a screen-sharing application using Java, Node.js, and JxBrowser.
Join the DZone community and get the full member experience.
Join For FreeRemote screen sharing is used in various applications and services, from web conferencing to remote access applications. A back-office employee can use it to consult a colleague on the frontline or a technical support specialist can use it to see exactly what their client sees.
You may go with a third-party application like a TeamViewer. But what if you need to have the remote access capabilities right in your Java application? In this case, you may want to go the other direction.
In this article, I will show an approach that lets you implement screen sharing between two Java applications running on different PCs using the capabilities of JxBrowser.
JxBrowser is a cross-platform Java library that lets you integrate the Chromium-based web browser control into your Java Swing, JavaFX, SWT apps, and use hundreds of Chromium features.
To implement screen sharing in Java, I will utilize the fact that Chromium supports screen sharing out of the box and JxBrowser provides programmatic access to it.
Overview
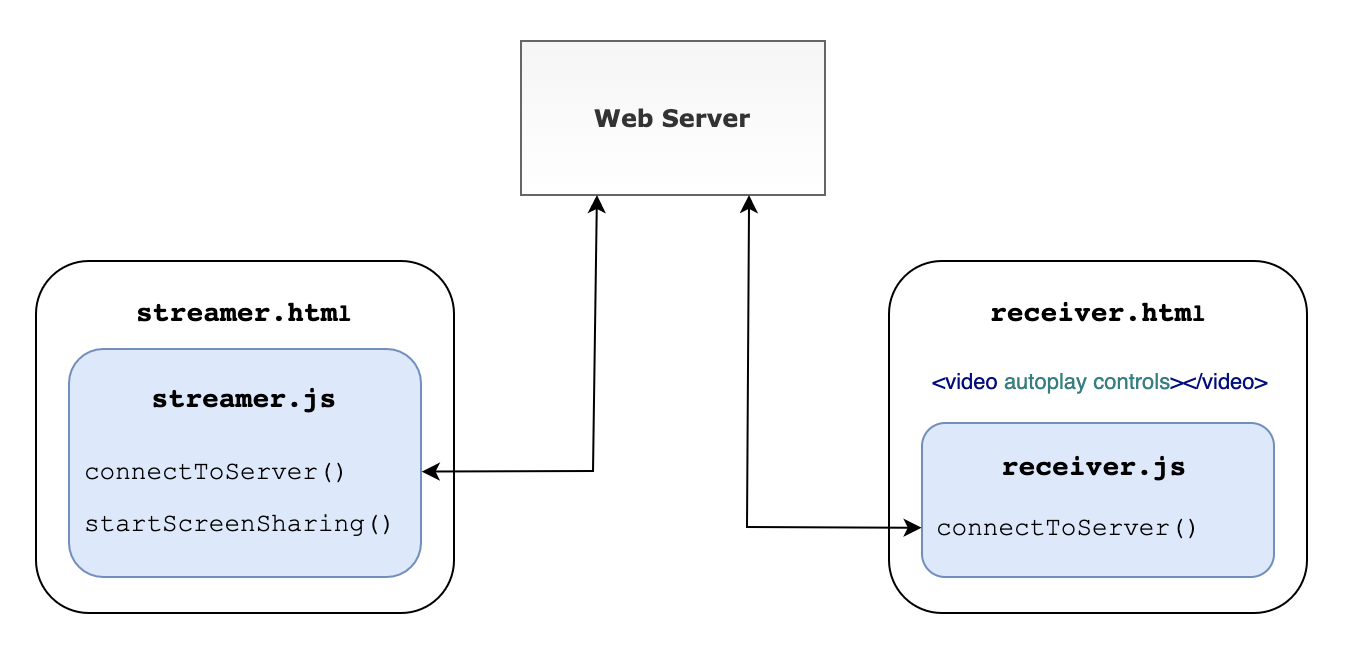
The project consists of two parts: the server on Node.js and two Java applications.
The server is a simplistic implementation of a WebRTС server. This part of the project contains the JavaScript code for connecting to the server and starting the screen-sharing session.
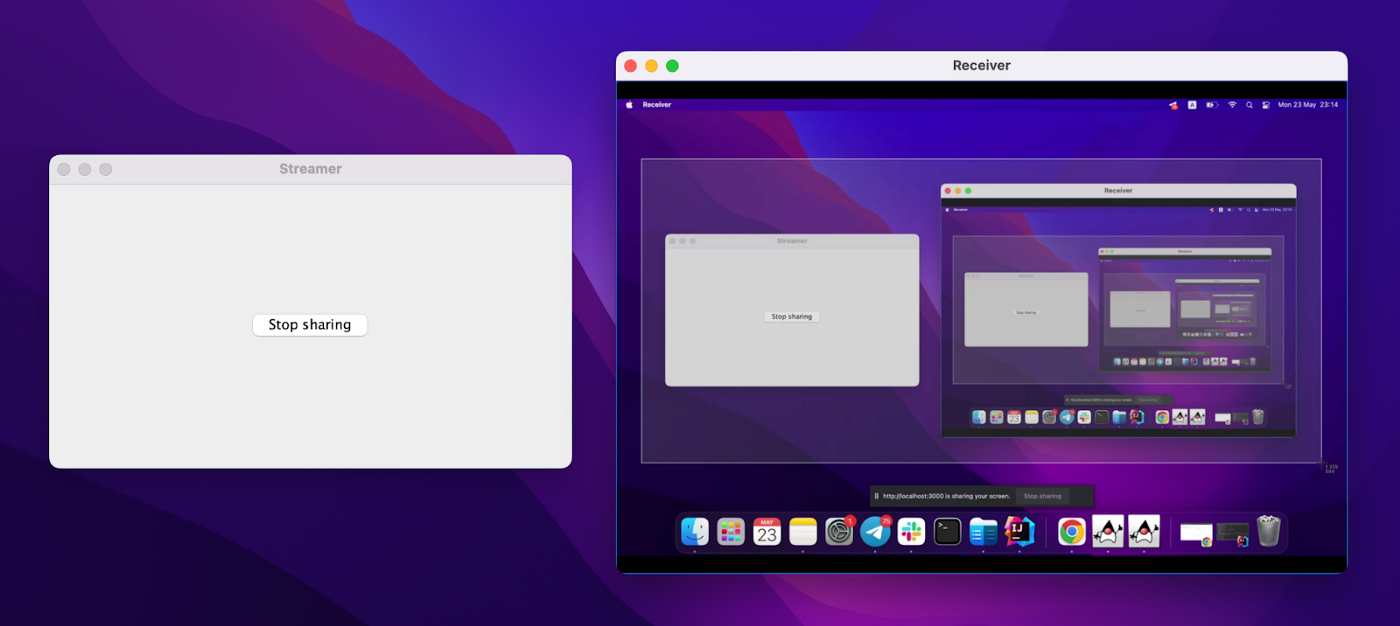
Java clients are two desktop applications. The first one is a window with a button. Clicking the button starts the sharing session. The second application automatically receives the video stream and shows it. And there is a button to stop the screen sharing.

WebRTC Server
The WebRTC server is configured for interaction between two clients: one streamer and one receiver. It serves two static pages, streamer.html and receiver.html respectively.
const app = express();

app.use(express.static('public'));

app.get('/streamer', (req, res) => {
   res.sendFile(rootPath + 'public/streamer.html');
});

app.get('/receiver', (req, res) => {
   res.sendFile(rootPath + 'public/receiver.html');
});
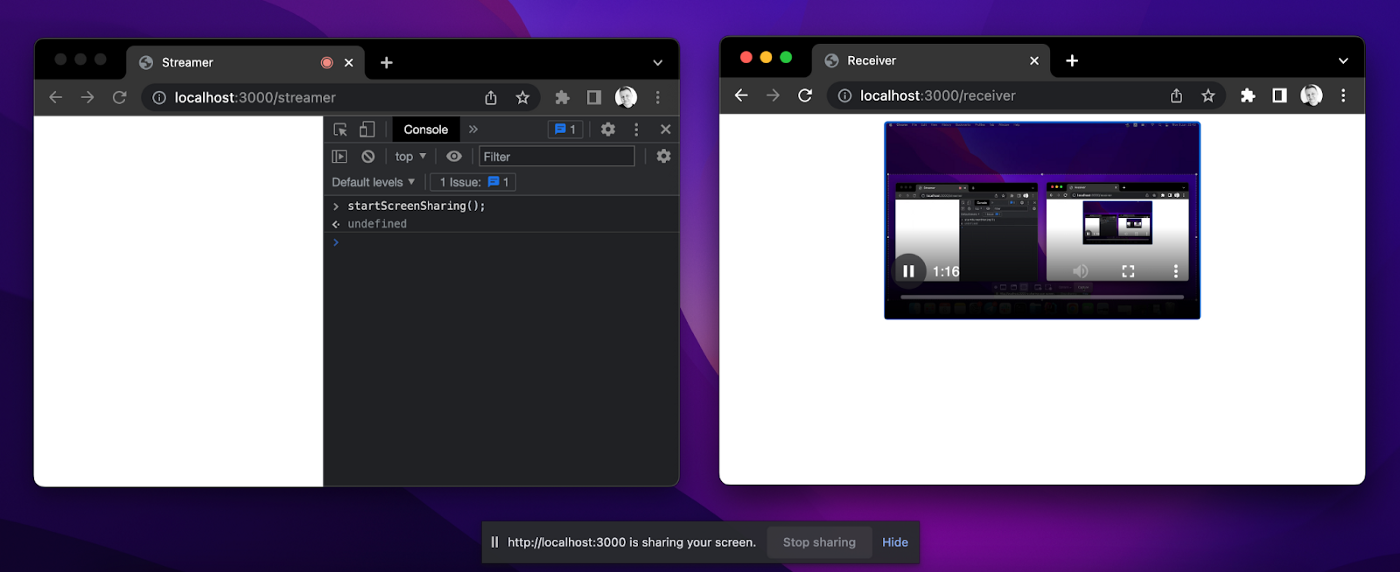
Each HTML file contains JavaScript code that connects to the server and sets up screen sharing via WebRTC. When a streamer starts capturing, we receive its screen view as a video stream. To show it, we use the built-in HTML5 video player on the receiver’s end.

To check that everything is working fine, let’s open two browser windows and see it for ourselves.

The source code of the project is available on GitHub.
Java Clients
Let’s implement Java clients and integrate them with the JavaScript application. We need to initialize an empty Gradle project and add JxBrowser dependencies using JxBrowser Gradle Plug-in.
plugins {
   …
   id("com.teamdev.jxbrowser.gradle") version "0.0.3"
}

jxbrowser {
   version = "7.24"
}

dependencies {
   // Detects the current platform and adds the corresponding Chromium binaries.
   implementation(jxbrowser.currentPlatform())

   // Adds a dependency to Swing integration.
   implementation(jxbrowser.swing())
}
Streamer App
Let’s start with an application that will share its screen.
We need to connect to the server on behalf of the streamer. First, we need to create Engine and Browser instances:
Engine engine = Engine.newInstance(HARDWARE_ACCELERATED);
Browser browser = engine.newBrowser();
And load the required URL:
browser.navigation().loadUrlAndWait("http://localhost:3000/streamer");Once the URL is loaded, we access the JavaScript code in streamer.html, and we can start screen sharing right from Java on button click:
JButton startSharingButton = new JButton("Share your screen");

startSharingButton.addActionListener(e -> {
   browser.mainFrame().ifPresent(mainFrame ->
       mainFrame.executeJavaScript("startScreenSharing()"));
});
By default, when a web page wants to capture video from the screen, Chromium displays a dialog where we can choose a capture source. With JxBrowser API, we can choose the capture source in the code:
browser.set(StartCaptureSessionCallback.class, (params, tell) -> {
    CaptureSources sources = params.sources();
    // Share the entire screen.
    CaptureSource screen = sources.screens().get(0);
    tell.selectSource(screen, AudioCaptureMode.CAPTURE);
});
Let’s save the instance of CaptureSession, so we can programmatically stop it later.
private CaptureSession captureSession;
…
browser.on(CaptureSessionStarted.class, event ->
    captureSession = event.capture()
);
We need a different button for this purpose:
JButton stopSharingButton = new JButton("Stop sharing");
stopSharingButton.addActionListener(e -> {
   captureSession.stop();
});
Receiver App
In the receiver application, we will be showing the shared screen.
Like in the streamer app, we need to connect to the WebRTC server, but this time as a receiver. So, create Engine and Browser instances, and navigate to the receiver’s URL:
Engine engine = Engine.newInstance(HARDWARE_ACCELERATED);
Browser browser = engine.newBrowser();
browser.navigation().loadUrlAndWait("http://localhost:3000/receiver");
To display the streamer’s screen in a Java app, let’s create the Swing BrowserView component and embed it into JFrame:
private static void initUI(Browser browser) {
   BrowserView view = BrowserView.newInstance(browser);

   JFrame frame = new JFrame("Receiver");
   frame.setDefaultCloseOperation(WindowConstants.EXIT_ON_CLOSE);
   frame.setSize(700, 500);
   frame.add(view, BorderLayout.CENTER);
   frame.setLocationRelativeTo(null);
   frame.setVisible(true);
}
The BrowserView component will display the content of the loaded web page with the HTML5 video player, and we will be able to see the streamer’s screen.
That’s it!

Code samples are provided under the Apache License 2.0 and available on GitHub. You can start the WebRTC server and both Java applications by running the following commands in different terminals:
cd server && node server.js
cd clients && ./gradlew runStreamer
cd clients && ./gradlew runReceiver
Conclusion
In this article, I showed you how to share the screen in one Java application and display it in another one using JxBrowser.
I have created a simple JavaScript application that can share the screen. Then I integrated it into two Swing applications using JxBrowser.
With the capturing API provided by JxBrowser, I enriched a standard Java application with screen-sharing functionality in no time.
Opinions expressed by DZone contributors are their own.

Comments