How to Integrate SalesForce With Mule
Once you integrate SalesForce, you can securely connect to and access data from your Mule application, as well as query, update, and delete records.
Join the DZone community and get the full member experience.
Join For FreeSalesForce Connector is a secure way of connecting to and accessing data from a Mule application. It handles all five ways of integrating Salesforce. It is capable of performing all of the operations exposed by SalesForce via four of their APIs.
Prerequisites
Create a SalesForce account if you don't have one.
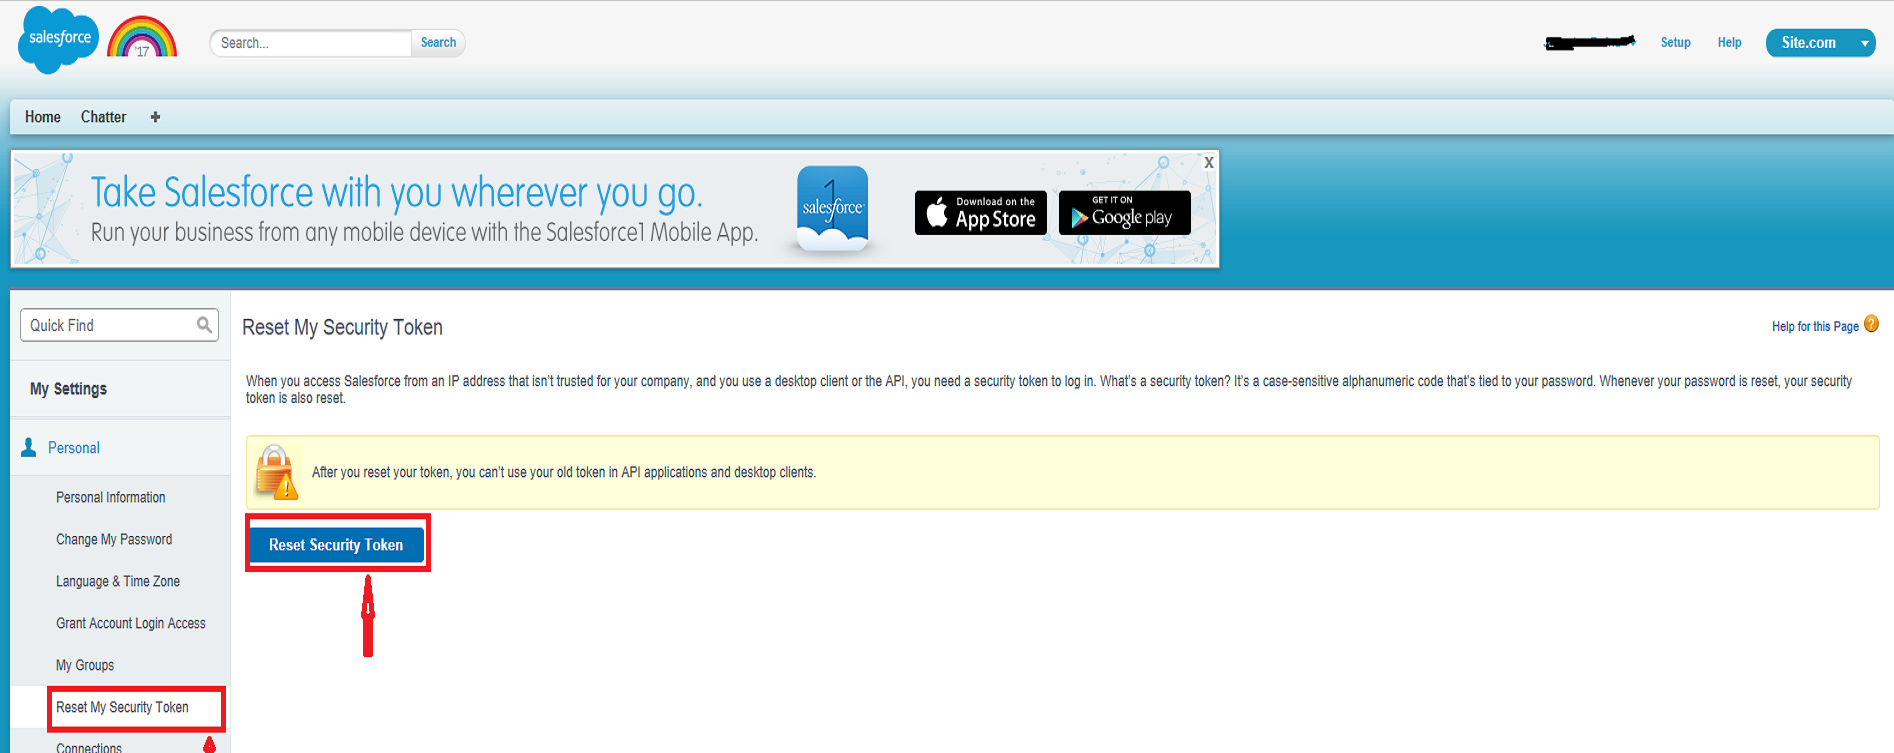
Reset the security token.
Go to My Settings > Personal > Reset My Security Token. Click Reset Security Token and it will send a security token to your registered email.
We will discuss how to create account record in SalesForce using basic authentication from the Mule application.
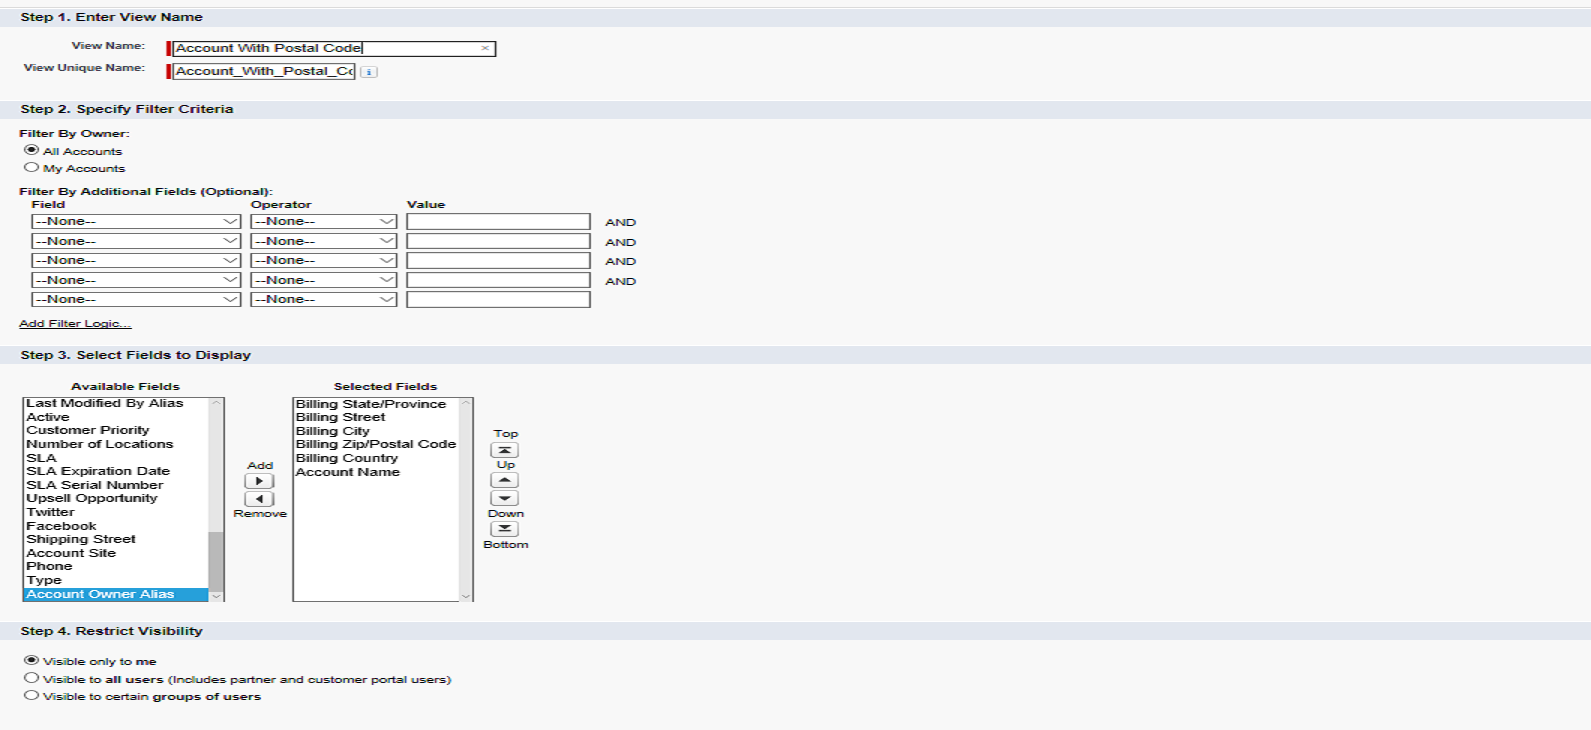
Create Accounts View With Postal Code in Salesforce
Log into Salesforce. Go to Accounts > Create New View. Enter the view name All Accounts with Postal Code and then go to Select Fields to Display.
Remove all default fields available in Selected Fields and add Billing State/Province, Billing Street, Billing City, Billing Zip/Postal Code, Billing Country, and Account Name.
 Designing the Mule Flow With Anypoint Studio
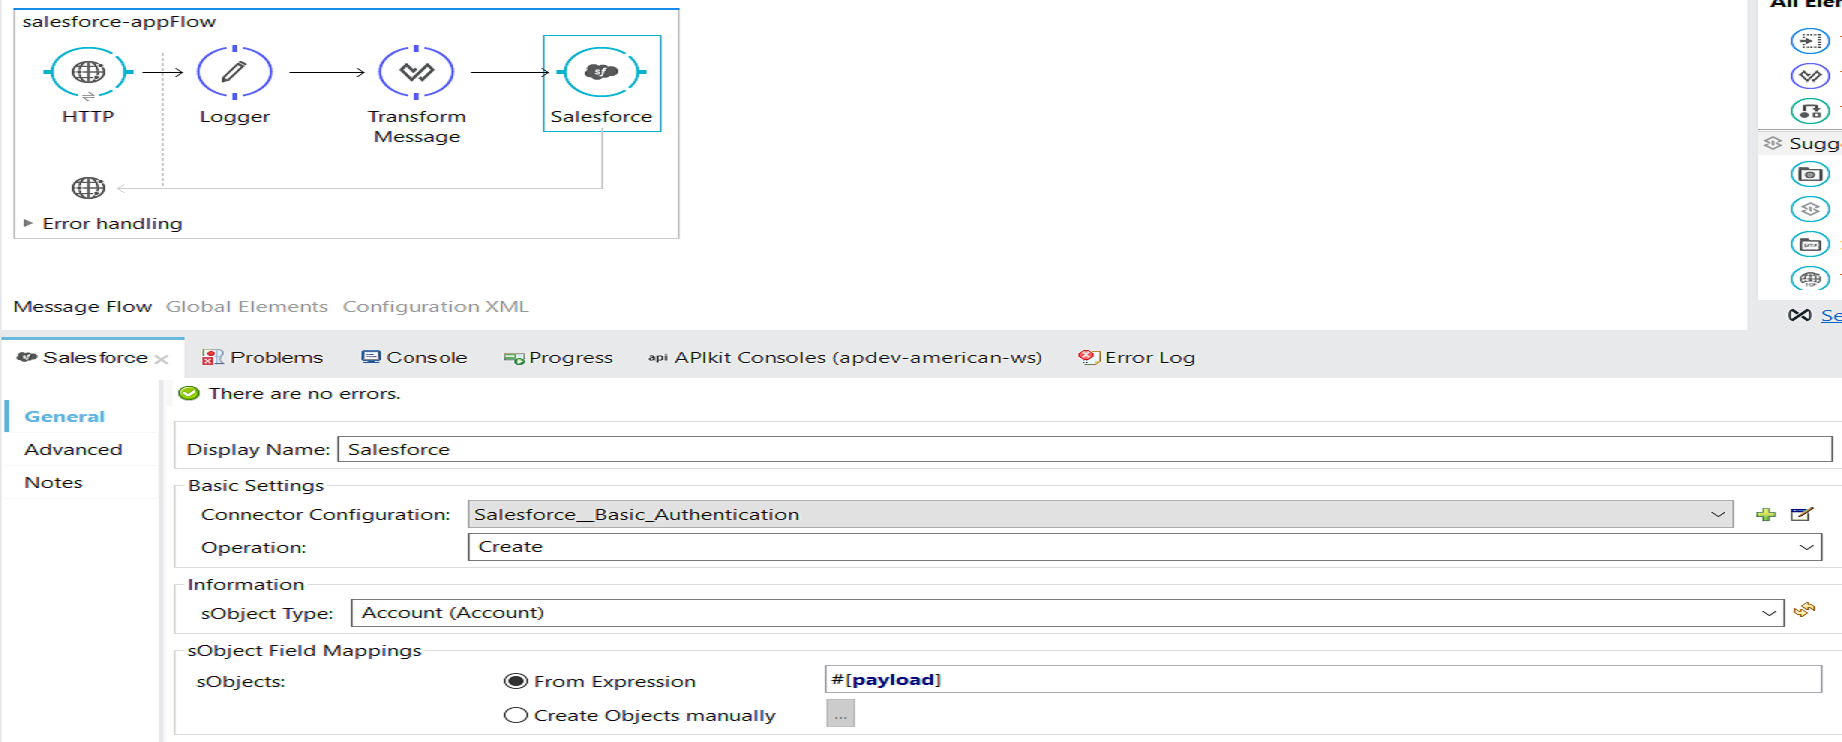
You can use HTTP Listener to receive messages and transform input messages using DataWeave in the required format to create accounts with a postal code in Salesforce.
<?xml version="1.0" encoding="UTF-8"?>
<mule
	xmlns:dw="http://www.mulesoft.org/schema/mule/ee/dw"
	xmlns:metadata="http://www.mulesoft.org/schema/mule/metadata"
	xmlns:http="http://www.mulesoft.org/schema/mule/http"
	xmlns:sfdc="http://www.mulesoft.org/schema/mule/sfdc"
	xmlns="http://www.mulesoft.org/schema/mule/core"
	xmlns:doc="http://www.mulesoft.org/schema/mule/documentation"
	xmlns:spring="http://www.springframework.org/schema/beans"
	xmlns:xsi="http://www.w3.org/2001/XMLSchema-instance"
xsi:schemaLocation="http://www.springframework.org/schema/beans http://www.springframework.org/schema/beans/spring-beans-current.xsd
http://www.mulesoft.org/schema/mule/core http://www.mulesoft.org/schema/mule/core/current/mule.xsd
http://www.mulesoft.org/schema/mule/http http://www.mulesoft.org/schema/mule/http/current/mule-http.xsd
http://www.mulesoft.org/schema/mule/sfdc http://www.mulesoft.org/schema/mule/sfdc/current/mule-sfdc.xsd
http://www.mulesoft.org/schema/mule/ee/dw http://www.mulesoft.org/schema/mule/ee/dw/current/dw.xsd">
	<http:listener-config name="HTTP_Listener_Configuration" host="0.0.0.0" port="8081" doc:name="HTTP Listener Configuration"/>
	<sfdc:config name="Salesforce__Basic_Authentication" username="" password="" securityToken="" doc:name="Salesforce: Basic Authentication"/>
	<flow name="salesforce-appFlow">
		<http:listener config-ref="HTTP_Listener_Configuration" path="/salesForce" allowedMethods="POST" doc:name="HTTP"/>
		<logger level="INFO" doc:name="Logger"/>
		<dw:transform-message metadata:id="f147a582-5125-4a5a-8d4a-ecb9c53b1705" doc:name="Transform Message">
			<dw:input-payload mimeType="application/json"/>
			<dw:set-payload>
				<![CDATA[%dw 1.0
%output application/java
---
[{
Name: payload.Name,
BillingStreet: payload.BillingStreet,
BillingCity: payload.BillingCity,
BillingState: payload.BillingState,
BillingPostalCode: payload.BillingPostalCode,
BillingCountry: payload.BillingCountry
}]]]>
			</dw:set-payload>
		</dw:transform-message>
		<sfdc:create config-ref="Salesforce__Basic_Authentication" type="Account" doc:name="Salesforce">
			<sfdc:objects ref="#[payload]"/>
		</sfdc:create>
	</flow>
</mule>
First, configure the SalesForce connector. Then, place the TransformMessage component before the SalesForce connector, as it will generate output metadata for TransformMessage automatically, depending on the configuration that we have done for the SalesForce connector.
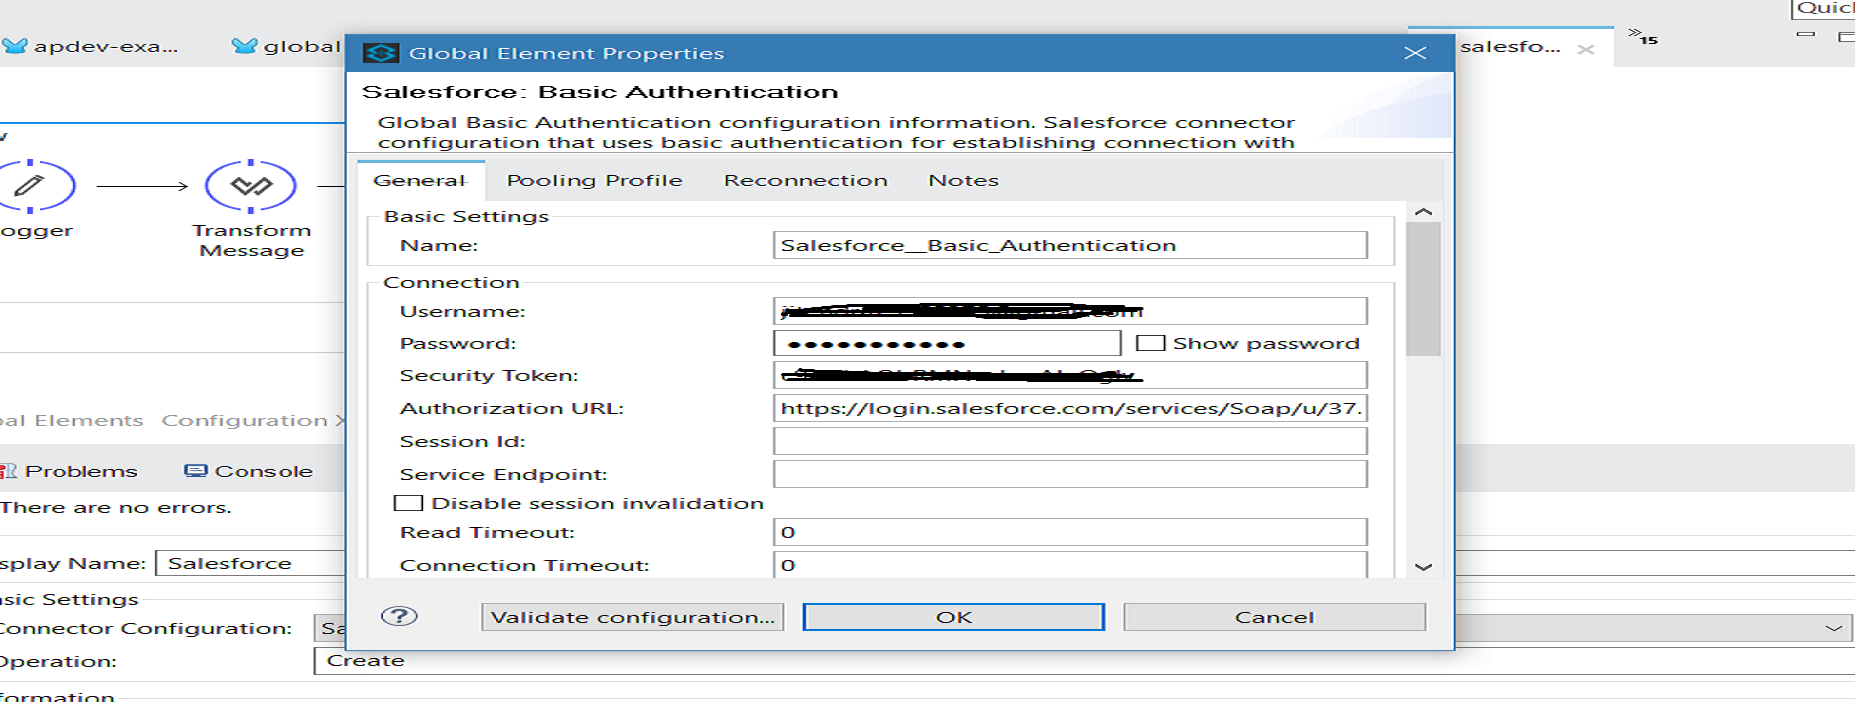
Now, set the Operation to Create, as you want to create an Accounts with Postal Code in Salesforce. Set the ObjectType to Account and click on Add Connector Configuration. It will open another window. Select Salesforce: Basic Authentication and provide your SalesForce account details like username and password with the security token that you received. You can validate your configuration by clicking Validate Configuration and finally pressing OK.
In TransformMessage, set up the input metadata (sample input file provided below). Output metadata will be generated as explained in this article above.
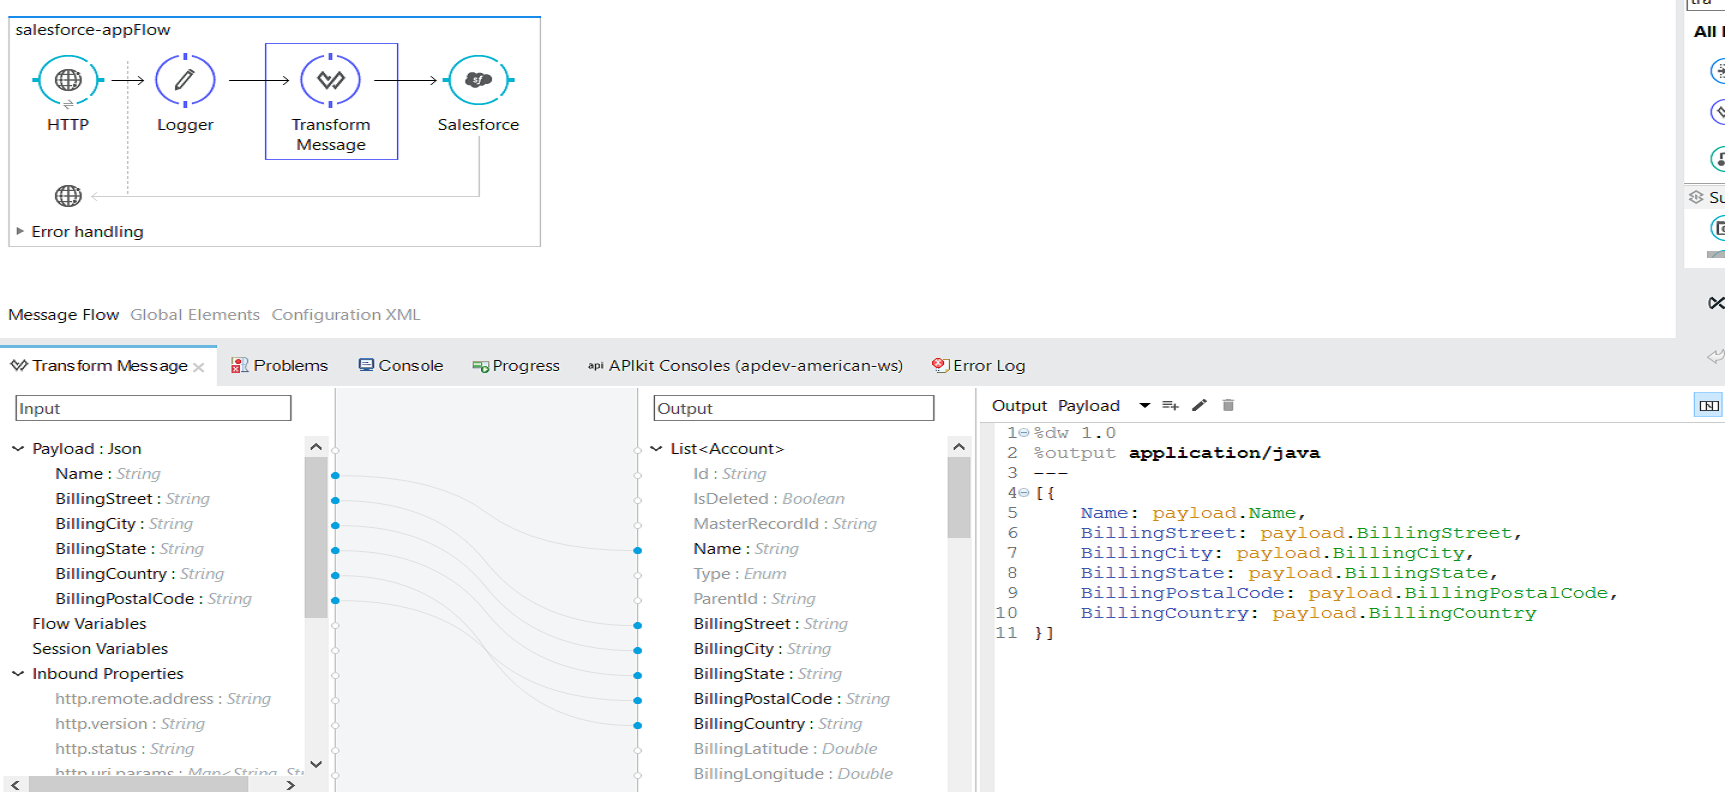 Input JSON example:
{
  "Name": "Donald Cook",
  "BillingStreet": "Baker Street",
  "BillingCity": "Mumbai",
  "BillingState": "Maharashtra",
  "BillingCountry": "India",
  "BillingPostalCode": "400710"
}
Testing the Application
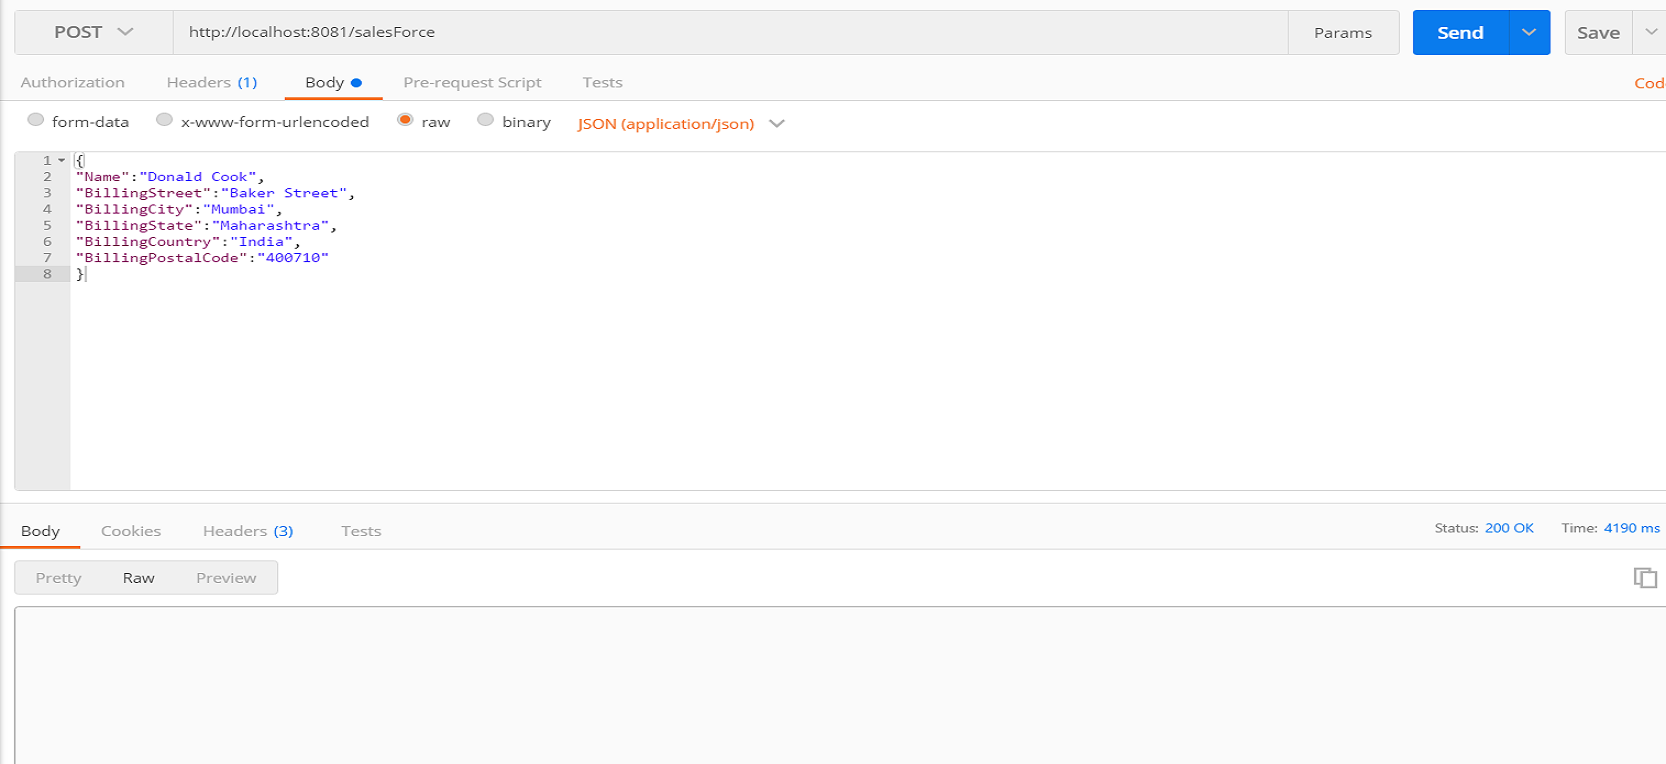
You can use Postman to post the message to the Mule application. It will transform the message and create an account in SalesForce.
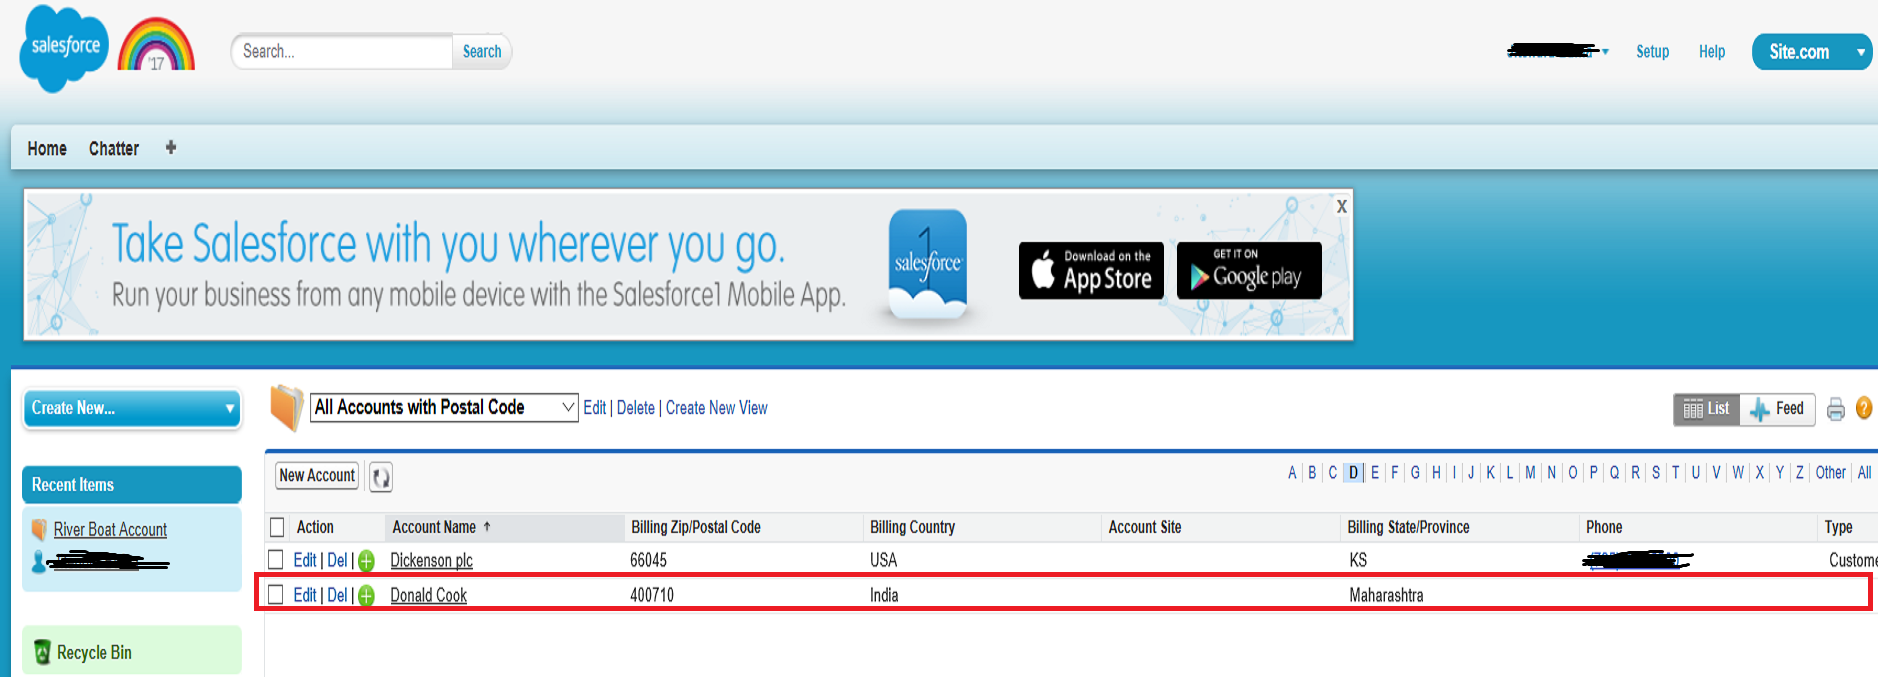
Now you can log into Salesforce and verify whether the account has been created.
Similarly, you can perform various operations such as querying, updating, deleting the records, and more. It also provides a facility called QueryBuilder to generate your query to read data from SalesForce.
I hope this article helps you in understanding how to integrate Salesforce with your Mule Application.
Opinions expressed by DZone contributors are their own.

Comments