Revitalizing Legacy .NET Apps: Upgrading From .NET 4.7 to .NET 7 With the .NET Upgrade Assistant Tool
In this article, readers will use a tutorial to explore the process of upgrading a legacy .NET application to .NET 7 with the help of upgrade assistant.
Join the DZone community and get the full member experience.
Join For FreeThe .NET framework has come a long way since its inception, and as newer versions are releasing quite frequently, it becomes increasingly important to keep up with the latest updates. As technology advances, software applications must keep up with the pace of change to remain relevant and effective. Legacy .NET applications that were developed on older versions of the framework can greatly benefit in terms of performance, enhanced security, and taking advantage of new features and improvements by upgrading to the latest version.
Note: In this article, I mainly focus on .NET console applications and class library projects. For upgrading ASP.NET applications step by step, I will create a separate article.
Prerequisites/Tools
- .NET SDK 7.0
- Visual Studio 2022 or Visual Studio Code
- .NET upgrade assistant tool (command line)
- .NET upgrade assistant (Visual Studio extension)
Introduction
Upgrading a legacy .NET application 4.7 to .NET 7 can be a complex and challenging process, but with the help of the .NET Upgrade Assistant, it can be much simpler and more efficient. In this article, we’ll explore the process of using the .NET Upgrade Assistant to upgrade your existing application and provide some best practices and tips to help you make the most of this powerful tool.
The .NET Upgrade Assistant is a .NET global tool that helps you incrementally upgrade your .NET framework-based applications, including WPF, Windows, and consoles.
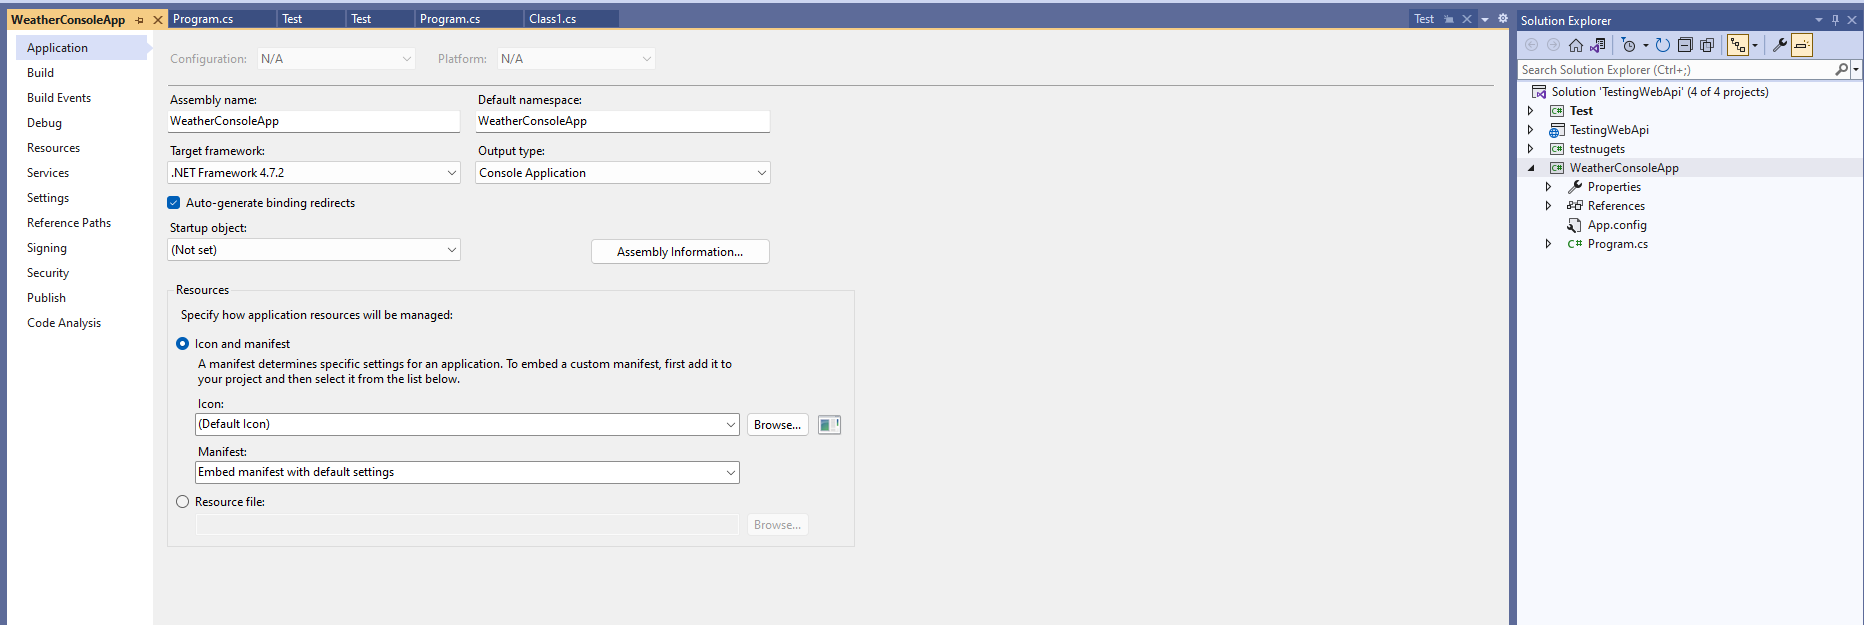
For this example, I have created a simple .NET project with the name “WeatherConsoleApp,” which is a console application on a target framework in .NET 4.7.2. The implementation details of the console app are irrelevant to this article.

.NET Upgrade Assistant Command-Line Interface
1. Install the .NET Upgrade Assistant tool by following the instructions provided in the official documentation.
2. Open a command prompt or terminal window and navigate to the directory containing the .NET application you want to upgrade.
3. Run the following command to analyze the project file and identify any issues or incompatibilities that need to be addressed:
upgrade-assistant analyze <path-to-project>4. Review the upgraded report generated by the tool (.Sarif file) to follow the recommended steps to address any issues.
5. Some of the common issues that may need to be addressed include:
- Changes to project configuration files required to use new features in the new version of .NET.
- Code changes required to use new APIs in the new version of .NET.
- Changes to the build process required to build the upgraded project.
6. After all issues are resolved, upgrade the application by running the following code:
upgrade-assistant upgrade <project-path>Output


Build and test the project to make sure there are no issues:
dotnet build
dotnet run
Visual Studio .NET Upgrade Assistant Extension
Once you’ve installed the extension, open your code in Visual Studio, and right-click on the project. You’ll see the upgrade option in the context menu. When you click on the upgrade option, it will show you different options available for you to upgrade. In the case of a console application, it will be either an “in-place project upgrade” or a “side-by-side project upgrade,” as shown in the screenshot below.

Upgrade Options
- In-place project upgrade: Upgrades the projects and selected components in place using transformations applicable to the project.
- Side-by-side project upgrade: Upgrades the project and selected components in a copy project using transformations applicable to the project.
Once you’ve selected one of the options above, it will ask you to select the target framework. Select “.NET 7” and click “Next.”
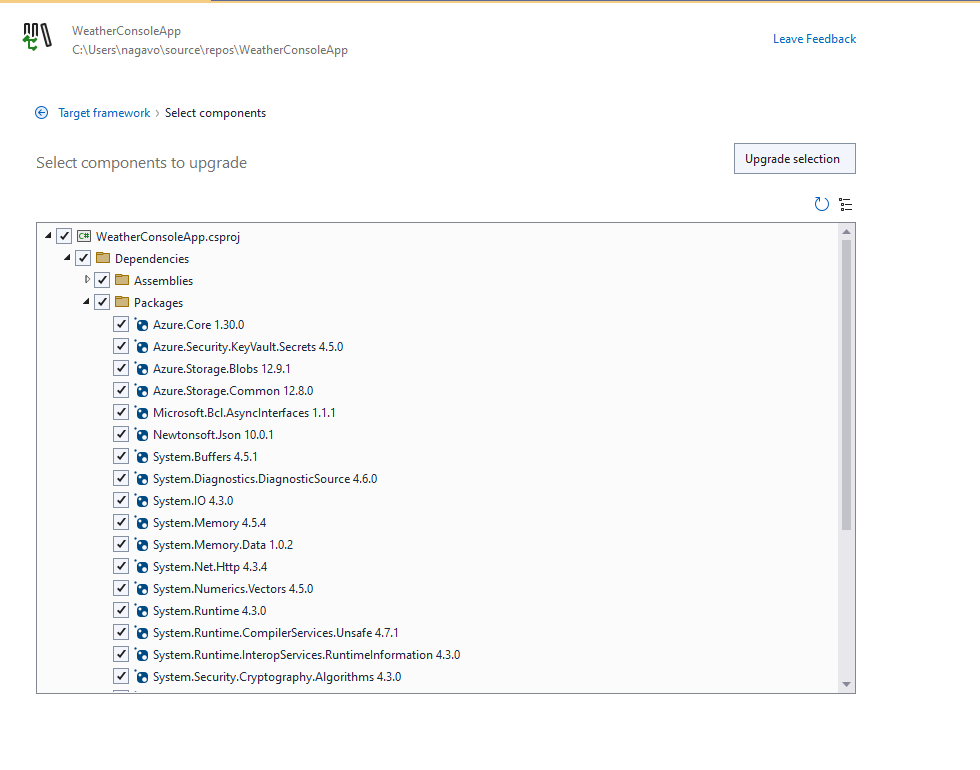
It will then ask you which components to upgrade. Select all the required components you would like to upgrade and click “Upgrade Selection.” Depending on the number of components, it may take a few minutes for Visual Studio to upgrade your project to .NET 7.

Once upgraded, you can see the target framework of the console application is now upgraded to .NET 7.0

Conclusion
In this article, we’ve explored the art of transforming a legacy .NET application into a modernized powerhouse, leveraging the power of the .NET Upgrade Assistant. With detailed steps, best practices, and prerequisites in mind, we’ve demonstrated how to upgrade to .NET 7, the latest version of the .NET Framework. By harnessing additional tools and careful planning, you can achieve a successful transition with ease, and unleash the full potential of the latest .NET technology. So, why wait? Revamp your legacy application today, and bring it into the future with confidence!
Opinions expressed by DZone contributors are their own.

Comments