Retrieving Emails and Attachments From Emails in Mule 4
This article describes the way to retrieve email and reads email attachments using the EMAIL connector in Mule 4.
Join the DZone community and get the full member experience.
Join For FreeStep 1
Create a new Mule project and name it samplemaildemo (You can choose any name).
Step 2
Drag and drop an HTTP listener component to get the request for your service. Specify the host and port and provide a URI path. Make sure to test it, as the port is not being used by any of your other services.

Step 3
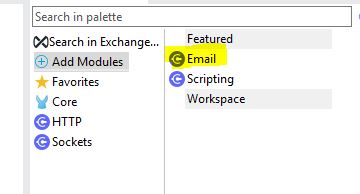
Click on the Add module section in the Mule palette and add the email connector extension, as by default, Mule 4 does not have the Email module.
Check out the pom file, as the dependency will be added to it.

Step 4
In Mule 4 under the email connector, you can see different operations like Send, Delete,
List - POP3, List - IMAP, Mark as read, etc. as shown below, whereas in an earlier Mule version, we had 3 different connectors.
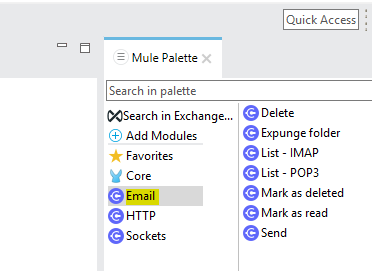
For this tutorial, we will be using the List - POP3 and List - IMAP operations.

Step 5
Drag and drop the List - POP3 to the right of the HTTP listener in the process section.
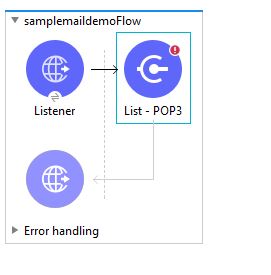
Step 6
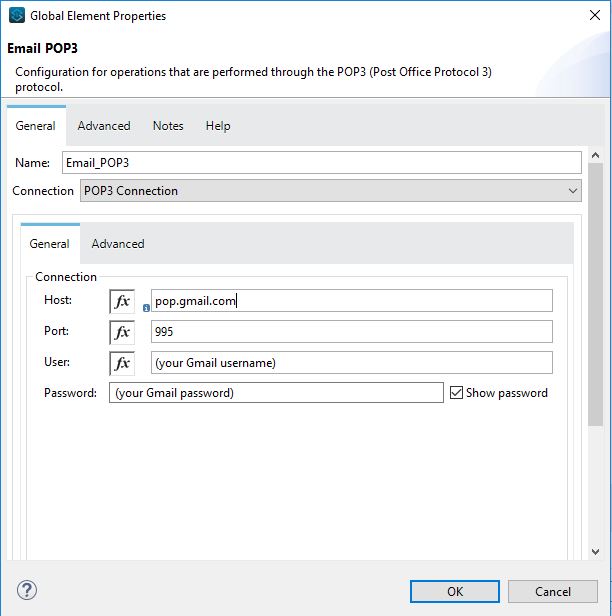
Give a display name of your choice or leave it as is. Under Basic Settings, click on add a new connector configuration. Here, we specify our POP3 mailbox server details.
Mule provides both secure and non-secure connections that you can choose for your security settings.
POP3 Connections
POP3S Connections
For connections, you need the Host, Port, User, and Password details of the respective mail server box.
(Server details — like common mailboxes such as Outlook or Gmail — are easily available over the internet, just Google it.)
Go to the Advanced tab, and under Properties, select Edit inline and add the below key: mail.pop3.ssl.enable and Value: true
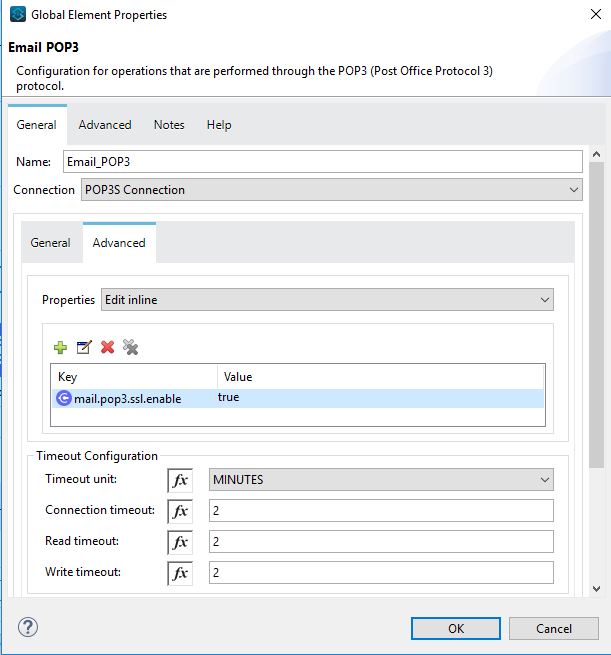
Specify the timeout connection values as per your requirements.
Step 7
For the POP3S connection, you need to specify the encryption type i.e., TLS. Under the TLS configuration, select Global reference, and under it, add a new Global reference and select the Ensure checkbox, and leave the rest of the fields blank. In case you have a network connection that requires TLS connection to be set up, then get the same and add it to the below configuration, as in this case, we will leave it as it is.
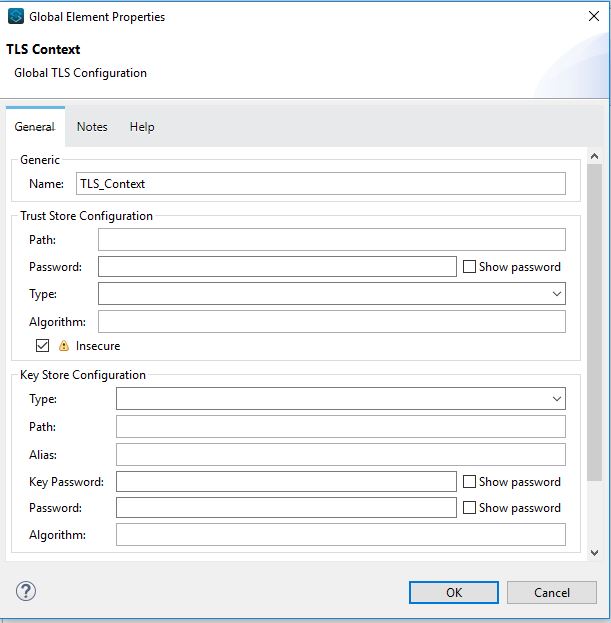
<tls:context name="TLS_Context" doc:name="TLS Context" doc:id="6bbe6316-8999-42d5-bb0a-692dfe51a340" >
<tls:trust-store insecure="true"/>
</tls:context>
Or add the above piece of code below the pop3 email configurations and the same (TLS) will be enforced.
Step 8
Now that we are done with the mail server connections, specify the mailbox folder name from which you want to read the mails. Filter the mail by applying the filter option available. Here, we are using the Edit Inline option and specifying the mail from a specific id whose mail we would like to read and get email attachments.
More specific filters can be applied as per the requirements. Check it out and explore the different options available.
Specify the page size (Size of the page used by the PagingProvider implementation for fetching the emails from the POP3 server)
and Limit as no of emails one wants to retrieve. The default is -1, which reads all the emails received after applying the filter.
Select False for Delete after retrieve.
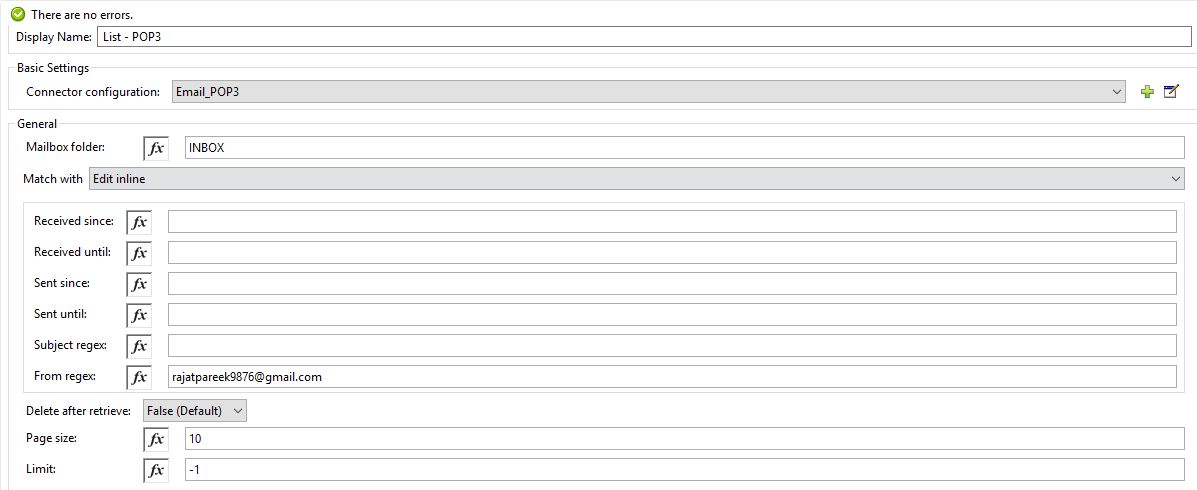
To get more details regarding the configurations details, click the below Mule docs link to get more insight about it.
https://docs.mulesoft.com/connectors/email/email-documentation
Step 9
Drag a For Each Scope and place it just after the connector and add a set variable and logger component.
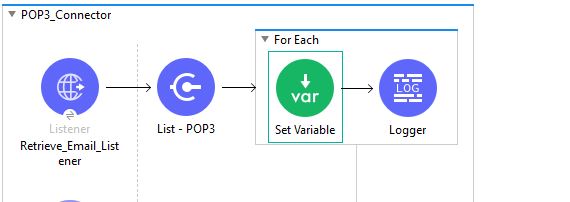
Change the For each setting as per your requirement or leave it as it is.
Specify a name for a variable and add the below code to the value, it reads the body of the emails retrieved.
#[payload.body]
In the logger, print the value of the variable to check it #[vars.value].
Save the project and test it using Postman or SoapUI. Make the get request call to your API and wait for it to get the mail.
Opinions expressed by DZone contributors are their own.

Comments