Remediating Incidents With the GitGuardian API [Cheat Sheet Included]
The GitGuardian API lets you remediate your secret incidents. We are proud to release a new demo app to help you learn how to automate your workflows.
Join the DZone community and get the full member experience.
Join For Free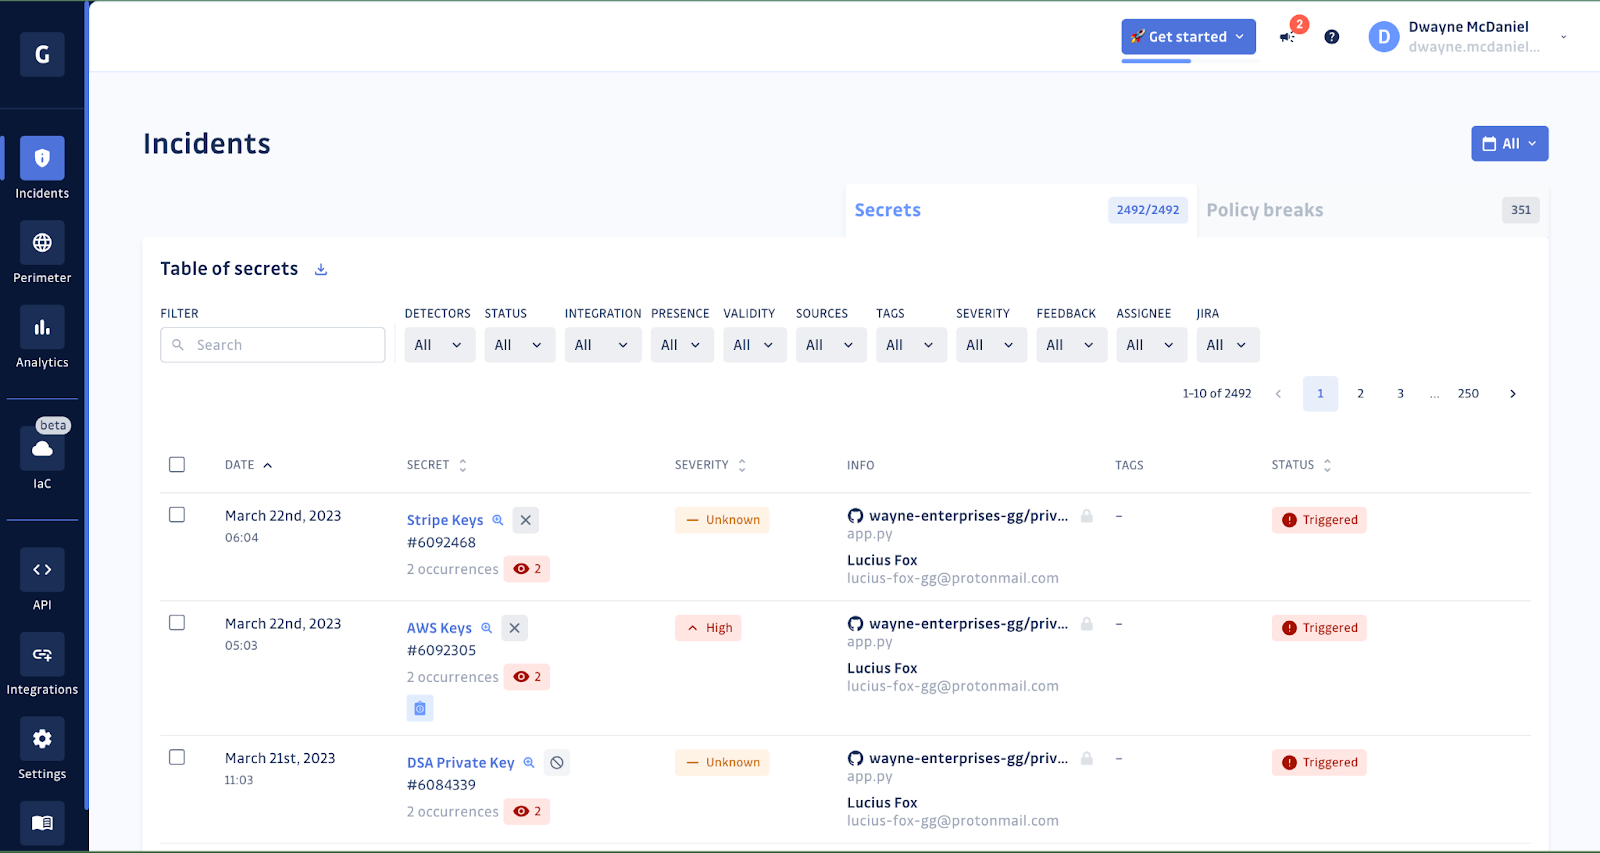
From this view, you can quickly see high-level incident information that can help you triage your incidents, assign them to workspace members and begin the process of fixing the issue. The team has put a lot of thought and effort into making this a very user-friendly interface that customers can quickly learn and leverage when dealing with secrets sprawl.
The GitGuardian API
Some teams might prefer to leverage the power of the GitGuardian platform without using the dashboard directly in some cases. This is entirely possible thanks to the powerful GitGuardian API, which is available to all customers. With our API, you can interact with incidents, teams, workspace members, and audit logs; or even implement your own secrets scanning.
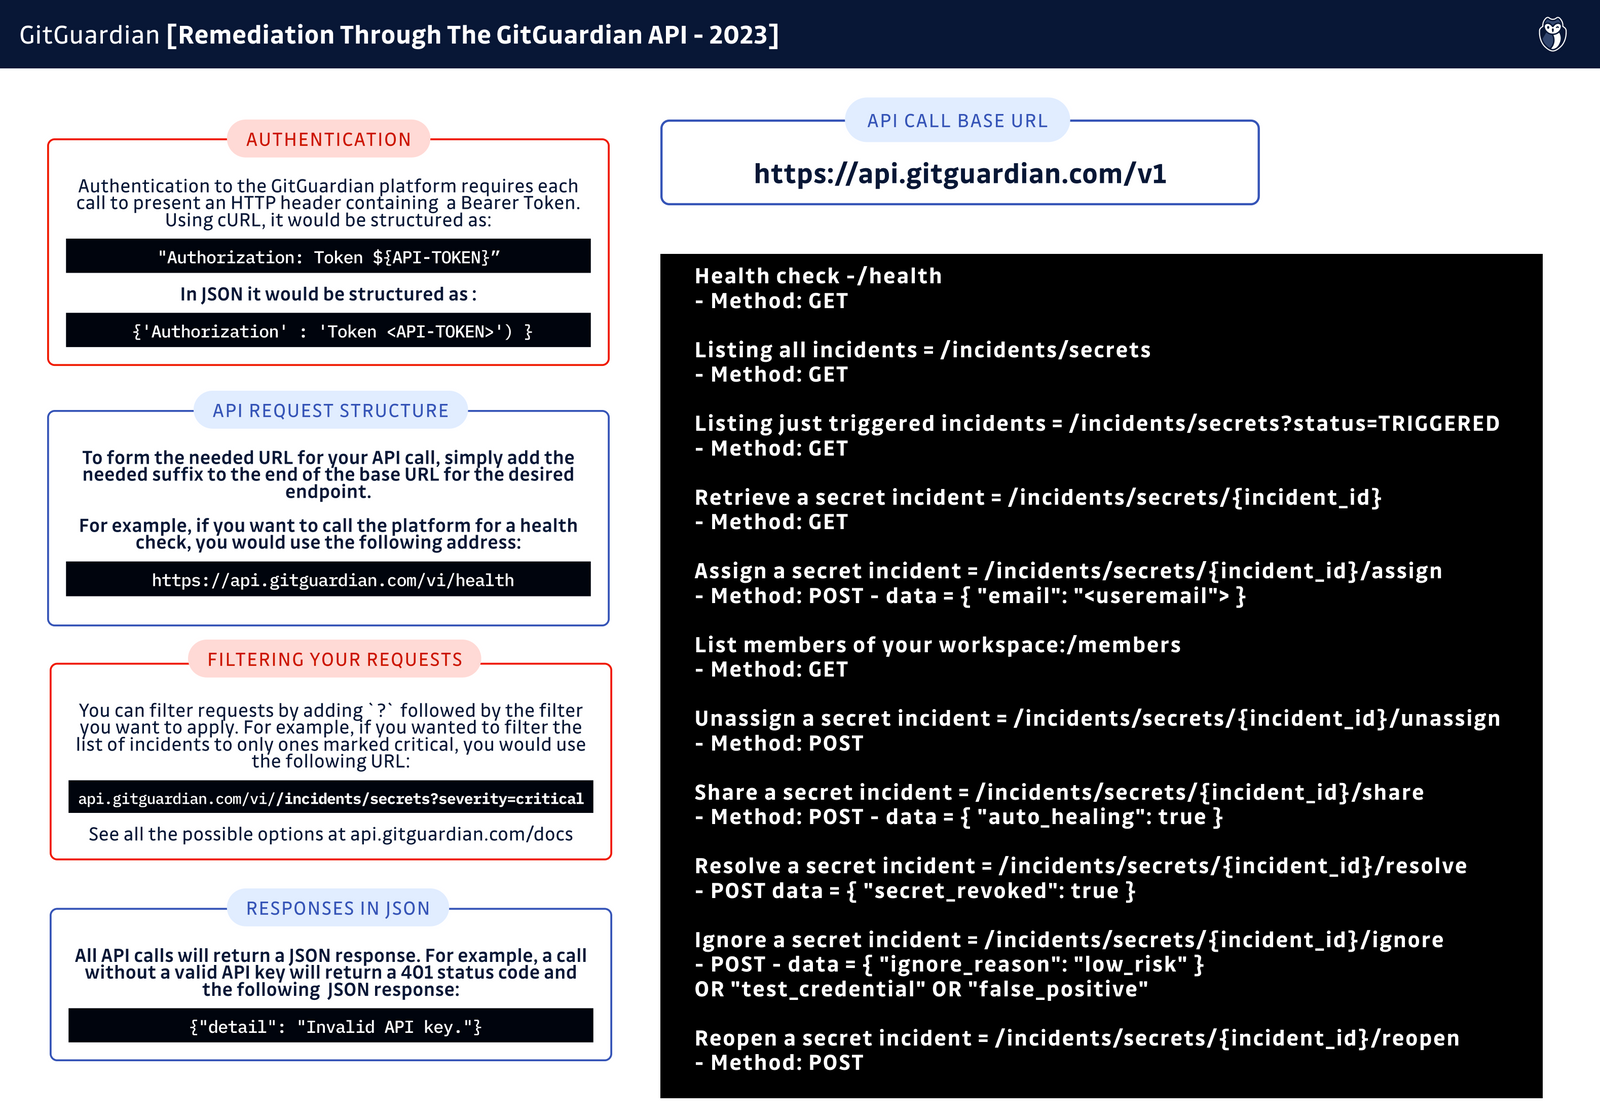
There are over 50 different endpoints available, all documented in our API reference docs. Instead of covering them all here, this article will cover which API endpoints are typically used in the remediation process as well as introduce you to a new example application you can use to explore the APIs and draw inspiration from as you work to automate your workflows.
Authentication
Like with any other secure API, you will need to authenticate that you have permission to make your request. GitGuardian uses bearer tokens to accomplish this, sending a header with each request that verifies the sender is allowed to get information or make a change.
There are two types of tokens you can generate with GitGuardian:
- Personal Access Tokens — For use when a human is directly involved in the request.
- Service Accounts — For use when a request will be made by an automated workflow, such as secret scanning in a CI environment as part of a pipeline. Service accounts can only be created by workspace team members with Owner and Manager roles and require a Business or Enterprise account.
Creating these tokens is simple through the GitGuardian dashboard. Navigate to the API menu from the left-hand sidebar, and select either the Service Accounts or Personal Access Tokens menu option. From there, you can create a new token.
Always remember to follow the principle of least privilege; you want to grant only the minimum permissions needed to be able to do your work. You will need to scope your token to the task at hand.
When a new token is created, it is shown once for you to copy somewhere safe, such as into your secrets manager of choice or into a local .env file kept out of source control. It is important to keep these a secret. We can help you not commit these to your repo, as you can detect them in your code with ggshield using a pre-commit hook.
Once you have your token that you can safely, programmatically call, then you are ready to dive into using the API!
Authentication Header
The best way to test your access token is to make a read-only call to the platform to make sure you get the response you expect. We recommend using the health check endpoint for this.
If you were to run this from the command line or wish to make API calls in Bash and had set up your access token as a local environment variable called TOKEN, the request would look like this:
$ curl -H "Authorization: Token $TOKEN" https://api.gitguardian.com/v1/health

$ {"detail":"Valid API key."}Of course, you are free to use whatever language you choose for your needs. For the rest of this article, we will be using Python. A similar request to the health check in Python would leverage the popular request HTTP library.
import requests
auth_headers = {'Authorization' : 'Token {}'.format(os.getenv("TOKEN")) }
response = requests.get("https://api.gitguardian.com/v1/health", headers=auth_headers)
print(response)

>>> <Response [200]>Remediation Step 1: Prioritizing Incidents
The first step to prioritizing your incidents is to see a list of them. To do this, you will use the list secret incidents endpoint:
response = requests.get("https://api.gitguardian.com/v1/incidents/secrets", headers=auth_headers)Calling that endpoint with no other information will retrieve the full list of all of your incidents.
For this stage of a remediation workflow, it is most common to focus on incidents that have not been assigned, resolved, or ignored. In GitGuardian, these incidents have a status of TRIGGERED.
You can filter your request by using the appropriate GET parameters, such as status. If you are brand new to using APIs, you can filter your request by adding a JSON statement after the URL in the request that contains the query parameter and the value. In this case, to just return a list of triggered incidents, you would alter the URL to:
response = requests.get("https://api.gitguardian.com/v1/incidents/secrets", {"status": "TRIGGERED"}, headers=auth_headers)You can also filter by date_before, date_after, severity, as well as multiple other parameters. The 'list secrets incidents' documentation shows all the options and gives some examples of how to leverage them.
Investigating an Incident More Deeply
Listing your incidents with the previous API call returns the same level of detail you would see in the Incidents view in the GitGuardian dashboard. While it provides a good deal of information, sometimes you need more info before proceeding. To get the full details of the incident, including specifics for each occurrence as well as the history of feedback, you can use the retrieve a secret incident API endpoint. In this example, we will return to the details of the incident 12345:
response = requests.get("https://api.gitguardian.com/v1/incidents/secrets/12345", headers=auth_headers)This is the equivalent of clicking on an incident name in the dashboard to open the Secrets Incident view. Unlike the dashboard, which can automatically take you to the appropriate view, you will need to fill in the incident_id yourself. Fortunately, that info is an easy-to-access field in secret incidents API response.
Remediation Step 2: Assigning Incidents
Once you have a better idea about the nature of the incident, you can choose which member of your workspace is best suited to handle the remediation process. But how do you know who is even on your team? That is where you will use the list members endpoint:
response = requests.get("https://api.gitguardian.com/v1/members", headers=auth_headers)This will return the ID, email, name, and role of each member of your GitGuardian workspace.
Now that we know who is on the team, including their email and id, we can now assign our incident.
Updating Information in GitGuardian
To assign an incident, you will post an update to the assign a secret incident endpoint. The previous calls were making GET requests, only reading information from the platform. When assigning an incident, you will be making a POST request. To make a change, you need to send a JSON request along with the authorization header in order to tell the platform what you want to update.
In order to update an incident, we need 2 things.
- The
incident ID, which we uncovered earlier,
And one of the following: EmailMember ID
If you wanted to assign the incident 12345 to a workspace member with the email , your request would look like this in Python
response = requests.post("https://api.gitguardian.com/v1/incidents/secrets/12345/assign", headers=auth_headers, data={"email": "user@gitguardian.com"})Unassign Incidents
To unassign an incident, use the unassign a secret incident endpoint. For this, all we need is the incident ID. For this example, we will use incident id 12345:
response = requests.post("https://api.gitguardian.com/v1/incidents/secrets/12345/unassign", headers=auth_headers)If the incident has not been closed, that is, moved to a status of resolved or ignored, then unassigning an incident will move the status back to triggered. Unassigning a resolved incident will not update the status.
Remediation Step 3: Getting Feedback To Resolve or Ignore the Incident
Now that the incident has been assigned, the next step is to work to close the incident, either resolving it or ignoring it. You might have enough information from the incident details already to make a decision; if so, feel free to skip ahead.
Sharing the Incident With the Developer
For many incidents, you will want to get developer feedback. GitGuardian is renowned for making this process very straightforward thanks to our sharing URLs, which can be sent to any developer, even if they are not a member of GitGuardian workspace. To generate this link from the dashboard, navigate to see the incident details view and activate the link sharing on the right-hand side of the screen.
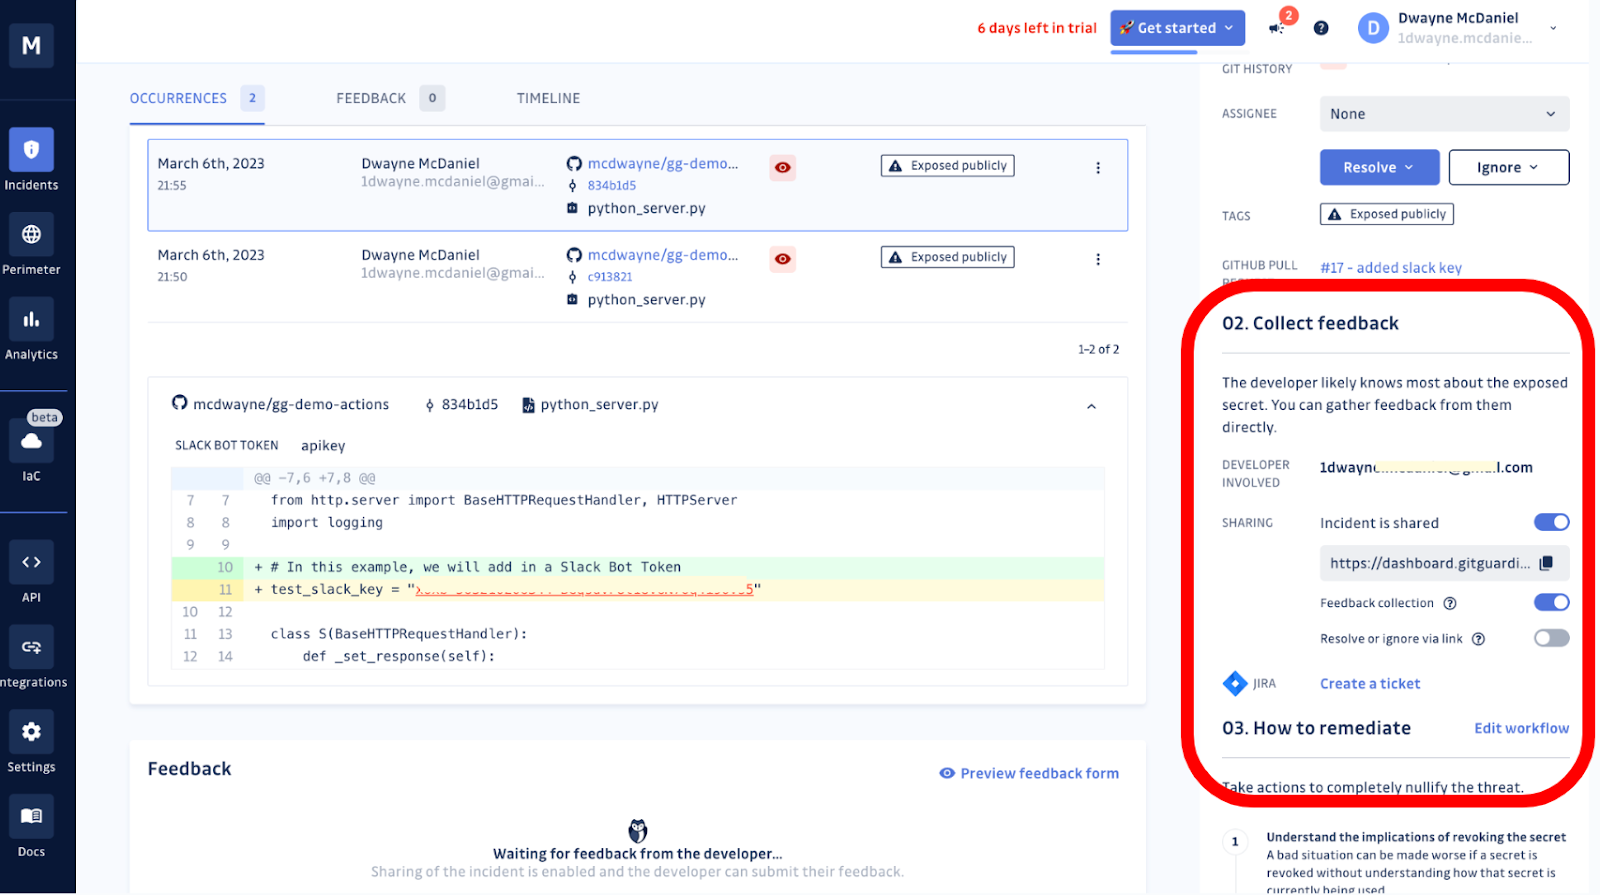
To generate this URL using the GitGuardian API, use the share a secret incident endpoint. This requires the incident ID, as well as a JSON formatted request if you want to allow the developer to resolve or ignore through the share link or modify the lifespan for the URL to be available.
For this example, let's say you want to generate a sharing URL for the incident 12345 and allow the developer to close the incident as resolved or ignored. Let's also set the time the URL can be shared for 24 hours:
response = requests.post("https://api.gitguardian.com/v1/incidents/secrets/12345/share", headers=auth_headers, data={"auto_healing": "true", "lifespan": 24})The returned JSON will contain the share_url which you can send to the developer via any communication tool you wish. Always use caution when sharing these links! We consider the sharing URLs to be secrets, so always keep them out of your source code.
Once a sharing URL has been generated, it will be listed in the incident information moving ahead. Trying to generate a new URL when one already exists will return an error message.
Resolve or Ignore an Incident
Now that we have the feedback from the developer, giving us enough information to remediate the incident, we need to determine if we are going to resolve or ignore the incident. While both options close an incident, categorizing your incident responses and reasons over the long term gives you valuable insight into how your organization manages secrets.
Resolving the Incident
To resolve an incident through the API, you will use the resolve a secret incident endpoint. When you resolve an incident, you have the option to mark the secret as revoked. This typically is used when real, non-test credentials have leaked, and remediation involves rotating, meaning revoking and replacing, a secret.
For this example, let's mark the secret as revoked for our incident 12345:
response = requests.post("https://api.gitguardian.com/v1/incidents/secrets/12345/resolve", headers=auth_headers, data={"secret_revoked": "true"})Ignoring the incident
To ignore an incident through the API, use the ignore a secret incident endpoint. Ignoring an incident requires an 'ignore reason.' Ignoring an incident is the right choice if you can confidently declare the secret is a test credential, a false positive, or is just low risk enough not to merit a further response.
For this example, let's give an ignore_reason of false_positive as we ignore incident 12345:
response = requests.post("https://api.gitguardian.com/v1/incidents/secrets/12345/ignore", headers=auth_headers, data={"ignore_reason": "false_positive"})Reopening an Incident
There might be times when you need to revisit an incident or had erroneously closed one before you meant to. You can always reopen incidents from the dashboard, but here is how you would do it from the API using the reopen a secret incident endpoint. Let's reopen incident 12345:
response = requests.post("https://api.gitguardian.com/v1/incidents/secrets/12345/reopen", headers=auth_headers)Automating Workflows
One of the real superpowers you gain by leveraging the GitGuardian API is the ability to automate workflows. While it might take a little time to set up automation, in the long run, it can save a great deal of time and effort.
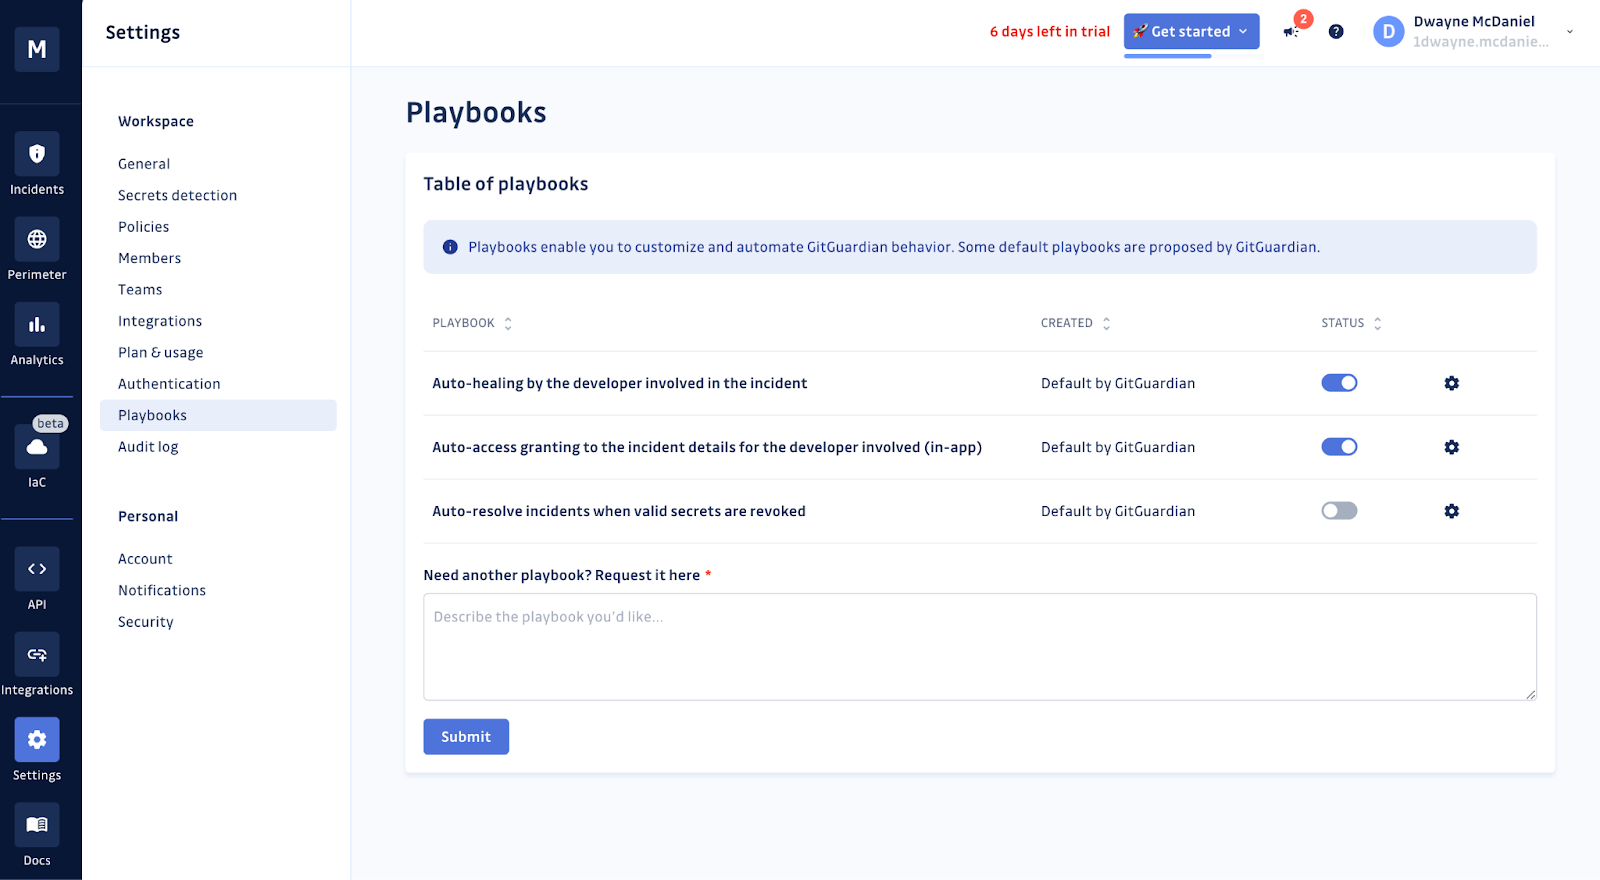
Saving teams time is one of the main drivers behind the GitGuardian Playbooks. These pre-built automated workflows can assist with triage and even remediate certain incidents. There are three available playbooks:
- Auto-healing playbook — shares the incident with the developer involved. This playbook will generate the sharing URL and send the developer an email.
- Auto-access granting playbook — gives access to an incident's details in the GitGuardian dashboard, for members with Restricted and Member roles. This playbook is only available to customers on a Business or Enterprise plan.
- Auto-resolution playbook — closes incidents that have once been valid but have become invalid.
You can turn these on under your dashboard 'Settings' in the 'Playbooks' menu.
But those three playbooks are just three ideas for automation based on available data from our platform. What if you wanted to assign any new incident to a specific workspace member automatically based on some incident attribute? Or how about ignoring an incident if the secret is both invalid and in a test repository?
With a little Python, Javascript, or whatever coding logic you choose, you can build workflows that can pull in data from external sources, like your LDAP implementation, to validate a developer is still part of the workspace. Or reassign all of a developer's incidents if they would leave the organization.
The sky is the limit, but we have put together a few examples to get your creative juices flowing.
An Example API Implementation
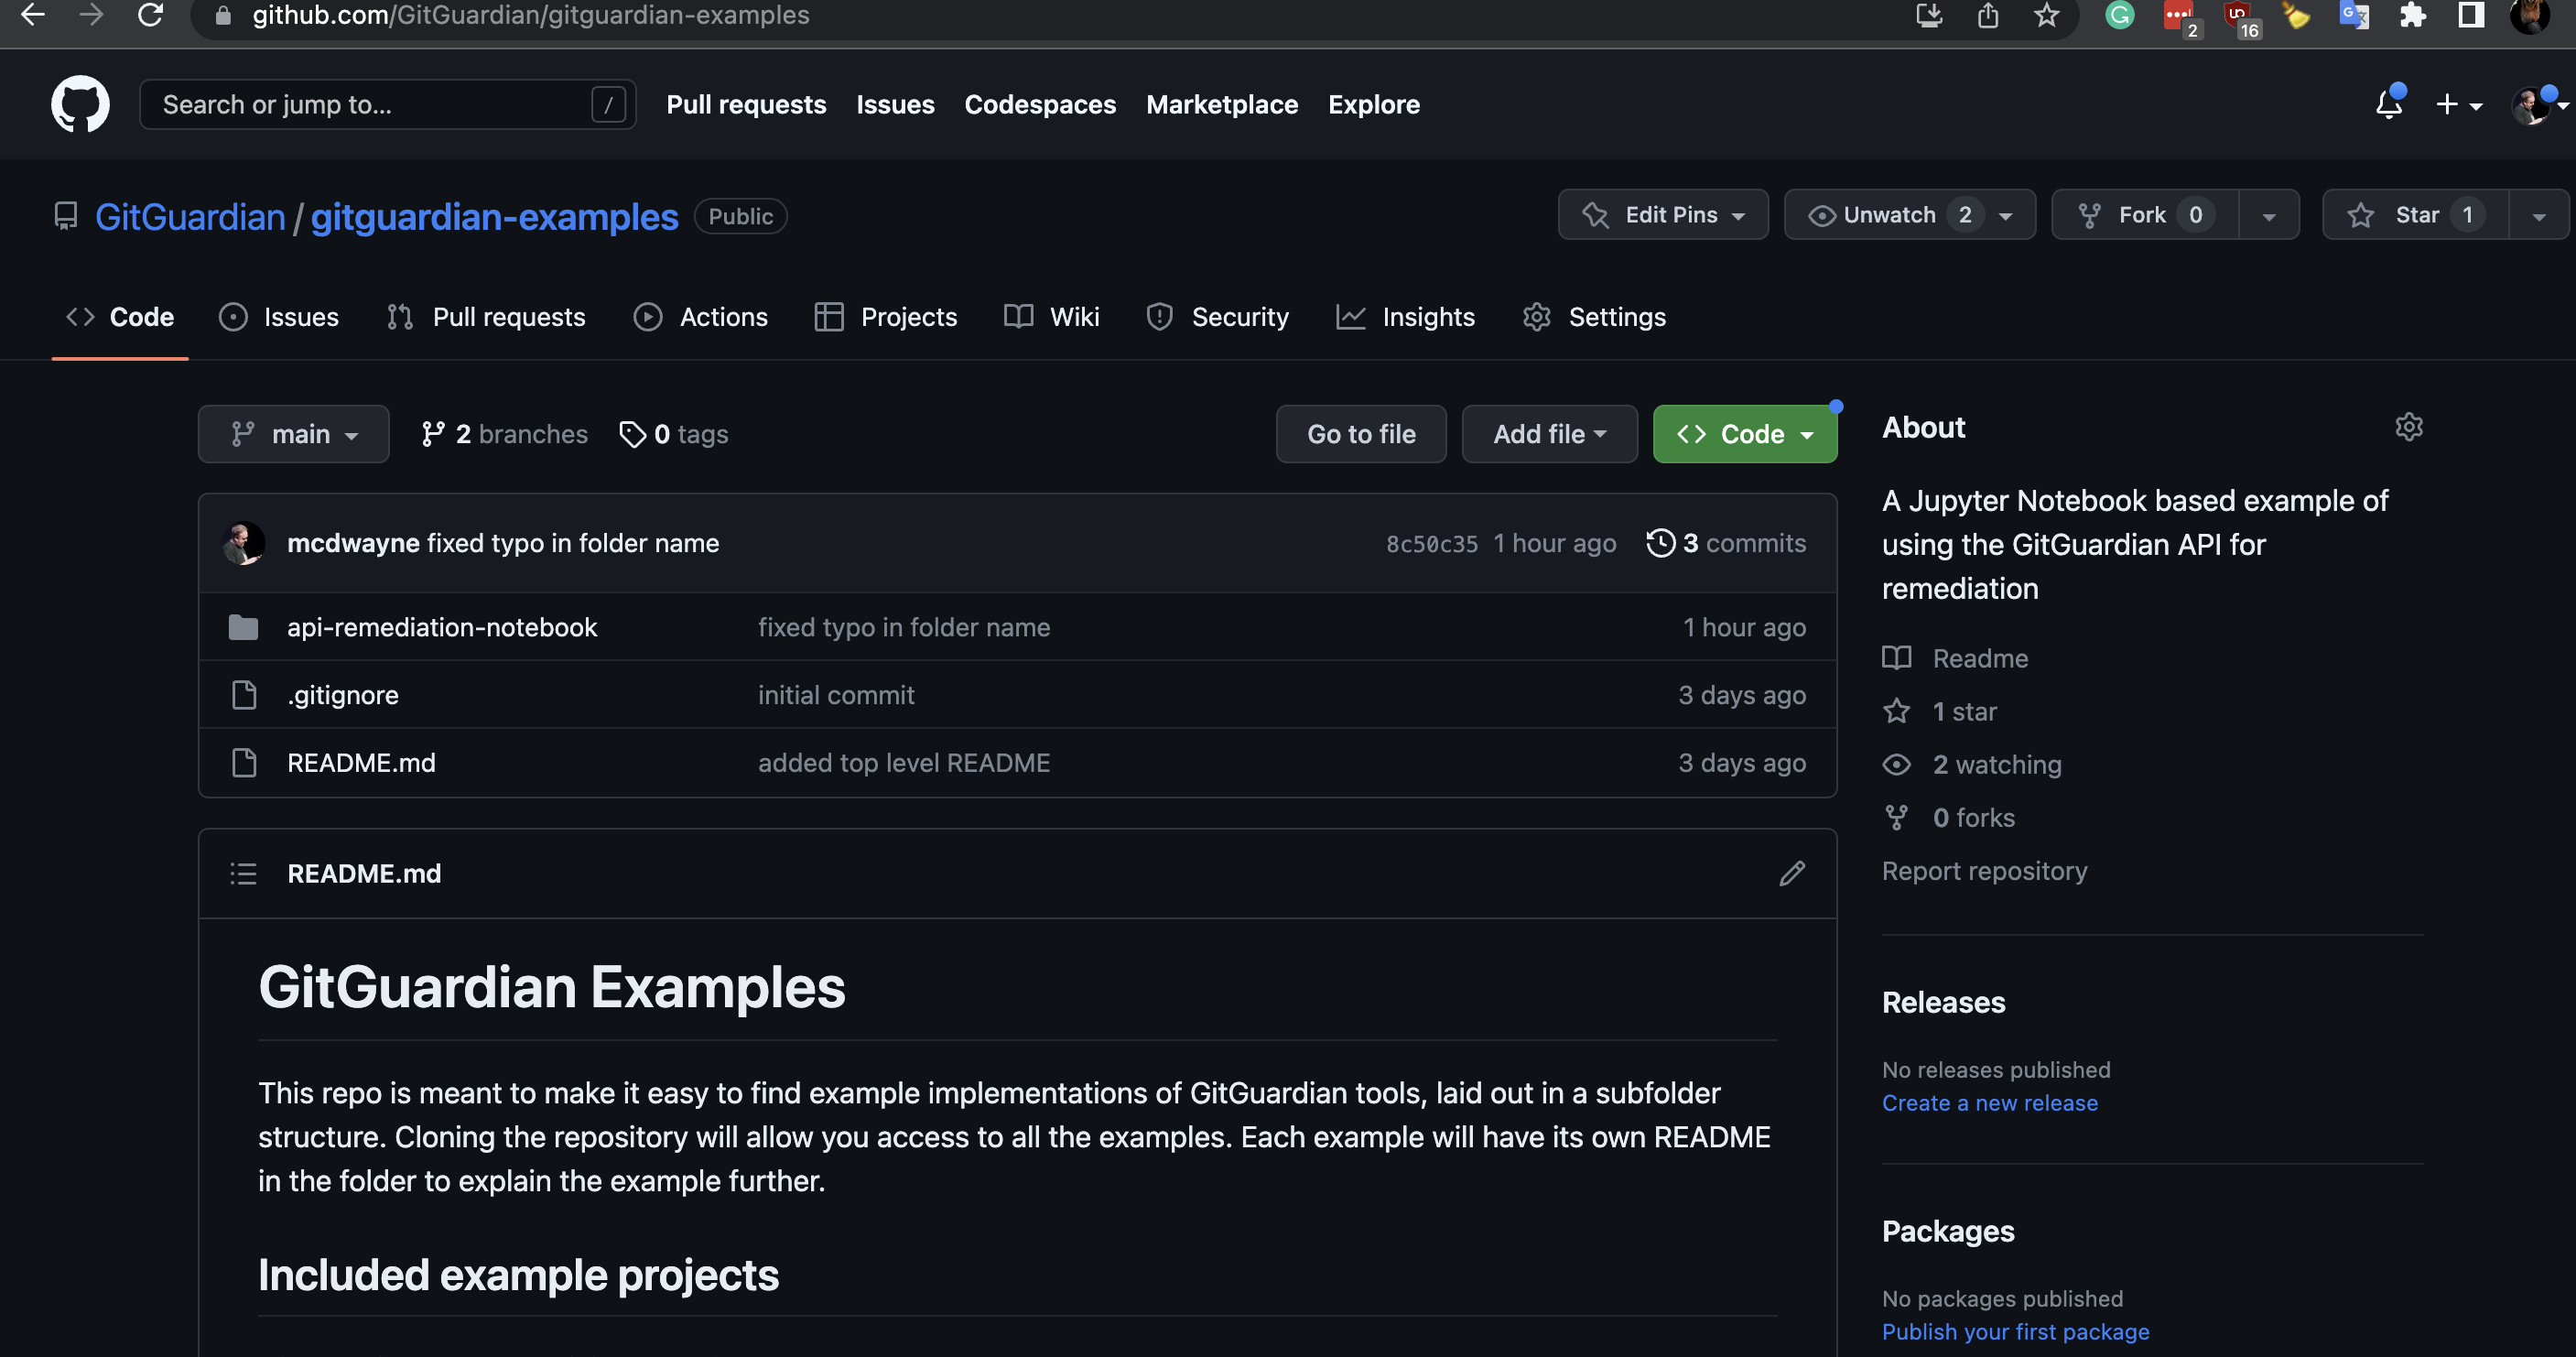
While it is great to read about the API and automated workflows you could possibly build, the best way to learn anything is through hands-on practice. That is why we are proud to announce a new example implementation: the GitGuardian API Remediation Workflow Notebook.
This fully interactive example application is built as a Jupyter Notebook. This makes it easy to execute one small block of code at a time and experiment with the API. The project contains two notebooks. The first will look familiar, as it is laid out very similarly to this blog post, with the intention of helping you understand how to leverage each individual API call throughout the remediation process.
The second notebook contains three pre-built automated workflow examples that show how to:
- Auto-assign the newest incident to a random member of the workspace.
- Auto-assign incidents to commit authors if they are a member of the workspace.
- Ignore an incident and mark it as a 'test credential' if all occurrences of a secret are in a
/test/directory and marked asinvalid.
These are meant as self-contained examples, only relying on the information found in the GitGuardian dashboard. Your automation scripts will be able to pull from literally any other API or files you can access. You are really only limited by your imagination.
Dive Into Integrating and Automating Your GitGuardian Workflows
In a perfect world, no one would ever hardcode a secret into your repositories anywhere throughout the software development lifecycle. But unfortunately, as our recent research has uncovered, the issue is only getting worse.
No matter how you interact with the GitGuardian platform, from our dashboard, through the command line with ggshield, or directly through API calls, you can trust our platform to help you remediate your secrets leakage incidents faster.
Published at DZone with permission of Dwayne McDaniel. See the original article here.
Opinions expressed by DZone contributors are their own.

Comments