Release Manage Workflow Introduction and Installation
Take a look at this release management plugin that interfaces directly with your existing JIRA instances.
Join the DZone community and get the full member experience.
Join For Free
Managing a release in which multiple people with multiple roles are involved is a challenging task for an IT team. As the commitment for delivery adheres to time and accuracy, release management emerges as a crucial role in process of software delivery. Release Management is a complicated process for IT teams.
Typically, a Release Manager must perform two major things:
- Filling the communication gap: Communicate and interface with test managers, development managers, IT Ops, and the PMO regularly.
- Record maintenance and report generation: He must actively manage a release and provide reporting as well as meeting updates to the Senior IT Management and business management.
We have created a solution that can simplify the entire procedure by addressing these two major tasks of Release Management. The solution is a workflow that is created on top of JIRA. If the teams already have a JIRA Product (JIRA Core/JIRA Software/JIRA Service Desk), they can easily implement it by following upcoming section the installation instructions where prerequisites and import procedure is explained. The main features of workflow are as follows:
- It provides a unified platform for everyone involved in release. That helps to keep people synced within time and proper communication.
- It keeps everyone involved in the entire process and updates are circulated to every concerned person, saving a lot of time and avoiding loopholes
- The Release Acceptance Criteria is well-defined in the beginning of the release, so everyone maintains focus on other needed things (like Documentation, Report, Environment Provisioning, etc.) rather than simply delivering a piece of code.
- Planning, development, and evaluation phases make everything crystal clear to help with timely and quality product delivery.
- Involvement of IT Manager and DevOps Lead avoids any type of production environment error which avoids chances of build failure on production environment.
Workflow
The workflow works in the following three phases (consisting of separate stages for separate roles) where every required person involves actively and gets feedback for every update done in release:
- Planning Phase (Involves Product Owner, development lead, DevOps lead, QA lead, IT manager, and the Release Manager)
- Development Phase (Involves developer, QA, and DevOps teams)
- Evaluation Phase (Involves Release Manager and Product Owner)
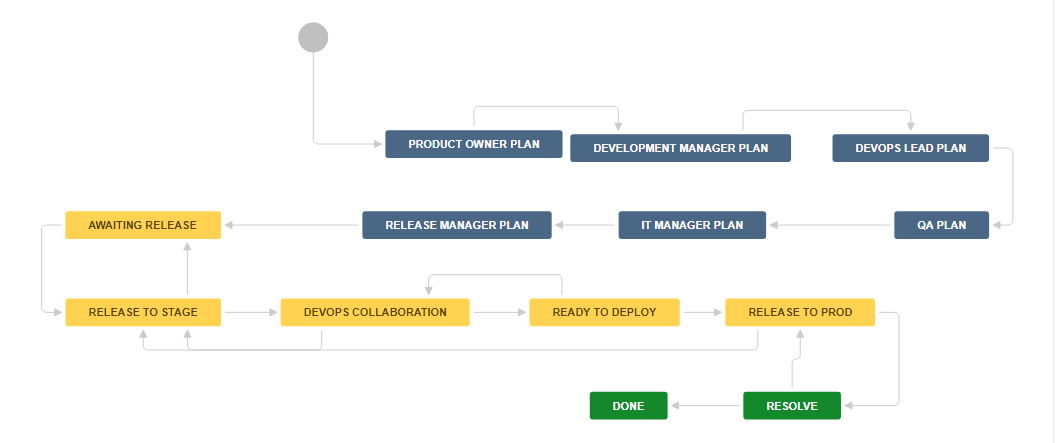
Whenever an issue ticket is opened for issue type "release management" (which follows the solution workflow), it addresses one release of software build at a time. The workflow goes through all the persons responsible for release, starting from the Product Owner, and after taking input and clearance from everyone involved in release, it ends up verifying the acceptance criteria by the Product Owner.
- Product Owner creates issues, specifying the goals/targets/acceptance criteria of the release acceptance.
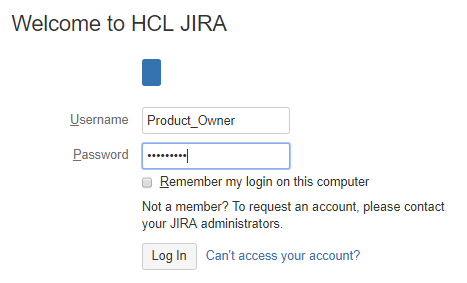
Logging into JIRA
Issue Creation
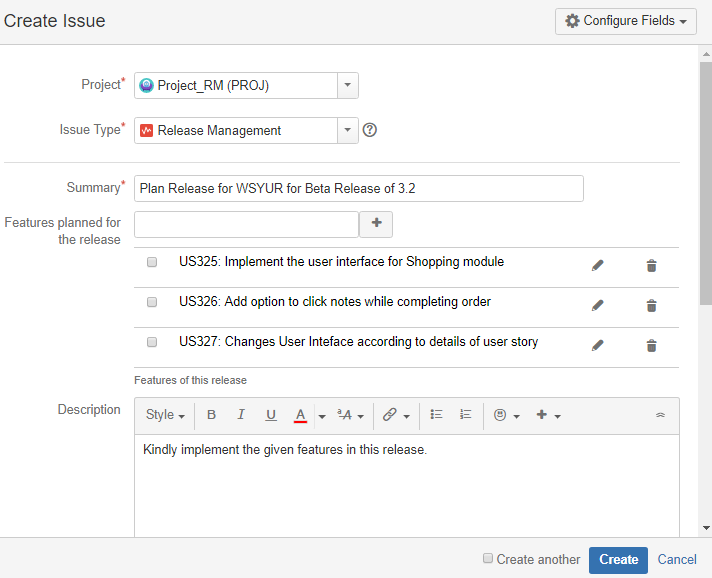
Issue looks like this after successful creation.
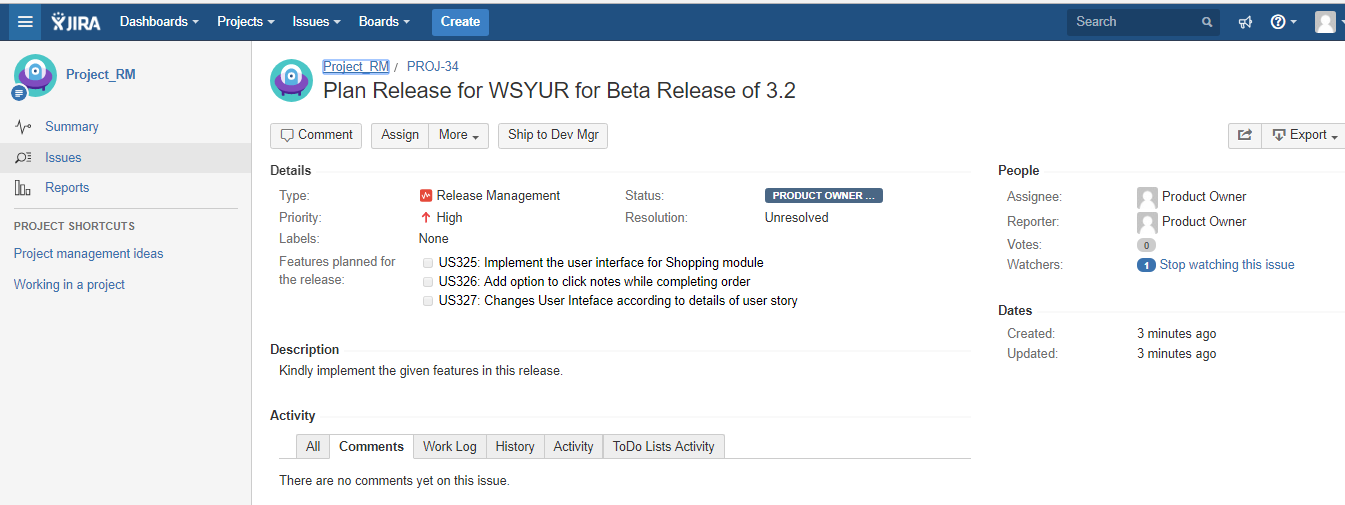
- This gets assigned to the development manager, who sets his plans for the development team.
- After the Planning phase, the development activity starts, where they work on the user stories targeted for the release. After completion, the QA is done, the IT lead prepares the production environment per the requirements. After it is checked by everyone, it is deployed on the production-like environment.
- The Product Owner verifies it and if he is satisfied according to acceptance criteria, he closes the release or reopens it if it fails to fulfill the acceptance criteria for release.
The solution is available on Atlassian Marketplace as "Release Management Workflow."
This workflow is customizable and can be customized by the JIRA administrator as needed.
Installation Guide
Prerequisites:
Get the workflow by following any of the following methods:
- Log into your Jira instance as an admin.
- Click the admin dropdown and choose Atlassian Marketplace. The Manage add-ons screen loads.
- Click Find new add-ons from the left-hand side of the page.
- Locate Release Management Workflow via search. The appropriate app version appears in the search results.
- You are all set!
Alternative Approach:
Add an additional standard issue type for release requests. We have named this issue type as "release management."

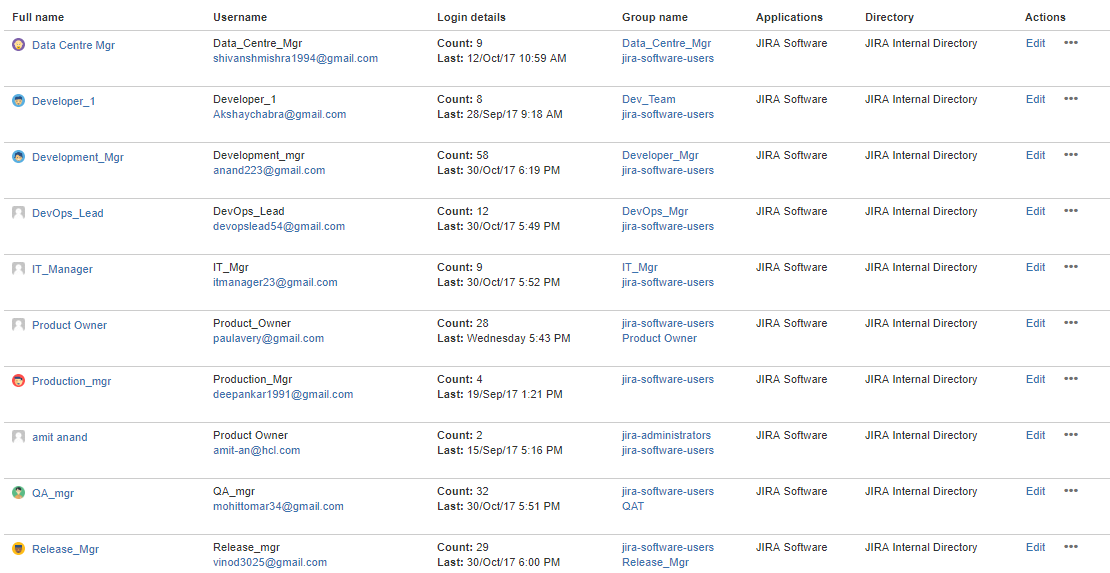
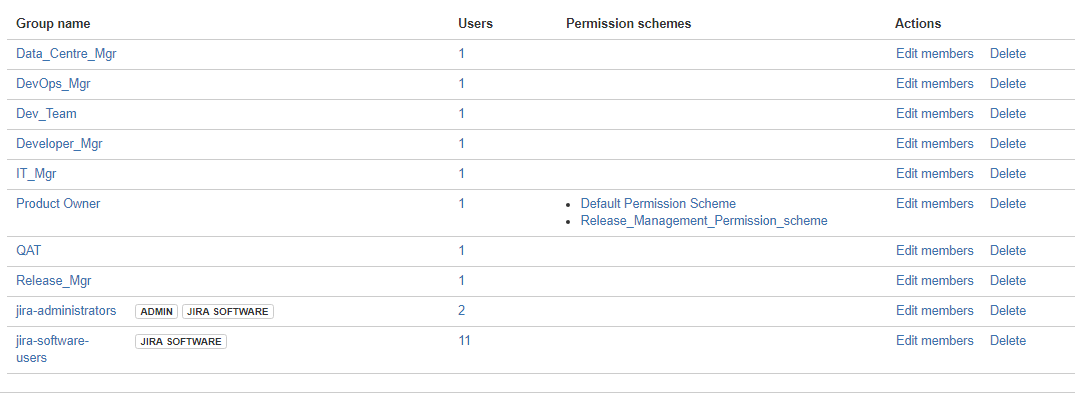
- Create users involved in release management process according to the roles mentioned below. Create respective groups as well and add relevant people from your team members in groups:
- Product Owner
- Development Manager
- QA Manager
- IT Team Manager
- DevOps Lead
- Data Centre Manager
- Release Manager
List of Users:
Group:
Import the Workflow
Choose >Issues.
- Click Workflows > Import from Marketplace. You'll see available workflows, ordered by the number of downloads.
- Find the workflow you want and click Select.
- You can keep using the default workflow name or choose a new name and click Next.
- Map the steps of the imported workflow to your existing workflow statuses or create new statuses. When you're finished, click Next.
- Review the summary of the import details and click Import.
If you had to use the alternative approach to get the workflow, follow the following procedure:
Choose >Issues.
- Click Workflows > From My Computer. You will see attachment field "Workflow file" below. Now click on "Choose File"
- Find the workflow you want and click Select.
- You can keep using the default workflow name or choose a new name and click Next.
- Map the steps of the imported workflow to your existing workflow statuses or create new statuses. When you're finished, click Next.
- Review the summary of the import details and click Import.
Now go to Issues > Workflow. In active scheme, you will see the project you had created for release management tasks. Let’s name it project "A." There you will see that a basic workflow is assigned with this project.
Go to Issues > Workflow schemes you will see a list of workflows assigned with multiple projects. Find out the workflow scheme that is assigned with the project "A."

Now click on edit for Project "A," click on add Workflow > Add existing. Select the workflow you imported and assign with the issue type created and associate.
Now your workflow has been successfully imported and associated with the project. Now you can begin working with release tasks.
Opinions expressed by DZone contributors are their own.

Comments