ODBC Connectivity to Airtable Data
Learn how to connect this ODBC driver with the Airtable REST API to work with your Airtable data in the ODBC-capable BI, reporting, and ETL tools of your choice.
Join the DZone community and get the full member experience.
Join For FreeAirtable is a spreadsheet-database hybrid, where the features of a database (typed fields, lookups, relationships between records, etc) are applied to a spreadsheet. By using the CData ODBC Driver for JSON with the Airtable REST API, you gain ODBC connectivity to your Airtable data, easily working with your data in the ODBC-capable BI, reporting, and ETL tools of your choice. This post will walk you through the connection process, including configuring a DSN and creating a schema file for the Applicants table.
Configure ODBC Connectivity to the Applicants Table
To use the ODBC Driver for JSON with Airtable data, configure a DSN (setting the Location connection property), create a schema file for each "table" you wish to work with, and save the schema file(s) to a specific location on disk. From there, you simply point your BI, reporting, or ETL tool to the DSN, like you would with any other ODBC driver.
Configure a DSN
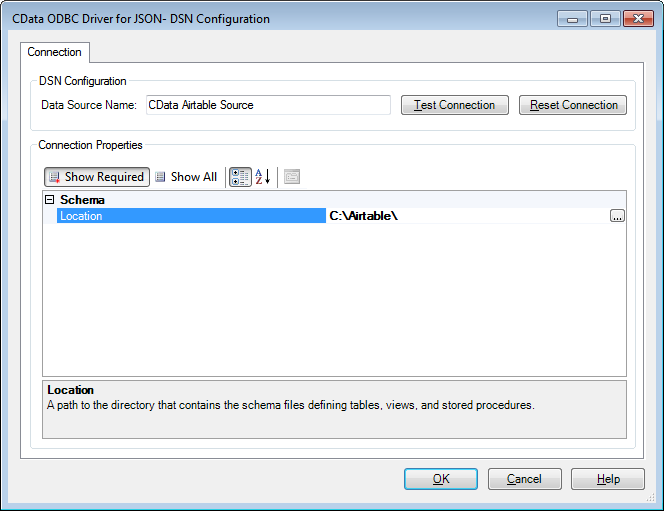
During the installation of the driver (on Windows), you are prompted to configure a DSN. If you have already installed the driver, you can use the ODBC Data Source Administrator to reconfigure your DSN or create a new one. Name your DSN something like "CData Airtable Source" and set the Location property to the directory on disk where you will store your schema files.
Note: If you are installing the ODBC Driver in a Mac or Linux/UNIX environment, refer to the Help documentation for more information on configuring the DSN.
Create a Schema File for the Applicants Table
With a DSN configured, you are ready to create a schema file for the Applicants table, which is exposed in the Applicant Tracking API. The principles applied to create the file can be extended to create schema files for any of the tables exposed in the API, including custom tables.
The schema file(s) you create will be based on information from the Airtable REST API and a sample response for the Applicants table (see below). In the sample response, each element in the records array corresponds to a single Applicant entity. For this post, the columns in our table schema will represent the id and createdTime elements, as well as all non-array child elements in the fields object.
Sample Response
{
"records": [
{
"id": "recRPGohCFwh3XUXb",
"fields": {
"Phone Screen Score": "2 - worth consideration",
"Onsite Interview Date": "2013-02-14",
"Stage": "Decision Needed",
"Email Address": "c.potato@example.com",
"Onsite Interview Notes": "Seems like a really hard worker, and has a ...",
"Phone": "(208) 555-0505",
"Phone Screen Date": "2013-02-07",
"Name": "Chippy the Potato",
"Onsite Interviewer": [
"receY4DXv5xkMOO8K"
],
"Attachments": [
{
...
}
],
"Onsite Interview Score": "2 - worth consideration",
"Phone Screen Interviewer": [
"recn46DSF3tdPHO9D"
],
"Phone Screen Notes": "Questionable, but tentatively move to on-site ...",
"Applying for": [
"recZqYoj6tzbIs2SS"
]
},
"createdTime": "2015-11-11T23:05:58.000Z"
},
...
]
}
Using the response above, the URL for the Applicants endpoint, and your API key, you can create a schema file for the Applicants table like the one below, configuring the table columns, connection and parsing properties, and read/write access using various keywords from RSBScript.
NOTE: Refer to the Help documentation for more information on using RSBScript to create schema files.
Table Columns
Each column in the table schema is configured using an attr element within the rsb:info element, incorporating various XML attributes to configure the name, datatype, and read/write access for each column. The other:xPath attribute informs the driver how to parse the value for the column, describing the location of the corresponding data in the JSON response. You can use a relative path ("createdTime"), based on the RepeatElement property or an absolute path ("/json/records/createdTime").
Connection & Parsing Properties, Read/Write Access
Using the rsb:set keyword, set the URI property to the full URL to be queried for data (using the Applicants endpoint and the API key) and set the RepeatElement property to the JSON path that represents each row of data ("/json/records/"). Last, configure access to the data, using the rsb:script keyword. For this schema, only read access is enabled.
Sample Schema: Applicants.rsd
<rsb:script xmlns:rsb="http://www.rssbus.com/ns/rsbscript/2" xmlns:xs="http://www.w3.org/2001/XMLSchema">

  <rsb:info title="Applicants" desc="Airtable Applicants table data." xmlns:other="http://www.rssbus.com/ns/rsbscript/2/other">
    <attr name="CreatedTime"               xs:type="datetime" readonly="true" other:xPath="createdTime"                      />
    <attr name="Applying_for"              xs:type="string"   readonly="false" other:xPath="fields/Applying for"              />
    <attr name="Email_Address"             xs:type="string"   readonly="false" other:xPath="fields/Email Address"             />
    <attr name="Name"                      xs:type="string"   readonly="false" other:xPath="fields/Name"                      />
    <attr name="Onsite_Interview_Date"     xs:type="date"     readonly="false" other:xPath="fields/Onsite Interview Date"     />
    <attr name="Onsite_Interview_Notes"    xs:type="string"   readonly="false" other:xPath="fields/Onsite Interview Notes"    />
    <attr name="Onsite_Interview_Score"    xs:type="string"   readonly="false" other:xPath="fields/Onsite Interview Score"    />
    <attr name="Onsite_Interviewer"        xs:type="string"   readonly="false" other:xPath="fields/Onsite Interviewer"        />
    <attr name="Phone"                     xs:type="string"   readonly="false" other:xPath="fields/Phone"                     />
    <attr name="Phone_Screen_Date"         xs:type="date"     readonly="false" other:xPath="fields/Phone Screen Date"         />
    <attr name="Phone_Screen_Interviewer"  xs:type="string"   readonly="false" other:xPath="fields/Phone Screen Interviewer"  />
    <attr name="Phone_Screen_Notes"        xs:type="string"   readonly="false" other:xPath="fields/Phone Screen Notes"        />
    <attr name="Phone_Screen_Score"        xs:type="string"   readonly="false" other:xPath="fields/Phone Screen Score"        />
    <attr name="Stage"                     xs:type="string"   readonly="false" other:xPath="fields/Stage"                     />
    <attr name="ID"                        xs:type="string"   readonly="true" other:xPath="id"                               />
  </rsb:info>

  <rsb:set attr="uri" value="https://api.airtable.com/v0/appaBCDEFgh1IJK2M/Applicants?api_key=key1aBC2eFGHIJklm" />

  <!-- Column XPaths are relative to a RepeatElement that splits the JSON into rows. -->
  <rsb:set attr="RepeatElement" value="/json/records" />

  <!-- The GET method corresponds to SELECT. -->
  <rsb:script method="GET">
    <rsb:call op="jsonproviderGet">
      <rsb:push/>
    </rsb:call>
  </rsb:script>

</rsb:script>
Connect to Airtable Applicant Data Over ODBC
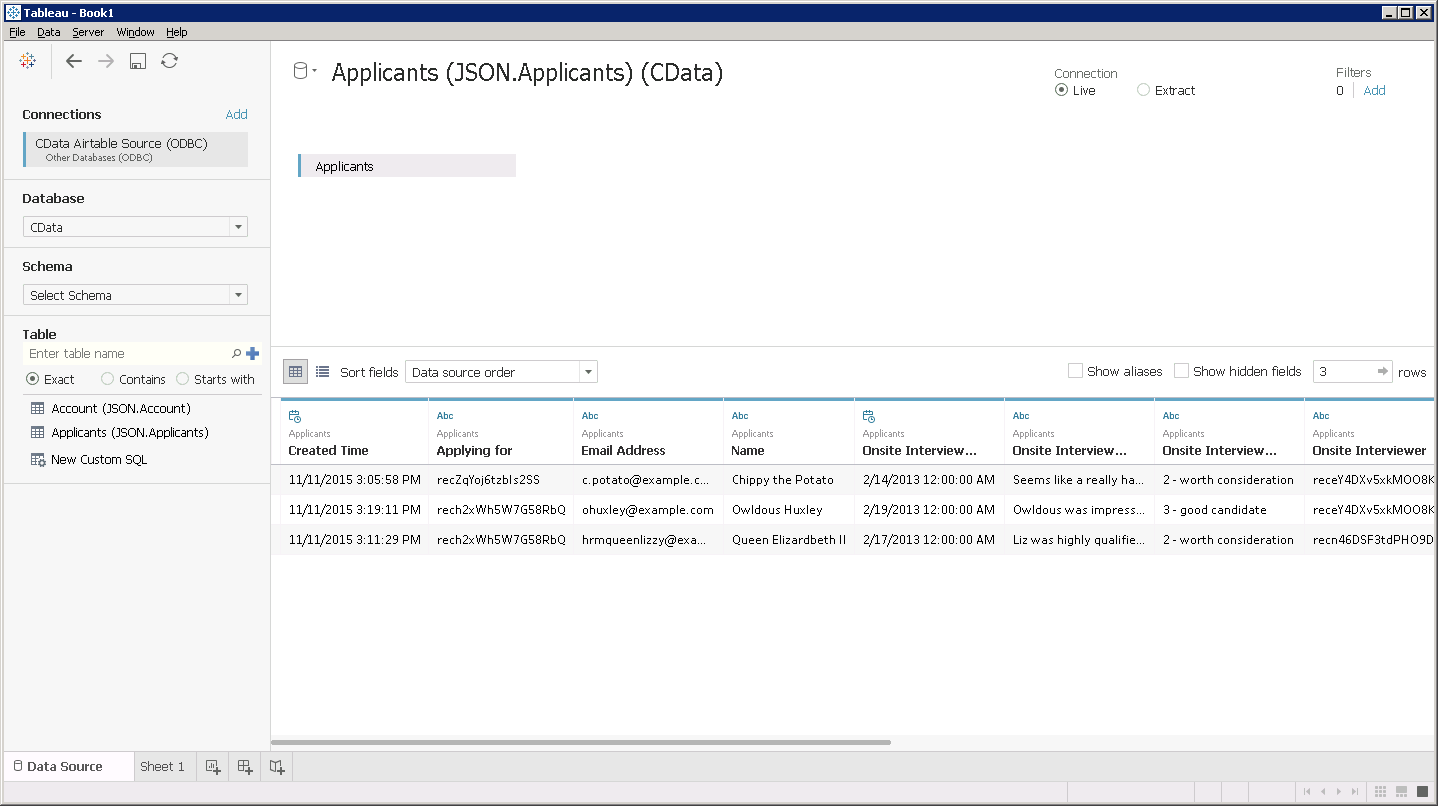
Now that you have configured the DSN and created a schema file for the Applicants table, it is time to connect to your Airtable data over ODBC in the BI, reporting, or ETL tool of your choice. Simply create an ODBC data source or connection in your tool, select the DSN you previously configured, choose the table(s) you wish to work with, and you are ready to start working with your Airtable data where you want.
Published at DZone with permission of Jerod Johnson, DZone MVB. See the original article here.
Opinions expressed by DZone contributors are their own.


Comments