Mulesoft Cloudhub Deployment using Azure DevOps
This article gives a brief overview of Azure DevOps and the detailed steps on deploying a Mule application into Cloudhub.
Join the DZone community and get the full member experience.
Join For FreeAzure DevOps is a Microsoft SaaS platform that provides end to end DevOps toolchain for developing and deploying applications.
Here, we are going to implement an Azure pipeline for deploying Mule applications into Cloudhub.
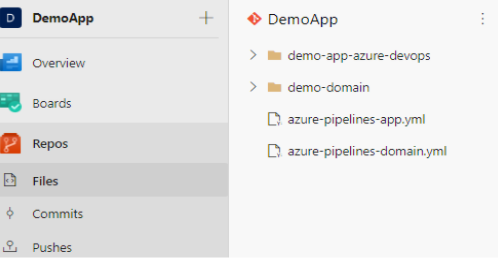
Azure Repos is a repository for the source code which is managed by version control. We can have multiple repositories under a single project and multiple branches under each repository as per the requirement. Here is a sample project “DemoApp” under which there is a repository named “DemoApp”. It consists of a Mule application “demo-app-azure-DevOps”.
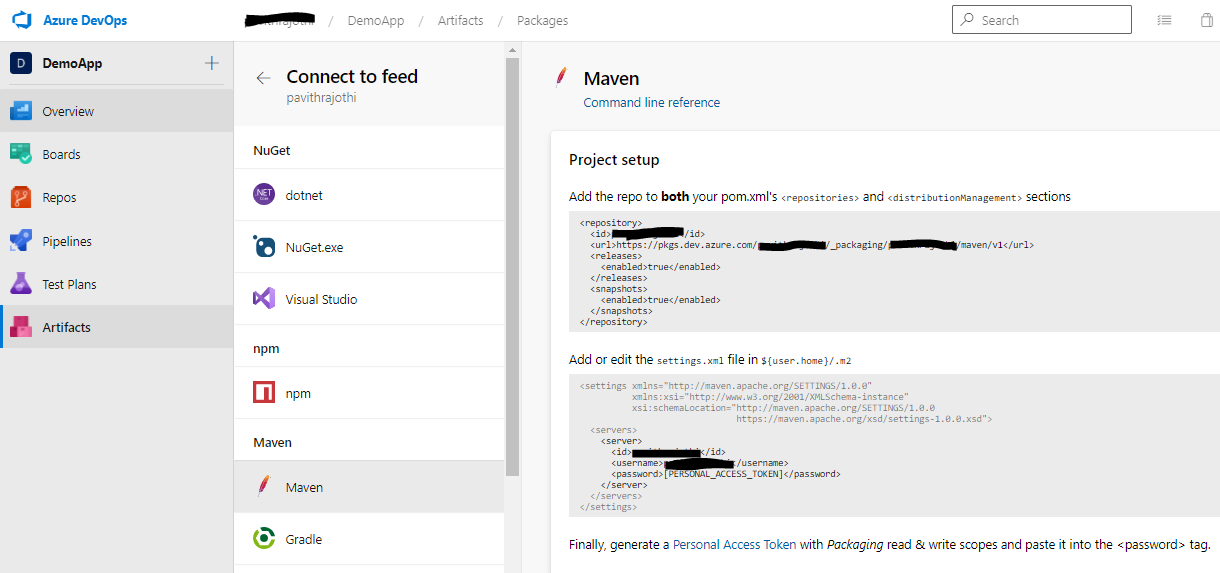
Edit pom.xml of the Mule application and include the below lines under both <repositories> and <distributionManagement> sections
xxxxxxxxxx
<repository>
<id>xxxx</id>
<url>https://pkgs.dev.azure.com/xxxx/_packaging/xxxxx/maven/v1</url>
<releases>
<enabled>true</enabled>
</releases>
<snapshots>
<enabled>true</enabled>
</snapshots>
</repository>
Also, include the following in pom.xml for Cloudhub Deployment. Refer this link for more details on each of the property — https://docs.mulesoft.com/mule-runtime/4.3/deploy-to-cloudhub
x
<plugin>
<groupId>org.mule.tools.maven</groupId>
<artifactId>mule-maven-plugin</artifactId>
<version>3.3.5</version>
<extensions>true</extensions>
<configuration>
<classifier>mule-application</classifier>
<cloudHubDeployment>
<uri>https://anypoint.mulesoft.com</uri>
<muleVersion>${mule.version}</muleVersion>
<username>${anypoint.username}</username>
<password>${anypoint.password}</password>
<environment>${cloudhub.environment}</environment>
<applicationName>${cloudhub.appName}</applicationName>
<workers>${cloudhub.workers}</workers>
<workerType>${cloudhub.workerType}</workerType>
<region>${cloudhub.region}</region>
<objectStoreV2>true</objectStoreV2>
<properties>
<mule.env>${mule.env}</mule.env>
</properties>
</cloudHubDeployment>
</configuration>
</plugin>
Creating Our First Build Pipeline
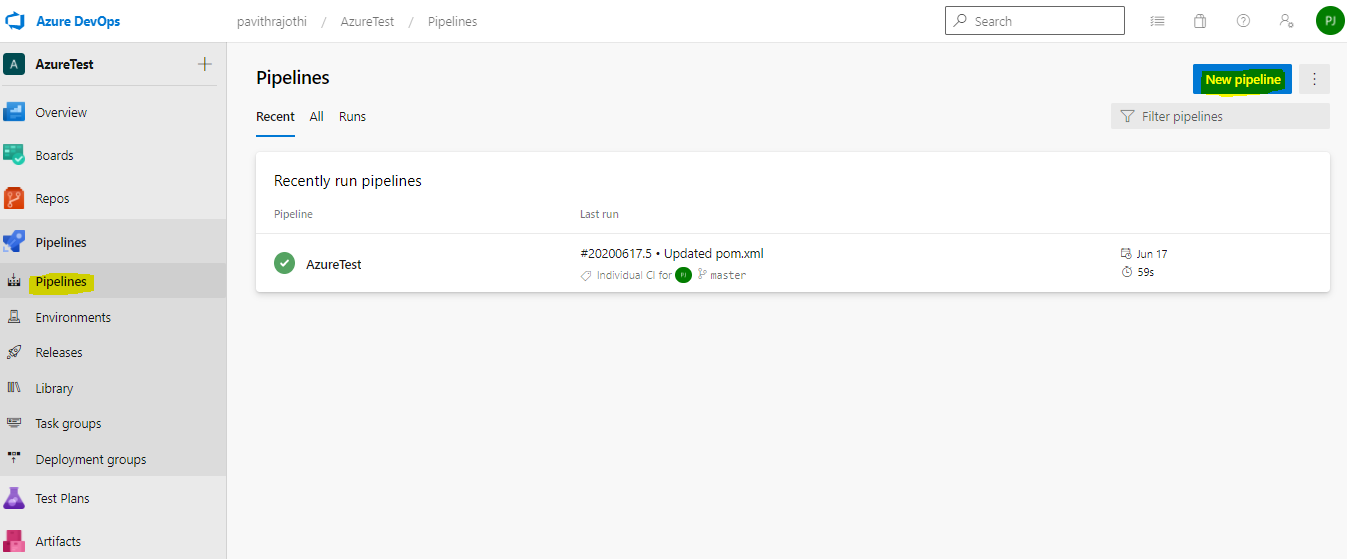
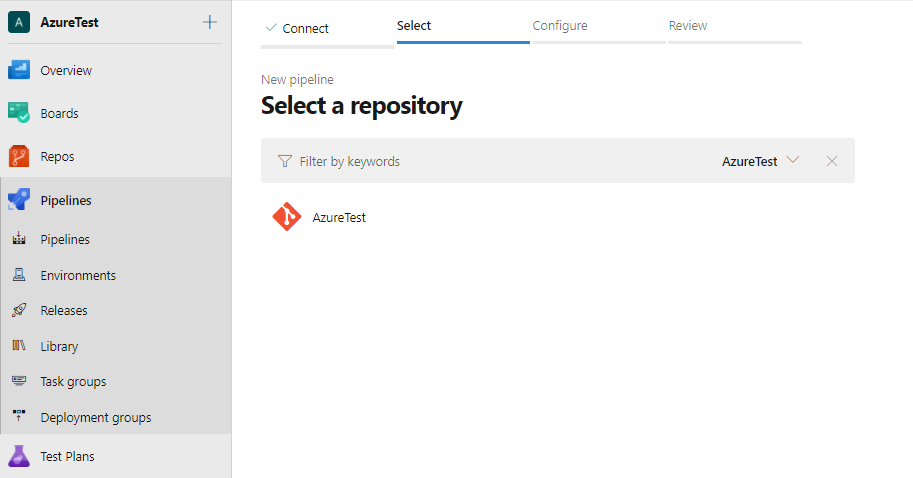
Goto Pipelines and click on New Pipeline
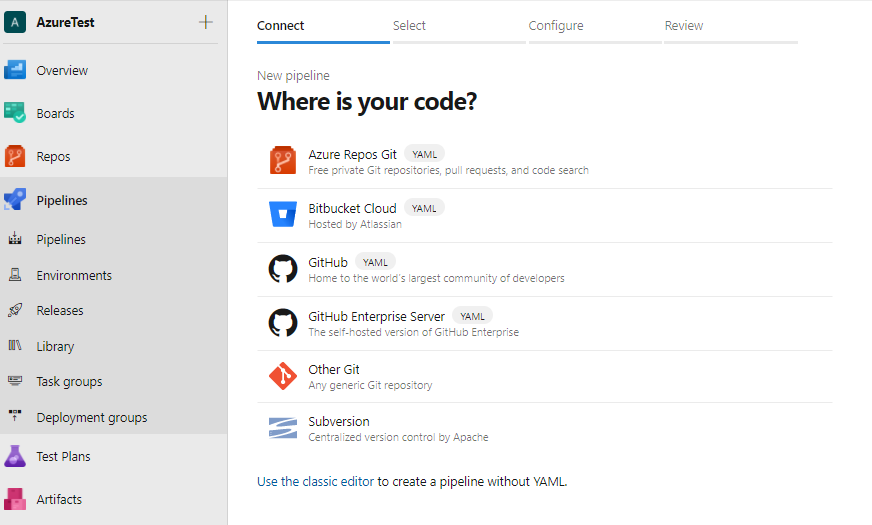
Select the appropriate Code repository
Configure your Maven build pipeline
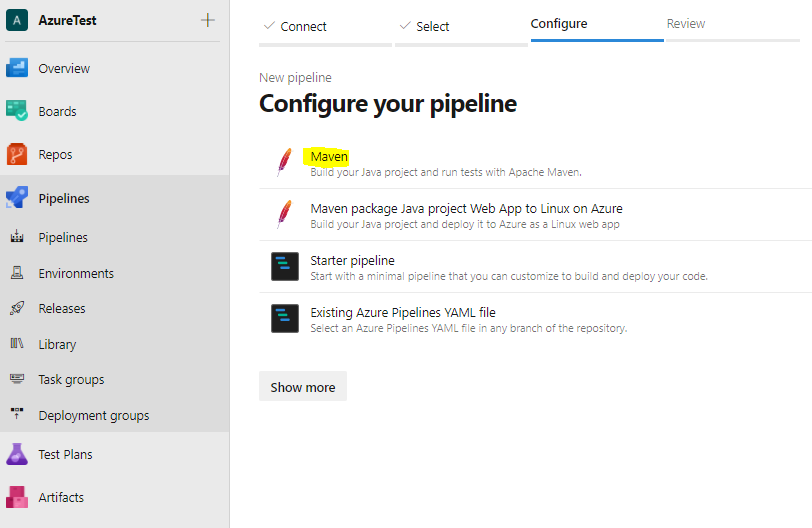
Then build the pipeline using the YAML file as shown below. These are the step by step instructions for the pipeline configured:
Pipeline gets triggered whenever the source code under the dev branch, under the path ‘demo-app-azure-DevOps/*’ changes.
Maven Authentication is done to push the artifacts into a particular feed
Pipeline caching is done to reduce the build time. Pipeline Caching can be implemented only on Build Pipelines and not on release pipelines. Create the below pipeline variables before building the pipeline
Name
Value
MAVEN_CACHE_FOLDER
$(Pipeline.Workspace)/.m2/repository
MAVEN_OPTS
-Dmaven.repo.local=$(MAVEN_CACHE_FOLDER)
Maven task to read the pom file and deploy the artifacts. We have given the goal as deploy to push the jar into Azure artifacts
Copy files task to copy the required files which can be used later
Publish Build Artifact which publishes the required artifacts in the pipeline
x
# Maven
# Build your Java project and run tests with Apache Maven.
# Add steps that analyze code, save build artifacts, deploy, and more:
# https://docs.microsoft.com/azure/devops/pipelines/languages/java
trigger
branches
include
dev
paths
include
'demo-app-azure-devops/*'
pool
vmImage'ubuntu-latest'
steps
taskMavenAuthenticate@0
inputs
artifactsFeeds'xxxxx'
taskCache@2
inputs
key'maven | "$(Agent.OS)" | demo-app-azure-devops/pom.xml'
path'$(MAVEN_CACHE_FOLDER)'
cacheHitVar'CacheRestored'
restoreKeys
maven | "$(Agent.OS)"
maven
displayNameCache Maven local repo
taskMaven@3
inputs
mavenPomFile'demo-app-azure-devops/pom.xml'
goals'deploy'
publishJUnitResultstrue
testResultsFiles'**/surefire-reports/TEST-*.xml'
javaHomeOption'JDKVersion'
mavenVersionOption'Default'
mavenOptions'-Xmx3072m $(MAVEN_OPTS)'
mavenAuthenticateFeedfalse
effectivePomSkipfalse
sonarQubeRunAnalysisfalse
taskCopyFiles@2
inputs
Contents'**/target/*.jar'
TargetFolder'$(Build.ArtifactStagingDirectory)'
CleanTargetFoldertrue
flattenFolderstrue
taskPublishBuildArtifacts@1
inputs
PathtoPublish'$(Build.ArtifactStagingDirectory)'
ArtifactName'DemoApplication'
publishLocation'Container'
Release Pipeline:
Once the build pipeline is completed, we can trigger the release pipeline as per requirements. Here is a sample release pipeline that gets triggered whenever the build pipeline is completed. This pipeline will deploy our application into Cloudhub.
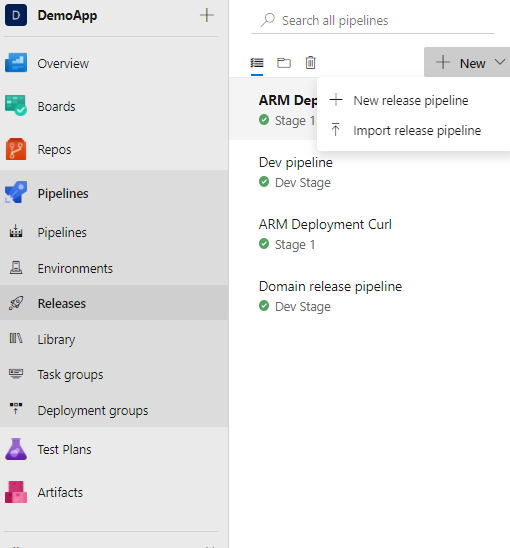
Goto Pipelines -> Releases and create a New release pipeline
Necessary artifacts must be added in the Artifacts section of the release pipeline to trigger it. In the below pipeline, we have configured the source build pipeline with the latest version. This configuration will pull up the artifacts which are built in the build pipeline.
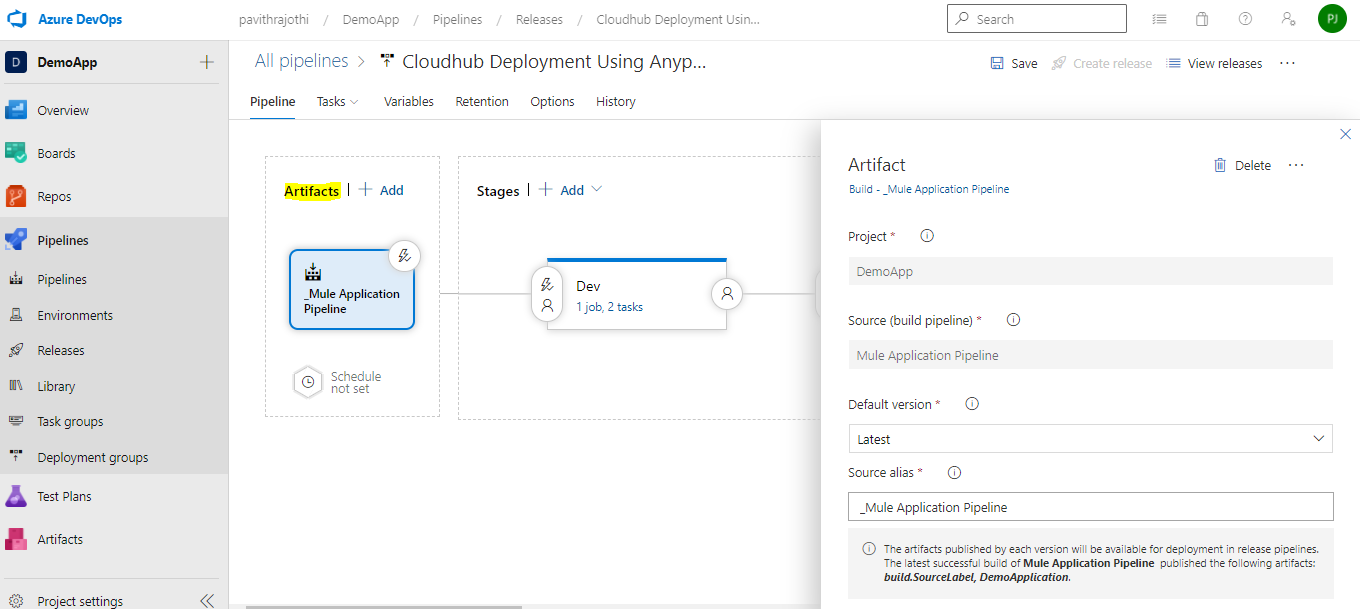
Also, enable the continuous trigger option to create releases every time a new build is done
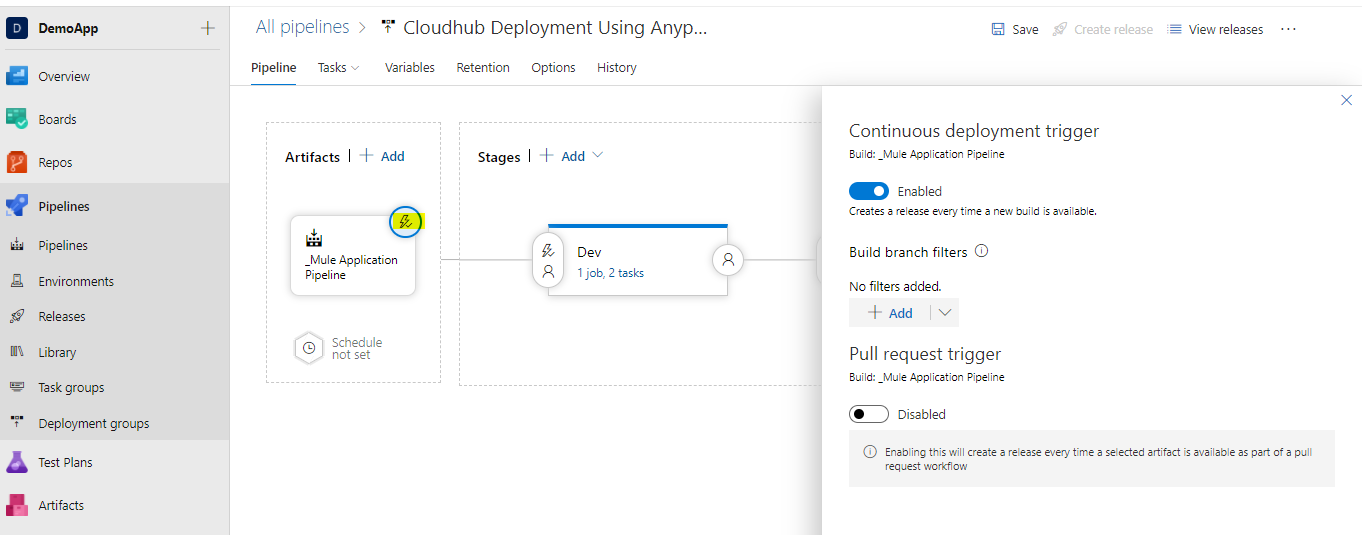
Then add Stages as per the environment to deploy and configure the tasks
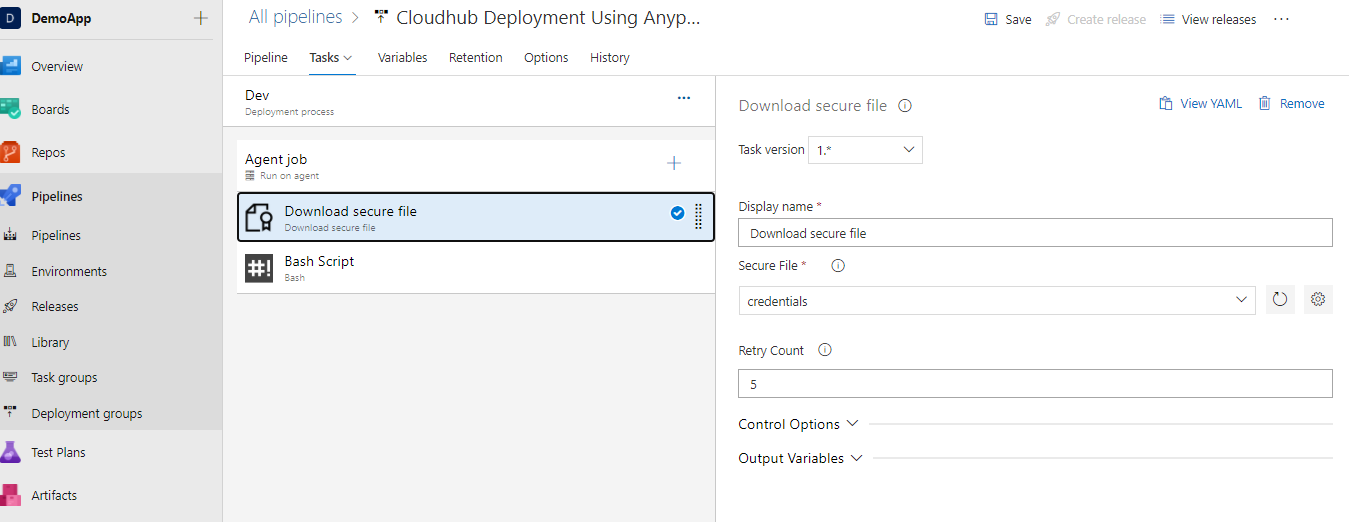
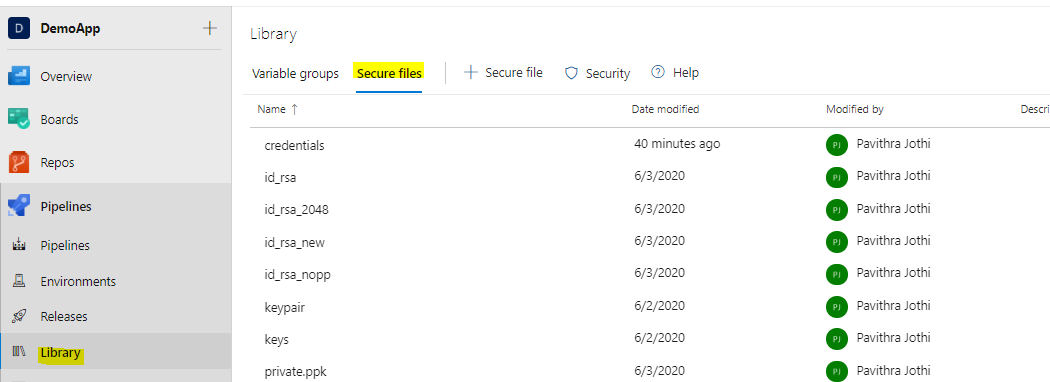
Download Secure file — Add the secure file under the Library section. The secure file should look like the below one. It can be configured according to the environment on which the Mule application should be deployed
x
{
"Sandbox": {
"username": "anypoint_platform_username",
"password": "anypoint_platform_password",
"organization": "xxxxx",
"environment": "Sandbox",
"host": ""
}
}
Bash Script — It includes Anypoint CLI commands to deploy the application into Cloudhub. Configure the below under the Script section. These commands are to deploy the application for the first time
x
npm install -g anypoint-cli@latest
mkdir ~/.anypoint
cp $AGENT_TEMPDIRECTORY/credentials ~/.anypoint/
export ANYPOINT_PROFILE=$(environment)
anypoint-cli runtime-mgr cloudhub-application deploy --runtime $(runtime) --workers $(workers) --workerSize $(workerSize) $(applicationName) $(applicationJarFilePath)
To redeploy the application into Cloudhub, make use of the below commands
x
npm install -g anypoint-cli@latest
mkdir ~/.anypoint
cp $AGENT_TEMPDIRECTORY/credentials ~/.anypoint/
export ANYPOINT_PROFILE=$(environment)
anypoint-cli runtime-mgr cloudhub-application modify --runtime $(runtime) --workers $(workers) --workerSize $(workerSize) $(applicationName) $(applicationJarFilePath)
Configure the below variables in the release pipeline or variable groups sections:
- Environment — Environment under which to deploy the Mule application (say: Sandbox)
- Runtime — Mule runtime (say: 4.3.0)
- Workers — The number of workers to be assigned to the application. (say: 1)
- WorkerSize — The number of vCores to be assigned to the application (say: 0.1)
- ApplicationName — Mule application name (say: demo-application)
- ApplicationJarFilePath — JAR file path which is located in the pipeline (say: D:/a/r1/a/_Mule Application Pipeline/DemoApplication/demo-app-azure-DevOps-1.0.2-SNAPSHOT-mule-application.jar)
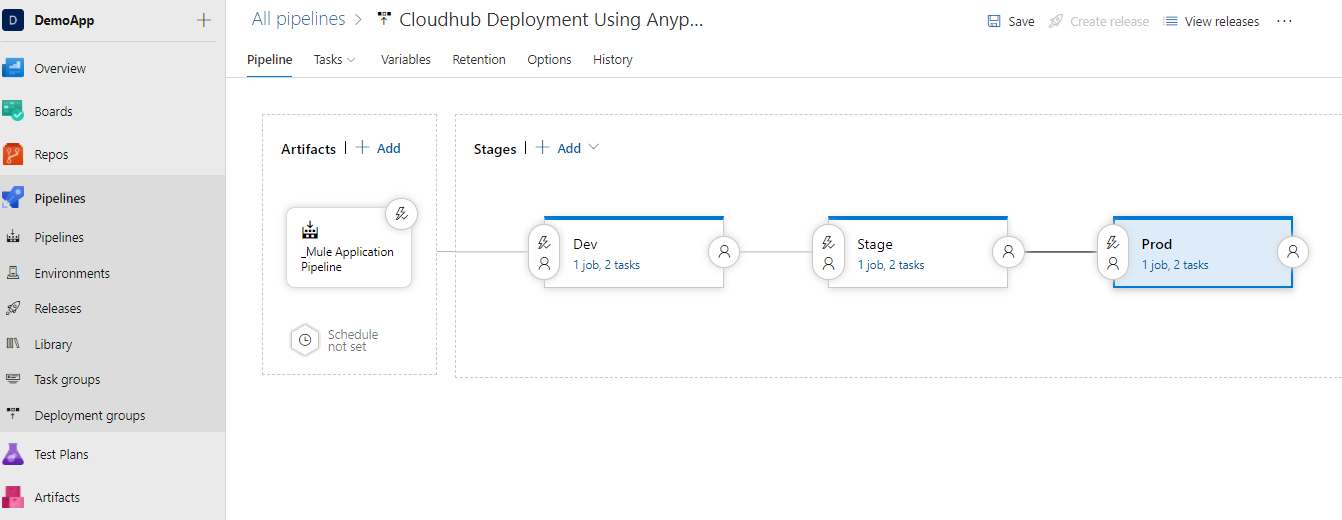
Once the tasks are configured, we are ready to run and once the pipeline is successful, the application would be deployed to Cloudhub.

We have successfully built our Azure pipeline to deploy the Mule application into Cloudhub.
Opinions expressed by DZone contributors are their own.

Comments