Mulesoft Basic Authentication With HTTPS
With Mulesoft's growing popularity, it's increasingly important to secure your Mule projects. Learn how to use Basic Authentication and HTTPS to secure your API.
Join the DZone community and get the full member experience.
Join For FreeI have read multiple articles to find out how I can secure my API. There are multiple ways you can secure newly created APIs. One of them is if you deploy on CloudHub and you declare the policy, it easily secures. But its a paid service. If you want to secure with extra few lines of code in your flow then this article will show you how to secure your API with Basic Authentication over HTTPS.
As you know, Mule is built on top of the Spring framework, so you can use spring authentication in your-app.xml. For example, I have created a project customer; and after creating my api.raml file, and generating the API, the project would look like this:
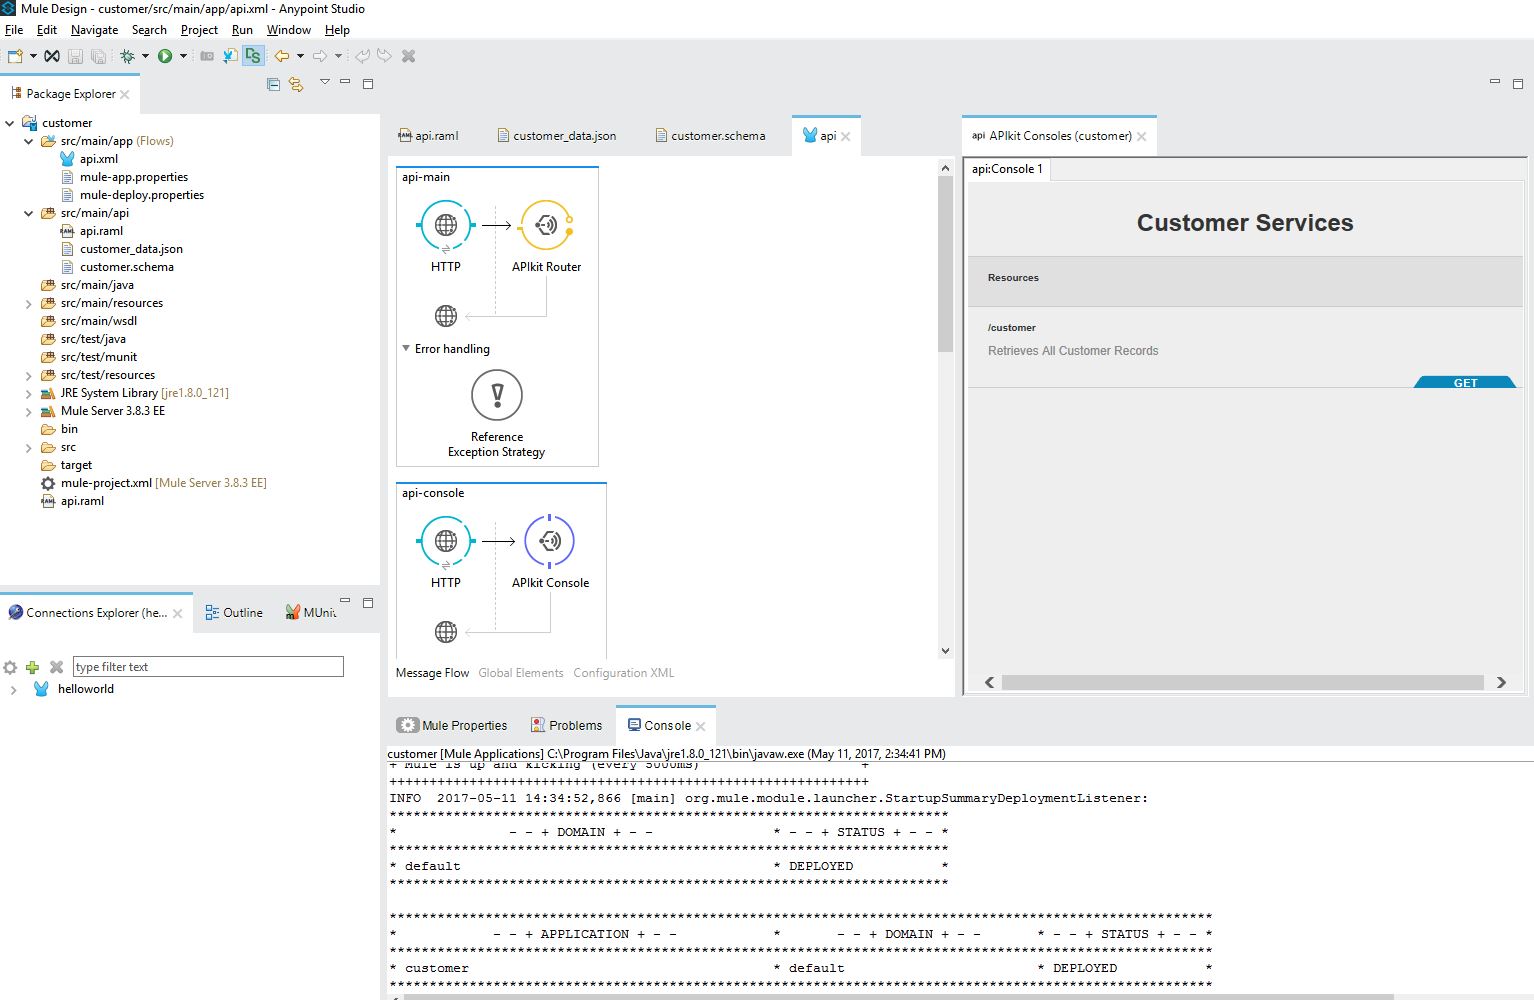
Once our API is created, it's time to implement Basic Authentication.
1. Define in RAML
In the api.raml file's header section, use the following:
securitySchemes:
    - basic:
        type: Basic Authentication
Then, inget: method define your file as:
securedBy: [basic]
The api.raml file should look like this:
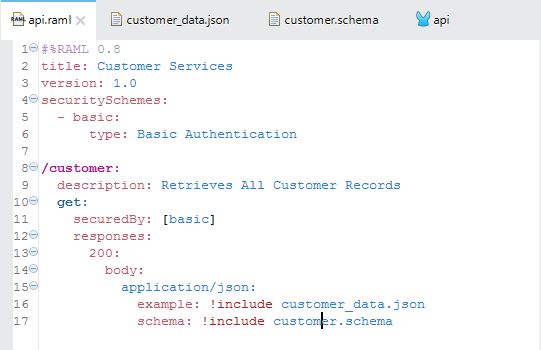
This enables the console window to ask for a username and password, but it's still not secure.
Now in our api.xml file, add the following lines of code to enable basic authentication:
<spring:beans>
   <ss:authentication-manager alias="authenticationManager">
     <ss:authentication-provider>
       <ss:user-service id="userService">
          <ss:user name="admin" password="admin" authorities="ROLE_ADMIN" />
          <ss:user name="user1" password="work4proj" authorities="ROLE_DEV" />
        </ss:user-service>
    </ss:authentication-provider>
  </ss:authentication-manager>
</spring:beans>
<mule-ss:security-manager name="muleSecurityManager" doc:name="Spring Security Provider">
  <mule-ss:delegate-security-provider name="memory-provider" delegate-ref="authenticationManager" />
</mule-ss:security-manager>
Note: Please add security name spaces in the namespace declaration.
xmlns:mule-ss="http://www.mulesoft.org/schema/mule/spring-security"
xmlns:ss="http://www.springframework.org/schema/security"

http://www.mulesoft.org/schema/mule/file http://www.mulesoft.org/schema/mule/file/current/mule-file.xsd
http://www.mulesoft.org/schema/mule/tls http://www.mulesoft.org/schema/mule/tls/current/mule-tls.xsd"
Your api.xml file should look like this:
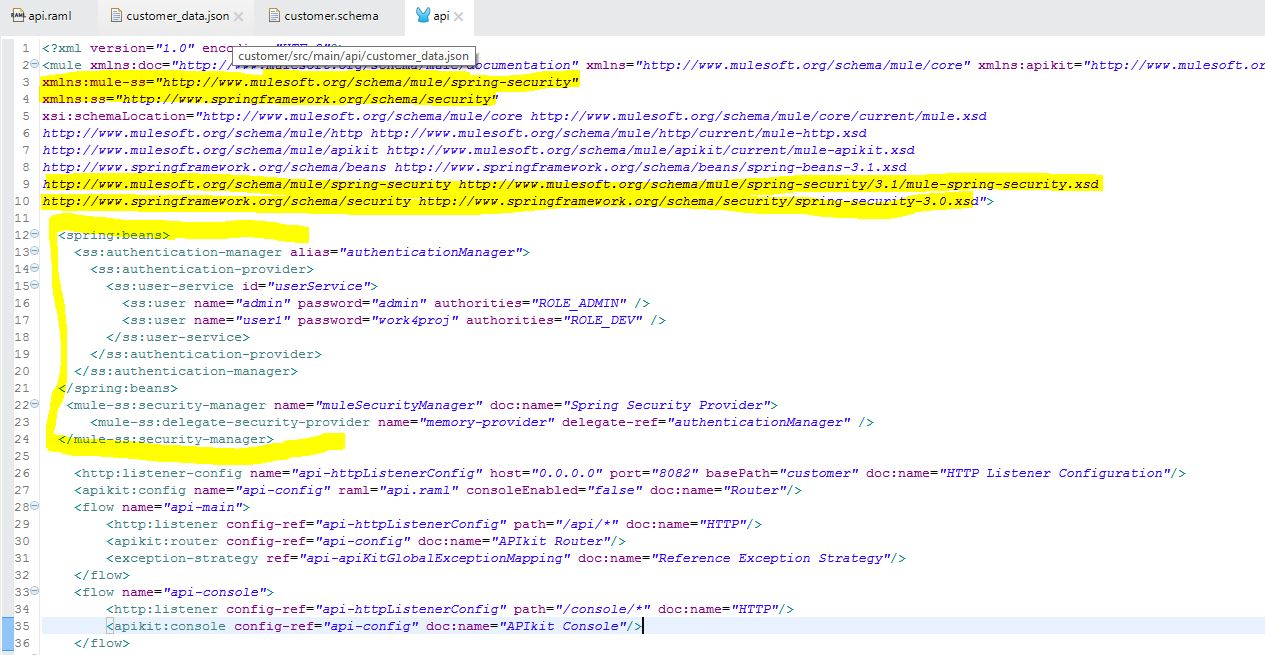
Note that this is an in-memory provider. You could easily change to an LDAP or a DAO provider.
Now apply security into the flow by adding the following line of code:
<mule-ss:http-security-filter realm="mule-realm" securityProviders="memory-provider"/>
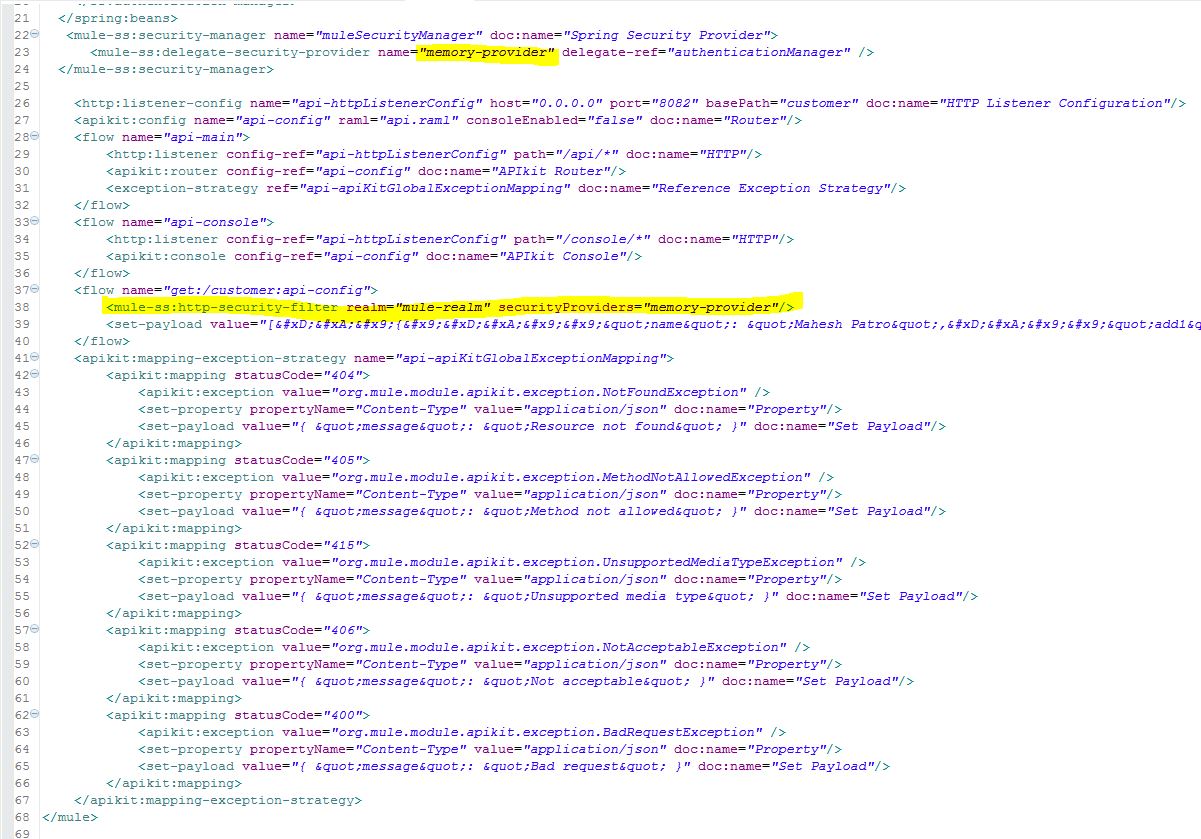
Here is the console window from IE and an actual API call from Postman.
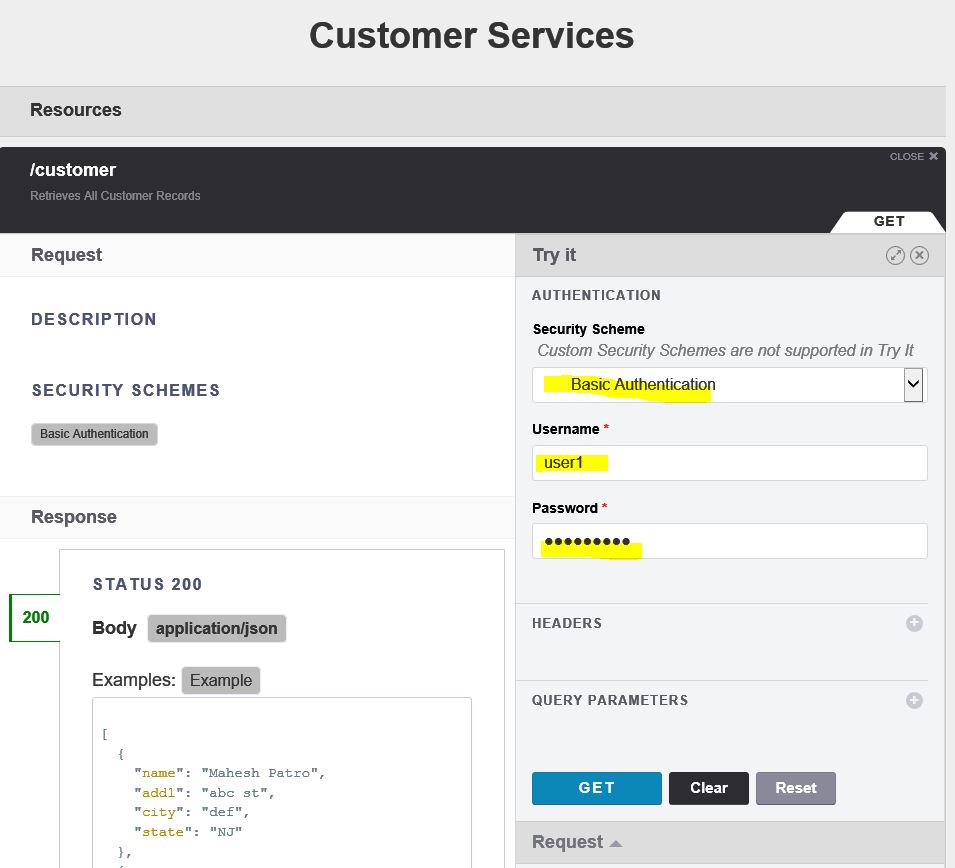
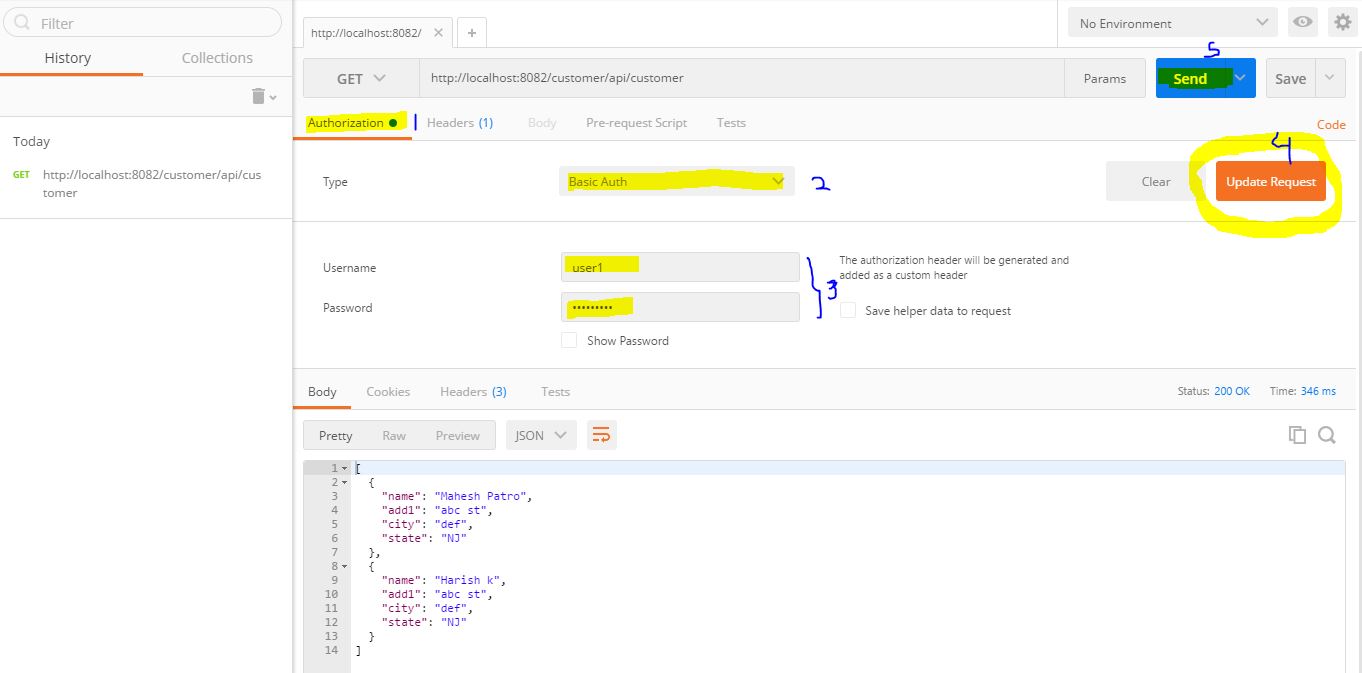
Try executing your code with the wrong password first, in order to verify it will not allow you to execute an incorrect username/password combination.
Note: if you try to execute with the correct password first, then you may need to clean the cache as there is no logout in basic authentication.
Once you have secured your Mulesoft project with Basic Authentication, it is time to secure it with HTTPS. For that, you will need to follow a three-step process:
1. Create keystore.jks using following command line tool (jdk bin must be in path variable)
keytool -genkeypair -keystore keystore.jks -dname "CN=localhost, OU=Unknown, O=Unknown, L=Unknown, ST=Unknown, C=Unknown" -keypass password -storepass password -keyalg RSA -sigalg SHA1withRSA -keysize 2048 -alias mule -ext SAN=DNS:localhost,IP:127.0.0.1 -validity 99992. Copy the newly created keystore.jks to a resource folder in your project.
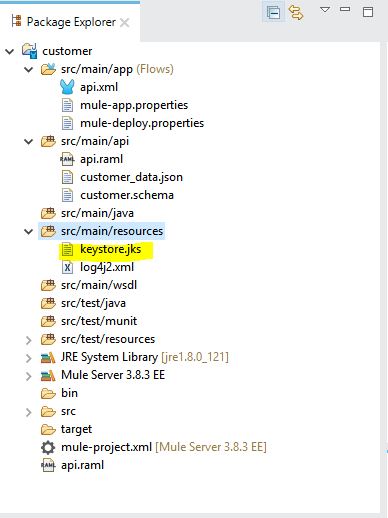
3. Open the HTTP connector properties window, select the protocol as HTTPS, and in the TLS/SSL tab enter Key Store Configuration as shown below:
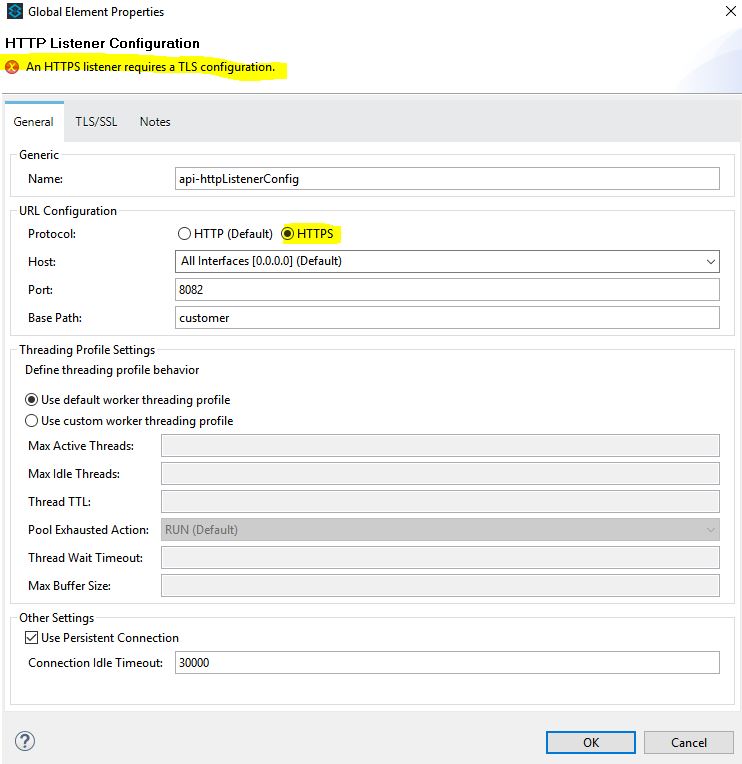
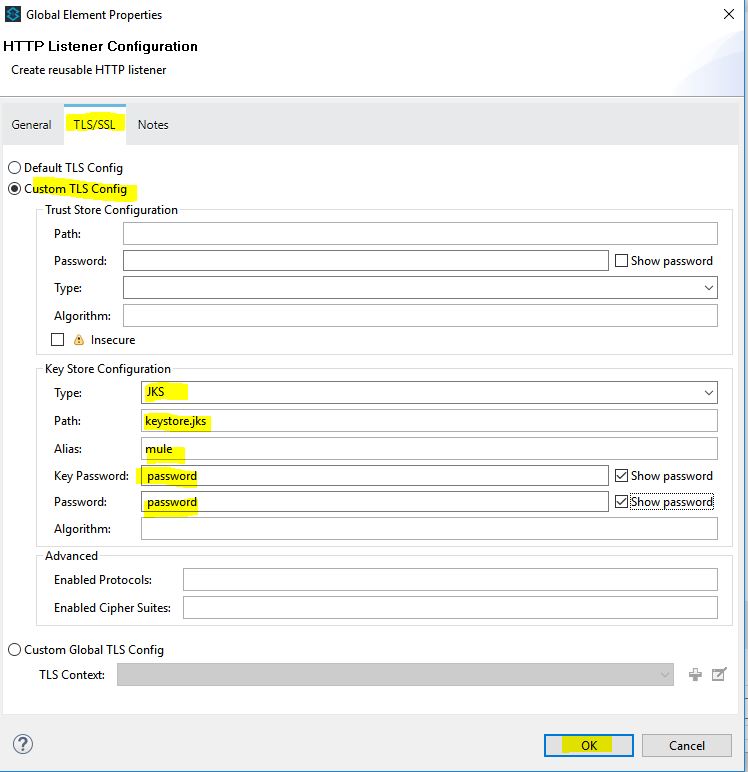
Please note that the Key Password and password have to match with the password you mentioned while creating keystore.jks in Step 1.
Now, revisit your console window with https://localhost:8082/customer/console
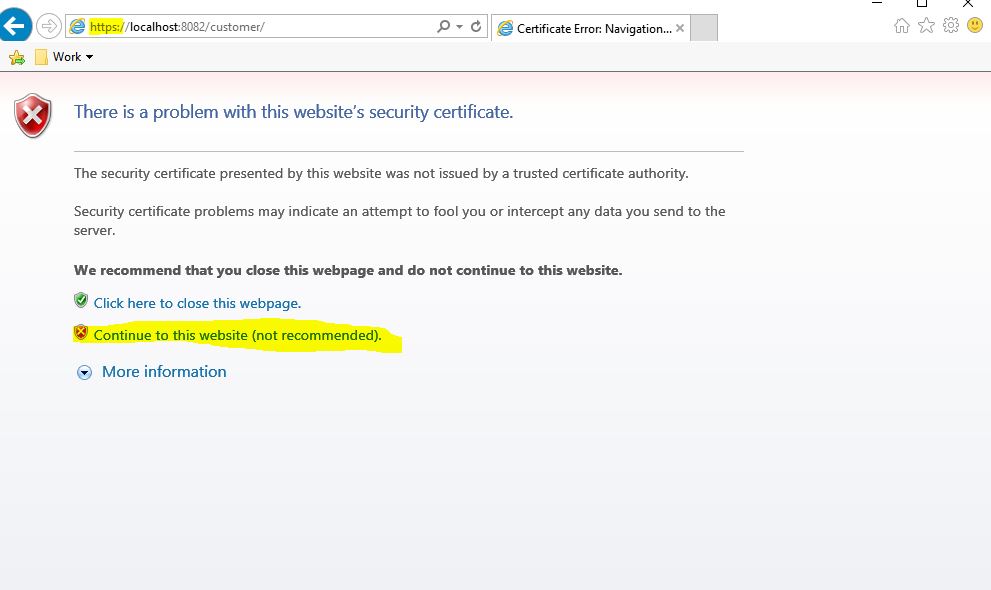
Click Continue as the keystore you created is not yet trusted (IE/Chrome will throw up a warning).
Cloud Deployment Note:
If you are deploying in the cloud, then you would need to change your port entry in api.properties from http.port to https.port.
Opinions expressed by DZone contributors are their own.

Comments