MongoDB and PostgreSQL Support for NestJS Boilerplate
Learn how to implement it with hexagonal architecture. How to choose what DB works better for your project and how to set up your NestJS project properly.
Join the DZone community and get the full member experience.
Join For FreeWe created the NestJS boilerplate in August 2020, and since then, we have worked on its optimization and improvements. NestJS boilerplate is a project that contains all necessary libraries and solutions like auth, mailing, etc., for fast-starting your project using a classic REST API approach. Right now, this boilerplate has 2.4K stars on GitHub and has recognition and support from the developer community. Recently, we also published our new frontend boilerplate on React, which is excellently compatible with the backend implementation, so for now, we have a whole bc boilerplate ecosystem.
Motivation To Include Mongo Support
PostgreSQL support was originally included in the boilerplate because of its reliability, data integrity, and active community. But for projects that require high speed of working with large data sets and high scalability, MongoDB is usually a better choice. So, we wanted to integrate MongoDB support into our project. Also, we’ve got a number of requests to include NoSQL DB support from the community members and coworkers who use this boilerplate.

So, now it's done, and developers can choose between the document-oriented database MongoDB and the relational database PostgreSQL.
Now, let’s figure out what would be better to use when setting up a new project. Of course, the question is not which database is better because both databases are excellent; it all depends on the scope and goals of the application. Let’s dive into the details.
- If you need a relational database that uses complex SQL requests and works with most apps that support relational table structures, it’s better to choose PostgreSQL.
- For a scenario where a high level of security and high ACID compliance is required, then PostgreSQL is the best solution.
- If you need a reliable tool to handle complex transactions and analytics in applications that work with multi-structured, fast-changing data, then MongoDB is a good choice for your project.
- If you're running an application that you'll need to scale and need to be distributed across regions for data locality or data sovereignty, MongoDB's scale-out architecture will automatically meet those needs.
In order to provide a good level of abstraction and to simplify work with MongoDB we use Mongoose — an object data modeling (ODM) library. It allows developers to define their data models using a schema-based approach and provides a rich set of features that simplify the process of working with MongoDB. In addition to supporting basic CRUD operations and query functions out of the box, Mongoose provides a richer set of features for working with MongoDB, such as middleware functions, virtual properties, query builders, and schema validation. It allows developers to define the structure of their data, including the types of each field, and specify validation rules to ensure data consistency and integrity.

Object Mapping between Node and MongoDB managed via Mongoose
Implementation With Hexagonal Architecture
To allow an application to uniformly manage batch execution scenarios separately from its end devices and databases, the hexagonal software architecture (aka ports and adapters architecture) introduced by Alistair Cockburn was used. In his article, he emphasizes that there is not much difference between how a user interface and a database interact with an application since they are both external connections that are interchangeable with similar components and interact with the application in equivalent ways. Therefore, we used this architectural approach in the project, and it allowed us to encapsulate the implementation details of the data source, thus implementing the support of 2 types of databases in the boilerplate.
Let's take a closer look at the implementation. First of all, we create the User entity in the users/domain directory.
export class User {
  id: number | string;
  email: string | null;
  password?: string;
  firstName: string | null;
  lastName: string | null;

  // ...
}
Then, we create a port called UserRepository.
 export abstract class UserRepository {
  abstract create(
    data: Omit<User, 'id'>,
  ): Promise<User>;
  abstract findOne(fields: EntityCondition<User>): Promise<NullableType<User>>;
}
In users/infrastructure/persistence/relational/repositories we implement UserRepository for working with TypeORM.
@Injectable()
export class UsersRelationalRepository implements UserRepository {
  constructor(
    @InjectRepository(UserEntity)
    private readonly usersRepository: Repository<UserEntity>,
  ) {}

  async create(data: User): Promise<User> {
    const persistenceModel = UserMapper.toPersistence(data);
    const newEntity = await this.usersRepository.save(
      this.usersRepository.create(persistenceModel),
    );
    return UserMapper.toDomain(newEntity);
  }

  async findOne(fields: EntityCondition<User>): Promise<NullableType<User>> {
    const entity = await this.usersRepository.findOne({
      where: fields as FindOptionsWhere<UserEntity>,
    });

    return entity ? UserMapper.toDomain(entity) : null;
  }
}
And we create a module for working with TypeORM in users/infrastructure/persistence/relational.
 @Module({
  imports: [TypeOrmModule.forFeature([UserEntity])],
  providers: [
    {
      provide: UserRepository,
      useClass: UsersRelationalRepository,
    },
  ],
  exports: [UserRepository],
})
export class RelationalUserPersistenceModule {}
Now, we do the same for Mongoose.
@Injectable()
export class UsersDocumentRepository implements UserRepository {
  constructor(
    @InjectModel(UserSchemaClass.name)
    private readonly usersModel: Model<UserSchemaClass>,
  ) {}

  async create(data: User): Promise<User> {
    const persistenceModel = UserMapper.toPersistence(data);
    const createdUser = new this.usersModel(persistenceModel);
    const userObject = await createdUser.save();
    return UserMapper.toDomain(userObject);
  }

  async findOne(fields: EntityCondition<User>): Promise<NullableType<User>> {
    if (fields.id) {
      const userObject = await this.usersModel.findById(fields.id);
      return userObject ? UserMapper.toDomain(userObject) : null;
    }

    const userObject = await this.usersModel.findOne(fields);
    return userObject ? UserMapper.toDomain(userObject) : null;
  }
}
And module for working with MongoDB.
@Module({
  imports: [
    MongooseModule.forFeature([
      { name: UserSchemaClass.name, schema: UserSchema },
    ]),
  ],
  providers: [
    {
      provide: UserRepository,
      useClass: UsersDocumentRepository,
    },
  ],
  exports: [UserRepository],
})
export class DocumentUserPersistenceModule {}
After that, we connect either the module for working with Mongoose (DocumentUserPersistenceModule) or TypeORM (RelationalUserPersistenceModule) in users/users.module.ts based on the ENV configuration.
const infrastructurePersistenceModule = (databaseConfig() as DatabaseConfig)
  .isDocumentDatabase
  ? DocumentUserPersistenceModule
  : RelationalUserPersistenceModule;

@Module({
  imports: [infrastructurePersistenceModule, FilesModule],
  controllers: [UsersController],
  providers: [UsersService],
  exports: [UsersService, infrastructurePersistenceModule],
})
export class UsersModule {}
And then, in the UserService, we can access the UserRepository, and NestJS will understand which database to use based on the ENV configuration settings.
@Injectable()
export class UsersService {
  constructor(
    private readonly usersRepository: UserRepository,
  ) {}
}
The full implementation can be found here.
MongoDB Schema
Schema was built with best practices for MongoDB for best performance and scalability. Schema design for NoSQL databases is not the same as for relational databases. One of the differences is that in relational, we have the option to reduce your schema to normal forms to avoid duplicates, etc. While for NoSQL, we can duplicate data to avoid "joins," due to which the best performance indicator will be achieved during data sampling. Let's take a look at the boilerplate as an example to see what the difference is. The database schema for PostgreSQL looks something like this:
An example of a data table:

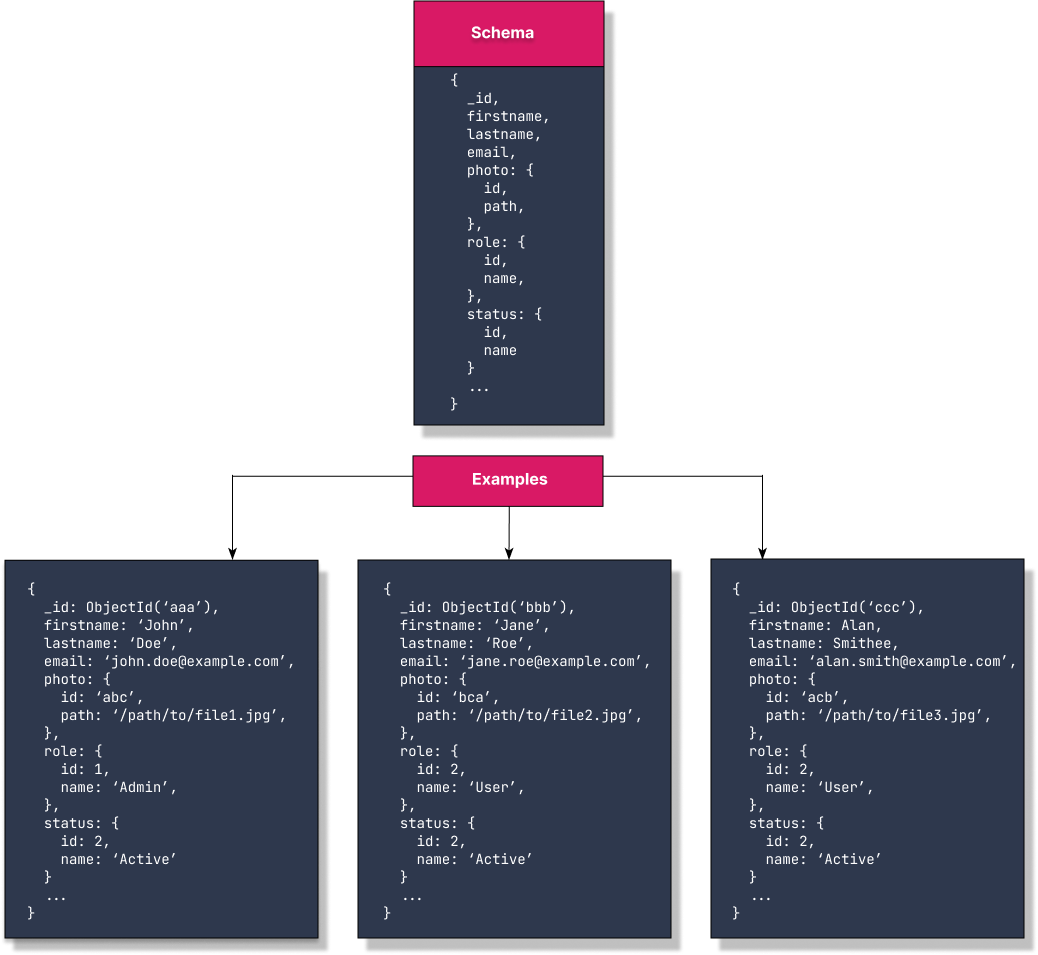
Talking about MongoDB, then we can NOT transfer the design experience from PostgreSQL here, that is, create four collections users, files (for photos), roles, and statuses, and store in the user collection links to other collections and during data sampling using aggregation ($lookup) append additional data, as this will affect performance (read more about joins comparison in this article, though 2020 sounds long ago, it is still relevant). What should the scheme look like? Everything is very simple: all data must be stored in one collection:

Now, when we fetch users, we will not need to make additional requests to obtain data about the user's photo, role, and status because all the data is already stored in the user's collection; in fact, productivity will increase.
How To Use NestJS Boilerplate With Mongoose
For comfortable development (MongoDB + Mongoose) you have to clone the repository, go to folder my-app/ and copy env-example-document as .env.
cd my-app/cp env-example-document .env
Change DATABASE_URL=mongodb://mongo:27017 to DATABASE_URL=mongodb://localhost:27017
Run additional container:docker compose -f docker-compose.document.yaml up -d mongo mongo-express maildev
Install dependency:npm install
Run migrations:npm run migration:run
Run seeds:npm run seed:run:document
Run app in dev mode:npm run start:dev
That's it.
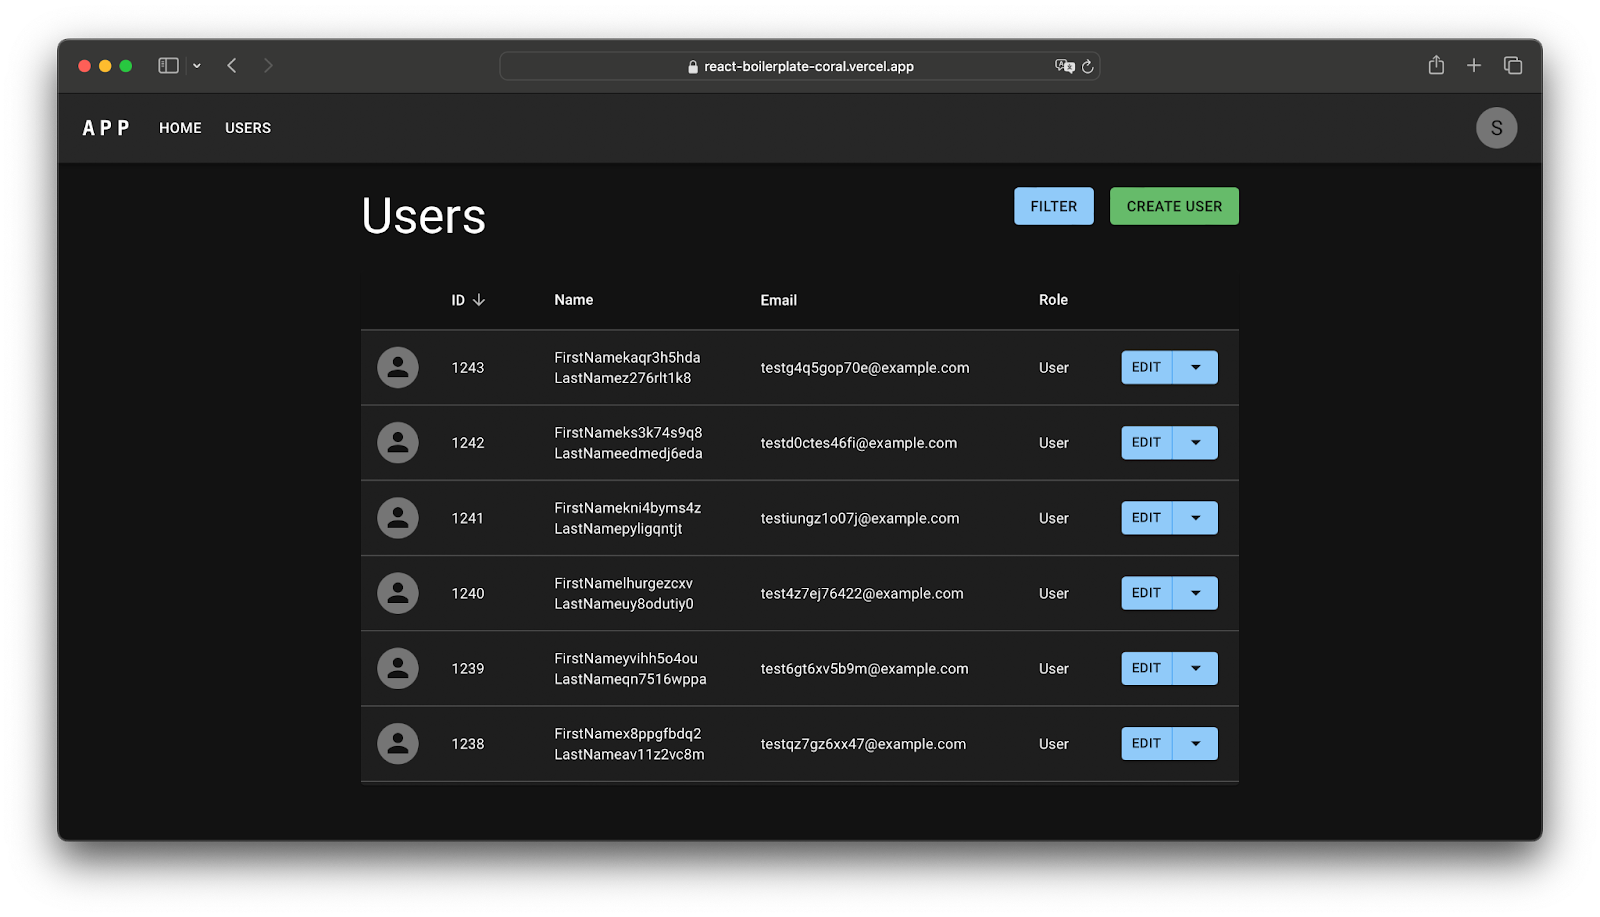
If we talk about the impact of the selected database on the frontend application, in particular the Extensive React boilerplate, which we also maintain up-to-date, it plays well with the currently discussed NestJS boilerplate, so that it won't have an effect on their interaction.

Whatever database you choose to use — PostgreSQL or MongoDB (they are both great), the choice should depend on the whole project, and in our boilerplate you have that choice) So, you are welcome to try it if you find it useful, check out our bc boilerplate ecosystem, and don't forget to click the star at the library.
Full credits for this article to Vlad Shchepotin and Elena Vlasenko.
Published at DZone with permission of Rodion Salnik. See the original article here.
Opinions expressed by DZone contributors are their own.


Comments