How to Use Minimal Hybrid to Quickly Migrate Exchange Mailboxes to Office 365
If you need to migrate Exchange 2010, 2013, 2016, or 2019 mailboxes to Office 365, Hybrid Migration is one of the smartest approaches.
Join the DZone community and get the full member experience.
Join For FreeWith the increasing popularity of cloud-based services, more and more organizations and businesses are shifting their on-premises Exchange to Office 365 or Microsoft 365. If you are planning to migrate your Exchange on-premises Server to Microsoft 365 or Office 365, you have several options, such as
- Cutover Migration
- Staged Migration
- Hybrid Migration
- IMAP-Based
- Office 365 Import Service
- Third-Party Software
You can choose the Office 365 migration option based on the on-premises Exchange Server version your organization is running on.
However, if you need to migrate Exchange 2010, 2013, 2016, or 2019 to Office 365, Hybrid Migration is one of the most straightforward and seamless approaches as it provides the best end-user experience.
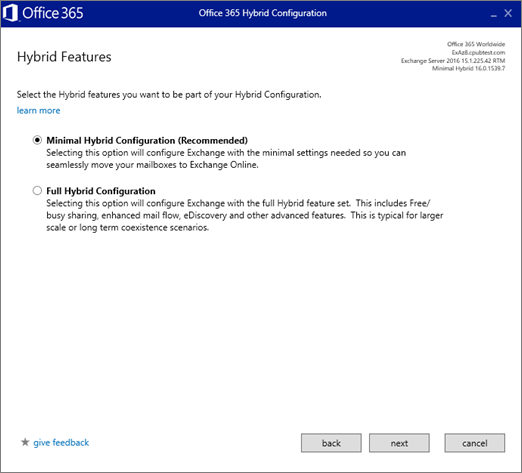
Although Hybrid Migration has a reputation of being hard to implement, Office 365 Hybrid Configuration wizard now provides a Minimal Hybrid Configuration option along with a Full Hybrid Configuration option that has simplified the mailbox migration from on-premises Exchange to Office 365.
You can use the Full Hybrid option for long-term co-existence and Minimal Hybrid (also known as Express Migration) for quick mailbox migration from on-premise Exchange to Office 365.
In this article, we have discussed steps to migrate mailboxes from an on-premises Exchange Server to Office 365 using the Minimal Hybrid approach.
Steps to Use Minimal Hybrid to Migrate Exchange Mailboxes To Office 365
Assuming you have already created and set up an Office 365 tenant, follow these steps to migrate Exchange mailboxes from On-Premises to Office 365 or Microsoft 365,
Step 1: Verify Connectivity
- On your Exchange Server, download the HybridManagement.psm1 PowerShell script and then open PowerShell window.
- Run the following command in PowerShell to verify all required endpoints for Hybrid installation and setup.
Import-Module .\HybridManagement.psm1

Test-HybridConnectivity -TestO365Endpoints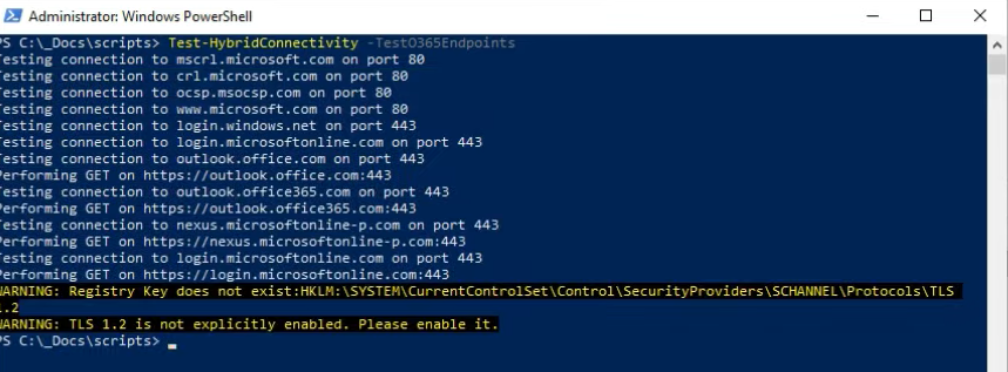
Step 2: Install And Configure Hybrid Configuration Wizard
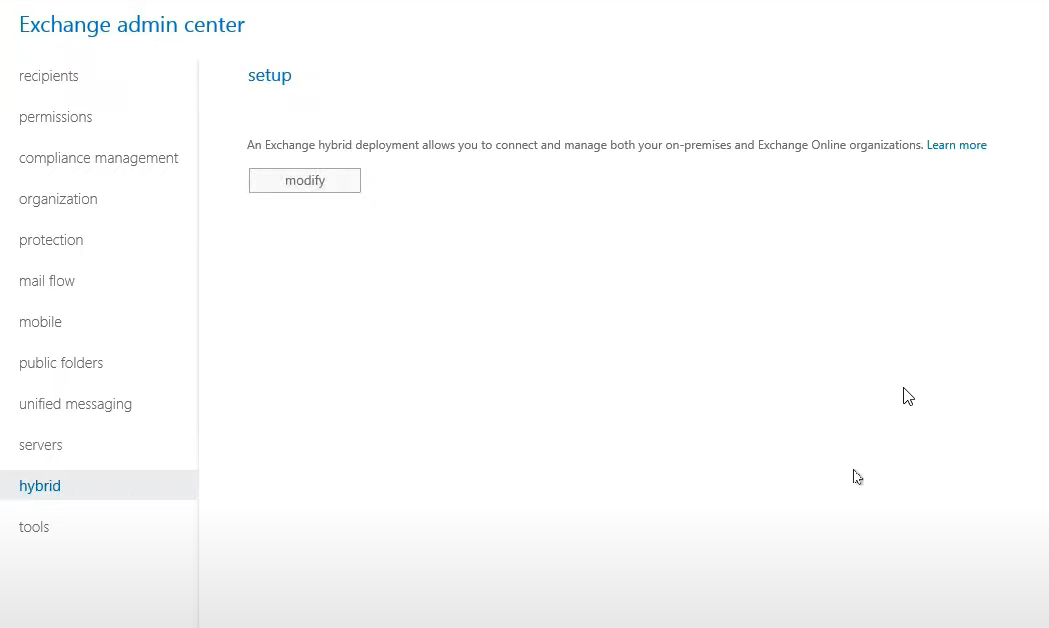
Sign in to Exchange Admin Center and click Hybrid. Click ‘Modify’ and then sign in using your Office 365 credentials
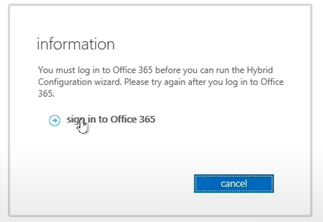
After signing in, click ‘Configure’ and then click ‘Install’ to download and install Office 365 Hybrid Configuration wizard.
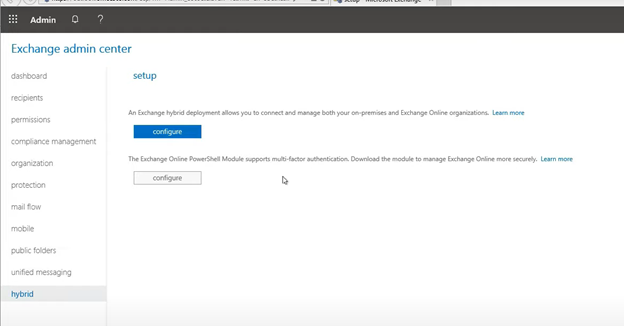
Click "Run" to launch the wizard and click "Next."
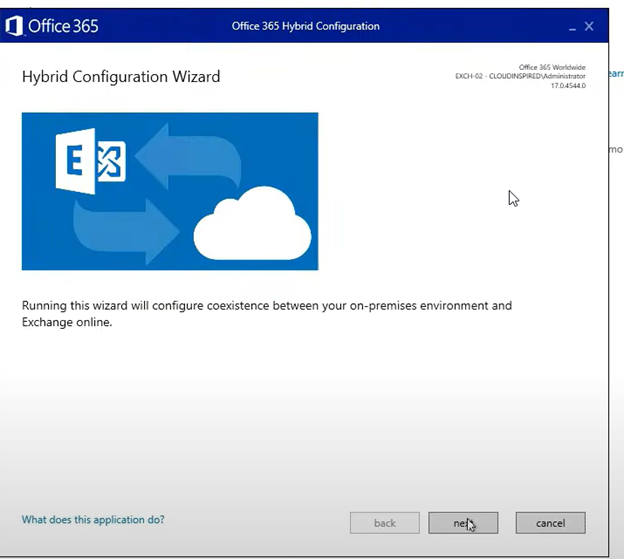
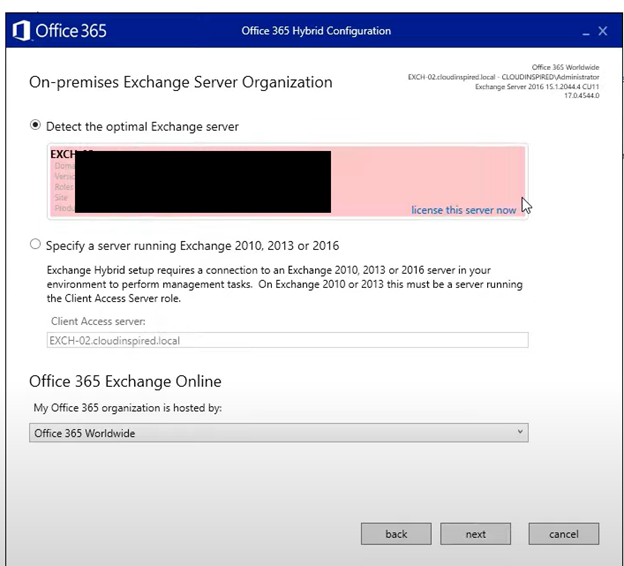
The wizard will auto-detect the Exchange Server. Then, click "Next."
Click "Sign In" to sign in as Office 365 global administrator and click "Next."
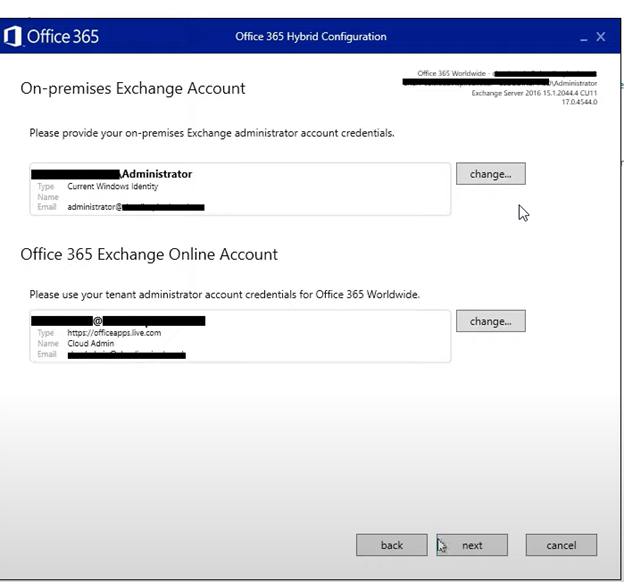
Click "Next."
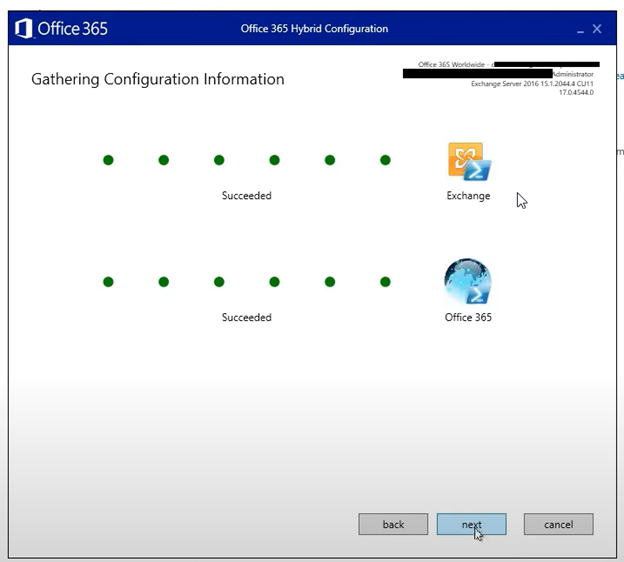
Choose the "Minimal Hybrid Configuration (Recommended)" option and click "Next."
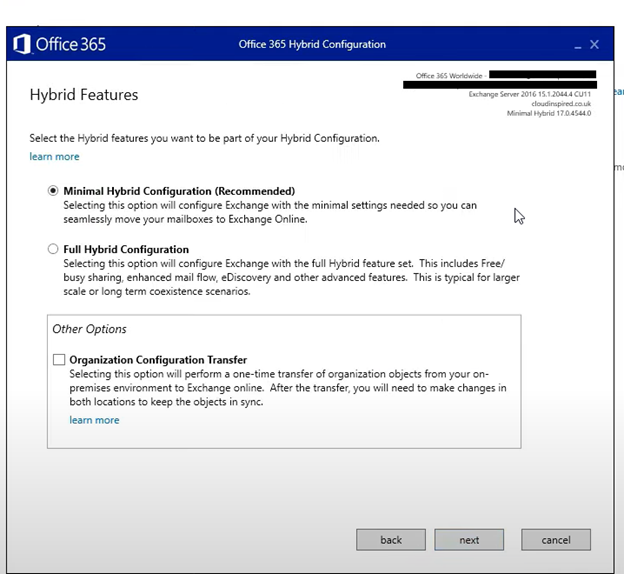
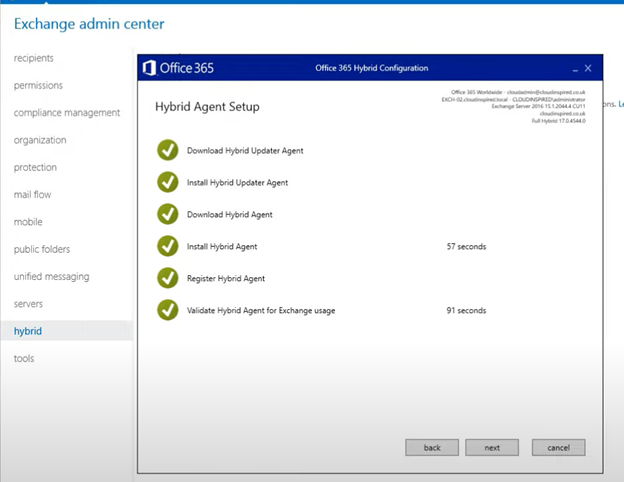
Choose the "Use Exchange Modern Hybrid Topology" option and click "Next." Then, accept the EULA terms. This will install and set up the Hybrid Agent on your on-premises Exchange Server. Click ‘next.’
If prompted, click the "Update" button to prepare an on-premises Exchange Server for mailbox migration. After the update, select the "Synchronize my users and passwords one time (Recommended)" option. Click "Next."
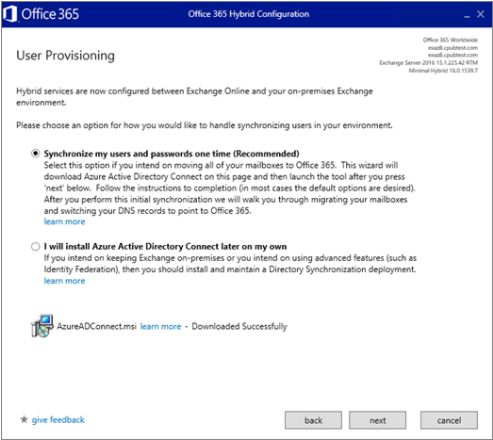
This will download Azure AD Connect Wizard on your server. Use Express Settings in Azure AD Connect wizard to synchronize users and their information, including passwords, from on-premises Exchange Server to Office 365.
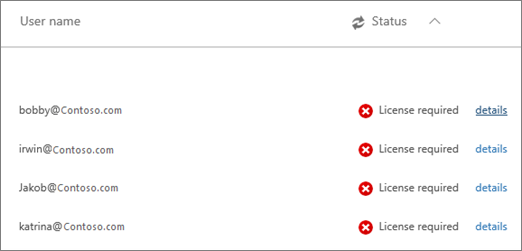
Once Azure AD Connect finishes synchronizing users from your On-Premises to Office 365, assign the licenses to the users. This will assign a mailbox to the user where you can migrate the mailbox data from on-premises mailboxes.
Step 3: Migrate Mailboxes From On-Premises Exchange To Office 365
To move mailboxes from On-Premises Exchange Server to Office 365, you need to export the mailboxes to PST using EAC or PowerShell cmdlets. Then use the Data Migration option in Office 365 to import the PSTs in Office 365.
You may also install an EDB Converter tool to extract the mailbox data from on-premises Exchange Server and export it to mailboxes on Office 365. The software auto-maps the source and destination mailbox and provides an option to edit the mailbox mapping. This allows you to quickly export the mailboxes data to correct mailboxes on the server effortlessly. It’s also faster and can export up to 4 mailboxes simultaneously from any on-premises Exchange server version to office 365.
However, if you still want to use the traditional manual approach, you may use the Cutover Migration to move your mailboxes from Exchange 2003 or later to Office 365.
You may also follow the network upload method where you need to export mailboxes from the Exchange database to PSTs using the New-MailboxExportRequest cmdlet and then upload those PSTs to Azure Storage using the using Azure AzCopy tool via SAS URL available in your Office 365 Data Migration section.
- From here, you can download and install Azure AzCopy on your server.
- Then launch AzCopy and then use the following commands to upload the PSTs from your local drive to Azure Storage on Microsoft Office 365 cloud.
AzCopy copy "/path/to/pstfiles/" “sas url=""” --recursive=true
The –recursive switch ensures all PSTs from folder and subfolders are uploaded to Azure Storage.
CAUTION: Do not upload large mailbox PSTs and ensure a high-speed internet connection to avoid issues.
TIP: Upload a few mailbox PSTs to Office 365 and import them to the user’s mailbox to check everything is working fine. Once verified, you can go ahead and upload all mailboxes.
You will also require the PST Import mapping file to map PSTs with user mailboxes on Office 365. You need to edit this CSV file. For more details, refer to this Microsoft guide.
- After mapping the user and mailboxes, save the file as CSV.
- Go back to Office 365, click ‘I’m done uploading my files,’ and ‘I have access to the mapping file’ options. Then click ‘Next.’
- Click ‘Select mapping file’ to upload the CSV file and click ‘Validate>Next.’
- Click ‘Submit>Done.’
- In Microsoft 365 or Office 365, click ‘Import to Office365.’
- You can filter the data using various parameters such as ‘To’, ‘From’ and ‘CC.’ Once done, click ‘Apply>Next> Submit.’
- Click ‘Done.’
- To check the import progress, click on the import job on Microsoft 365 Compliance page.
- After successful import, the status will change to ‘Completed.’
At this stage, you have successfully migrated Exchange mailboxes from on-premises to Office 365.
Conclusion
Minimal Hybrid is one of the fastest and reliable ways to migrate mailboxes from an on-premises Exchange Server to Office 365. You can use the Minimal Hybrid approach to migrate mailboxes from on-premises Exchange to Office 365 quickly. However, if you also want to transfer organization configurations, such as ActiveSync policies, route emails through the existing Exchange environment, configure advanced sharing between Exchange and Office 365, etc., use the Full Hybrid approach. You may also use a third-party tool, such as Stellar Converter for EDB to avoid complexities and automate mailbox data migration from on-premises Exchange to Office 365 with complete integrity.
If you have any questions or need more help migrating mailboxes from Exchange Server to Office 365, leave a comment below.
Opinions expressed by DZone contributors are their own.

Comments