Lifecycle of a Request-Response Process for a Spring REST API
The steps involved in the lifecycle of a request process and how the request is mapped to the appropriate controller method and then returned to the client.
Join the DZone community and get the full member experience.
Join For FreeDeveloping a REST API or microservice using the Spring Boot framework accelerates the development process, and allows API developers to only focus on writing the core business logic and not worry about all the underlying configurations and setup. This article describes the steps involved in the lifecycle of a request process and how the request is mapped to the appropriate controller method and how a response is returned to the client.
In order to create a REST API to serve a client with a list of users, the tasks involved are
- Create a class with the
@RestControllerannotation. Due to the annotation, this class will be auto-detected through classpath scanning and the methods annotated with@RequestMappingannotation will be exposed as HTTP endpoints. When an incoming request matches the requirements specified by the@RequestMappingannotation, the method will execute to serve the request.
For our example of a users API, the controller class will look like this:
@RestController

@RequestMapping("/users")
public class UserController {

                @Autowired
                UserService userService

                @RequestMapping(method = RequestMethod.GET)
                public List<UserDTO> findAllUsers() {

                                return userService.findAllUsers();

                }

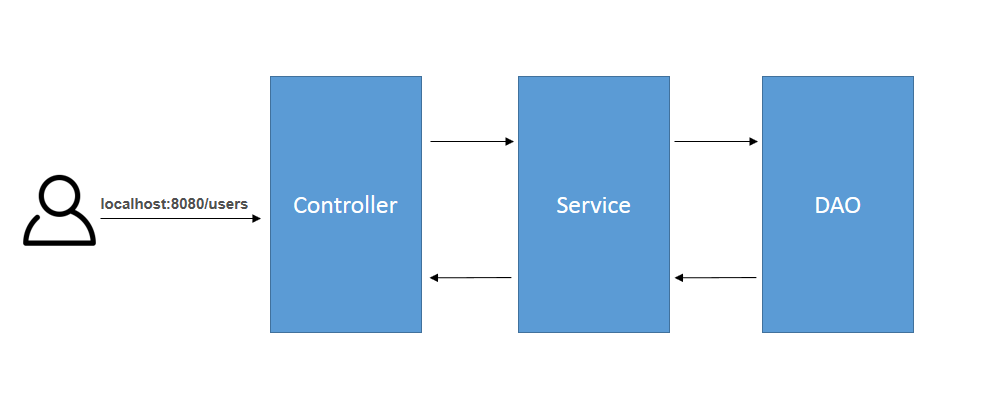
}From a developer’s perspective, the flow to fetch the list of users from the database can be viewed as below:

However, with Spring doing a lot of work for us behind the scenes, the lifecycle of the entire process for making an HTTP request to a resource to serving the response back to the client in either XML/JSON format involves many more steps.
This article describes the entire request to response lifecycle with steps which are managed by Spring.
When a user makes a request for a resource, for example:
Request: http://localhost:8080/users
Accept: application/json
This incoming request is handled by the DispatcherServlet, which is auto-configured by Spring Boot. While creating a project through the Spring Boot framework, and when we mention the Spring Boot Starter Web as a dependency in pom.xml, Spring Boot’s auto-configuration feature configures dispatcherServlet, a default error page, and other dependent jar files.
When a Spring boot application is run, the log will have a message like this:
[ost-startStop-1] o.s.b.w.servlet.ServletRegistrationBean : Mapping servlet: 'dispatcherServlet' to [/]
DispatcherServlet is the front controller and all incoming request goes through this single servlet.
The process from a request to response is shown in the below flow chart:

The blocks in the green are the ones which are implemented by developers.
In our request for /users resources, the activities below are performed in each step:
In Step 1, the dispatcher servlet will intercept the request for the resource
/users.In Step 2, the servlet determines the handler for the request (a good link on this topic).
In Step 3, Spring checks which controller method matches the incoming lookup path of the “/users” request. Spring maintains a list of all mapping registries fetched from the
@RequestMappingof the controller class and iterates the list to look for the matching method in the controller class implemented by the developer.In Step 4, after determining the right method it executes the controller method.
Step 5 returns an ArrayList of users.
The response type accepted by the client can be either JSON or XML. Therefore, Step 6 does the job of marshaling the Java object to the response type requested by the client. Spring takes the ArrayList of users and uses the message converter method to marshal it to the type requested by the client. If the converted message is not available, then the client will get a 406 error. In the case of users, as the requested type is JSON, thus a JSON object for users is returned as a response.
Conclusion
Understanding the lifecycle of the request and response process and other classes involved helps one to understand the issues better and troubleshoot it more easily. To check the process lifecycle, open the Eclipse Open Type DispatcherServlet class and add a breakpoint at the doDispatch method.
Thanks a lot for reading this article! If you have any questions or suggestions, then please drop a note and I'll try to answer your question.
Opinions expressed by DZone contributors are their own.

Comments