iOS Swift UICollectionView with Horizontal Pagination
Tutorial on setting up iOS swift UICollectionView with horizontal pagination.
Join the DZone community and get the full member experience.
Join For FreeHey, today I'm presenting you horizontal pagination in swift 5. The reference I have taken from one of my organization's library.
If you are new bee then please refer to following links first:
- https://developer.apple.com/documentation/uikit/uicollectionview
- https://www.raywenderlich.com/9334-uicollectionview-tutorial-getting-started
Horizontal Pagination
Basic pagination works as you pulled to a threshold value. Beyond that, it will hit API and gives some array items back, that you will append to the main array. Pagination consist of 2 things refresh all and load more. Refresh all works when you need fresh content from the beginning and load more works when you need more data at the end. In context with horizontal pagination you will drag collection towards the right to refresh all and in case of load more, you will scroll to last content and drag towards left.
So moving ahead and let's create a new project name HorizontalPaginationDemo.
Project Setup
- Open default Main.Storyboard, there is default view controller in Interface Builder (IB), add UICollectionView with top, left, right and height to 0,0,0 and 200 respectively.
- There is a default UICollectionViewCell present in the collection view. Extend it and add UILabel in the centre.
- Create an IBOutlet of collection view in default ViewController Class and delegates methods for no. of rows and cell for row.
func setupCollectionView() {
 self.collectionView.delegate = self
 self.collectionView.dataSource = self
}
- For horizontal or vertical pagination we need to specify in which direction collection view will scroll strictly. So for that set collection view property alwaysBounceHorizontal to true.
self.collectionView.alwaysBounceHorizontal = true
5. Add a subclass of UICollectionViewCell name HorizontalCollectionCell and set this as a subclass for the same in IB.
6. Add IBOutlet of the label in above collection cell's subclass. Add below method. Updating the background colour will differentiate cells.
func update(index: Int) {
 self.titleLabel.text = "\(index) Value"
 self.backgroundColor = index % 2 == 0 ? .lightGray : .lightText
}
7. Coming back to view controller class, add an array variable with an integer type. Initialize the array with some dummy data. Update collections delegate methods as shown below.
extension ViewController: UICollectionViewDelegate,func collectionView(_ collectionView: UICollectionView, numberOfItemsInSection section: Int) -> Int {   let cell = collectionView.dequeueReusableCell(   cell.update(index: indexPath.row)
 UICollectionViewDataSource {
 return self.items.count
} func collectionView(_ collectionView: UICollectionView, cellForItemAt indexPath: IndexPath) -> UICollectionViewCell {
 withReuseIdentifier: "HorizontalCollectionCell",
 return cell
}
 for: indexPath
 ) as! HorizontalCollectionCell
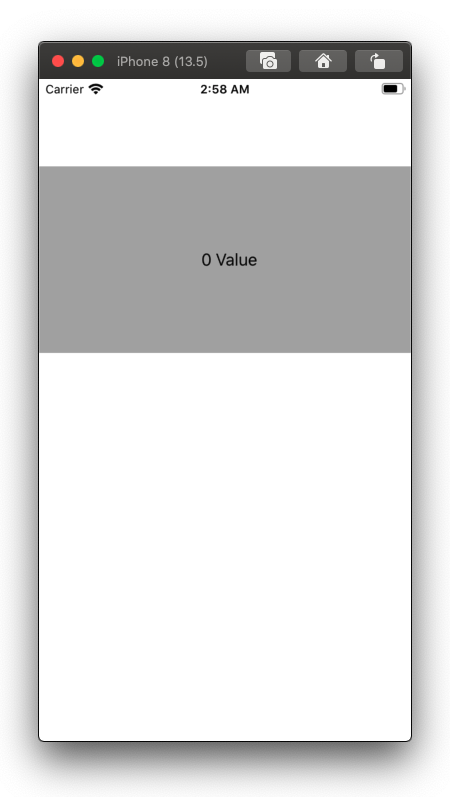
It should look like this on running the project.

Concept
Assuming that reader knows about contentOffset and contentInset.
But actually contentOffset is a CGPoint aka a pointer which tells the content position in frame from X and Y direction and contentInset is Space/Padding you can give either on top and bottom in vertical flow layout else left or right in horizontal flow layout in the collection view.
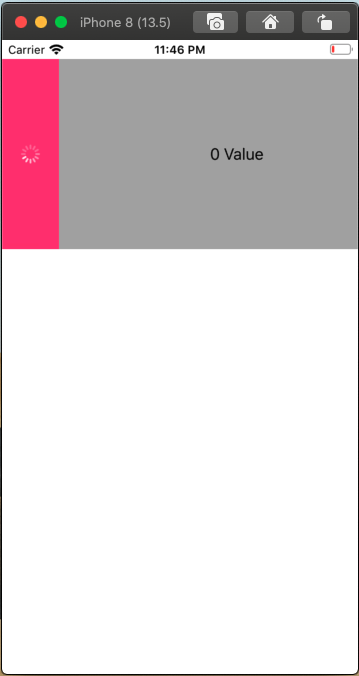
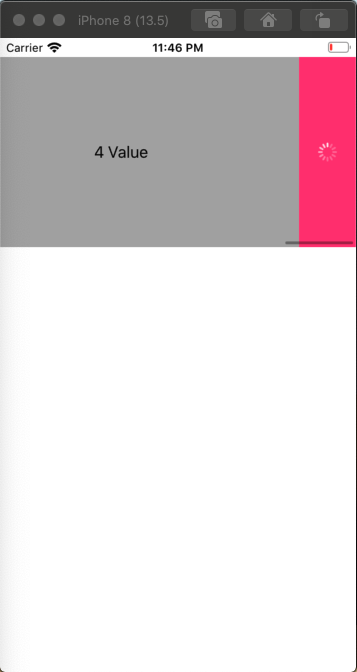
So depending upon pagination case we will add subview. In that subview there is UIActivityIndicatorView or we can say loader, which will rotate when the view will be visible. As shown below the visuals of refresh all and load more.


Let's began with creating manager class name HorizontalPaginationManager. This class will handle pagination actions. It would be good practice to add managers to handle some usual actions. It makes code reusable.
Code Initiation
So I'll explain the step by step
- Add above mention variables in your manager class from Line no.19-27.
- isLoading tells whether loading is going or not. It helps to avoid duplicate requests.
- isObservingKeyPath helps in observing the change in content offset. It helps to check threshold distance from where we call refresh all or load more. In de-initialiser, the observer is removed.
- scrollView is taken as a superclass variable Though it is not required. We will add above-mentioned observer on this variable.
- leftmost/rightmost views are the views we will add on the basis of action i.e. left one for refresh all and the right one for load more. This view visibility denotes that action is processing.
- Rest are colours used as per requirement for customisation.
- Add a delegate of type HorizontalPaginationManagerDelegate. This need to get te actions which needed to perform while pagination. This protocol consists of two methods as per the actions required. trailing closures are required in order to remove loader views and reset the pagination actions in order to use it again.
- init() aka initialiser required scrollView majorly your collection view.
Now you have to setup leftmost/ rightmost views as above mentioned, In both the case I have added activity indicator. Set scrollView inset left/right respectively on the basis of view width. Also when the action is performed completely, we have to assign nil and remove from scrollView so that we don't get duplicates.
Observing Offset
Now you have to override observeValue for keyPath method like above. Mention key contentOffset and set condition for .new value so that we will get lastest changed value. On observing we'll call setContentOffSet as mentioned in above. So in that, there will be 2 conditions.
- if offsetX < -100 && !self.isLoading: which means if you dragged beyond -100 the threshold value && it is not loading then you will perform the action for refresh all and you have to set self.isLoading to true so it will be called once. Followed by you will call refresh all delegate method in which it's callback will reset value for loading. It will remove left most view and self.isLoading to false.
- if contentWidth > frameWidth, offsetX > (diffX + 130) && !self.isLoading: which means if you have your content size is greater than you scrollView frame size && dragged beyond 130 the threshold value && it is not loading then you will perform the action for load more and you have to set self.isLoading to true so it will be called once. Followed by you will call load more delegate method in which it's callback will reset value for loading. It will remove left most view and self.isLoading to false.
- The final part is set up pagination in your ViewController class.
Here I called fetchItems method in viewDidLoad as initially, we want to load items initially without pagination actions. Added delay in order to feel like API calls. Like I said earlier refresh all will reset data i.e. sets fresh data and load more append data in the same content.
I hope you like this tutorial. Feel free to reach out! Nickelfox
GitHub: https://github.com/Abhishek9634/HorizontalPaginationDemo
Happy Coding!
Published at DZone with permission of Abhishek Thapliyal. See the original article here.
Opinions expressed by DZone contributors are their own.

Comments