Introduction to ESP32 for Beginners Using the Xedge32 Lua IDE
Unlock the power of the ESP32 microcontroller and discover the joys of coding with Lua, one of the most intuitive and user-friendly programming languages out there.
Join the DZone community and get the full member experience.
Join For FreeWhat Is the ESP32?
The ESP32 is an incredible microcontroller developed by Espressif Systems. Based on its predecessor's legacy, the ESP8266, the ESP32 boasts dual-core processing capabilities, integrated Wi-Fi, and Bluetooth functionalities. Its rich features and cost-effectiveness make it a go-to choice for creating Internet of Things (IoT) projects, home automation devices, wearables, and more.
What Is Xedge32?
Xedge32, built upon the Barracuda App Server C Code Library, offers a comprehensive range of IoT protocols known as the "north bridge." Xedge32 extends the Barracuda App Server's Lua APIs and interfaces seamlessly with the ESP32's GPIOs, termed the "south bridge."
While not everyone is an embedded C or C++ expert, with Xedge32, programming embedded systems becomes accessible to all.
The beauty of Xedge32 lies in its simplicity: you don't need any C code experience. All you need is Lua, which is refreshingly straightforward to pick up. It's a friendly environment that invites everyone, whether you're a seasoned developer or just someone curious about microcontroller-based IoT projects. With Lua's friendly nature, diving into microcontroller programming becomes super easy.

The Xedge IDE is built on the foundation of the Visual Studio Code editor.
Installing the Xedge32 Lua IDE
To get started with Xedge32, an ESP32 development board is your starting point. However, Xedge32 has specific requirements regarding the type of ESP32 you can employ. If you're new to the world of ESP32, it's recommended to opt for the newer ESP32-S3. Ensure it comes with 8MB RAM, although most ESP32-S3 models feature this. If your project scope involves camera integrations, consider the ESP32-S3 CAM board. The CAM board will allow you to explore exciting functionalities like streaming images to a browser via WebSockets or using the MQTT CAM example, which publishes images to an MQTT broker. While Amazon offers the ESP32-S3, marketplaces like AliExpress often present more budget-friendly options.
Once you have your ESP32, proceed to the Xedge32 installation page for step-by-step firmware installation instructions.
Shilles Coding Tutorials has a video demystifying Xedge32 IoT programming. Perfect for beginners, this guide walks you through the basics of installing Xedge32 and the Lua programming language, showing how simple it is to set up your IoT device and start scripting.
Your First Xedge32 Program: Blinking an LED
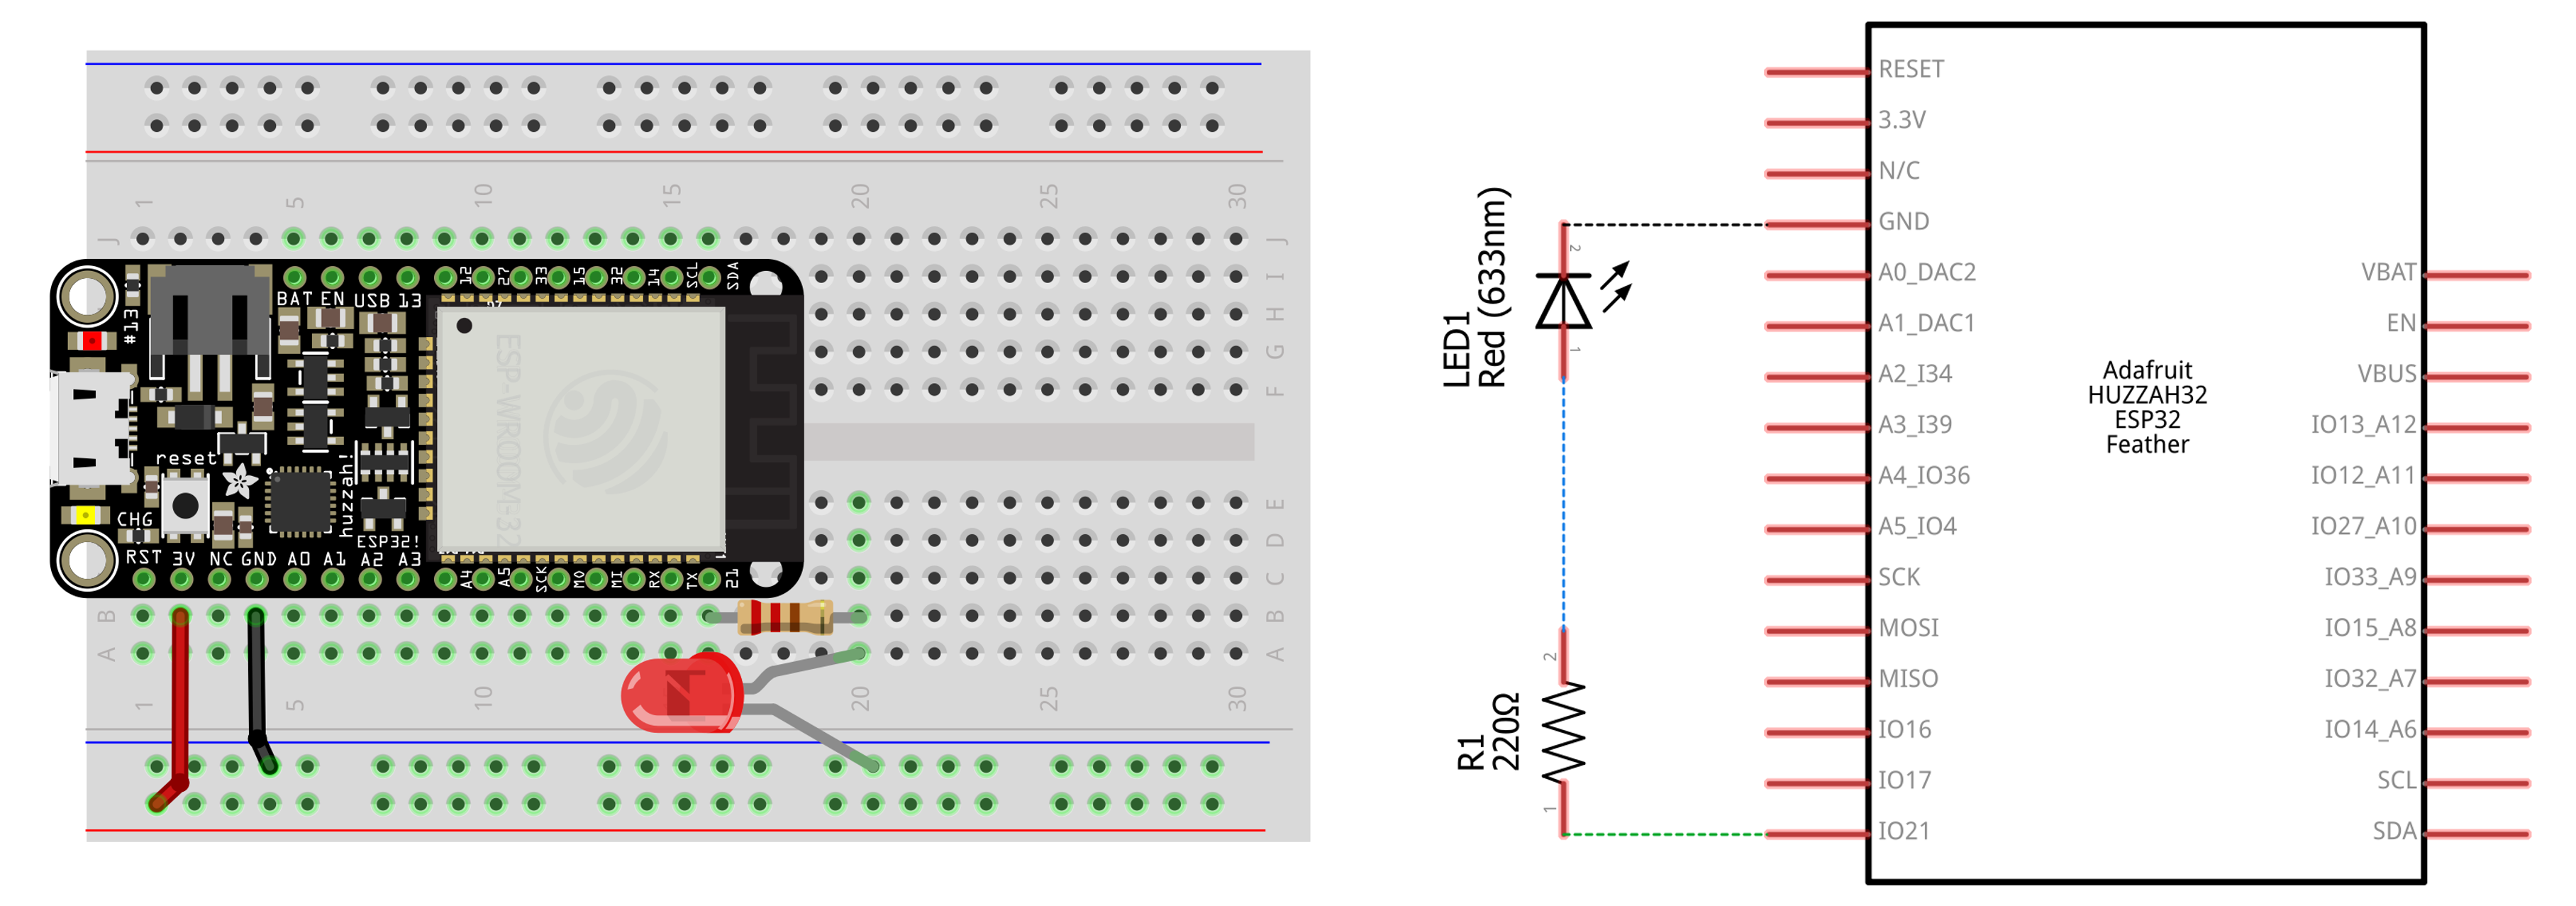
Many ESP32 development boards come equipped with a built-in LED. This LED can be great for simple tests, allowing you to verify if your code is running correctly quickly. However, if you wish to dive deeper into understanding the wiring and interfacing capabilities of the ESP32, we recommend getting your hands on a breadboard. The figure below provides a visual guide.

A breadboard is a handy tool for prototyping circuits without soldering, making it perfect for beginners and experiments. Using a breadboard, you can connect multiple components, test out different configurations, and quickly see the results of your efforts.
An external LED can be a great starting component for your initial projects. LEDs are simple to use, and they offer immediate visual feedback. While many DIY electronics kits come with an assortment of LEDs, you can also purchase them separately. Places like Amazon offer various LED packs suitable for breadboard projects.
Remember, when working with an LED, ensure you have the appropriate resistor to prevent too much current from flowing through the LED, which could damage it. As you become more comfortable with the ESP32 and the breadboard, you can expand your component collection and experiment with more complex circuits.
The Lua Blink LED Script
The following Lua script shows how to create a blinking LED pattern using Lua. Here's a step-by-step breakdown:
- Local
blinkfunction: The script defines a local function namedblink. This function is designated to handle the LED's blinking behavior. - Utilizing coroutines for timing: Within the
blinkfunction, an infinite loop (while true do) uses the Lua Coroutines concept for its timing mechanism. Specifically,coroutine.yield(true)is employed to make the function "sleep" for a specified duration. In this context, it pauses the loop between LED state changes for one second. - LED state control: The loop inside the
blinkfunction manages the LED's state. It first turns the LED on withpin:value(true), sleeps for a second, turns it off withpin:value(false), and then sleeps for another second. This on-off cycle continues indefinitely, creating the blink effect. - GPIO Port 21 initialization: Before the blinking starts, the GPIO port 21 is set up as an output using
esp32.gpio(21,"OUT")and is referenced by thepinvariable. If your LED is connected to a different GPIO port, you must modify this number. If you're unfamiliar with how GPIO works, check out the GPIO tutorial to better understand this concept.
Finally, the two last code lines outside the function initialize the blinking pattern, setting the timer to trigger the blink function every 1,000 milliseconds (every second).
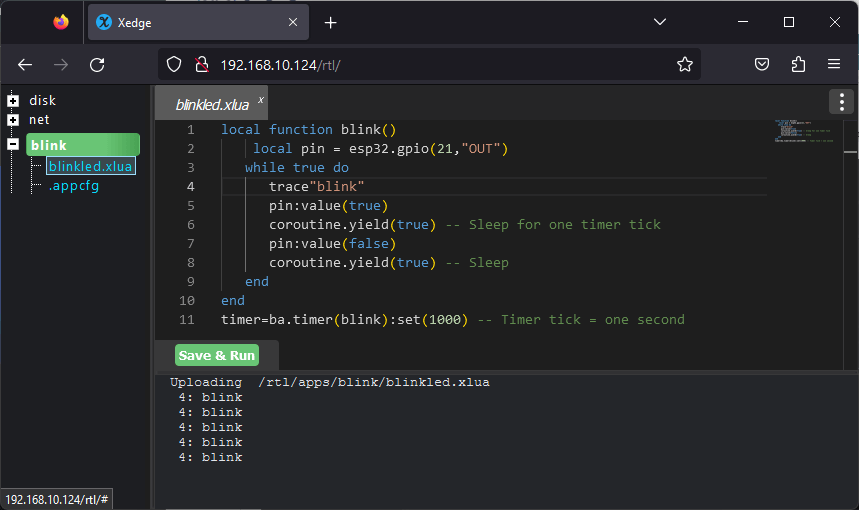
local function blink()
    local pin = esp32.gpio(21,"OUT")
   while true do
      trace"blink"
      pin:value(true)
      coroutine.yield(true) -- Sleep for one timer tick
      pin:value(false)
      coroutine.yield(true) -- Sleep
   end
end
timer=ba.timer(blink) -- Create timer
timer:set(1000) -- Timer tick = one second
How To Create an Xedge Blink LED App
- When the Xedge32-powered ESP is running, use a browser, navigate to the ESP32's IP address, and click the Xedge IDE link to start the Xedge IDE.
- Create a new Xedge app as follows:
- Right-click
Diskand clickNew Folderon the context menu. - Enter
blinkas the new folder name and click Enter. - Expand
Disk, right-click theblinkdirectory, and click New App in the context menu. - Click the
Runningbutton and click Save.
- Right-click
- Expand the
blinkapp now visible in the left pane tree view. Theblinkapp should be green, indicating the app is running. - Right-click the
blinkapp and clickNew Fileon the context menu. - Type
blinkled.xluaand click Enter. - Click the new
blinkled.xluafile to open the file In Xedge. - Select all and delete the template code.
- Copy the above blink LED Lua code and paste the content into the Xedge editor.
- Click the
Save & Runbutton to save and start the blink LED example.
References
Opinions expressed by DZone contributors are their own.

Comments