Introduction to Data Replication With MariaDB Using Docker Containers
Send in the clones: that’s what we do when we replicate databases. In this article, you’ll learn how to perform the most basic form of replication with MariaDB.
Join the DZone community and get the full member experience.
Join For FreeClones. Send in the clones. That’s what we do when we replicate databases. At least to some extent. In this article, you’ll learn how to perform the most basic form of replication with MariaDB.
You can adapt the instructions in this article to use virtual machines or bare metal, but Docker is probably one of the easiest ways to try out MariaDB replication without having to install a full operating system before getting to the meat of the matter. So, the only requirement here is to have Docker installed and running on your system (check with docker --version in a terminal).
Setting Up the Nodes
Let’s start by creating the machines. The nodes. The containers. It’s all the same for our purposes. We want two nodes with MariaDB installed. Although you can directly create a Docker container with MariaDB ready in it, let’s use a different approach and create a Linux box where we can manually install MariaDB. Don’t use this approach in real life! This is just for demo purposes and to ease the process. In real-life applications, use the official MariaDB Docker image, or even better, avoid all the hassle of dealing with configurations and go directly for a cloud solution like SkySQL where you can configure the number of nodes in a few clicks.
Anyway, for now, let’s create a Linux box with Docker. You’ll use the bitnami/minideb image which allows you to create small Debian-based Linux containers:
docker pull bitnami/minidebI recommend preparing two terminal windows or panes (one for each node) and not closing them for the duration of this exercise. On the first terminal, execute the following to create a new container:
docker run --detach --tty --name node01 bitnami/minidebOn the second terminal execute the following:
docker run --detach --tty --name node02 bitnami/minidebNow we have two Linux systems up and running (node01 and node02). If these were virtual or physical machines, you’d probably use SSH to connect to them, but since we are using Docker, we can simply start a new Bash shell on them to get to the command line of these Linux boxes. Run the following command on node01:
docker exec -it node01 bashAnd the following on node02:
docker exec -it node02 bash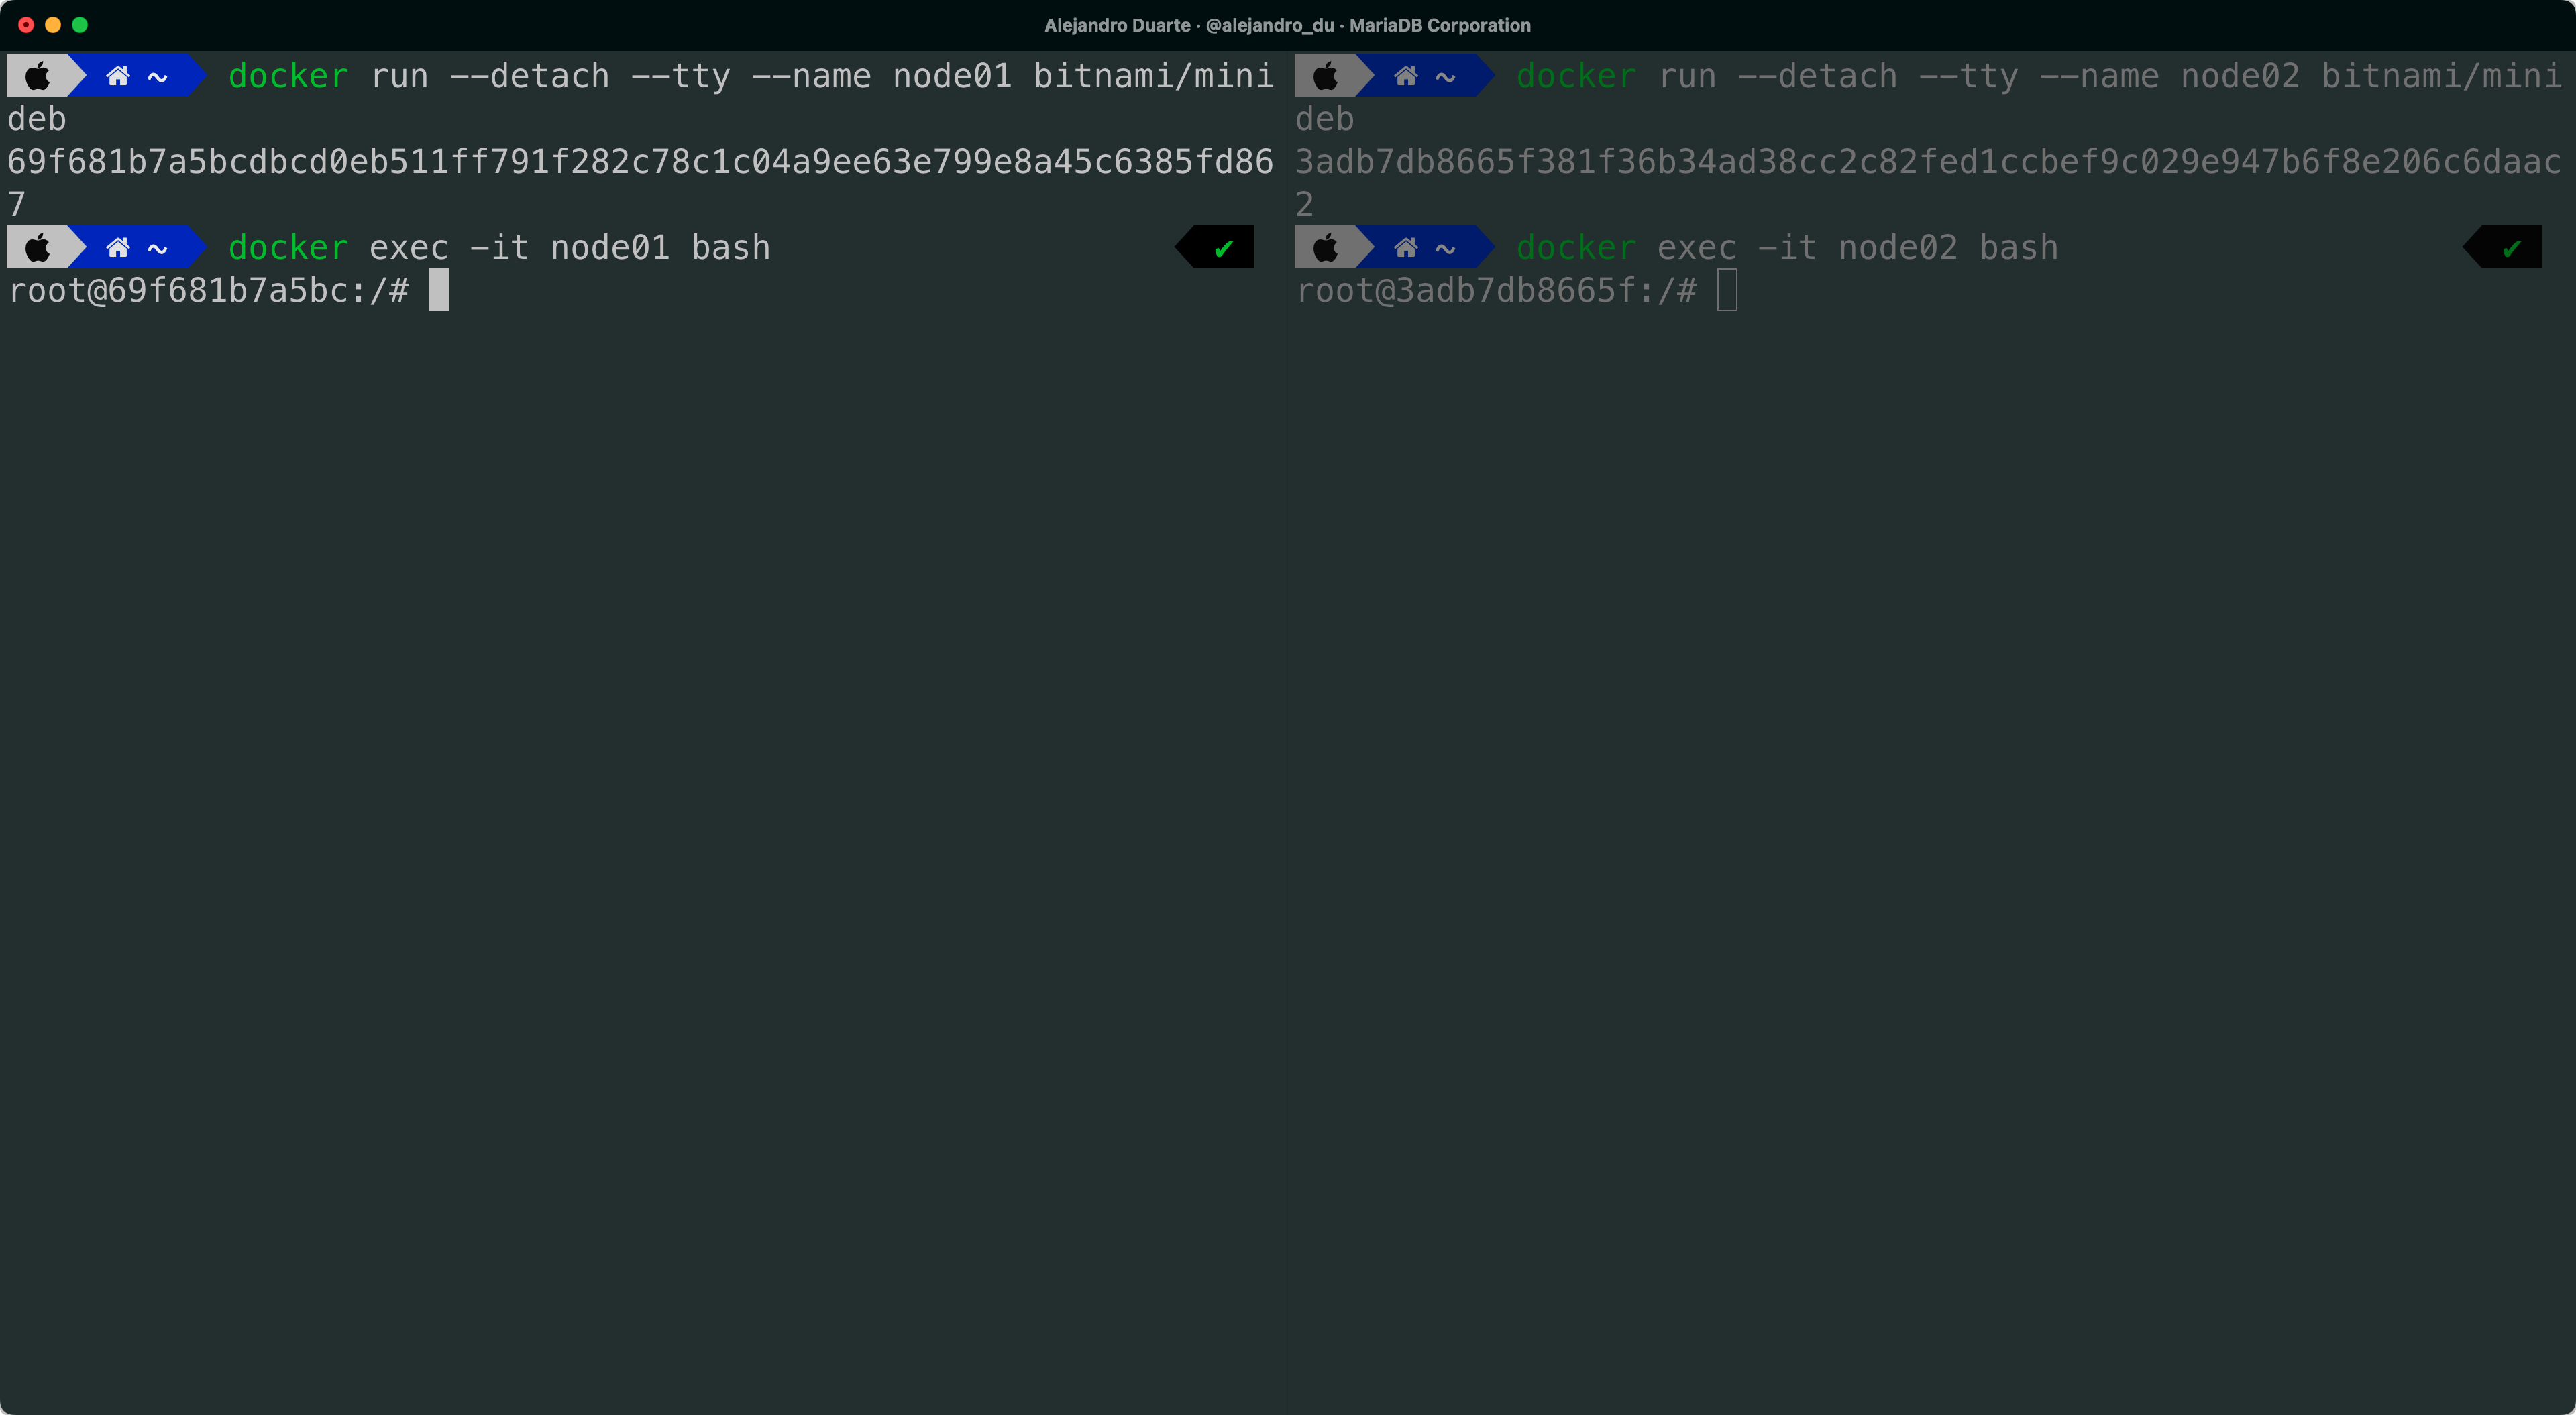
We need to install MariaDB on both nodes, so run the following commands on both, node01 and node02:
apt update
apt install mariadb-server mariadb-backup nano -y
service mariadb start
mariadb-secure-installation
Accept all the defaults (pressing Enter when asked for yes/no questions) and set a root password (the default is an empty password). I used password as the root password. Not the best idea in production environments, but okay for this laboratory environment.
Remember to run these commands in both nodes.
The Starting Point
Typically, you start with an application (let’s say a web application) that connects to a database instance, hopefully in a secure way! Both reads and writes are directed to this database.
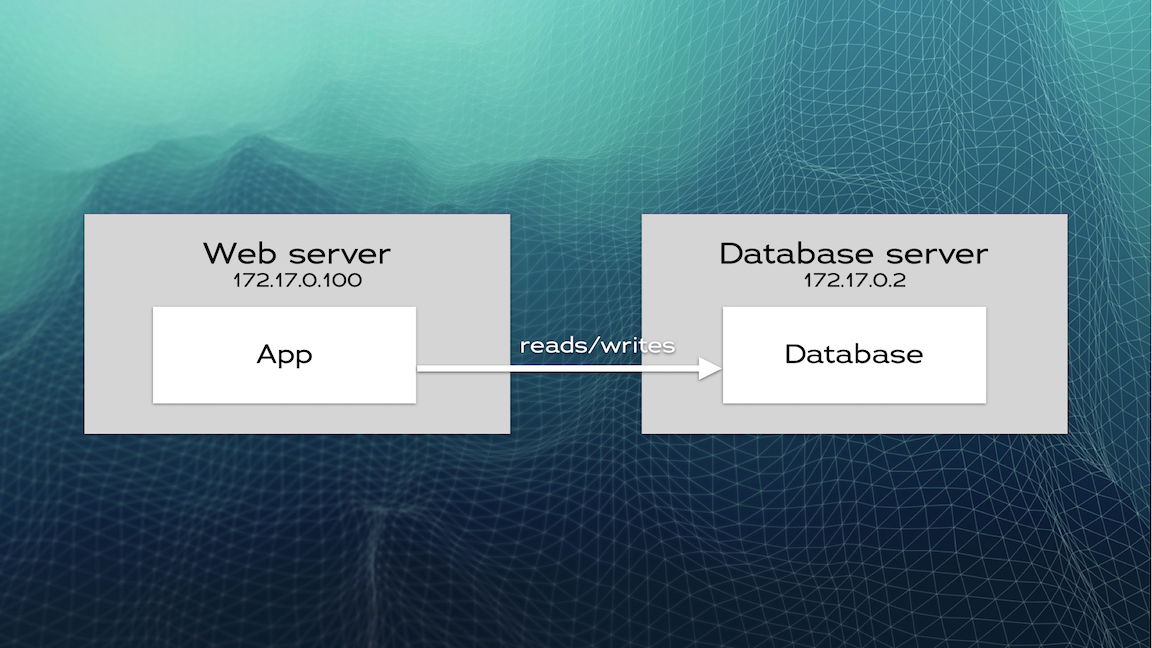
We won’t implement a web application in this example and instead will focus on the database nodes. So let’s prepare the database on node01.
On node01, connect to the database using the built-in SQL client:
mariadbCreate a demo database:
CREATE DATABASE demo;
USE demo;

CREATE TABLE person(
  id INT PRIMARY KEY AUTO_INCREMENT,
  name VARCHAR(200)
);
In a real-life scenario, the hypothetical web application would insert, delete, and update data in this database. For our purposes, let’s just manually insert a couple of rows:
INSERT INTO person(name) VALUES('John');
INSERT INTO person(name) VALUES('Jane');
Check that the data is there:
SELECT * FROM person;
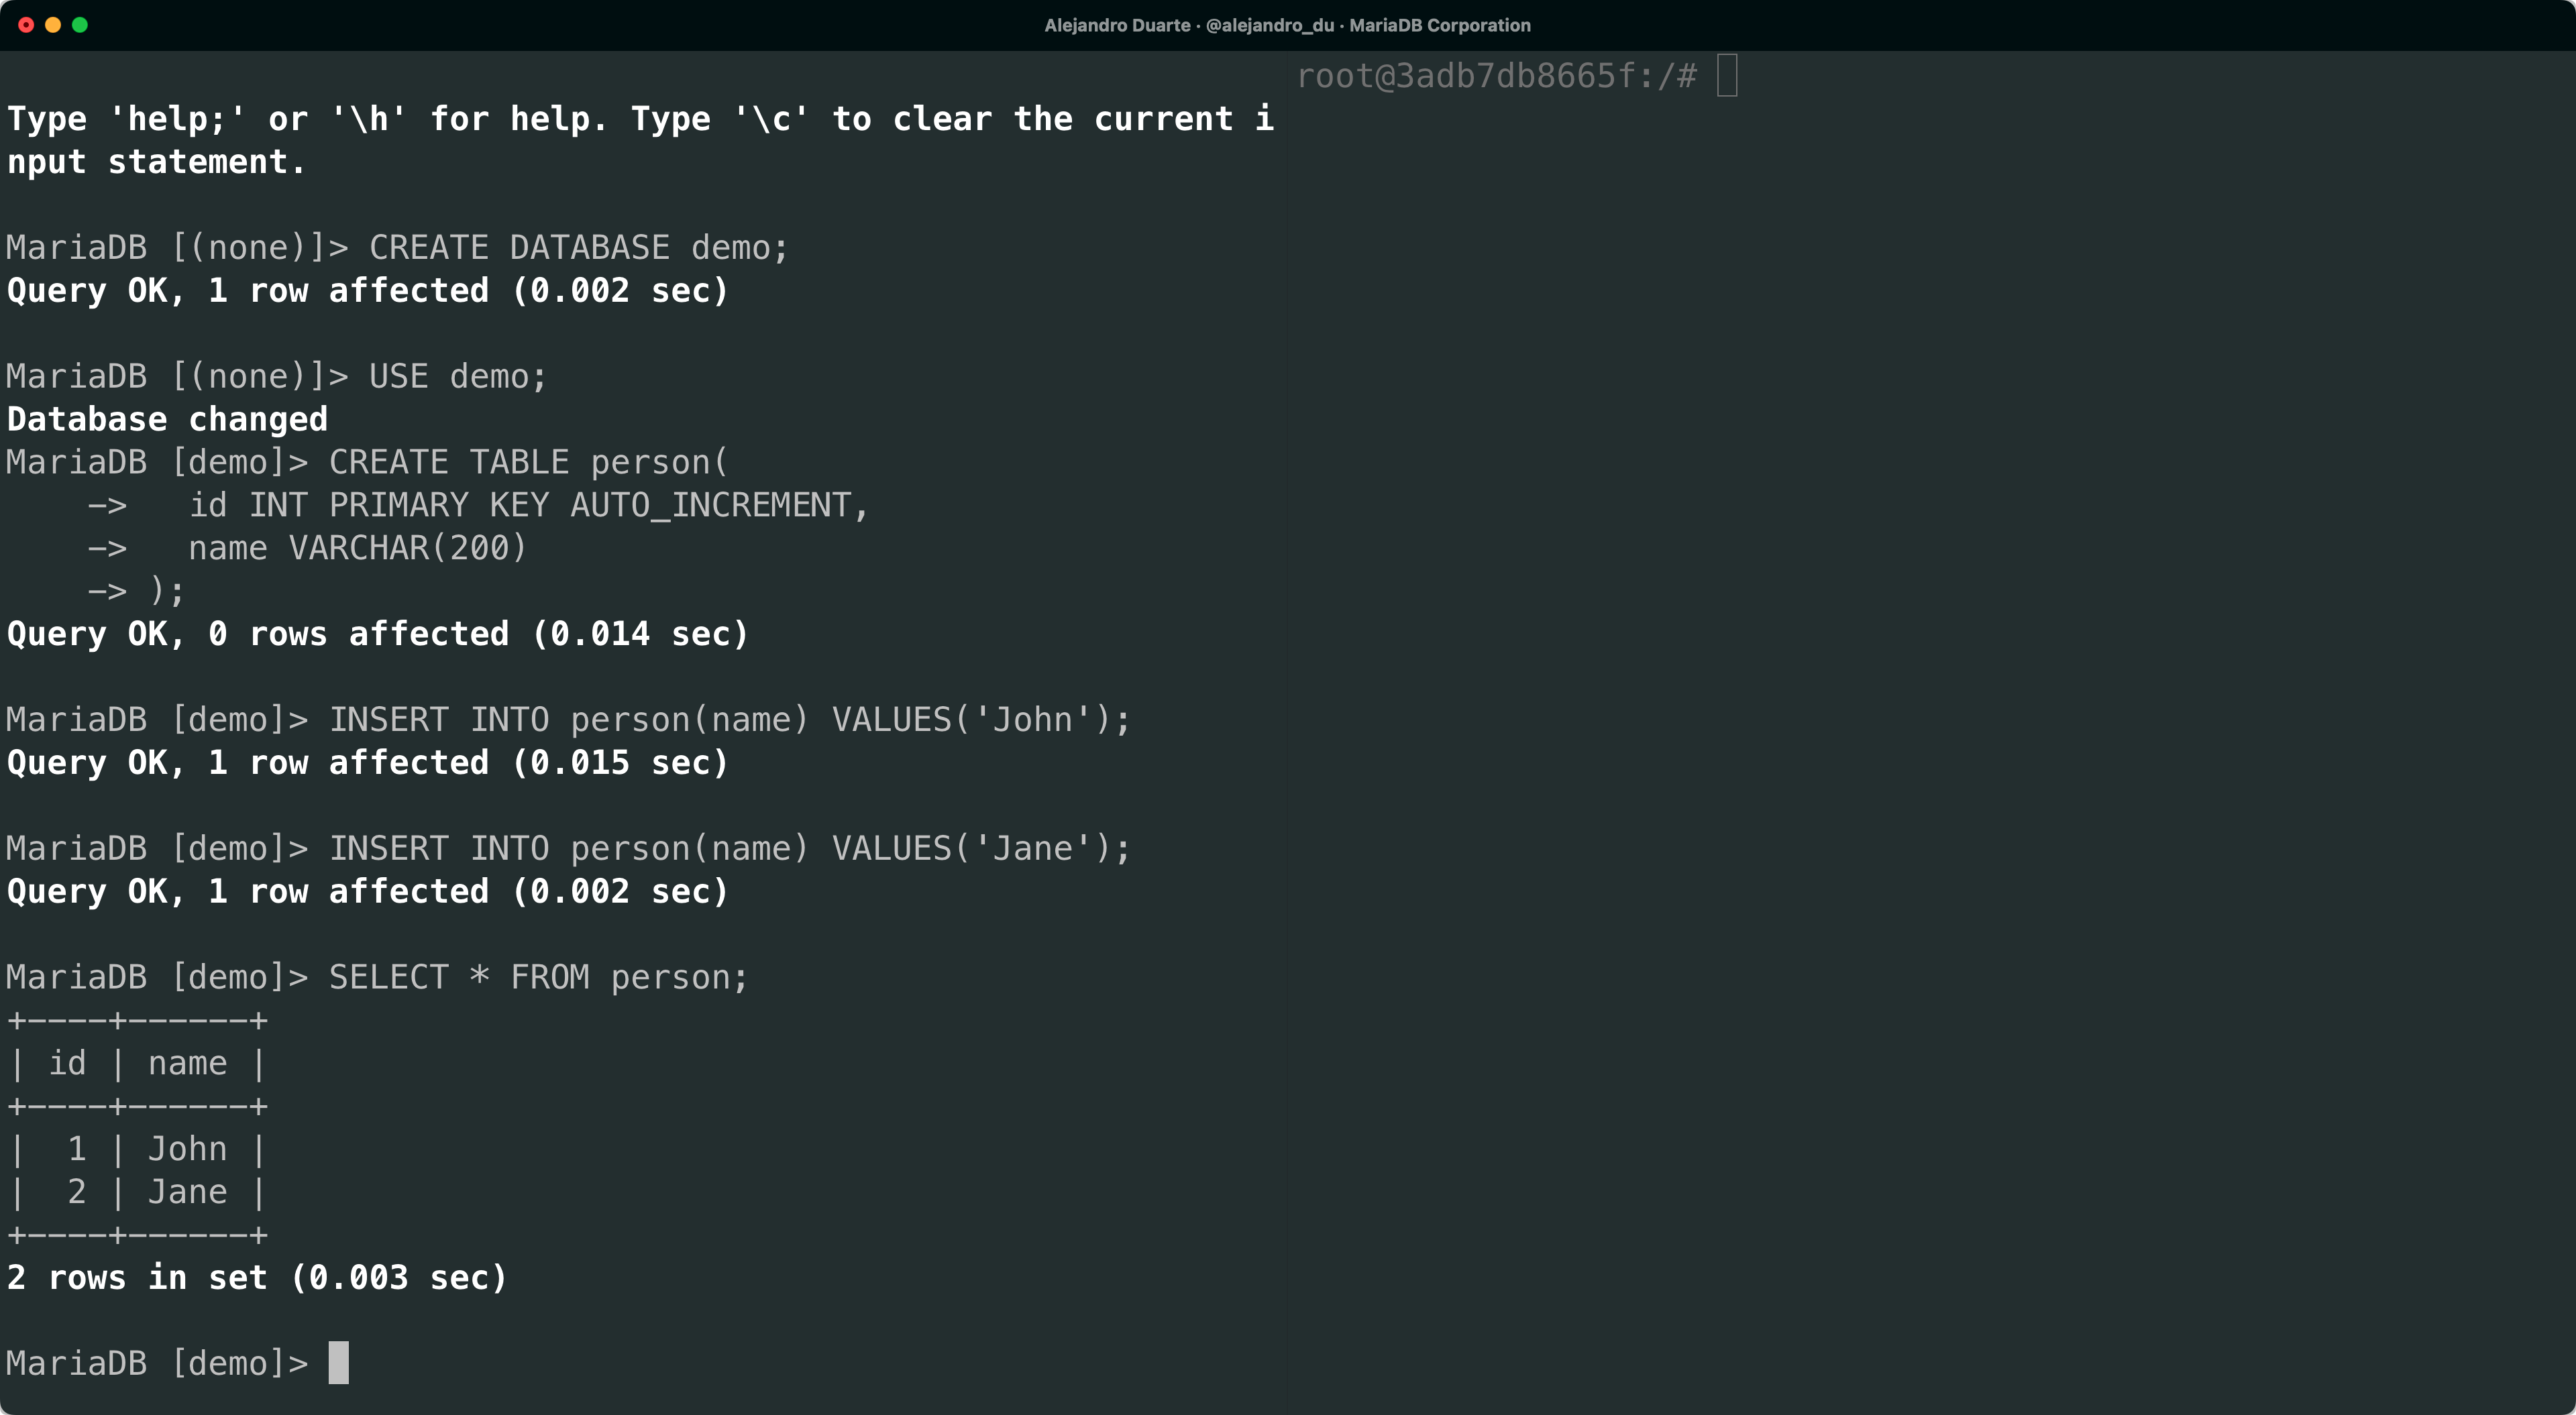
This is the typical starting point: a database that is already functioning and has data in it.
Cloning Nodes
At some point, you might want to send in the clones. Why? You want clones (or replicas) to:
Scale horizontally by adding database nodes that can handle reads or writes.
Minimize the impact of data analytics by moving analytical queries to a separate server and letting the primary server handle the application’s transactional load.
Ease backup tasks by running them in a database server that is not constantly changing data.
Other application-specific use cases
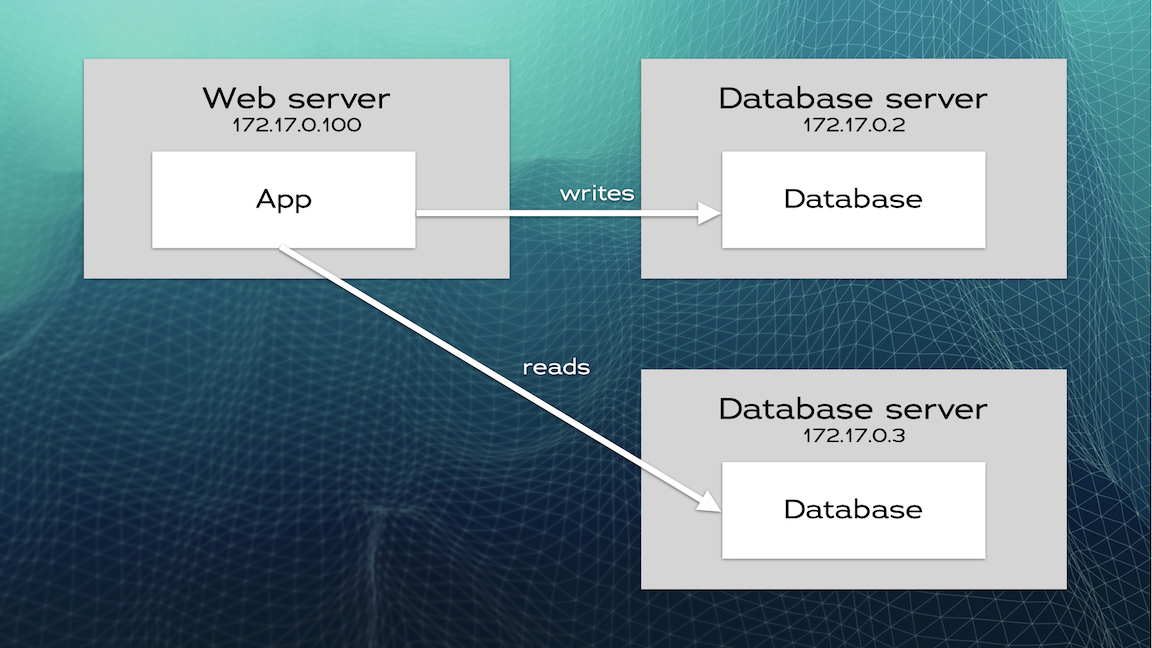
The most basic form of replication is in the form of primary/replica. You keep your current database server as the primary node and add an extra node to clone the data in the primary. The data is automatically kept up-to-date in the replica every time a row is updated, inserted, or deleted in the primary. Even Data Definition Language (DDL) statements such as CREATE TABLE are kept automatically in sync in the replica. In this form of replication, the web application continues to write only to the primary but can route reads to the replica if needed. More replicas can be added if, for example, you want to horizontally scale reads.
Preparing the Primary Node for Replication
You need to activate the binary log in the primary node (node01). To check if the binary log is on or off run SHOW VARIABLES LIKE 'log_bin' in the SQL client (mariadb). If it is off, enable it in a configuration file as follows (use exit if you are in the SQL client to get back to the Linux shell):
nano /etc/mysql/mariadb.conf.d/50-server.cnfAdd the following to the file after [mariadb]:
log-bin
server_id=1
Notice the server ID. Each MariaDB instance needs a unique ID for replication to work. You also need to enable remote connections by commenting out this line as shown:
#bind-address = 127.0.0.1Save the file, exit the editor, and restart the database:
service mariadb restart
Copying the Data From Primary to Replica
Before enabling automatic replication of data, we need to take a backup of the primary database and restore it in the replica node. For that, you need to lock the tables in node01, print the binary log status, take the backup, and unlock the tables. Run a mariadb client and execute the following:
FLUSH TABLES WITH READ LOCK;
SHOW BINLOG STATUS \G
Don’t close the client just to avoid unlocking the tables. Instead, open a third terminal window and run an extra Bash shell on node01:
docker exec -it node01 bashTake a backup as follows:
mariadb-backup --backup --target-dir=backup01 --user='root' --password='password'
This creates a directory called backup01 with all the data from the database. At this point you can move to the previous node01 terminal and unlock the tables:
UNLOCK TABLES;
This is needed to avoid changes to the data directory while the backup is running. In this laboratory example, nothing is really changing the data in node01, but this could be different in real-life scenarios, so try to minimize the time between looking and unlocking the tables.
Move again to the third terminal (node01) and type exit to end the Bash session and leave the container. Copy the backup01 directory from the node01 container to the host machine, and from the host machine to the node02 container (replace 69f681b7a5bc and 3adb7db8665f with the container IDs that you get reported in the prompt of your terminals):
docker cp 69f681b7a5bc:/backup01 ./backup01
docker cp ./backup01/ 3adb7db8665f:/backup01
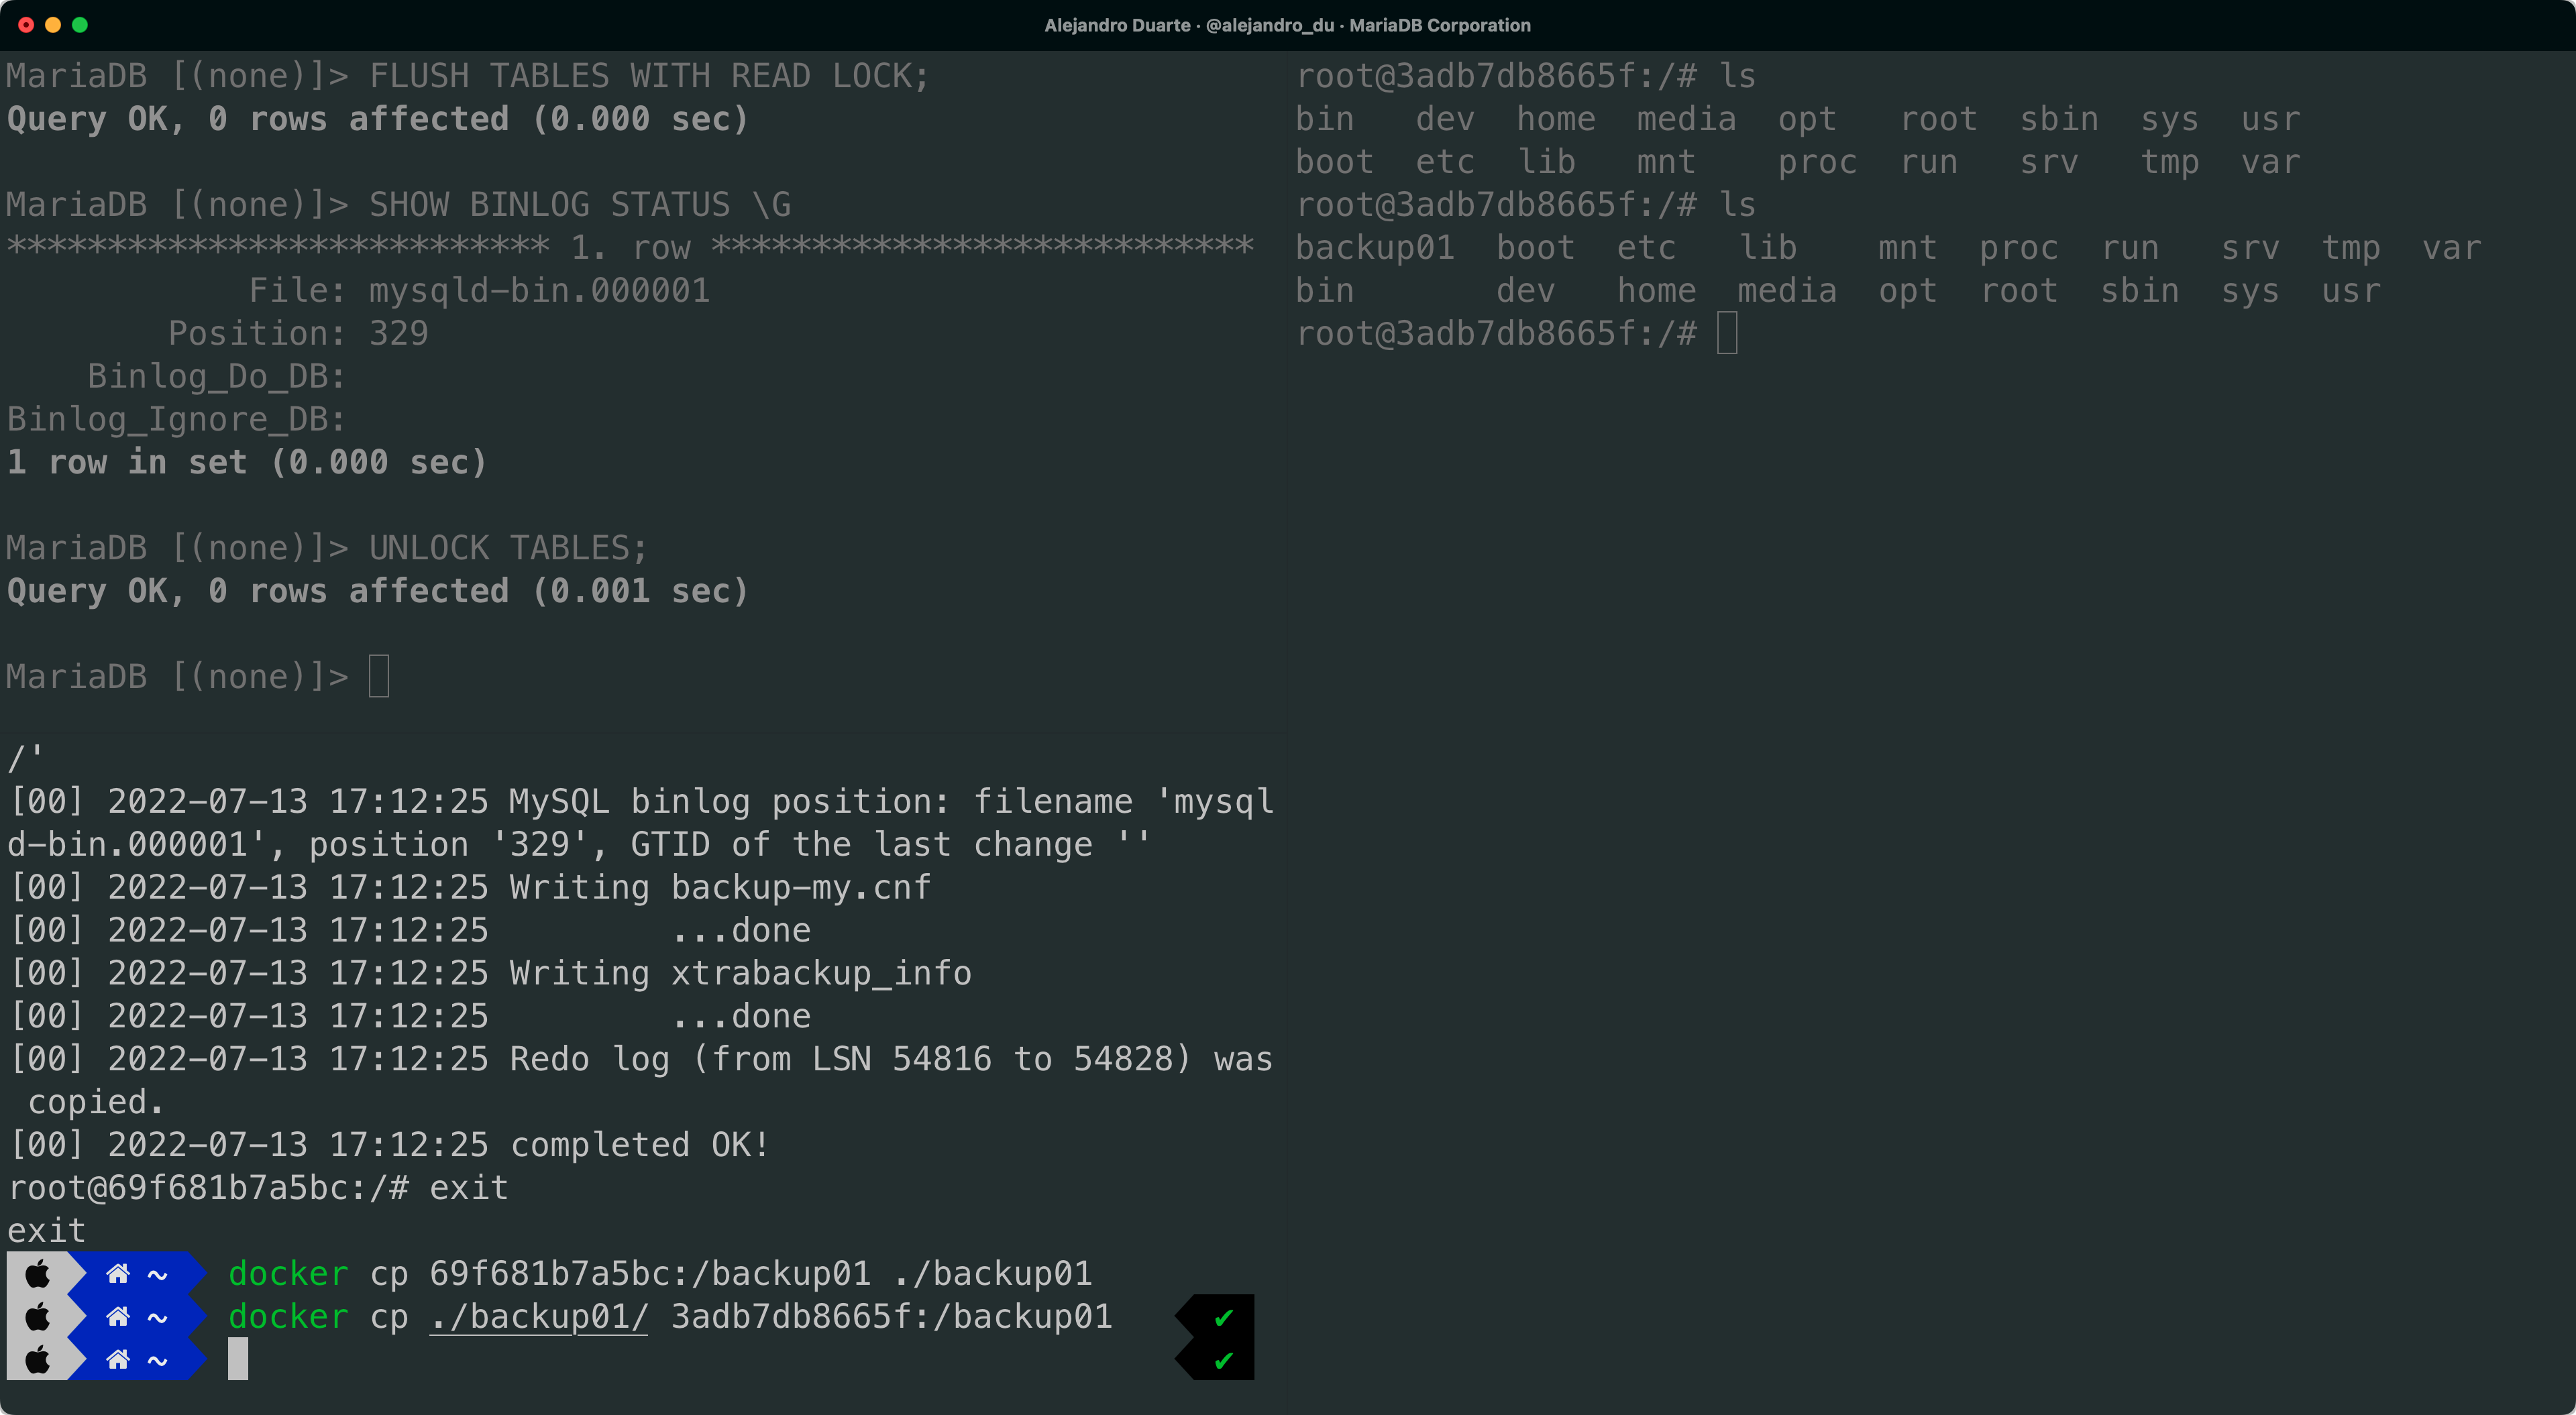
The hypothetical web application can perfectly keep writing data in the primary node even after taking the backup. Thanks to the binary log, the MariaDB replication mechanism will know later where to take over when starting the automatic replication.
Preparing the Replica Node
Before restoring the database backup, you need to configure the server ID in the replica similarly to how you did it in the primary but using a different ID. Go to the node02 terminal and run:
nano /etc/mysql/mariadb.conf.d/50-server.cnf
Assign a unique ID:
[mariadb]
server_id=2
Save the file and exit the editor. Restore the database backup:
rm -rf /var/lib/mysql/
mariadb-backup --prepare --target-dir=backup01
mariadb-backup --copy-back --target-dir=backup01
chown -R mysql:mysql /var/lib/mysql/
service mariadb restart
Connect to the database by running the mariadb client and check that the data is there:
SELECT * FROM demo.person;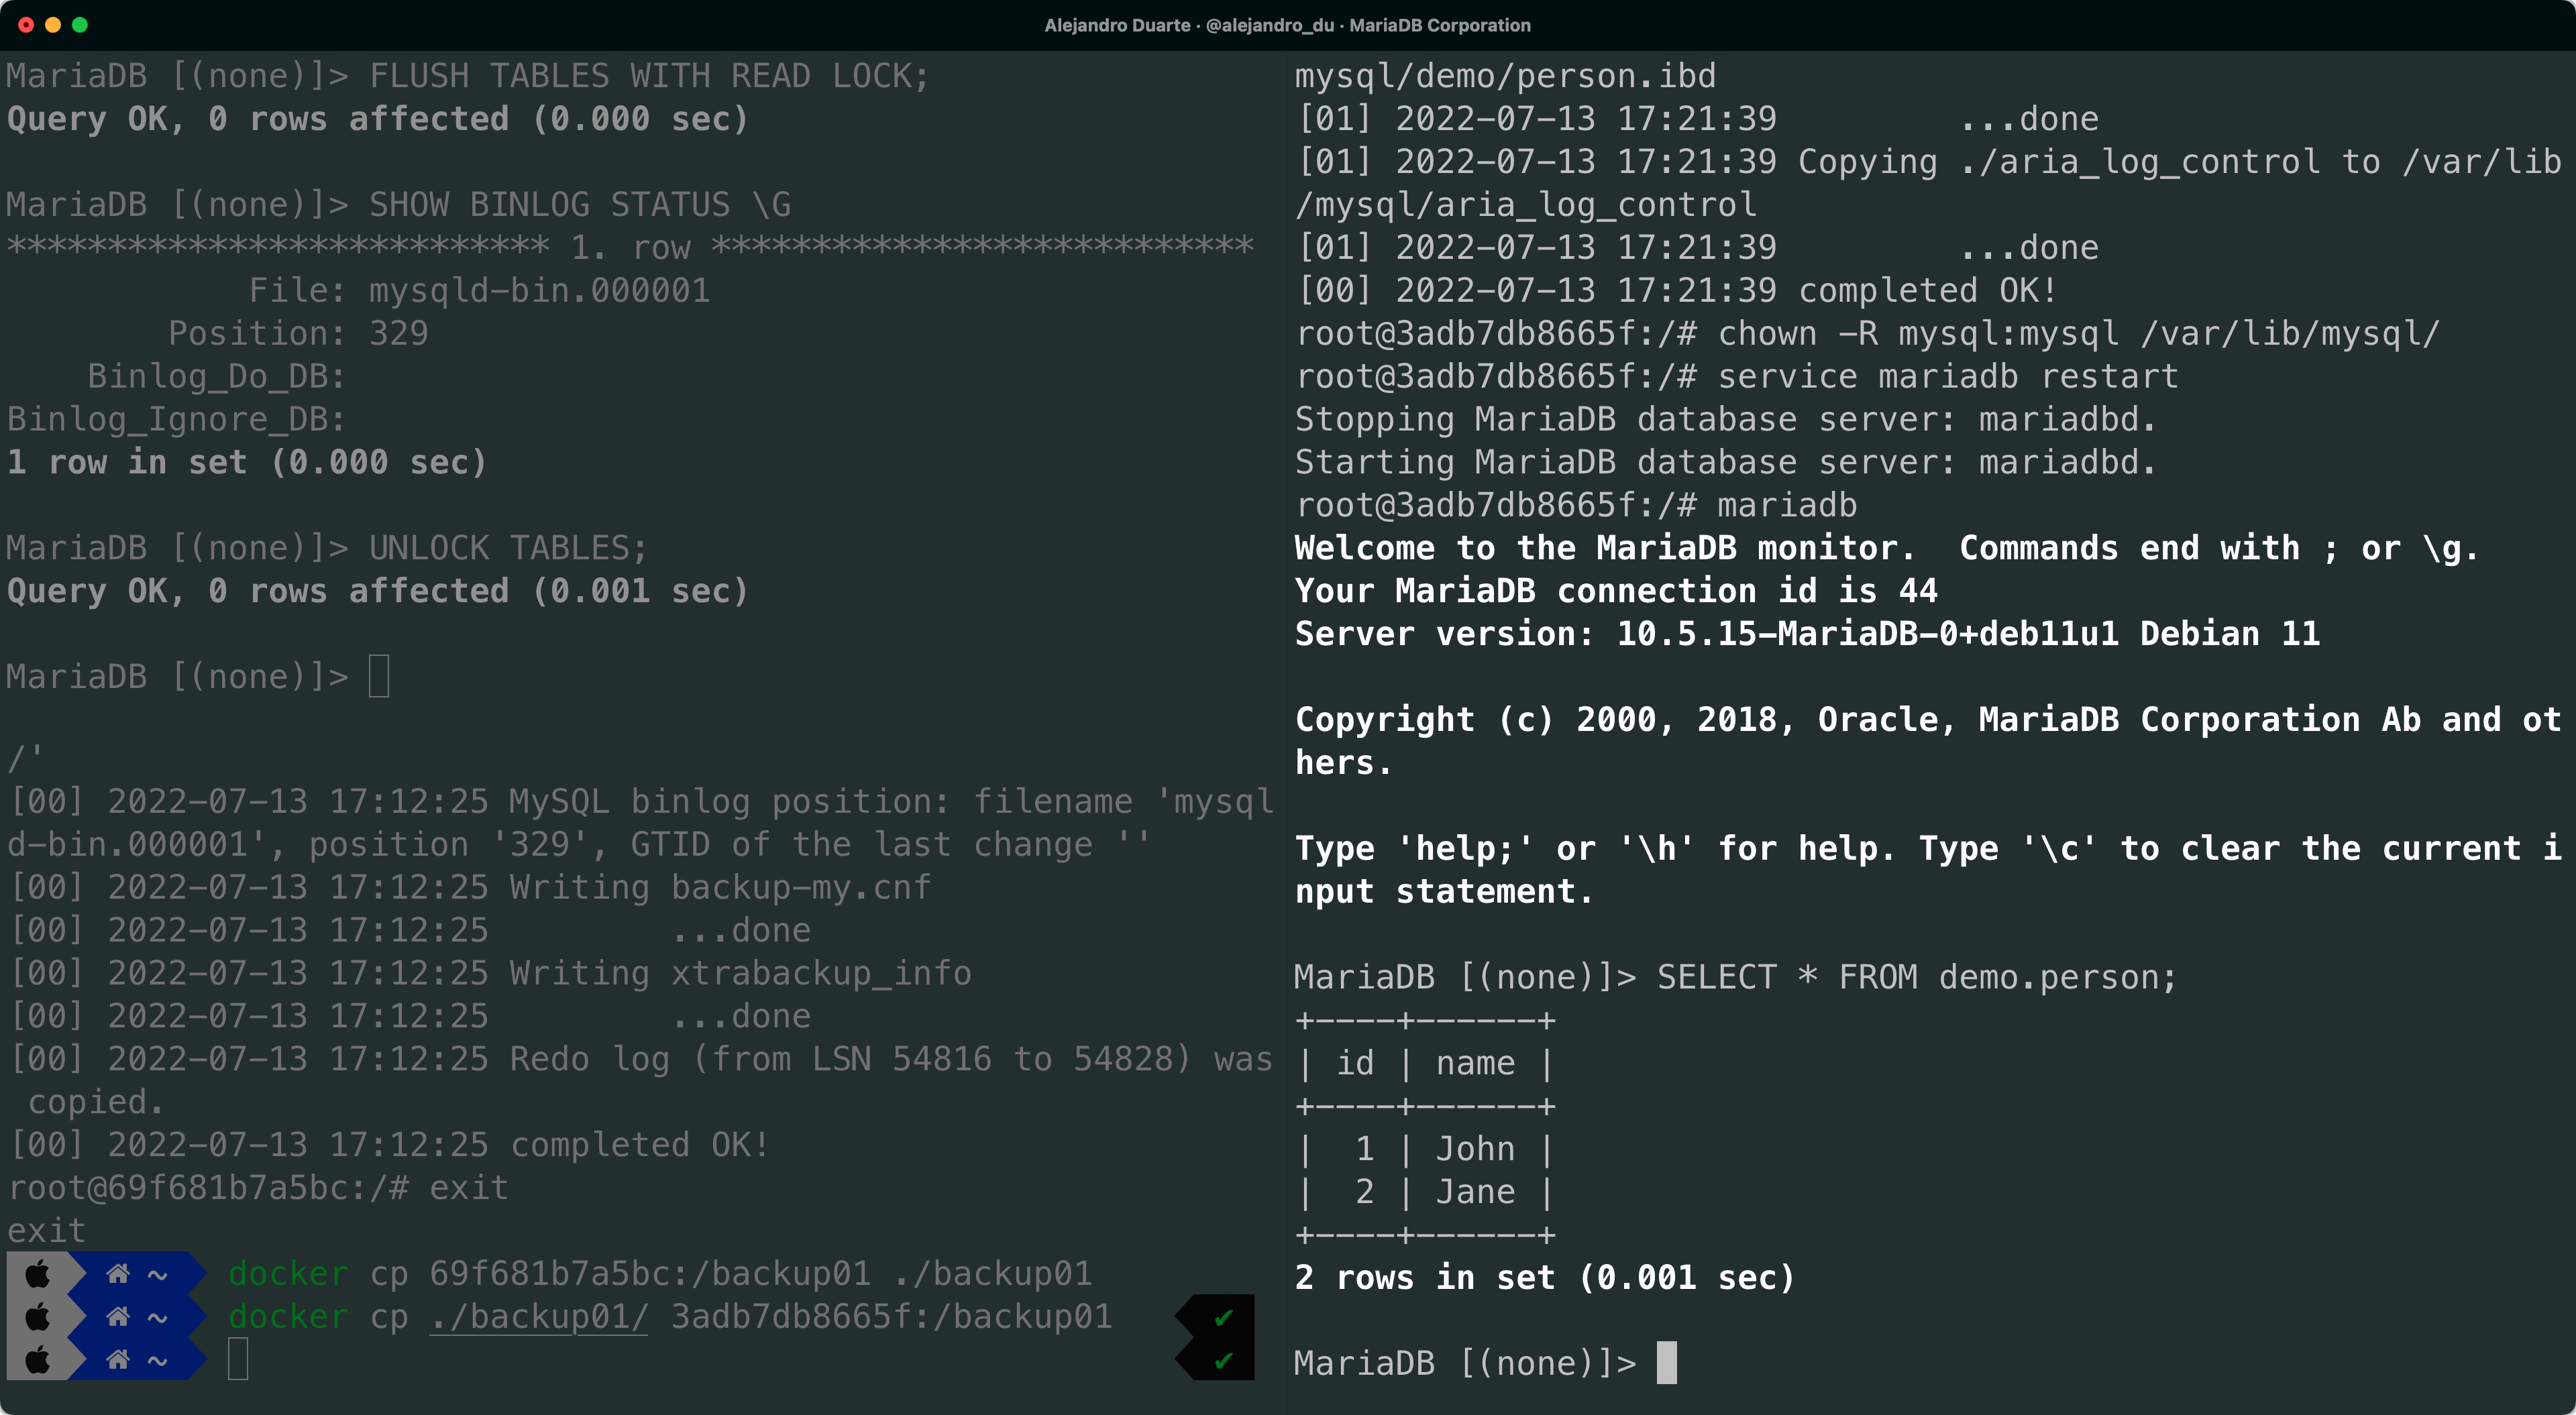
Enabling Automatic Replication
In order for node02 to replicate the data, it needs to connect to node01 (the primary) using a SQL user. Start the mariadb SQL client in the primary node (node01) and create the following user:
CREATE USER 'replication_user'@'%' IDENTIFIED BY 'password';
GRANT REPLICATION REPLICA ON *.* TO 'replication_user'@'%';
You’ll need the IP address of node01. You can get it by running the following in the third terminal:
ip addr
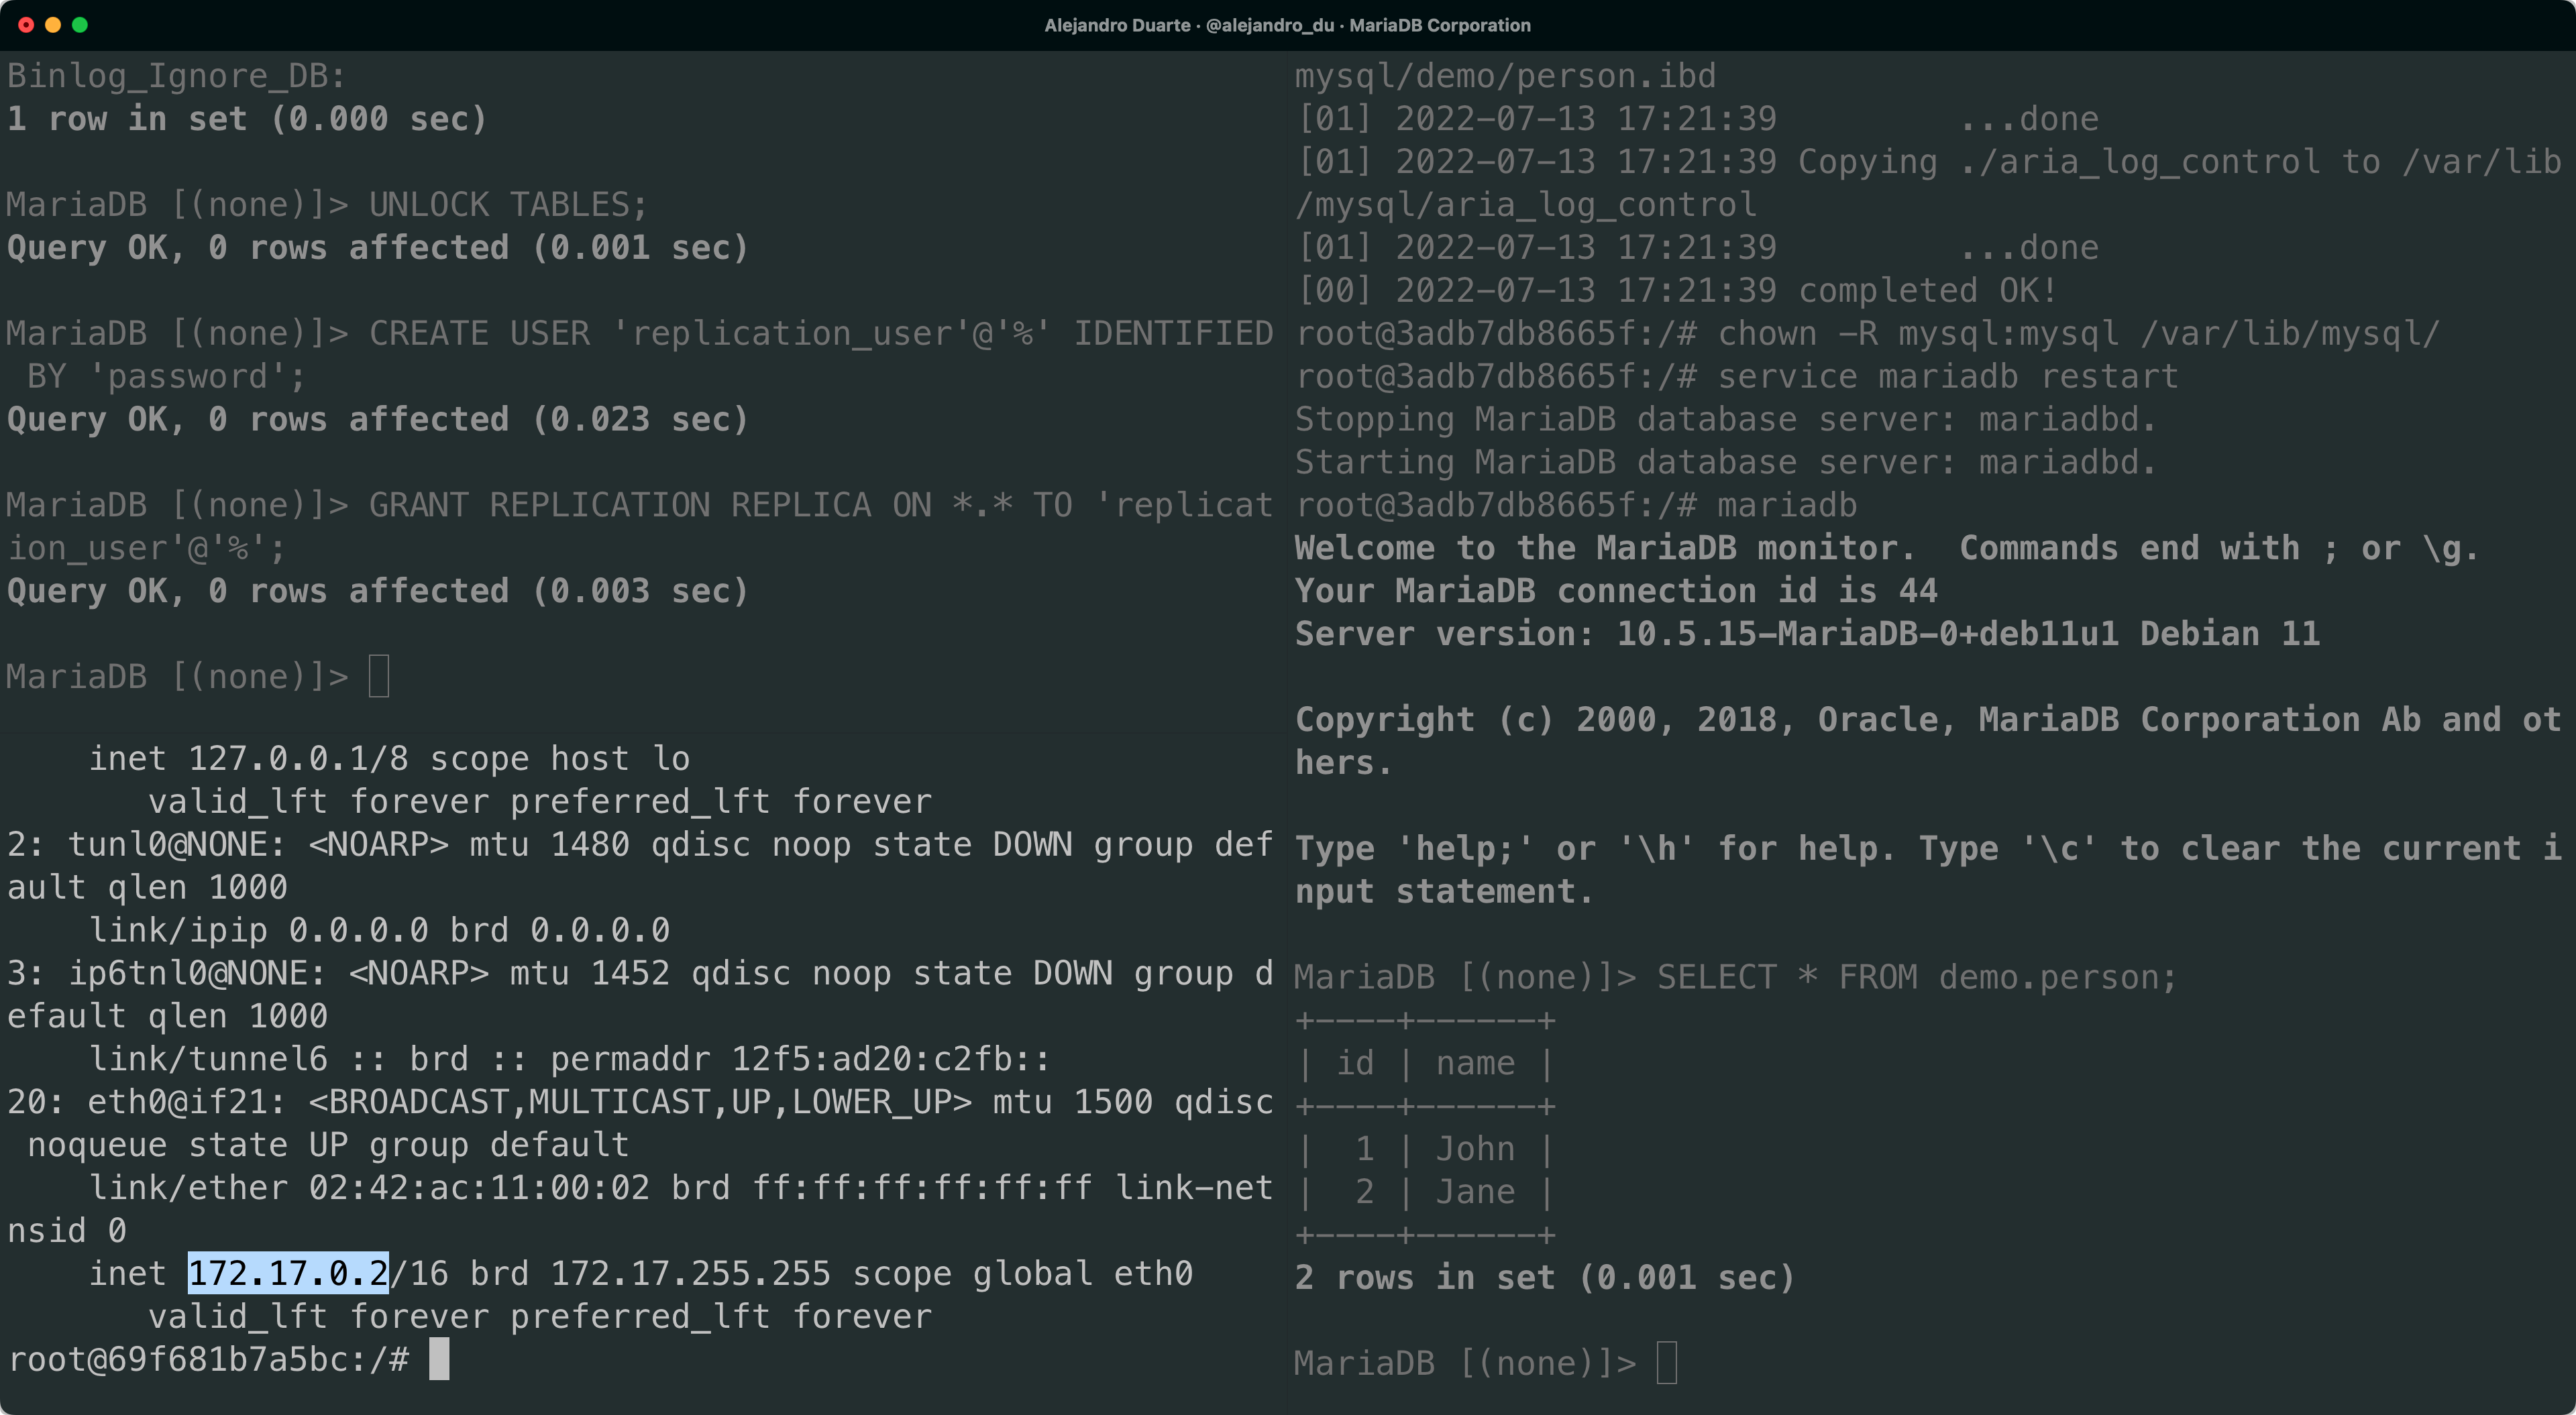
Move to node02 and execute the following in the SQL client:
CHANGE MASTER TO
  MASTER_HOST='172.17.0.2',
  MASTER_PORT=3306,
  MASTER_USER='replication_user',
  MASTER_PASSWORD='password',
  MASTER_LOG_FILE='mysqld-bin.000001',
  MASTER_LOG_POS=329, MASTER_USE_GTID=replica_pos;
Use the information you previously got from the SHOW BINLOG STATUS and ip addr commands. Start the automatic replication:
START REPLICA;
To check that replication is working, run:
SHOW REPLICA STATUS \G
You should see the following properties:
Slave_IO_Running: Yes
Slave_SQL_Running: Yes
Go ahead and insert a new row in the primary node (node01):
INSERT INTO demo.person(name) VALUES('Maria');
Then move to the replica (node02) and check that the new data is there as well. If so, congrats! You are seeing replication in action!
What’s Next?
You can add even more replicas. Try repeating the process to add a second replica (for example node03). In a real-life example, the application should connect to different nodes when performing different tasks depending on your requirements. For example, an analytics module in your application could use node02 to run reports. Take a look at the official MariaDB documentation to get a complete view of the possibilities and best practices when replicating data with MariaDB.
If you are feeling adventurous, check MariaDB MaxScale, a database proxy that forwards database statements to one or more database servers. For example, you can combine data replication and MaxScale to implement a read/write split router that performs query-based load balancing between nodes.
Opinions expressed by DZone contributors are their own.

Comments