Guide to Integrating OKTA OAuth 2.0 OIDC With Mulesoft API Anypoint Platform (Mule 4)
Learn more about integrating OKTA OAuth 2.0 on your platform.
Join the DZone community and get the full member experience.
Join For FreeWhat Is OAuth 2.0 OIDC?
OIDC (Open ID Connect) is an identity layer on the top of the OAuth 2.0 protocol. It allows clients to verify the identity of the End User on the authentication performed by an Authorization Server as well as provides basic profile information of End User in a secure way and Rest-like manner.
Prerequisites
An Anypoint Platform Account. Click here to create one.
An Okta Account. Click here to create one.
An Active API on Mulesoft API Manager (API must be deployed and active on API Manager).
API must be accessible over the developer portal or exchange.
POSTMAN Client.
Setting Up Application in Okta
In OKTA, add a new application by clicking on Application menu -> Add Application.

Click on Web -> Next.
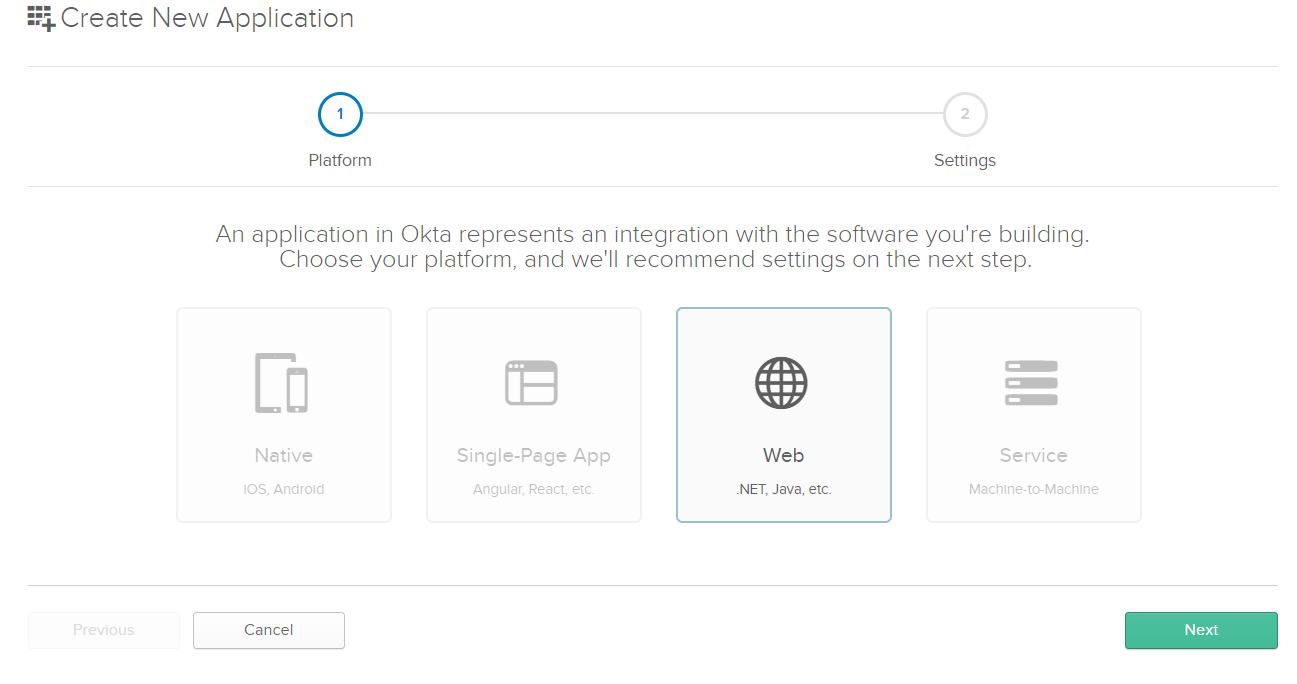
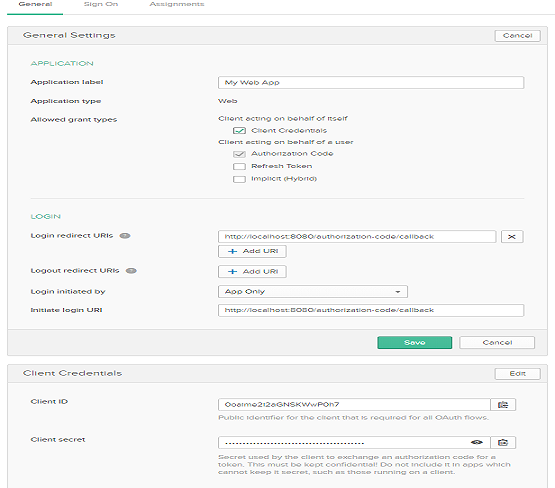
After clicking Next, it will navigate to next screen and provide Name and keep rest of the data as it is.
Now, click on Done button; it will navigate you to the next screen where you can see generated Client ID and Client Secret for your application. Copy the Client Id and Client Secret on Notepad for later use.
Click on Edit Button and check Client Credentials allowed grant type and click Save.
Generating an SSWS Token in OKTA
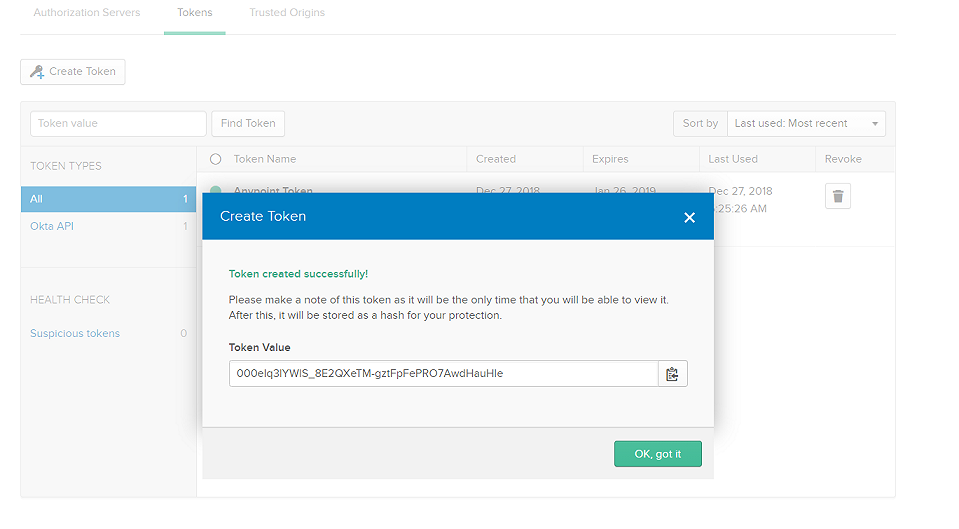
In OKTA, you can generate SSWS token by clicking on API menu -> Authorization Servers -> Tokens Tab -> Create Token. It will open the pop-up window, provide Token Name, and click Create Token. Finally, click on OK, got it.
You need to make sure that token is copied in notepad for later use.
Define Scope in OKTA
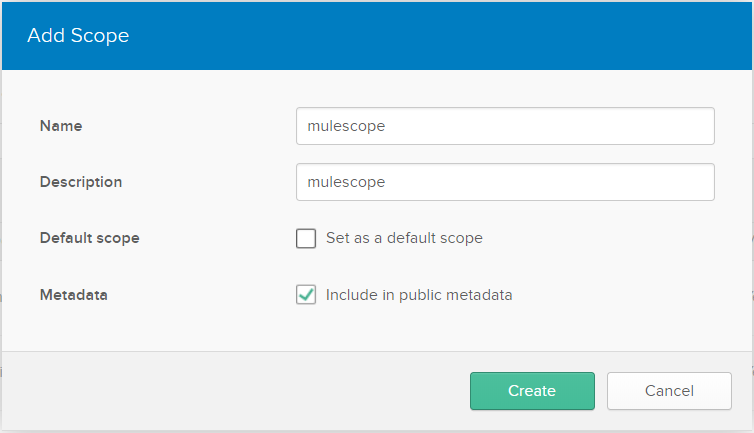
Navigate To API -> Authorization Servers -> Scopes -> Add Scope. After clicking on Add Scope, it will open popup windows, fill Name as "mulescope," and check "Include in metadata." Click Create.
Registering OKTA OpenID Connect Identity Provider With Mulesoft Anypoint Platform
Log in to the Mulesoft Anypoint Platform. After login, navigate to Anypoint Platform -> Management Center -> Access Management.
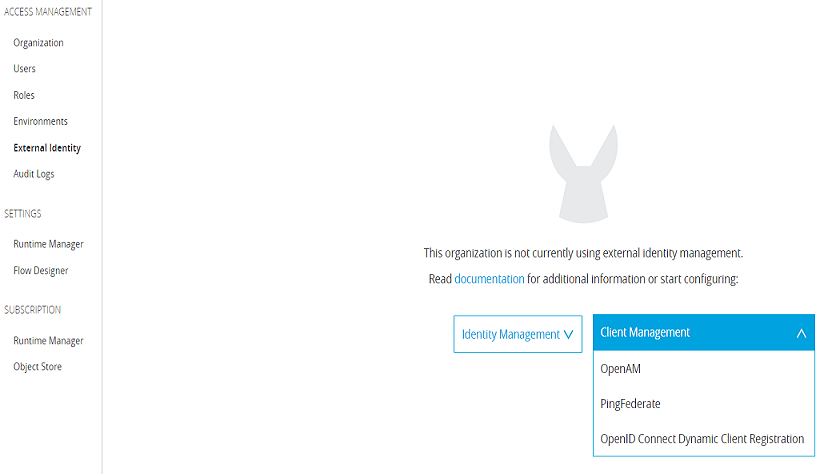
Click on External Identity -> Client Management -> OpenID Connect Dynamic Client Registration.
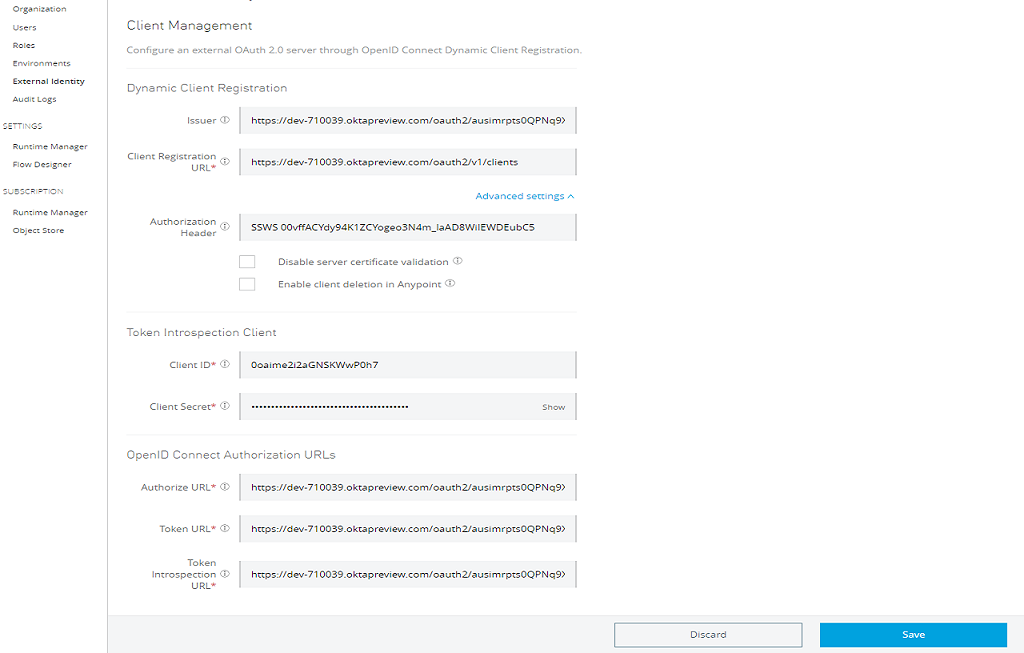
Now, you need to fill the dynamic client registration form.
Provide the Issuer and Client Registration Url.
Click on Advanced Settings below Client Registration Url and provide Authorization Header. Authorization Header value should be the Token that you have copied and prefix with "SSWS".
Authorization Value: - SSWS TokenValue
Fill the Client ID and Client Secret that you copied during creating OKTA application.
Fill the Authorize URL, Token URL, and Token Introspection URL.
Please check next step for retrieving the Metadata like Authorize, token URL, etc.
Retrieving OKTA Authorization Servers Metadata
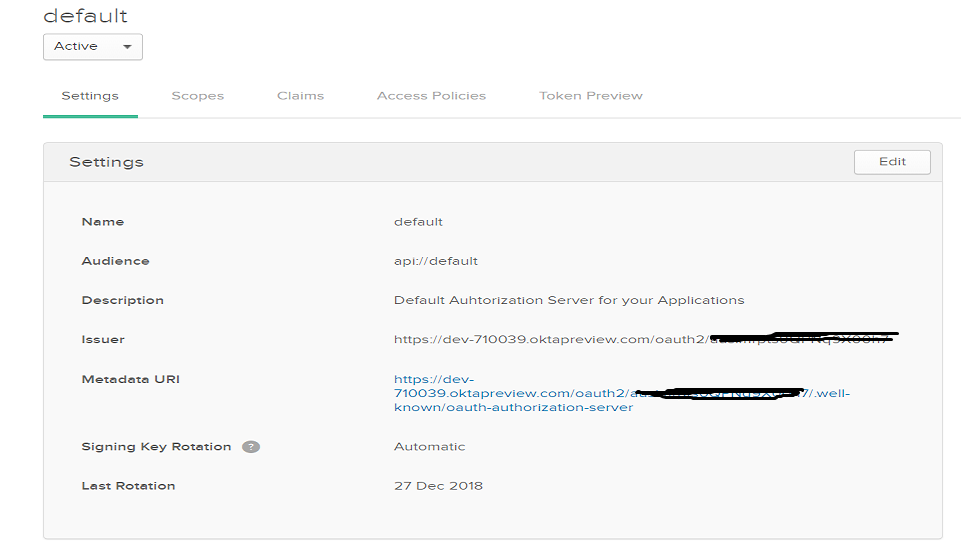
In OKTA, navigate to API Menu -> Authorization Servers -> default. After clicking on default, it will navigate you to other page and click on Metadata URI and it will provide Issuer, Client Registration, Authorize, Token, and Token Introspection URL required for above steps.
Setting Up OpenId Connect Access Token Enforcement Policy in Mulesoft API Manager
Navigate to the API Manager in Anypoint Platform. Click on Active API for which you need to set up the policy.
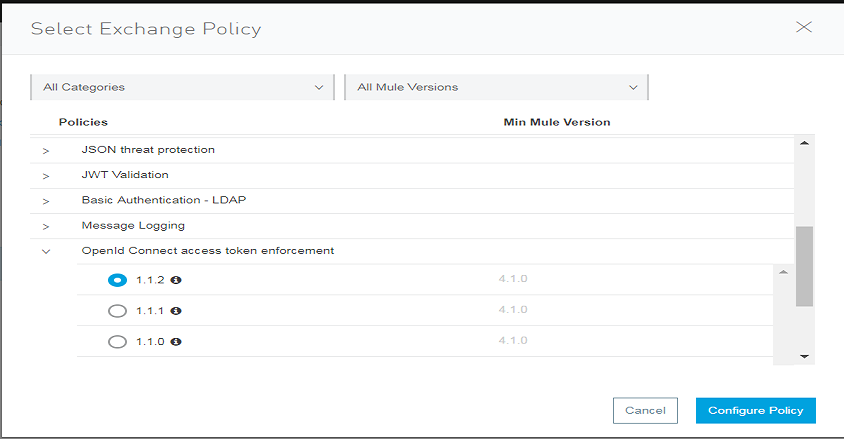
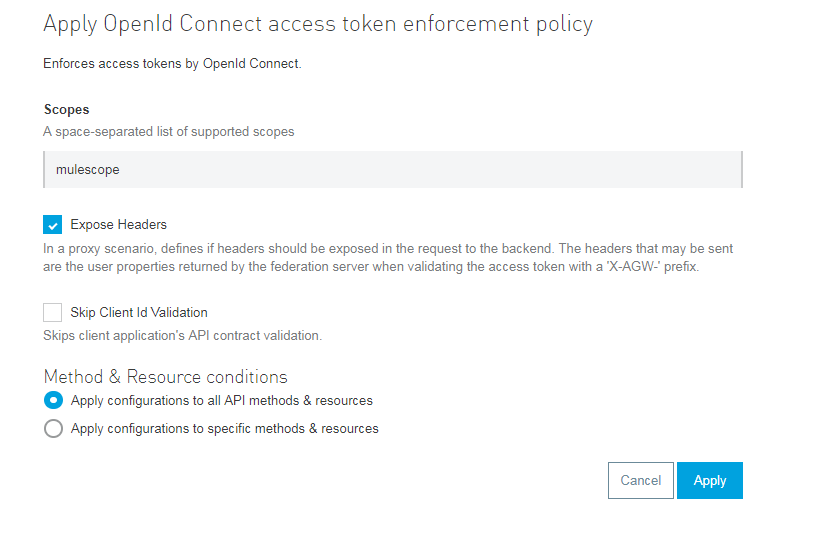
Click on Policies -> Apply New Policy -> Select OpenId Connect access token enforcement policy -> Select appropriate version (e.g. 1.1.2) -> Configure Policy
Once you click on Configure Policy, fill Scopes to mulescope (i.e. scope configured in OKTA in above steps) and keep rest of settings as default. Click Apply.
Registering the Mulesoft API With OKTA and Add Client Credentials Grant Type
Navigate to Mule Exchange or developer portal for registering Mulesoft API with OKTA. I will be using Mule developer portal for this article.
Navigate to Mule developer portal and click on the API for which you need to request access.
Click on Request Access option on the developer portal, it will open request access pop window.

Click on Create new application and it will new popup window. Provide Application Name and check on Authorization Grant Code. Finally, click on Create button.
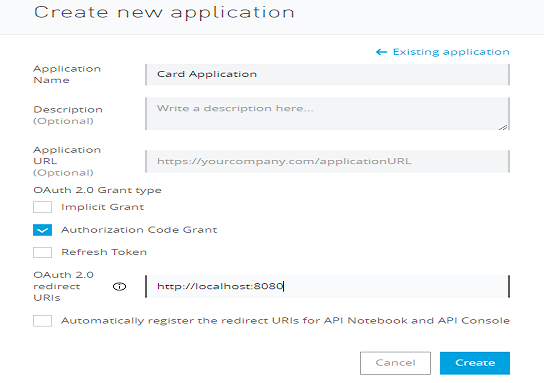
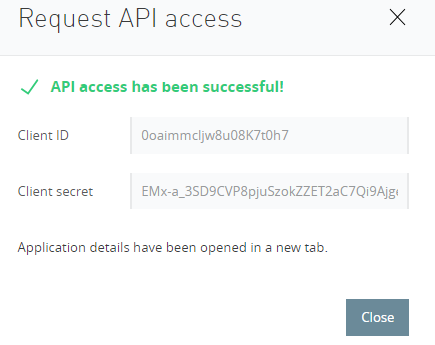
In Request API Access window, select API Instance and click on the Request API Access. It will create the application in OKTA with name Card Application and provide Client ID and Client Secret in a new popup window.
In Okta, Go to Application and check for an application that you have created above using Request Access. You need to click on the gear icon, select Assign to Groups.
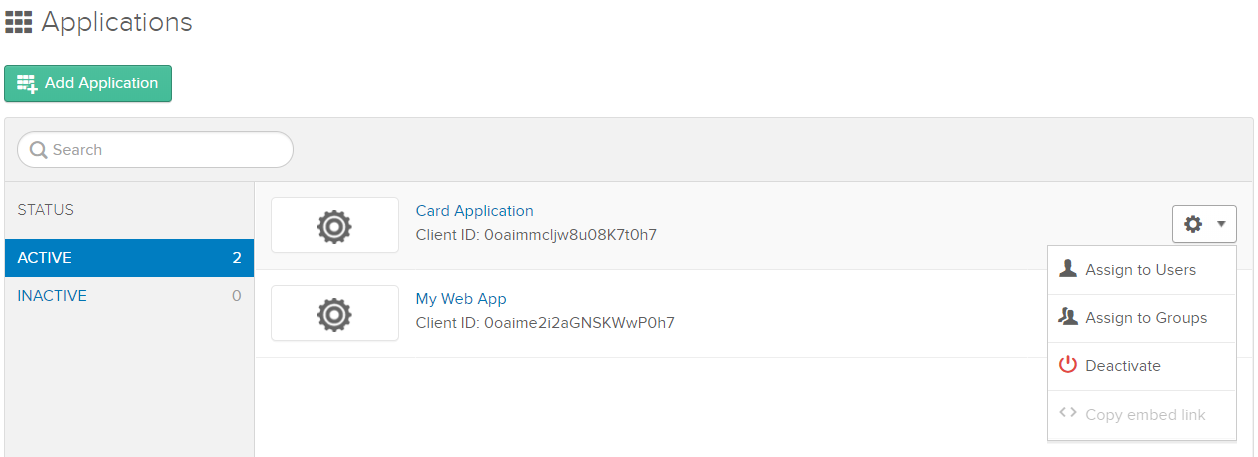
It will open a new pop up windows, click on Assign to Everyone and Done.

Note: You can perform above steps using Mulesoft Anypoint Exchange instead of Mulesoft developer portal.
Generating Access Token With Postman Client
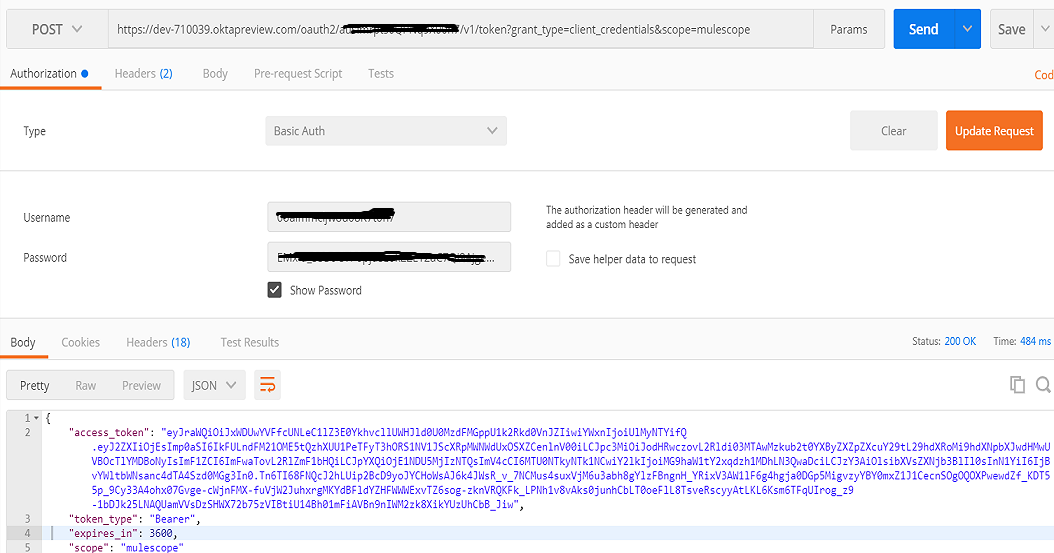
To get access token, you need to post the request to OKTA token URL (i.e. URL can be retrieved from Authorization Servers Metadata and it is the same token URL that has been configured during client dynamic registration in above steps).
This POST request should contain Content-Type application/x-www-form-urlencoded and query parameter grant_type=client_credentials&scope=mulescope.
You need to use Basic Authentication, Client ID as Username, and Client Secret as the password.
Testing the Mule API With Developer Portal
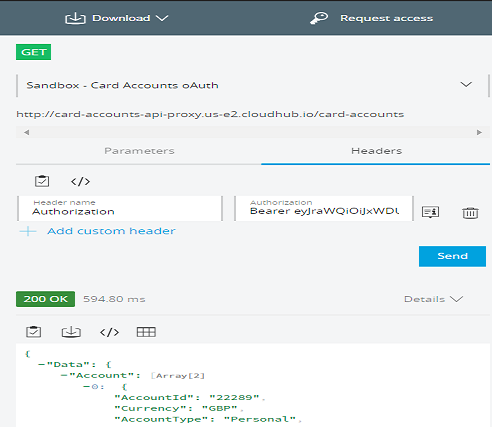
Now, you can make API call by sending Bearer Token in Authorization header or adding query parameter access_token. I will be using Mule developer portal for testing.
You can add above generated token in the Authorization header.
Authorization: Bearer {Token Generated}
Now, you know how to integrate OKTA OAuth 2.0 with the Mulesoft Anypoint Platform!
Opinions expressed by DZone contributors are their own.

Comments