Integrate VSCode With Databricks To Build and Run Data Engineering Pipelines and Models
Developing Data Engineering pipelines and Machine Learning models locally with Databricks clusters. Integrating Databricks with VSCode for smoother development.
Join the DZone community and get the full member experience.
Join For FreeDatabricks is a cloud-based platform designed to simplify the process of building data engineering pipelines and developing machine learning models. It offers a collaborative workspace that enables users to work with data effortlessly, process it at scale, and derive insights rapidly using machine learning and advanced analytics.
On the other hand, Visual Studio Code (VSCode) is a free, open-source editor by Microsoft, loaded with extensions for virtually every programming language and framework, making it a favorite among developers for writing and debugging code.
The integration of Databricks with VSCode creates a seamless environment for developing, testing and deploying data engineering pipelines and machine learning models. This synergy allows developers and data engineers to harness the robust processing power of Databricks clusters while enjoying the flexibility and ease of use offered by VSCode.
Prerequisites for Integration
Before starting integration, the user should complete below steps:
- Databricks: Follow this link to get a trial version.
- Visual Studio: Download the Mac or Windows version of Visual Studio Code on your personal computer.
- GitHub/GitLab: Follow this link to get a trial version of GitLab and install Git on the local machine.
Steps for Integration
- Create a Databricks Token under user settings > Developers > Access tokens once you configure Databricks with the required steps.
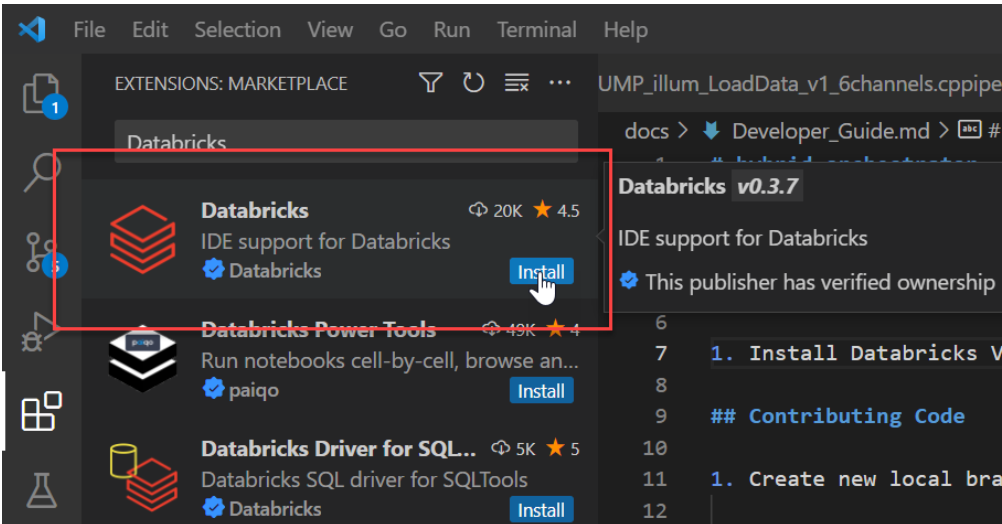
- Install the Databricks Plugin in VSCode Marketplace.
![Databricks]()
Configure the Databricks Plugin in VSCode. If you have used Databricks cli before, then it’s already configured for you locally.
Create the following contents in ~/.databrickscfg file.
[DEFAULT]

host = https://xxx

token = <token>

jobs-api-version = 2.0
Click on the “Configure Databricks” option.
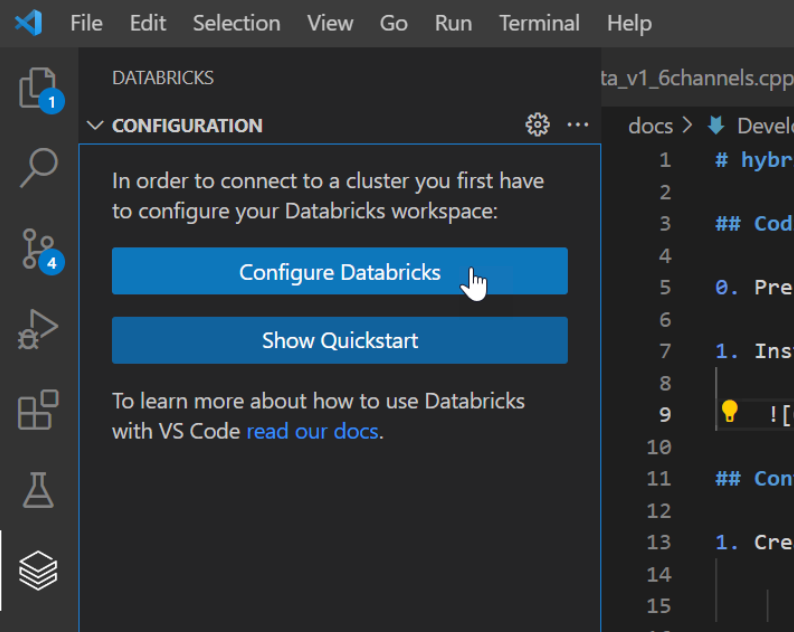
- Select the first option from the dropdown, which display’s hostname configured in the before step, then continue with the "DEFAULT" profile.

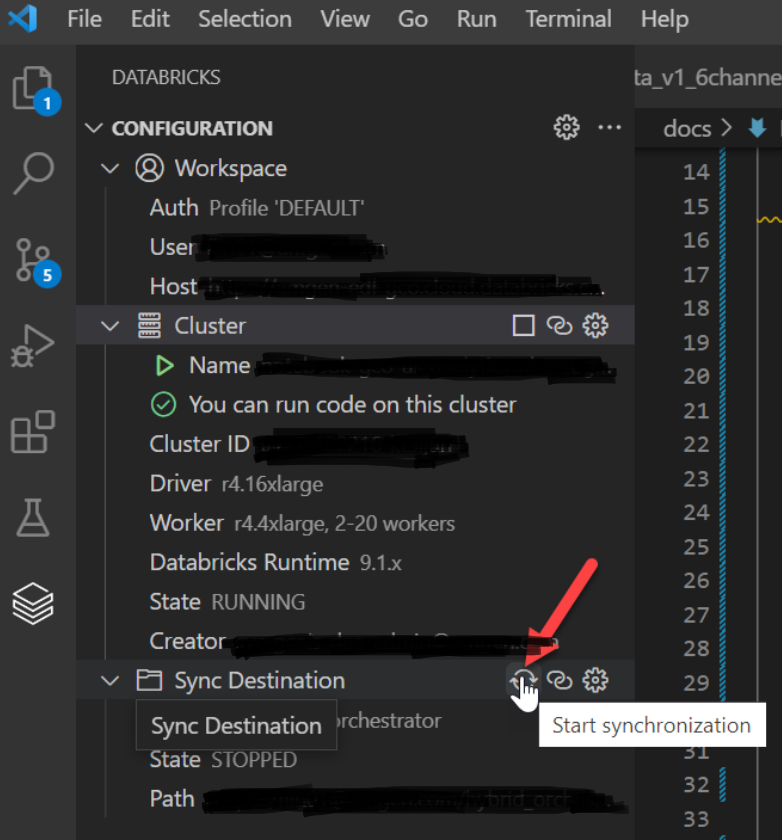
- Click on the small gear icon on the right of "Cluster" to configure the cluster. Select the appropriate cluster.

- Click on the small gear icon on the right of “Sync Destination'' to configure the workspace with the local environment under Databricks Repo. If you are using Databricks Repo’s, then sync our local files to our personal workspace under Databricks Repos. Click the “Start Synchronisation” button. If you don’t want to utilize Databricks Repos, you can discard this step.
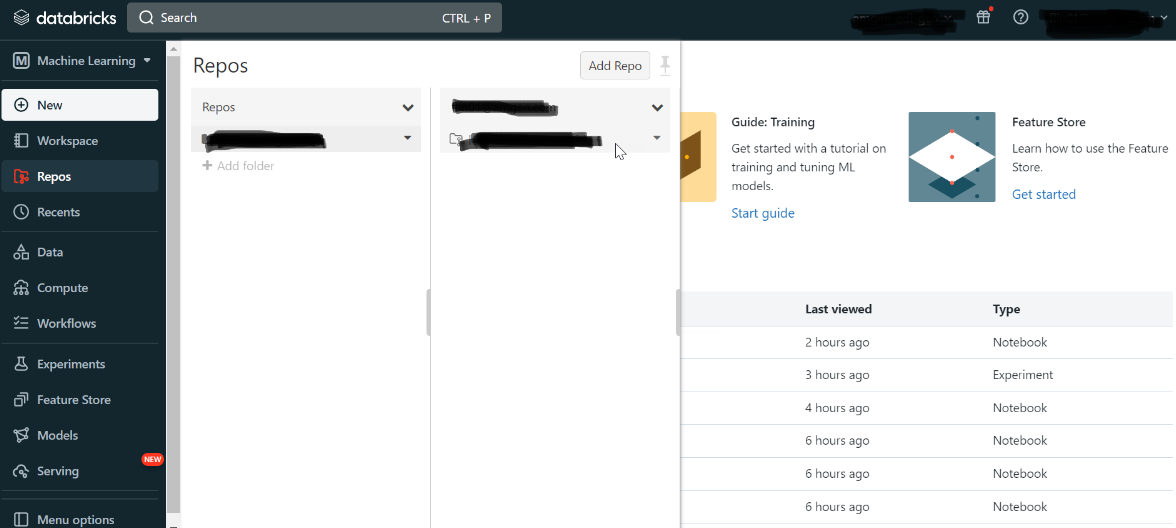
- Navigate to Databricks Repo’s; files will automatically be copied in Databricks.
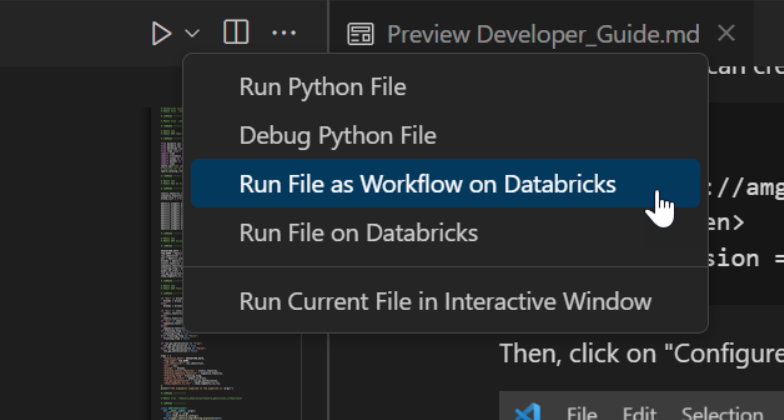
- Run code using Databricks cluster locally. On the upper right corner, there is a button that says, “Run File as Workflow on Databricks”.
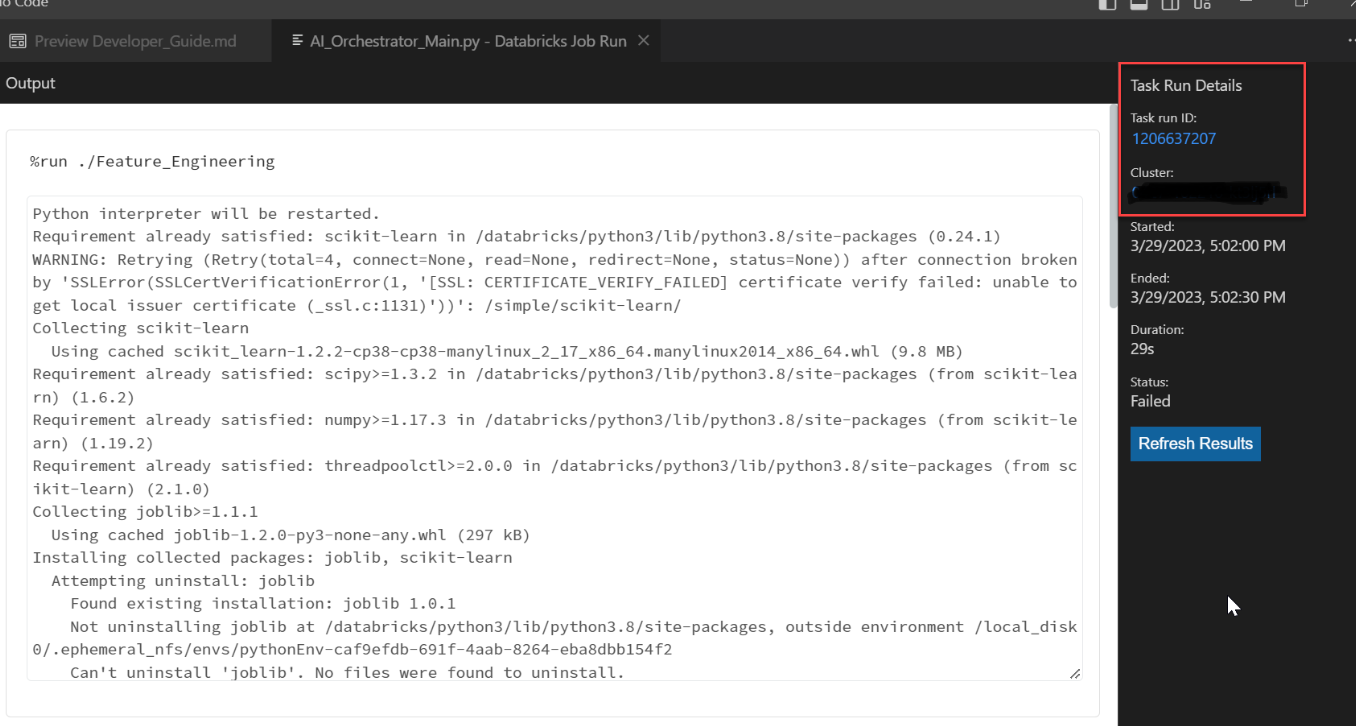
- Once you complete the Databricks Job Run, it will execute your notebook. You can see the outputs and links to the specific run activity
Frequently Asked Questions and Troubleshooting
The synchronization between my local environment and Databricks Repo is not working correctly. How can I resolve this?
Ensure that the Databricks Plugin in VSCode is updated to the latest version. If you still encounter issues, refer to the official Databricks documentation for troubleshooting.
Can I use other IDEs besides VSCode to integrate with Databricks?
Yes, Databricks can be integrated with other popular IDEs such as IntelliJ IDEA, PyCharm, etc. The integration steps may vary, so it's advisable to refer to the respective IDE's documentation for Databricks integration.
Troubleshooting Tips
Synchronization Problems:
- Ensure that your Databricks workspace and VSCode are configured correctly as per the instructions provided in the article.
- Check for any updates to the Databricks plugin in VSCode, as outdated versions might cause synchronization problems.
Opinions expressed by DZone contributors are their own.

Comments