In-Sprint Test Automation at Agile and DevOps Speed Using Testsigma
Learn how to implement in-sprint testing to avoid losing time for UI automation.
Join the DZone community and get the full member experience.
Join For FreeIntroduction
A few years back, when software development strategies such as the Waterfall model were prominent, the testing phase used to start after the whole development phase was complete and later came the release. We have come a long way since then after the adoption of Agile and DevOps practices. However, UI automation typically still lags behind the sprint.
The reason is that Agile and DevOps approach doesn't allow a lot of time for comprehensive test creation between code completion and release. You may need to depend heavily on manual testing practices in order to guarantee test coverage. One of the ways to avoid this is to start the testing process very early in the sprint.
Now, we will see how in-sprint automation is achieved in Testsigma using a sample scenario.
Use Case
Let's take a simple login story as an example. Consider the below user story with two steps:
Enter the username and password to log into the application.
Verify that the login is successful and verify the home page.
Let's assume we have received the below Mockup design from the business analysts or product owners.
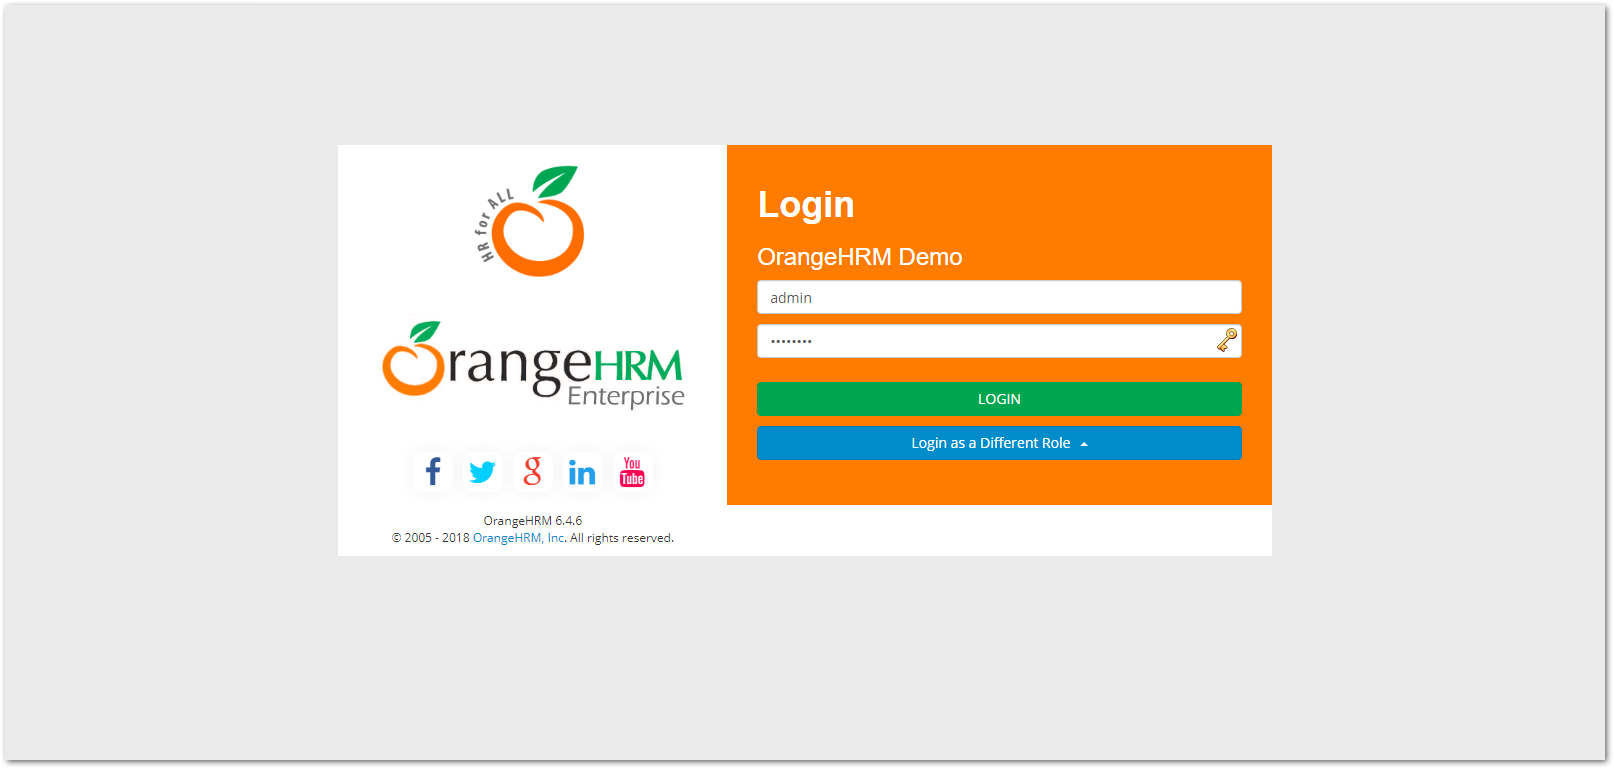
Login Page
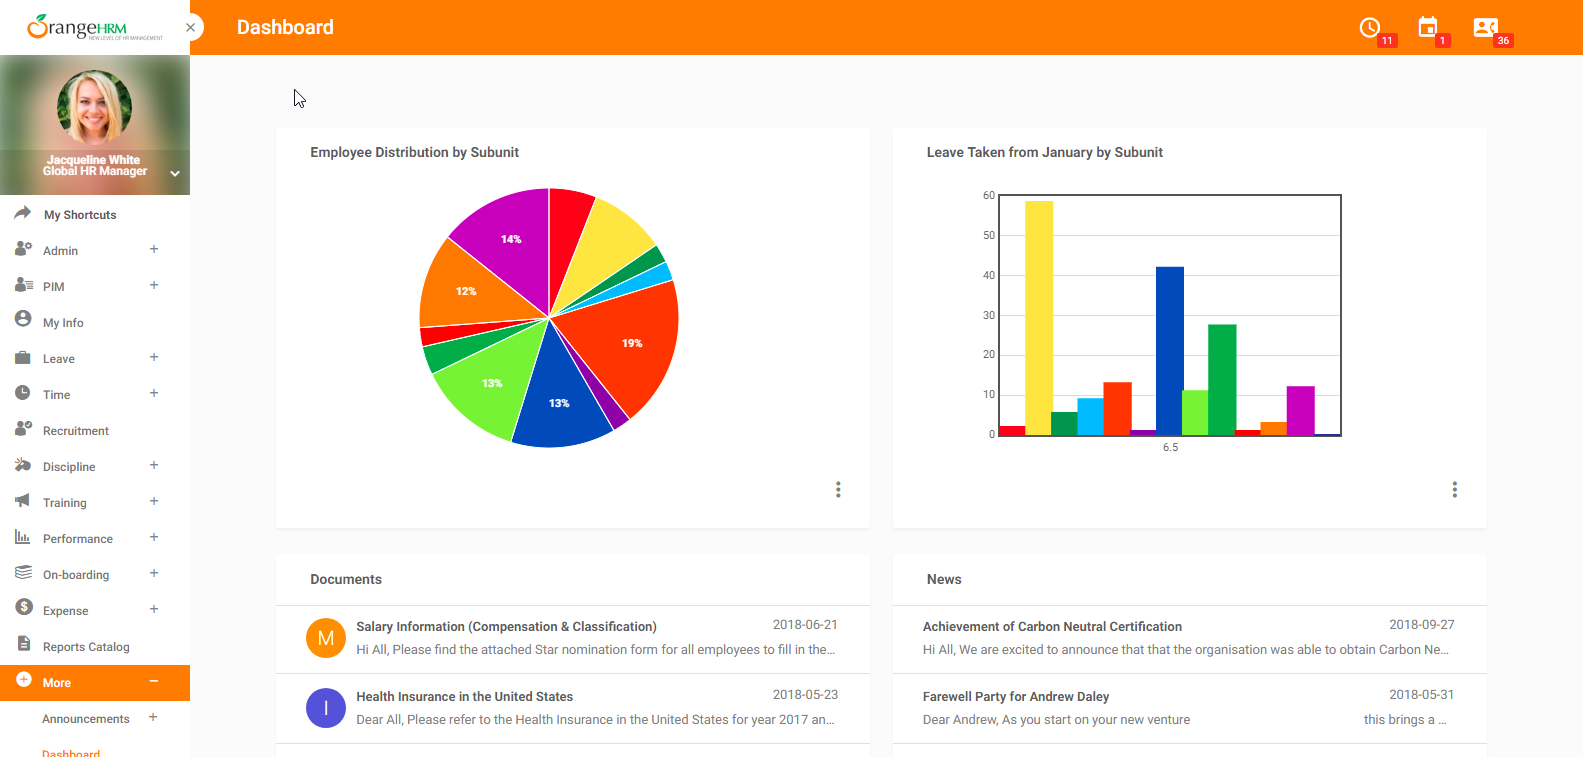
Landing Page
Based on the above mockup, the following steps need to be performed to test this screen:
Go to the corresponding URL (in this case, https://orangehrm-demo-6x.orangehrmlive.com/).
Enter the username "admin" in the username field.
Enter the password "admin" in the password field.
Click on the "LOGIN" button to log into the application.
Verify the text "Dashboard" on the landing page to confirm a successful login.
Testsigma is a simple natural-language-based automated testing tool, and you don't need to write any code to automate these steps. The automated steps for this scenario would look quite similar to the steps given above, albeit the format exercised by Testsigma.
Creating a Test Case and Adding Test Steps Before Development
Now let us see how we can write automated tests for this scenario without UI. We can start test case development even before the front end UI is designed, although it would be easier with the designs in hand. This is how Testsigma enables you to start automating your tests towards the left end of the sprint, i.e close to the design phase.
The first time you log in to Testsigma, A sample project named 'Testsigma Examples' is created by default with some sample Test Cases in it.
Now, let us start by creating a test case. Clicking on Test Development (third icon on the left navigation pane) from the Testsigma Dashboard takes you directly to the Test Cases page. Click on + Create Test Case to create a test case. Just enter a suitable name and click on Create.
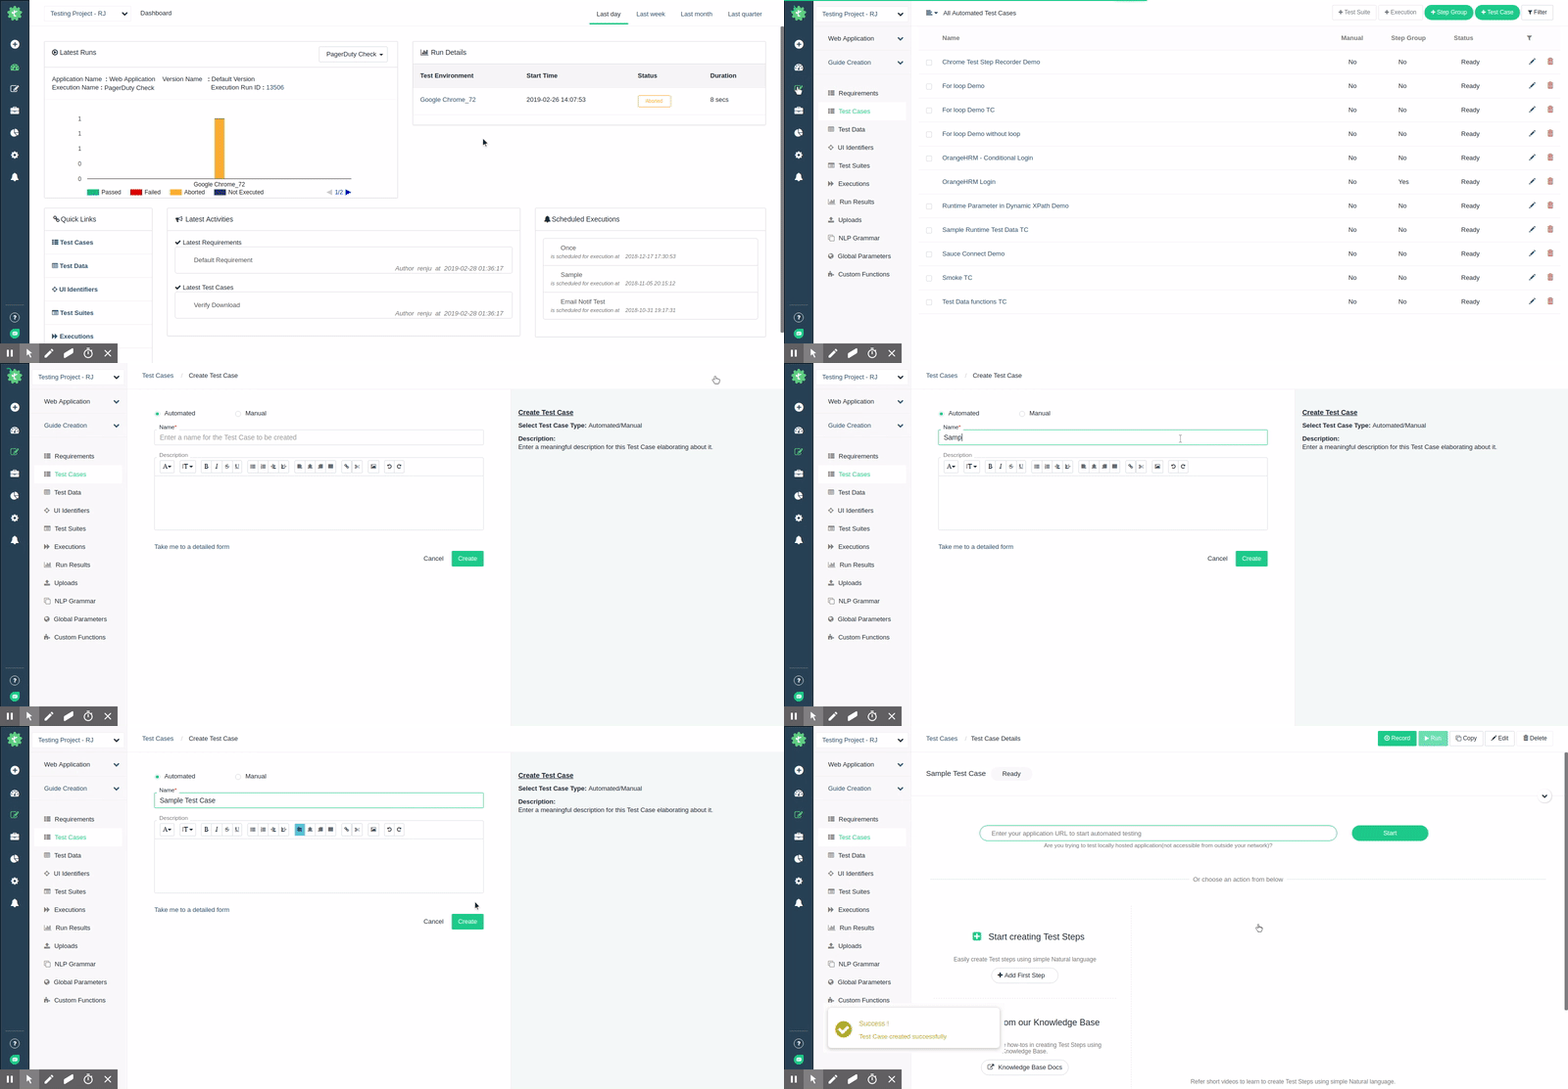
(Refer to this link to learn more about creating a test case, or click here to watch a quick video to learn how Test Creation in Testsigma works.)
We will be taken directly to the Test Case details page.
Once the test case is created, let us start with the first step.
1. Navigate to the Application URL
On the Test Case Details page, enter the Application URL and click on the Start button. You can enter a dummy URL if you don't have a URL yet.
In this case, we will be entering the URL of the application that we are testing: https://orangehrm-demo-6x.orangehrmlive.com/.
This will create the first step for you automatically.
Go to https://orangehrm-demo-6x.orangehrmlive.com/

2. Enter the username "admin" in the Username Field
Type "enter" in the Action Textbox and select the appropriate NLP statement from the suggested list. We will select Enter test data in the ui identifier field in this case, as shown below:
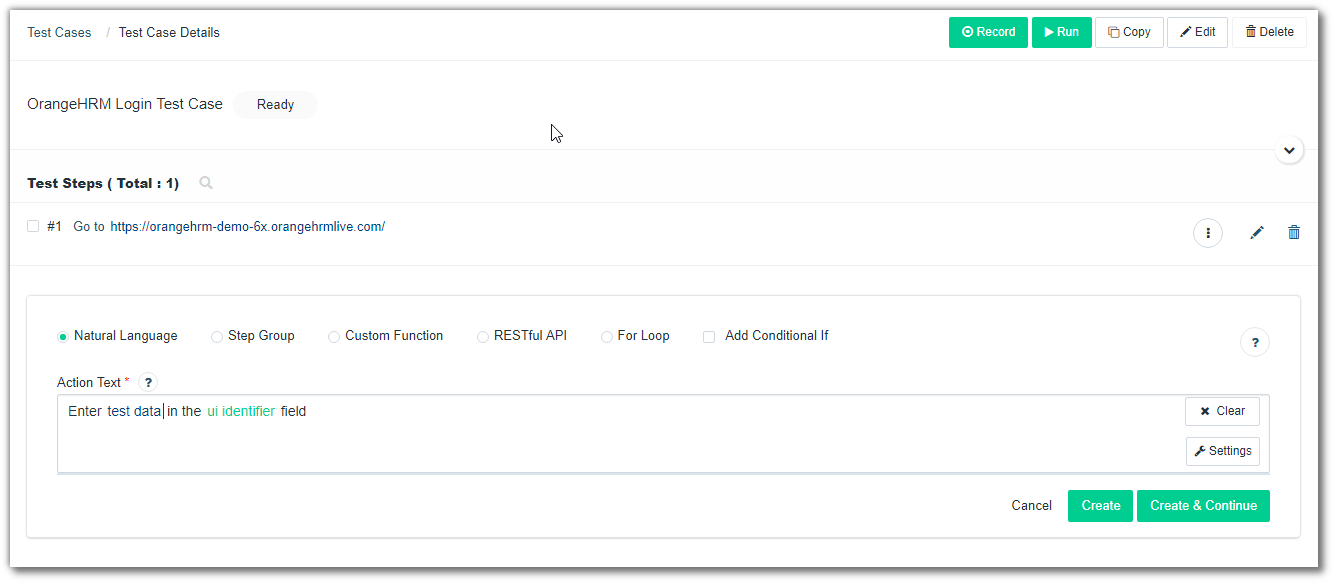
Double click on test data and type "admin" to change the test data.
Double click on the UI identifier and type "username" to change the UI Identifier name.

Here, we have changed the name of UI Identifier to "username." The UI Identifier username is used to identify the actual Username field in the page.
When we create this step, an empty UI Identifier, username will be created. Once the application is developed, we can update the UI Identifier username with the correct attribute values to locate the Username element on the web page.
Now click on Create and Continue button to create this Step and move onto the next step.
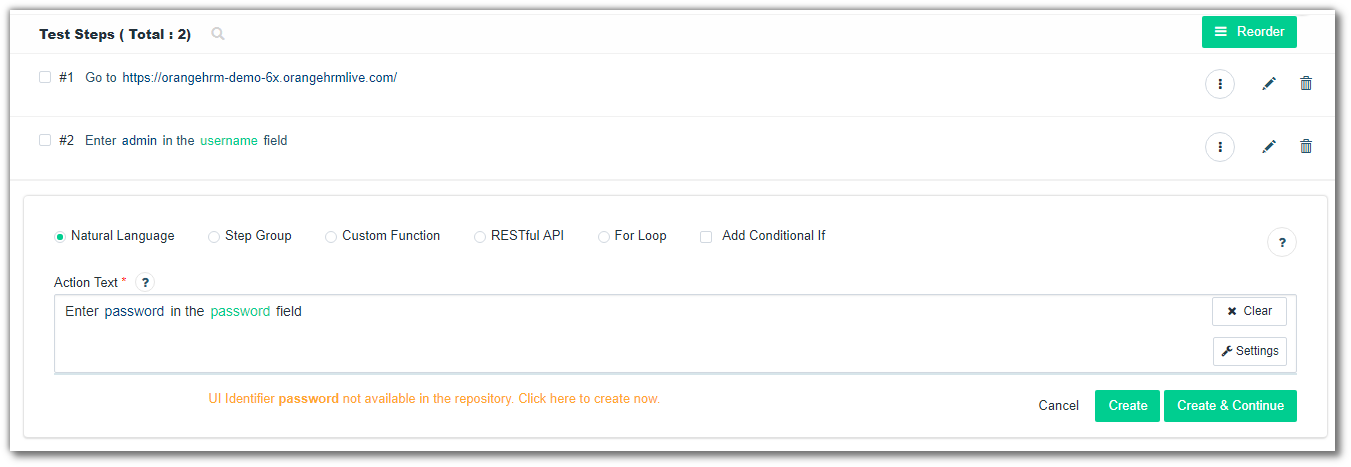
3. Enter the Password "admin" in the Password Field
Follow the same steps as in Step 2 to create this step. In addition to that, modify the test data as "admin" and UI identifier name as "password" and click Create and Continue.
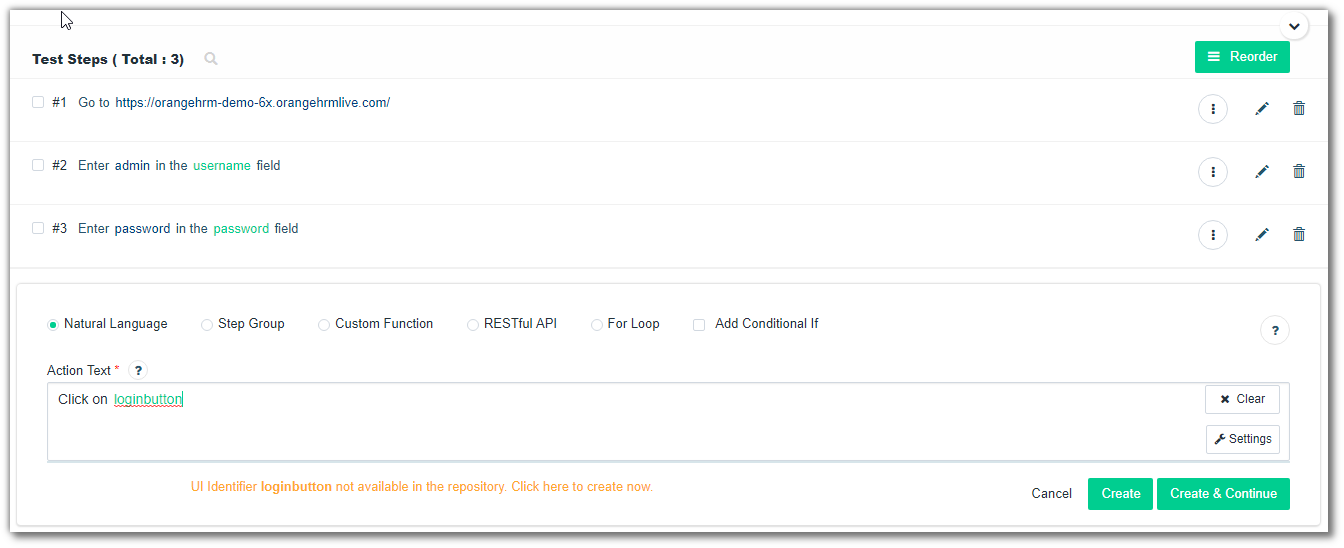
4. Click on the LOGIN Button
The process is similar to the second and third steps except that we don’t have any test data in this step. Modify the UI Identifier name as "loginbutton" and click on Create and Continue.
5. Verify Successful Login
The final step is to verify that clicking on "loginbutton" has resulted in a successful login and we have reached the Dashboard page, as shown below:
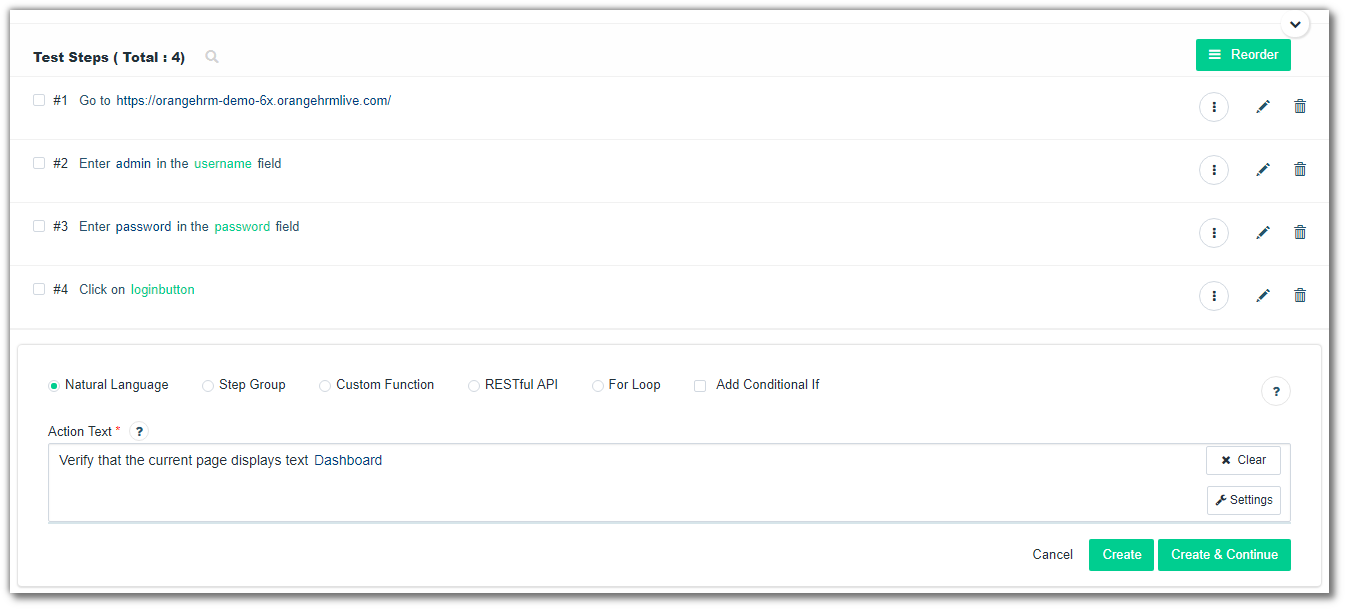
Type "verify" in the Action text box and select the NLP statement Verify that the current page displays text test data. After that, modify the test data as "Dashboard" and click on Create.
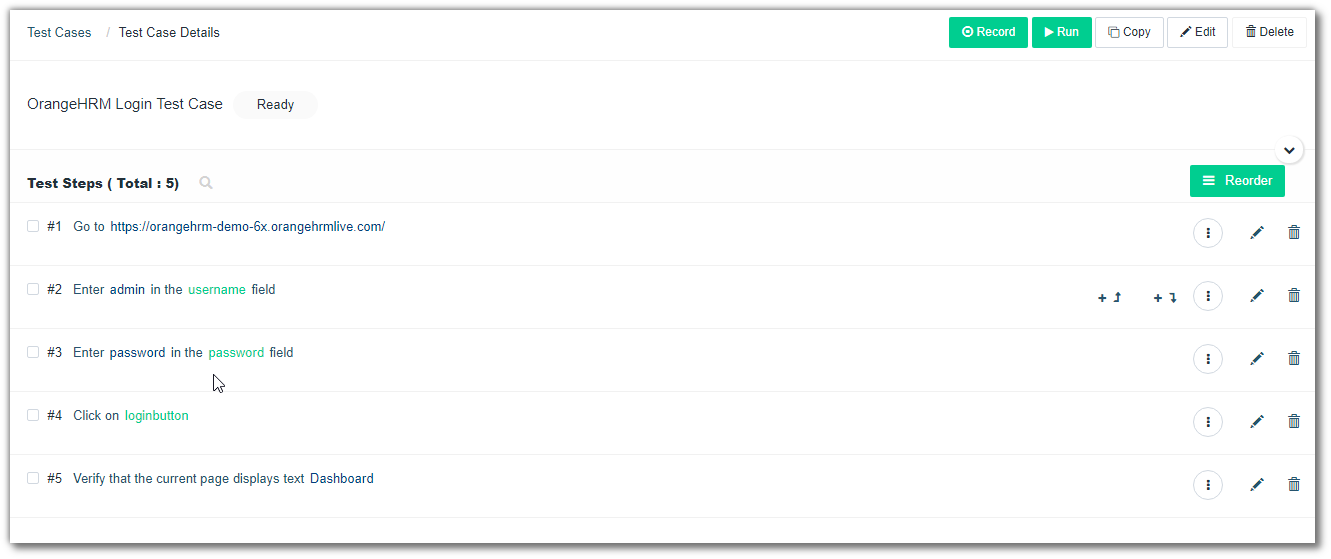
And our automated test case is complete!
Updating UI Identifiers After Development
If you have carefully observed the test, you will notice that the values for UI Identifiers — username, password, and loginbutton — are not filled yet because the application is still in development.
The test case is complete except for the values of the UI Identifiers we just mentioned.
Once the application is developed, we can come back to the test case and edit the UI Identifiers to fill the Element locators with the help of Testsigma Chrome Recorder or with the Element locators(ID locators) provided by the development team.
For example, let’s assume that your application development is now complete and we can update the UI Identifiers. In this case, we need to update the UI Identifier "username" in Step #2, "password" in step #3, and "loginbutton" in step #4.
First, let’s update "username":

Click on the Update (1) button for Step #2.
Click on the UI Identifier name (2) to update the UI Identifier. The Update UI Identifier page opens up as shown below:
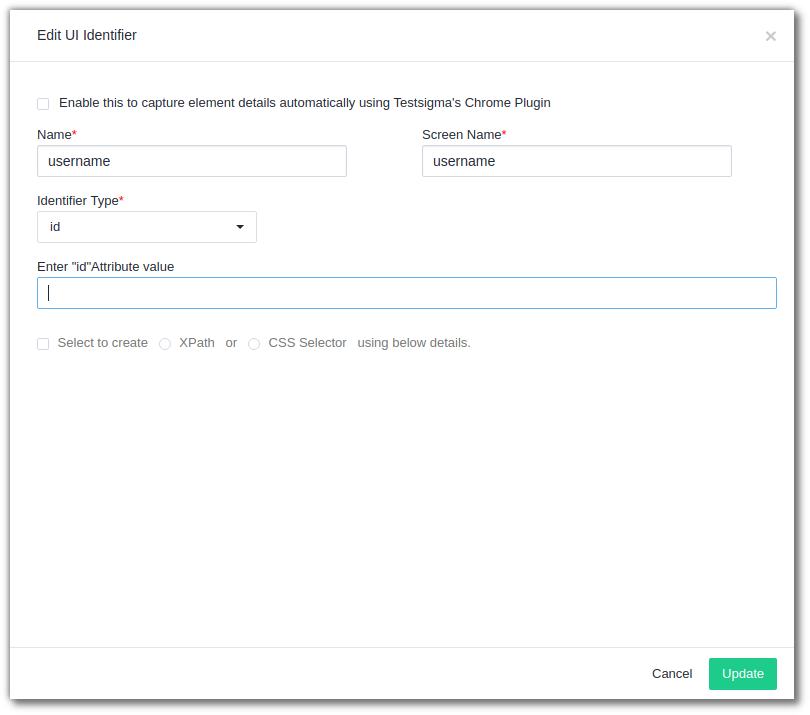
Select the appropriate Identifier type, enter the Element locator value there, and click on Update. Else, simply use the Testsigma Chrome Recorder to inspect the Elements from the Application.
Follow the same steps for the other UI Identifiers (password and loginbutton) to update them with valid Element locators.
Once this information is filled, your test is 100% ready to execute right from the first build.
This way, your tests can be completed within the sprint, and by the end of the cycle, all the planned tests can be automated.
Opinions expressed by DZone contributors are their own.

Comments