Implementing DDoS With MuleSoft: Demonstration With Apache JMeter
Join the DZone community and get the full member experience.
Join For FreeDDoS (Distributed Denial Of Service)
A Distributed Denial-of-Service (DDoS) is any type of attack where the attackers attempt to prevent legitimate users from accessing the service. In a DDoS attack, the attacker usually sends excessive messages asking the network or server to authenticate requests that have invalid return addresses.
How to Prevent DDoS Attacks
There are different ways we can prevent DDoS attacks; we can do IP blacklisting to avoid traffic from sources of attack, rate limit your application to prevent it from being overwhelmed, or use both of them to provide multiple layers of security.
Here, we will see Rate limiting with SLA way of doing it.
You may also like: Everything You Need to Know about DDOS: What Is a DDOS Attack?
Rate Limiting With SLA
Rate Limiting policies based on Service Level Access (SLA) are client ID-based policies that use the client ID as a reference to impose limits on the number of requests that each application can make within a period of time.
To implement Rate Limiting with SLA in Mulesoft and then test with JMeter you need the following prerequisites:
- Create an API and deploy it to Runtime Manager.
- Apache JMeter to test the policy.
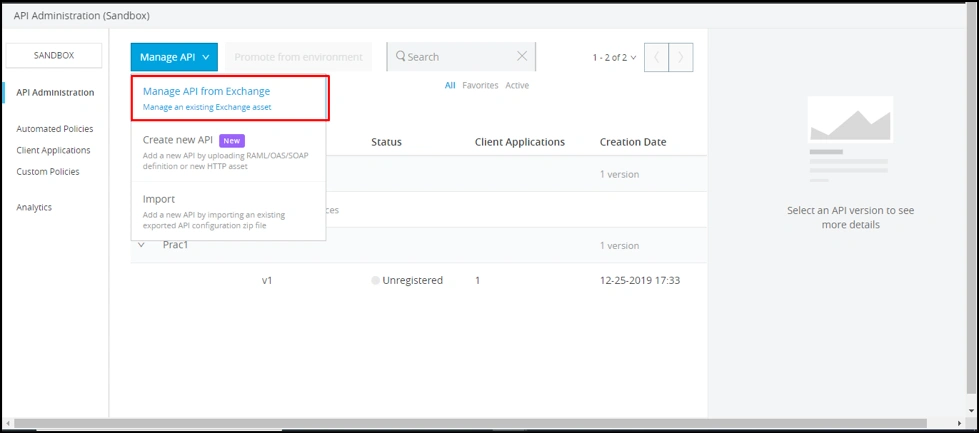
Let's see how to implement Rate Limiting with SLA in MuleSoft. Let’s create an API proxy from the API manager for our existing application called, “demo”.

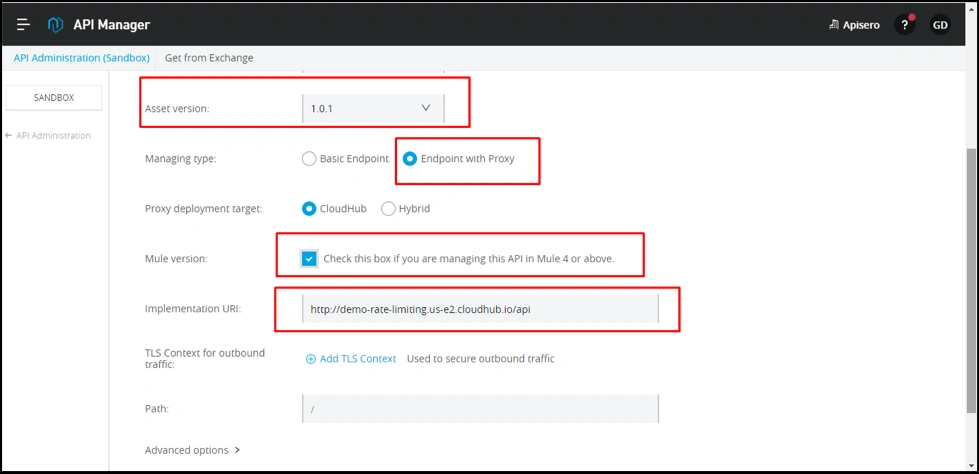
Provide Implementation URL, which will be base URI for our application, “demo”.
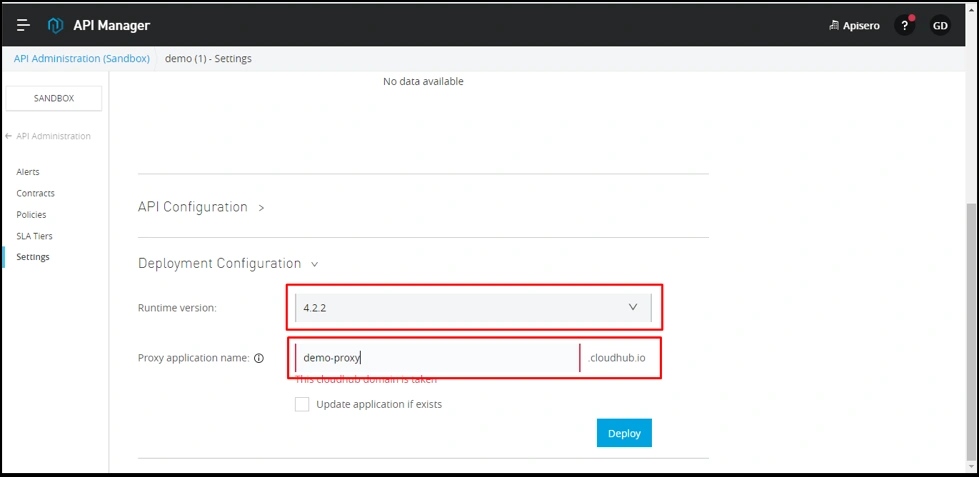
Now, let’s deploy the API proxy to the Runtime Manager.
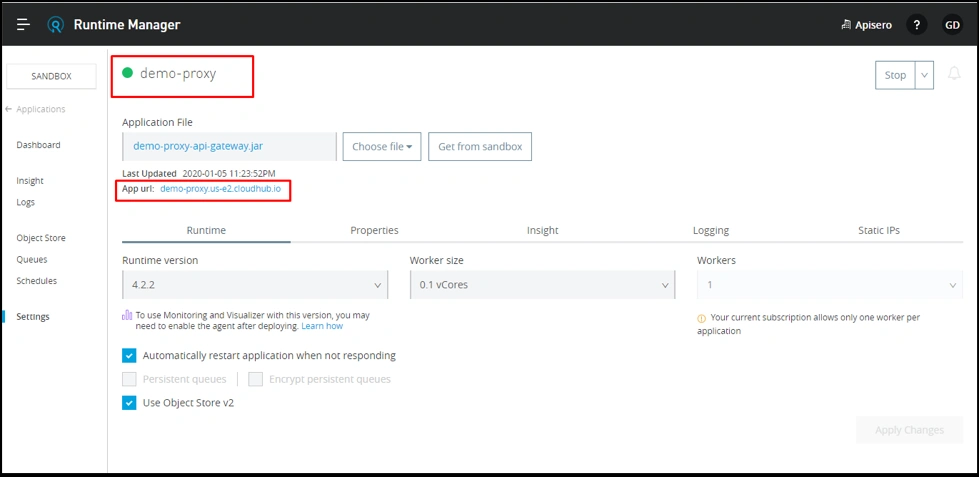
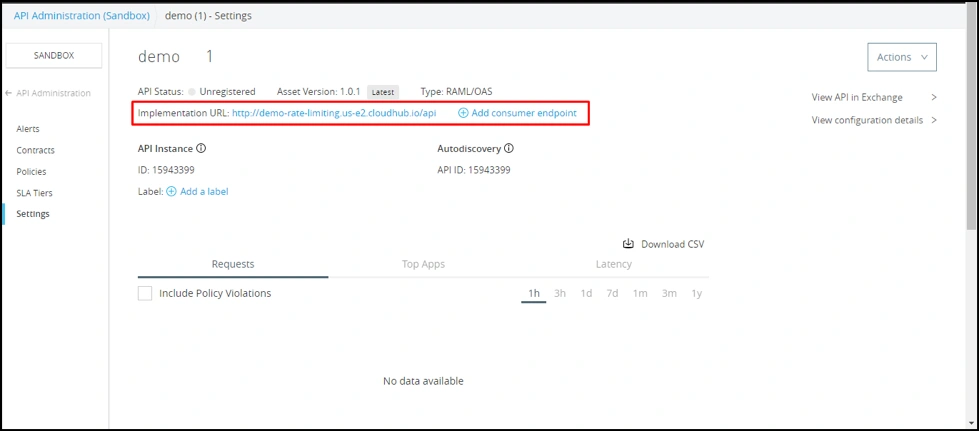
Now, once we have created the proxy and deployed to Runtime, we get an APP URL for proxy, which we need to update as consumer endpoint in API settings.
This consumer endpoint is what we are going to use for further invocation of our API instead of using applications Cloudhub URL.

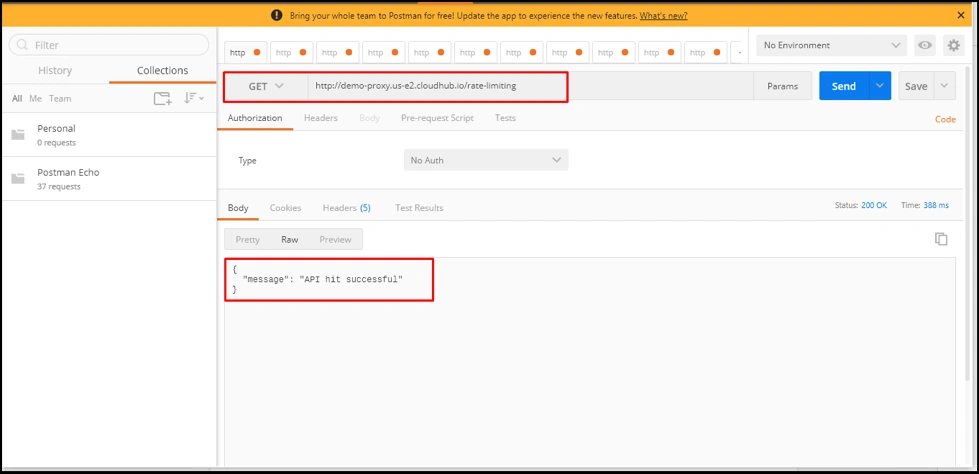
Let’s test the application without any policies.
As you can see, we are able to hit the application via our API proxy.
For applying the Rate Limiting policy with SLA, which will help prevent DDOS attacks, we need to first create SLAs.
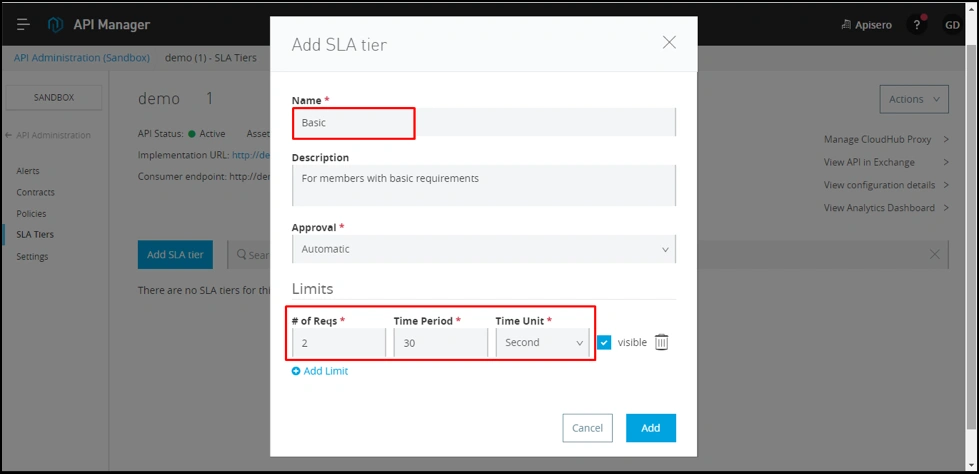
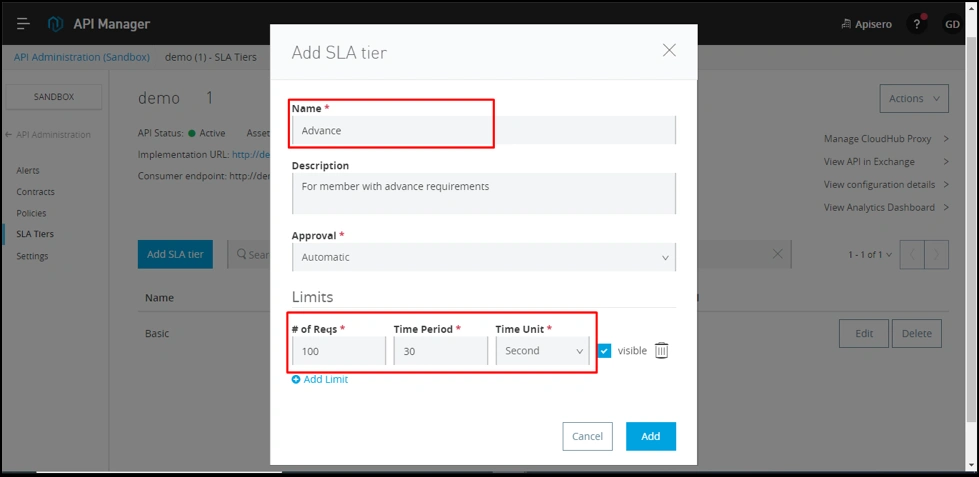
So, let’s create two SLA tiers, as shown below:
- Basic:
- Number of requests: 2.
- Time period: 30.
- Time unit: seconds.
- Advance:
- Number of requests: 100.
- Time period: 30.
- Time unit: seconds.
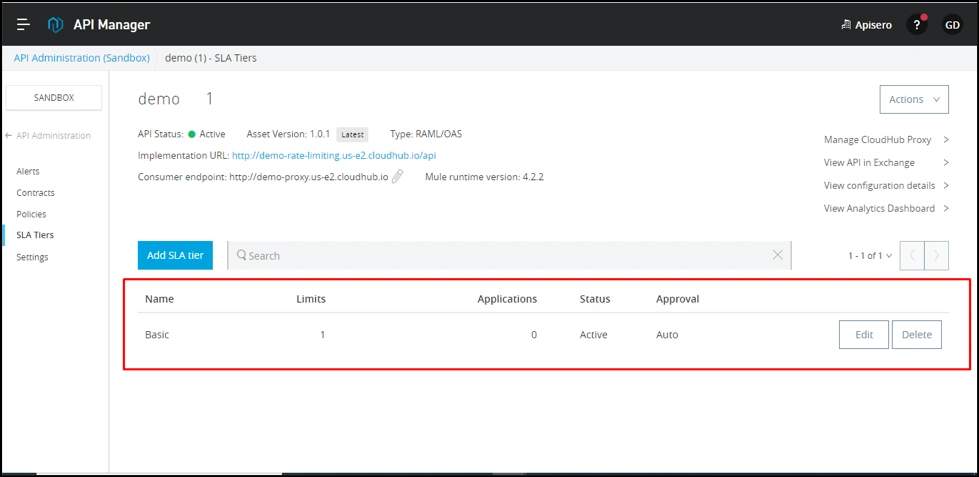
In API Manager, under SLA Tiers, click on the button, Add SLA Tiers to add SLAs.
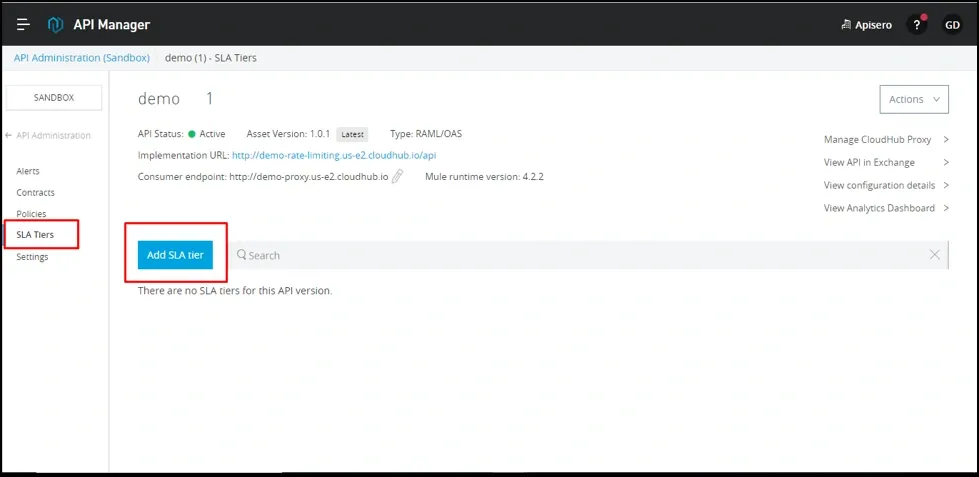
Create “Basic SLA Tier”.
Create “Advance SLA Tier":
So, now we have 2 SLA tiers. Let's now create an SLA-based Rate Limiting policy.

After selecting the version, click on Configure policy.
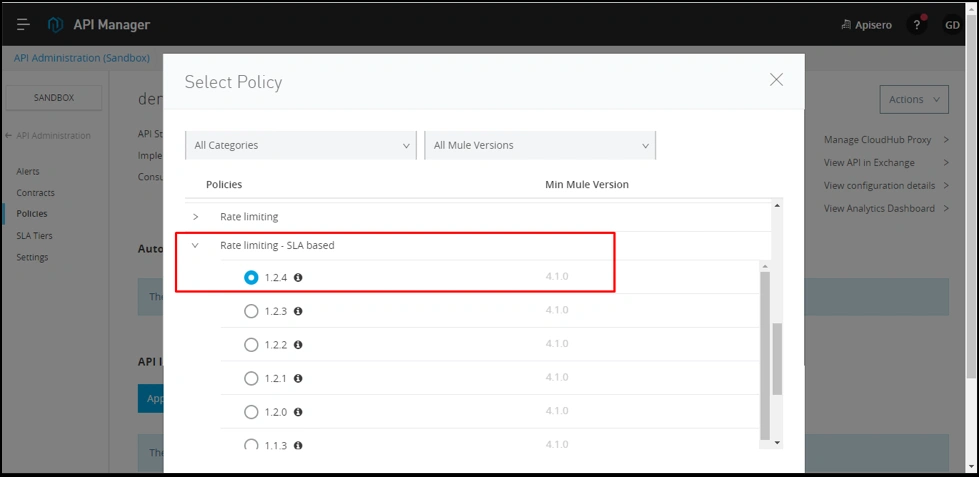
Click on apply with default configuration.
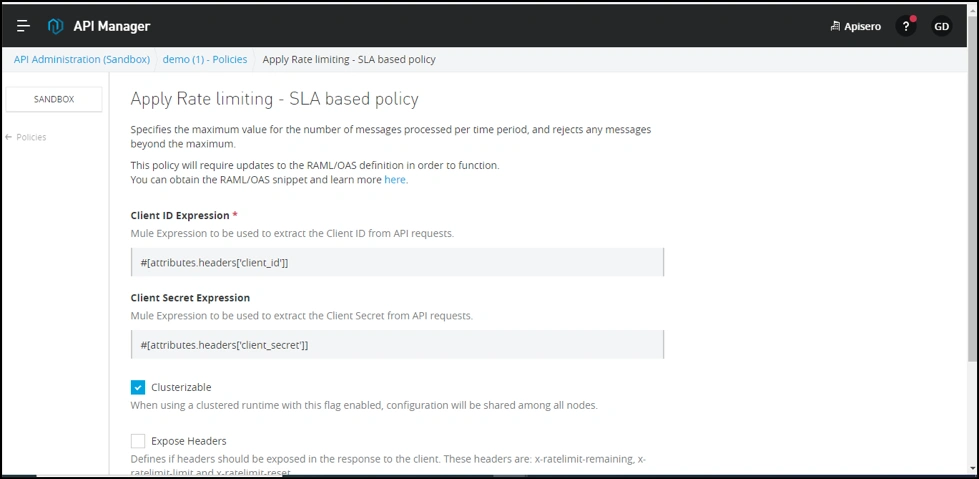
Now, you can see Rate limiting - SLA based policy in API level policies.
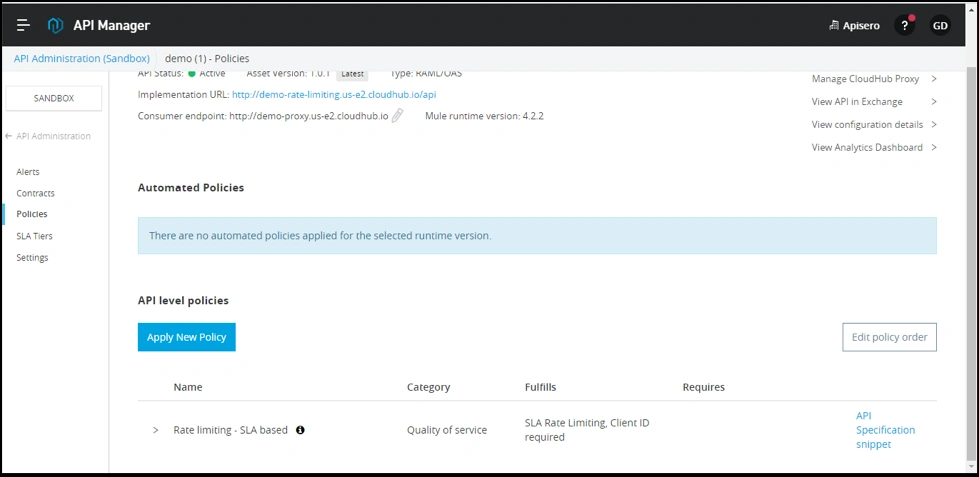
Now, to test this policy, we're required to create two applications, one each for each SLA tier.
Go to Exchange, open asset “demo”, and request for access with the SLA tier selected as “Basic”.
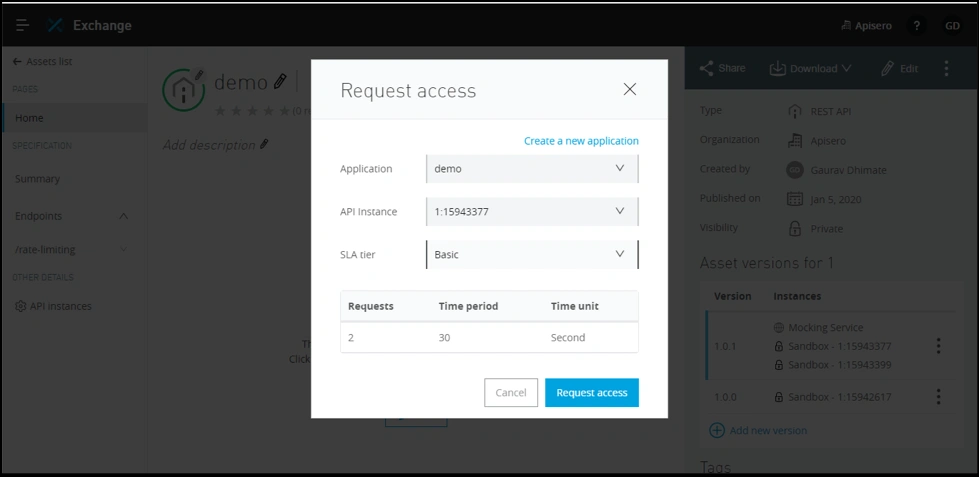
After requesting access, you will get a client_id and client_secret. Store them in your notepad for future use.
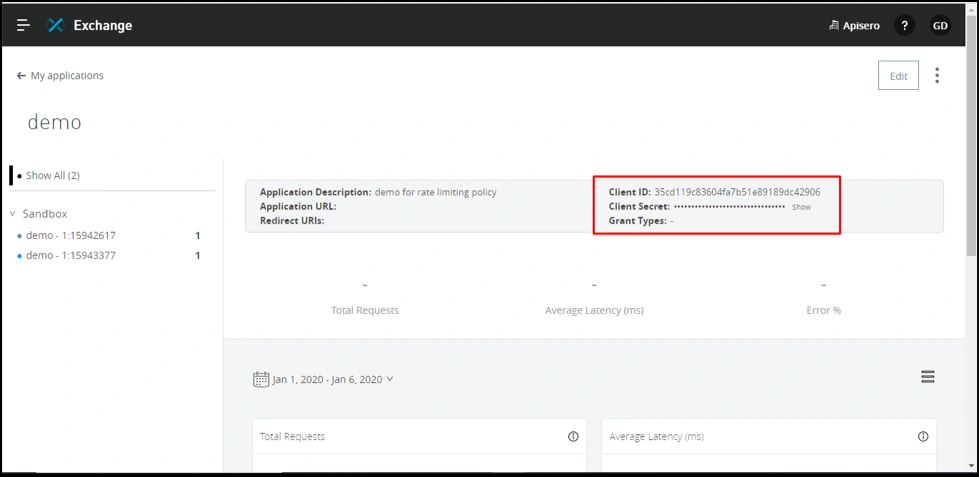
Let’s do the same for the Advance SLA tier. This time you will need to create a new application.
So, let's create an application “demo-advance” for the Advance SLA tier.
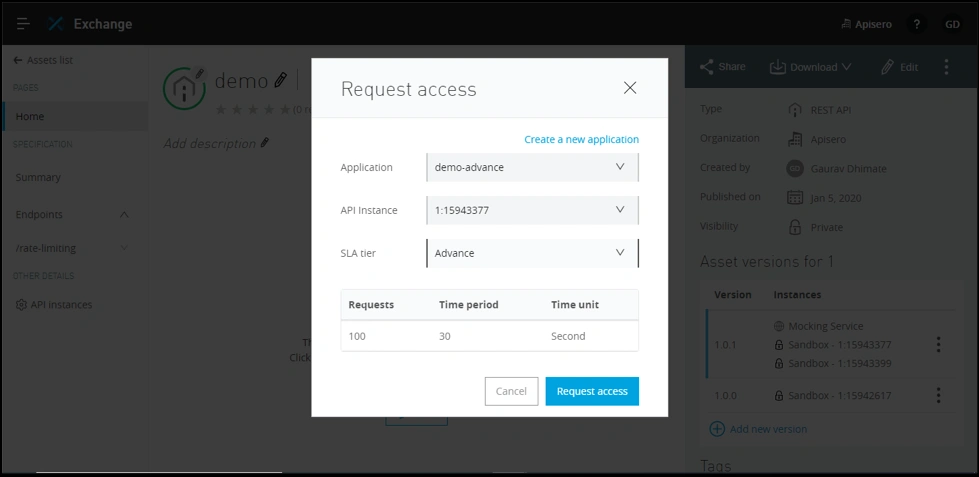
After requesting access, we will get another set of client_id and client_secret, which we will store in Notepad.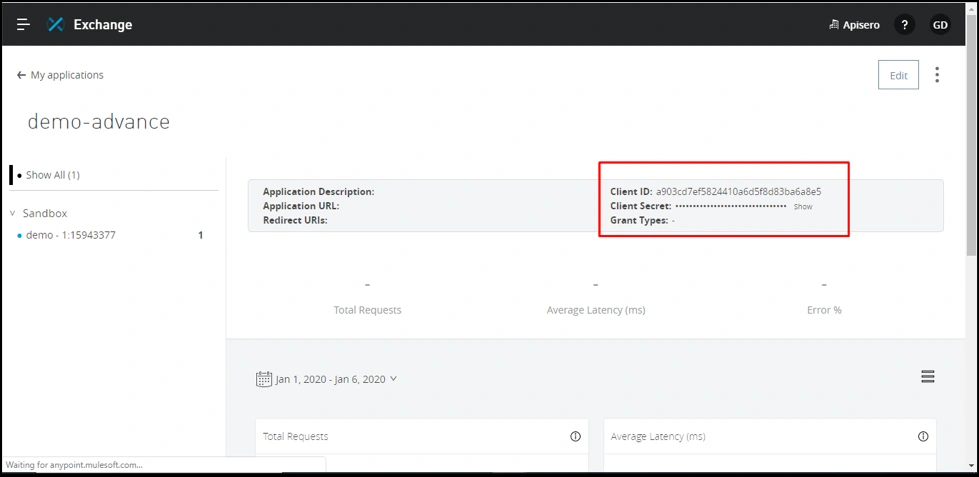
Testing With JMeter
Now, we are ready to test whether our policy is working or not. We will be testing using JMeter, which you can download from https://jmeter.apache.org/download_jmeter.cgi.
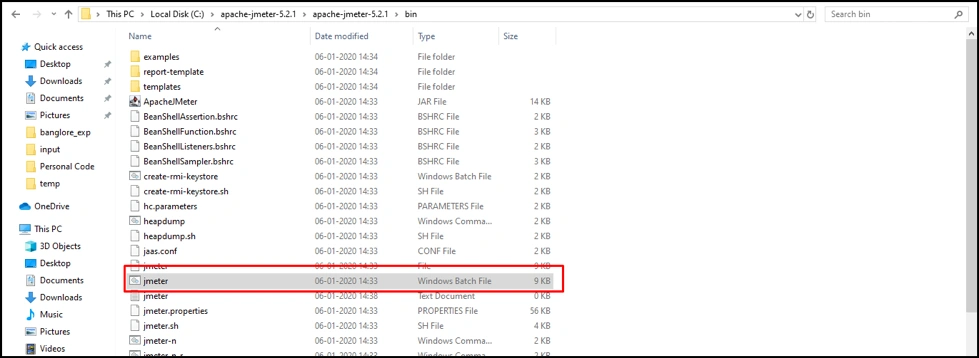
After downloading, unzip into the preferred location on drive and go to the \bin folder.
Double click on jmeter.bat for windows
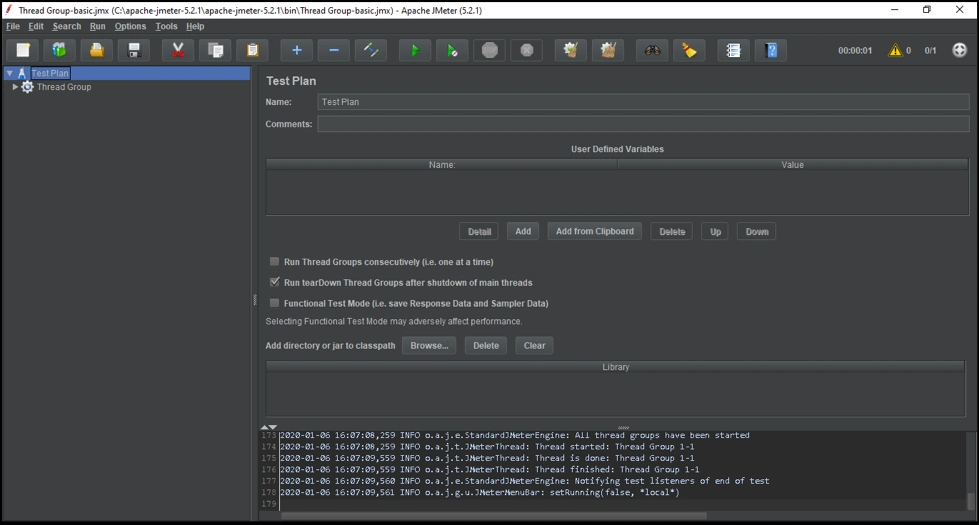
You will see an empty Test plan. Test Plan is where actual tests are kept.
Testing Basic SLA tier
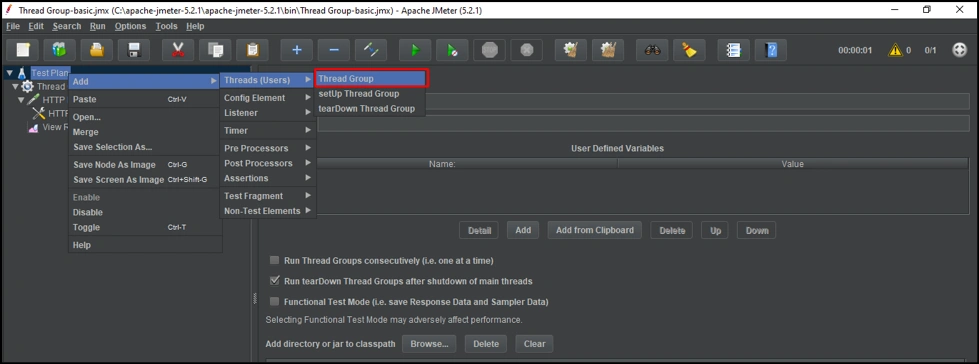
Let's create a ThreadGroup under TestPlan, which is where we define all threads and related properties for our execution.
The previously defined Basic SLA tier has the following config:
No of requests: 2.
Time period: 30.
Time unit: seconds.
So, let’s configure the ThreadGroup for the Basic tier.
Under Thread properties:
Number of Threads (Users): This property defines how many threads/users can be used to execute this test, so for our current scenario I have kept it as 1.
Ramp-up period(seconds): This is the time taken by JMeter to start all the threads. Keep it as 0.
Loop-count: This count specifies the number of times you want to execute the test; for our scenario, since we have a limit of two requests per 30 seconds, let's keep this value at three.
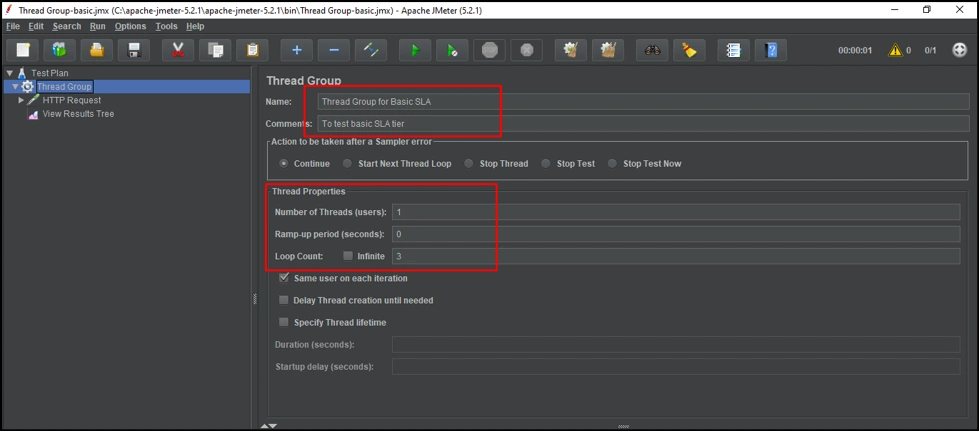
Now that our Thread configuration is complete, let's define the HTTP endpoint that we want to hit.
To define the HTTP endpoint, we have to create an HTTP request under our ThreadGroup that we created in the previous step.
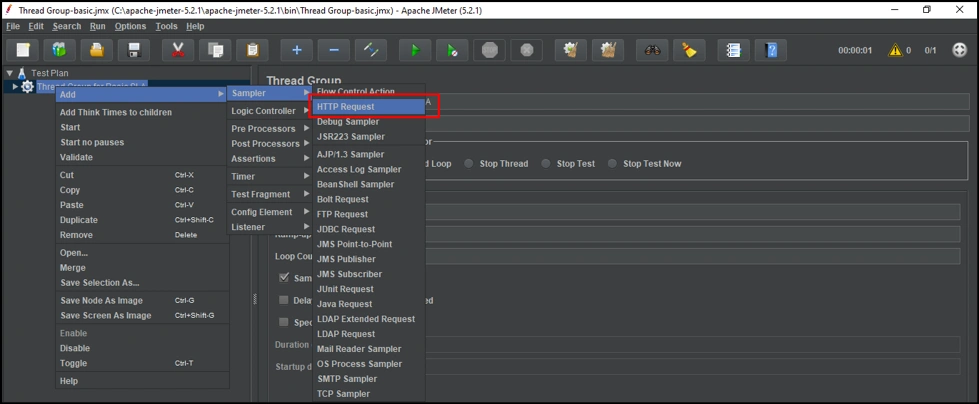
Once our HTTP request is created, we configure it as shown below:
Protocol: HTTP.
ServerName or IP: demo-proxy.us-e2.cloudhub.io (which is our proxy applications URL).
Method: Get.
Path: /rate-limiting (our API’s endpoint).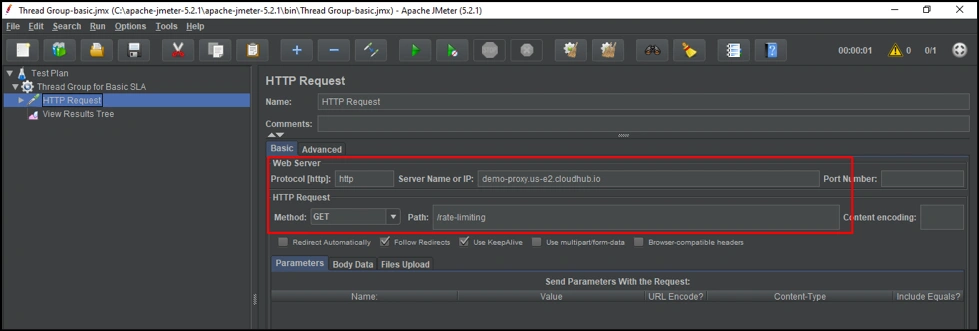
To use an SLA-based policy, we need to provide a client_id and client_secret, which goes into the header of an HTTP call. We can do this in the HTTP header manager.

Lets now add a client_id and client_secret in the header, as shown below: Adding client Id and secret
All the configuration has been done for us to run the tests now, but we want to see the result of executions for which we want to create listeners.
There are various different types of listeners provided by JMeter, which make the analysis of your test executions simple.
For our case, let's create a Results Tree, as shown below.
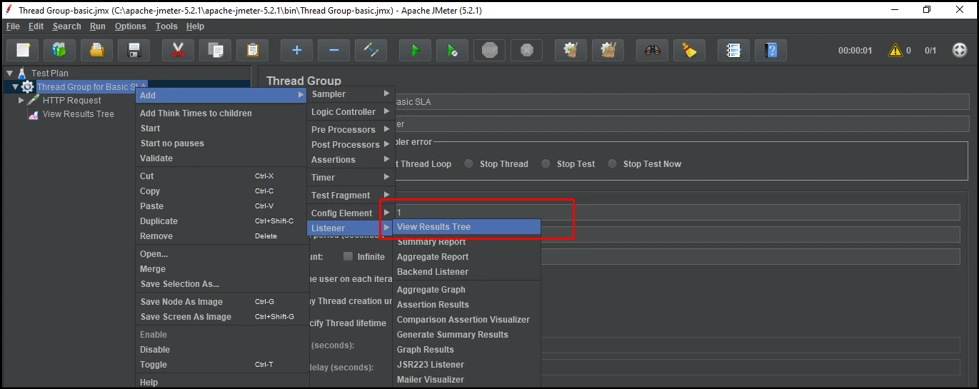
This will create an empty template, as shown below:
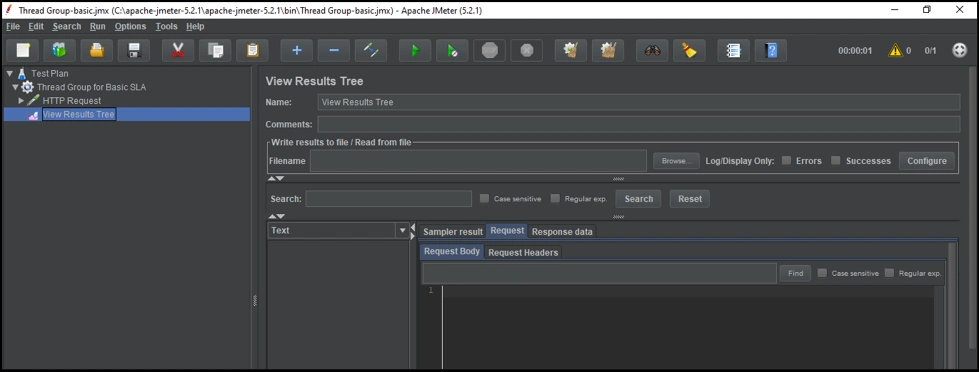
Now, we are ready for execution. We need to click on the green-colored arrow button for execution.
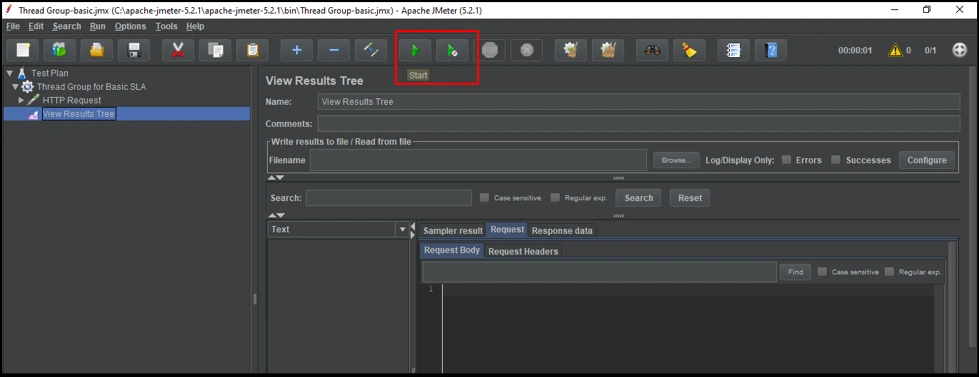
Let's execute it now:
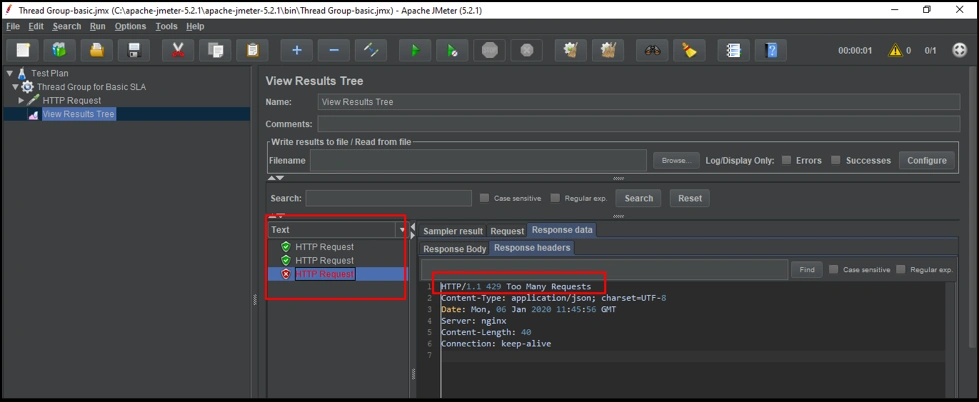
After executing, we can see that the test has run three times (left box), out of which the first and second were successful (in green). The third one failed (in red) due to this error: “HTTP/1.1 429 Too Many Requests”.
The third test failed, since in the Basic SLA tier, we have configured that a total of two requests are allowed over a period of 30 seconds. After this, all the requests will be rejected.
Testing Advance SLA tier
Let’s do the same testing for the Advance SLA tier.
The previously defined Advanced SLA tier now has the following config :
No of requests: 100.
Time period: 30.
Time unit: seconds.
So, let’s configure the ThreadGroup for the Basic tier.
Under Thread properties:
Number of Threads (Users): 3.
Ramp-up period(seconds): 0.
Loop-count: 101.
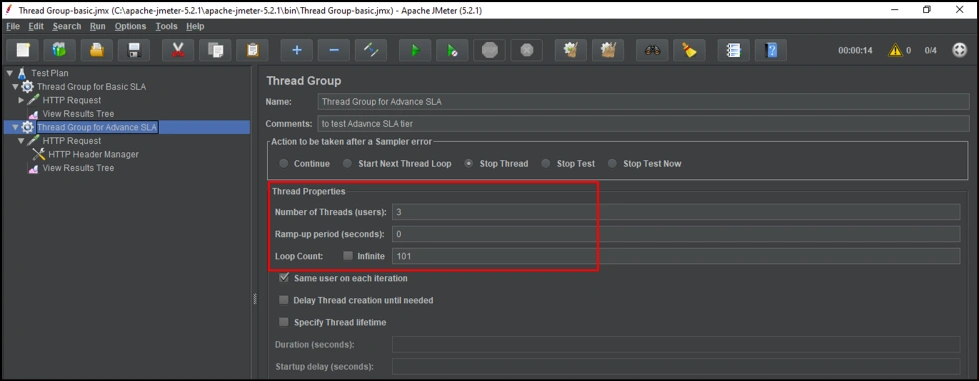
The only other thing we need to run this test plan is to change client_id and client_secret in the HTTP header Manager, which we created from the Advance SLA tier.

Let's run now run it.
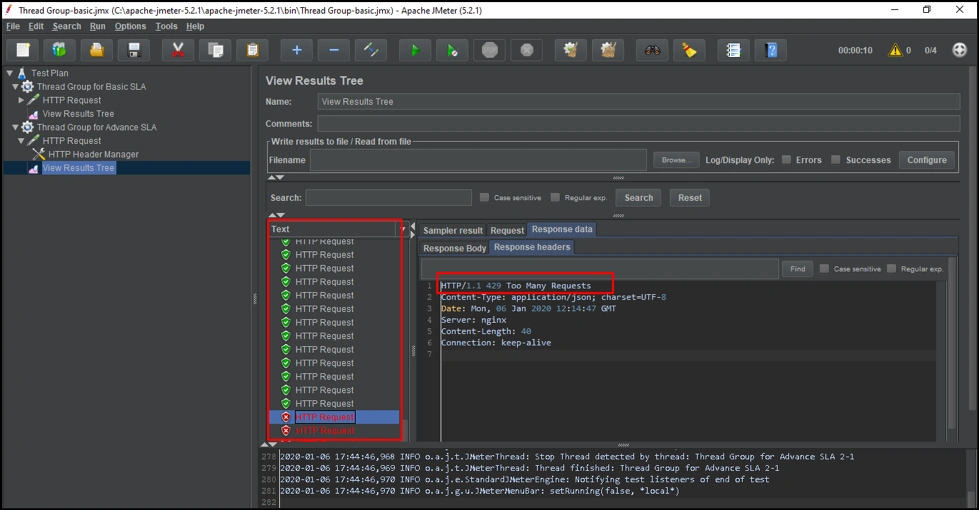
As you can see, after 100 requests, our calls failed due to the following error: “HTTP/1.1 429 Too Many Requests”
Conclusion
SLA-based Rate Limiting restricts the number of requests by users to your API, based on the configuration of an SLA tier, which in turn helps us in preventing attacks, such as DDoS.
Further Reading
Opinions expressed by DZone contributors are their own.

Comments