How to Use SingleStore With Spark ML for Fraud Detection
In this 3-part series of articles, we’ll see how easy it is to use the SingleStore Spark Connector and the performance benefits it provides.
Join the DZone community and get the full member experience.
Join For FreeAbstract
SingleStore is a database technology that can easily integrate with a wide range of big data tools and services. One such tool is Apache Spark™. In this 3-part series of articles, we’ll see how easy it is to use the SingleStore Spark Connector and the performance benefits it provides. We’ll also discuss a Credit Card Fraud Detection case study using actual data that we save into SingleStore, and then develop a Machine Learning model using Spark to determine if a Credit Card transaction is fraudulent or not.
The notebook files used in this article series are available on GitHub in DBC, HTML, and iPython formats
Introduction
Despite technological advances in the recent past, fraud still remains a problem today for many financial institutions worldwide. Having been the victim of credit card fraud on several occasions during the past few years, financial fraud is a problem close to my heart. In this article, we’ll work through an example of how we can store some credit card transaction data in SingleStore and use Spark’s Machine Learning capabilities to develop a Logistic Regression model to predict financial fraud. For ease of use, we’ll develop everything in the cloud using the SingleStore Managed Service and Databricks Community Edition (CE).
To begin with, we need to create a free Managed Service account on the SingleStore website and a free Community Edition (CE) account on the Databricks website. At the time of writing, the Managed Service account from SingleStore comes with $500 of Credits. This is more than adequate for the case study described in this article. For Databricks CE, we need to sign-up for the free account, rather than the trial version.
This is a 3-part article series and it is structured as follows:
- Configure Databricks CE.
- Load the Credit Card data into SingleStore.
- Create and evaluate a Logistic Regression model.
This first article covers Part 1, Configure Databricks CE.
Configure Databricks CE
First, we need to log in to our Databricks CE account.
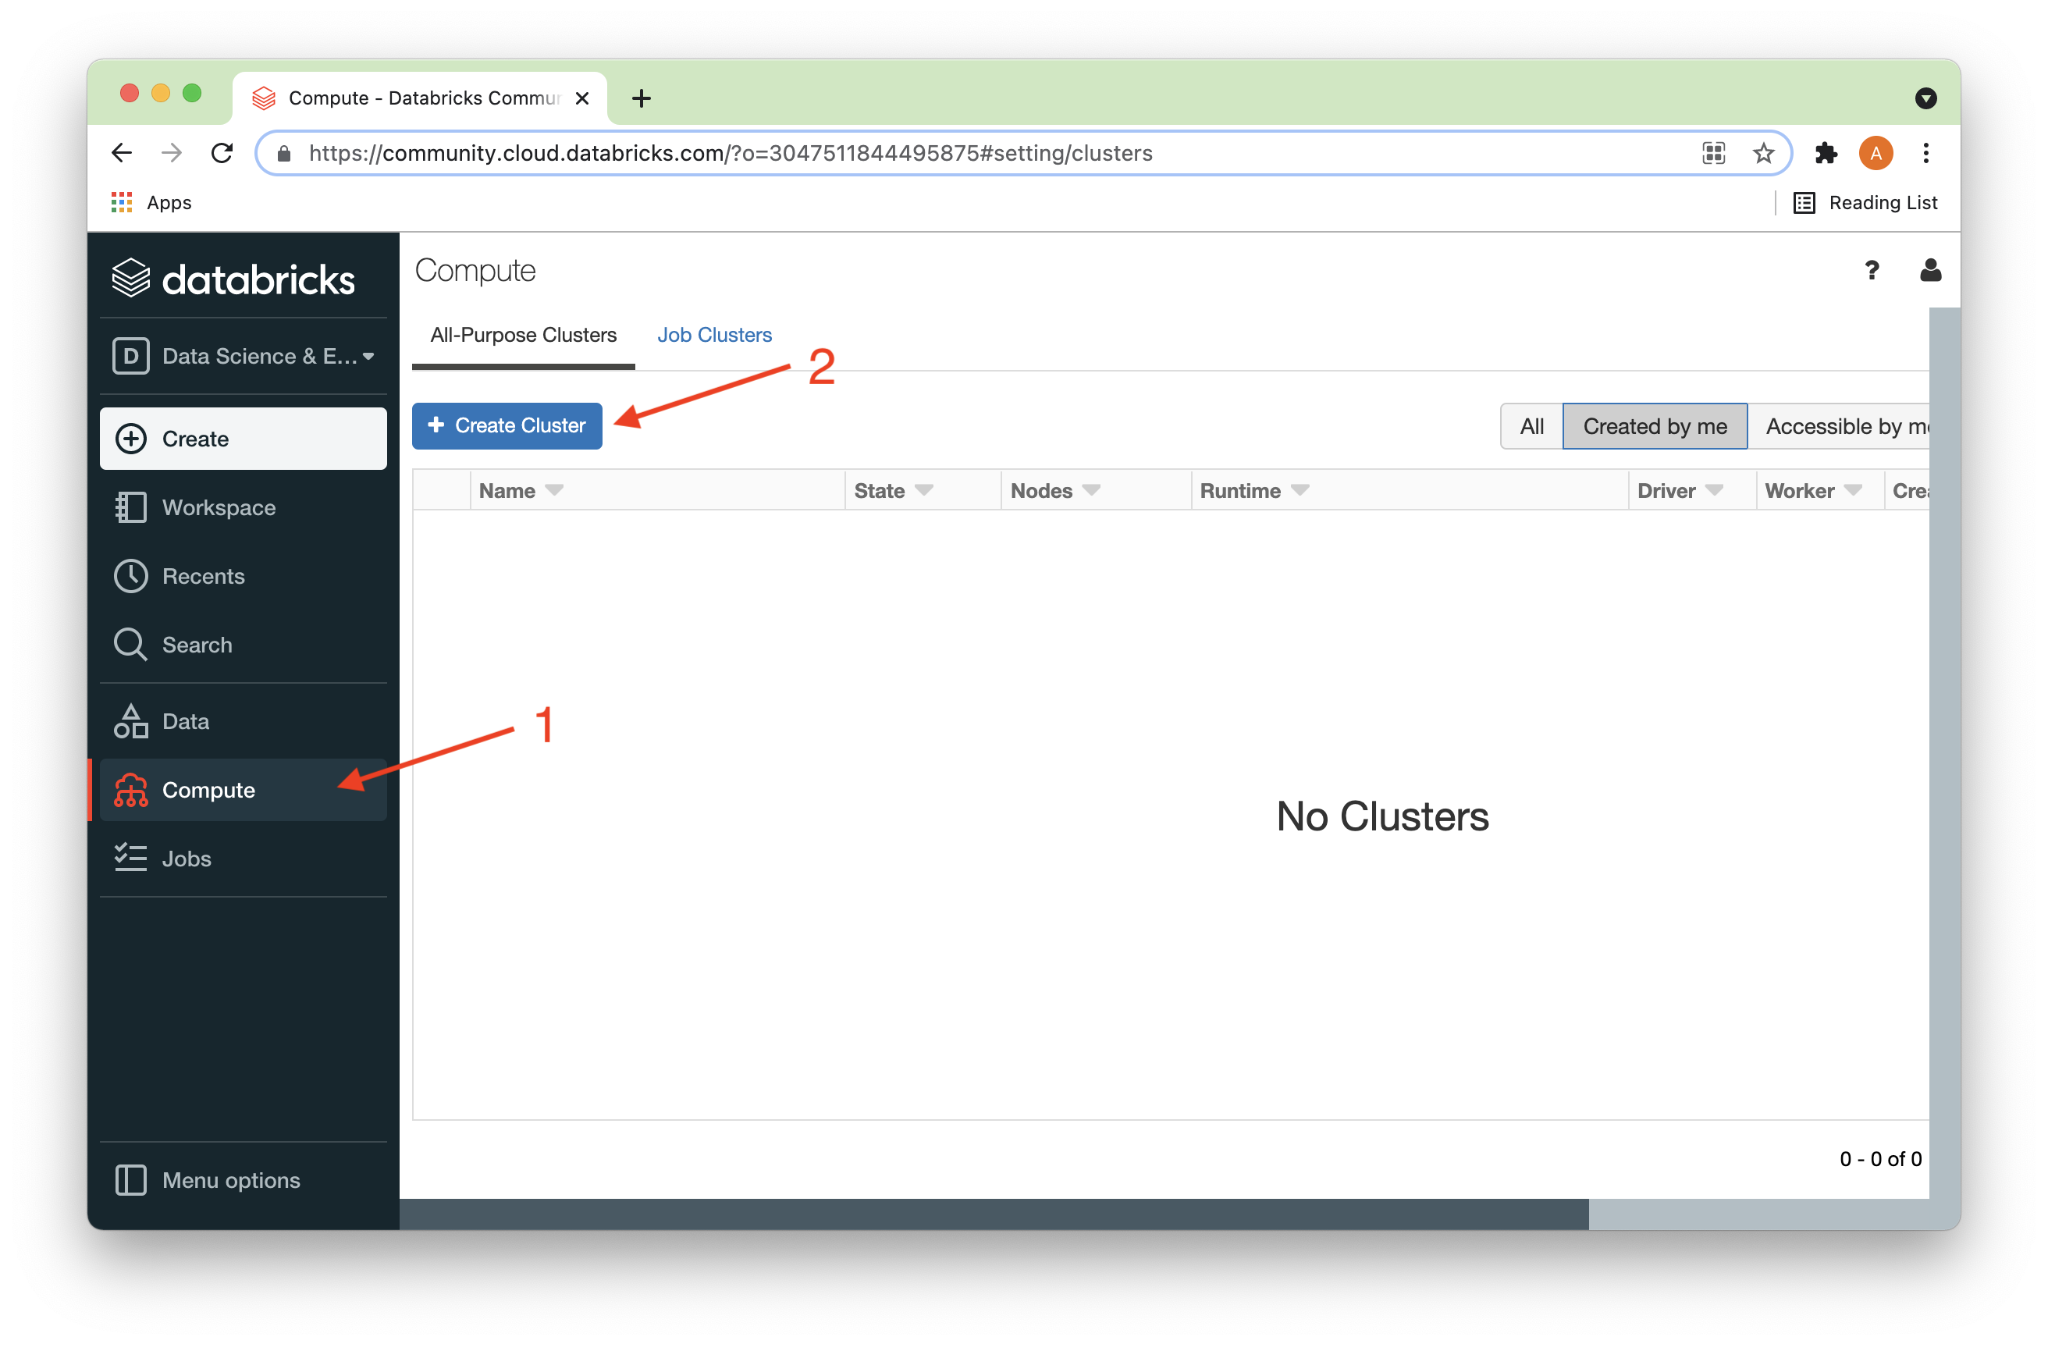
From the left navigation pane, we’ll select Compute (1) and then + Create Cluster (2) as shown in Figure 1 below.
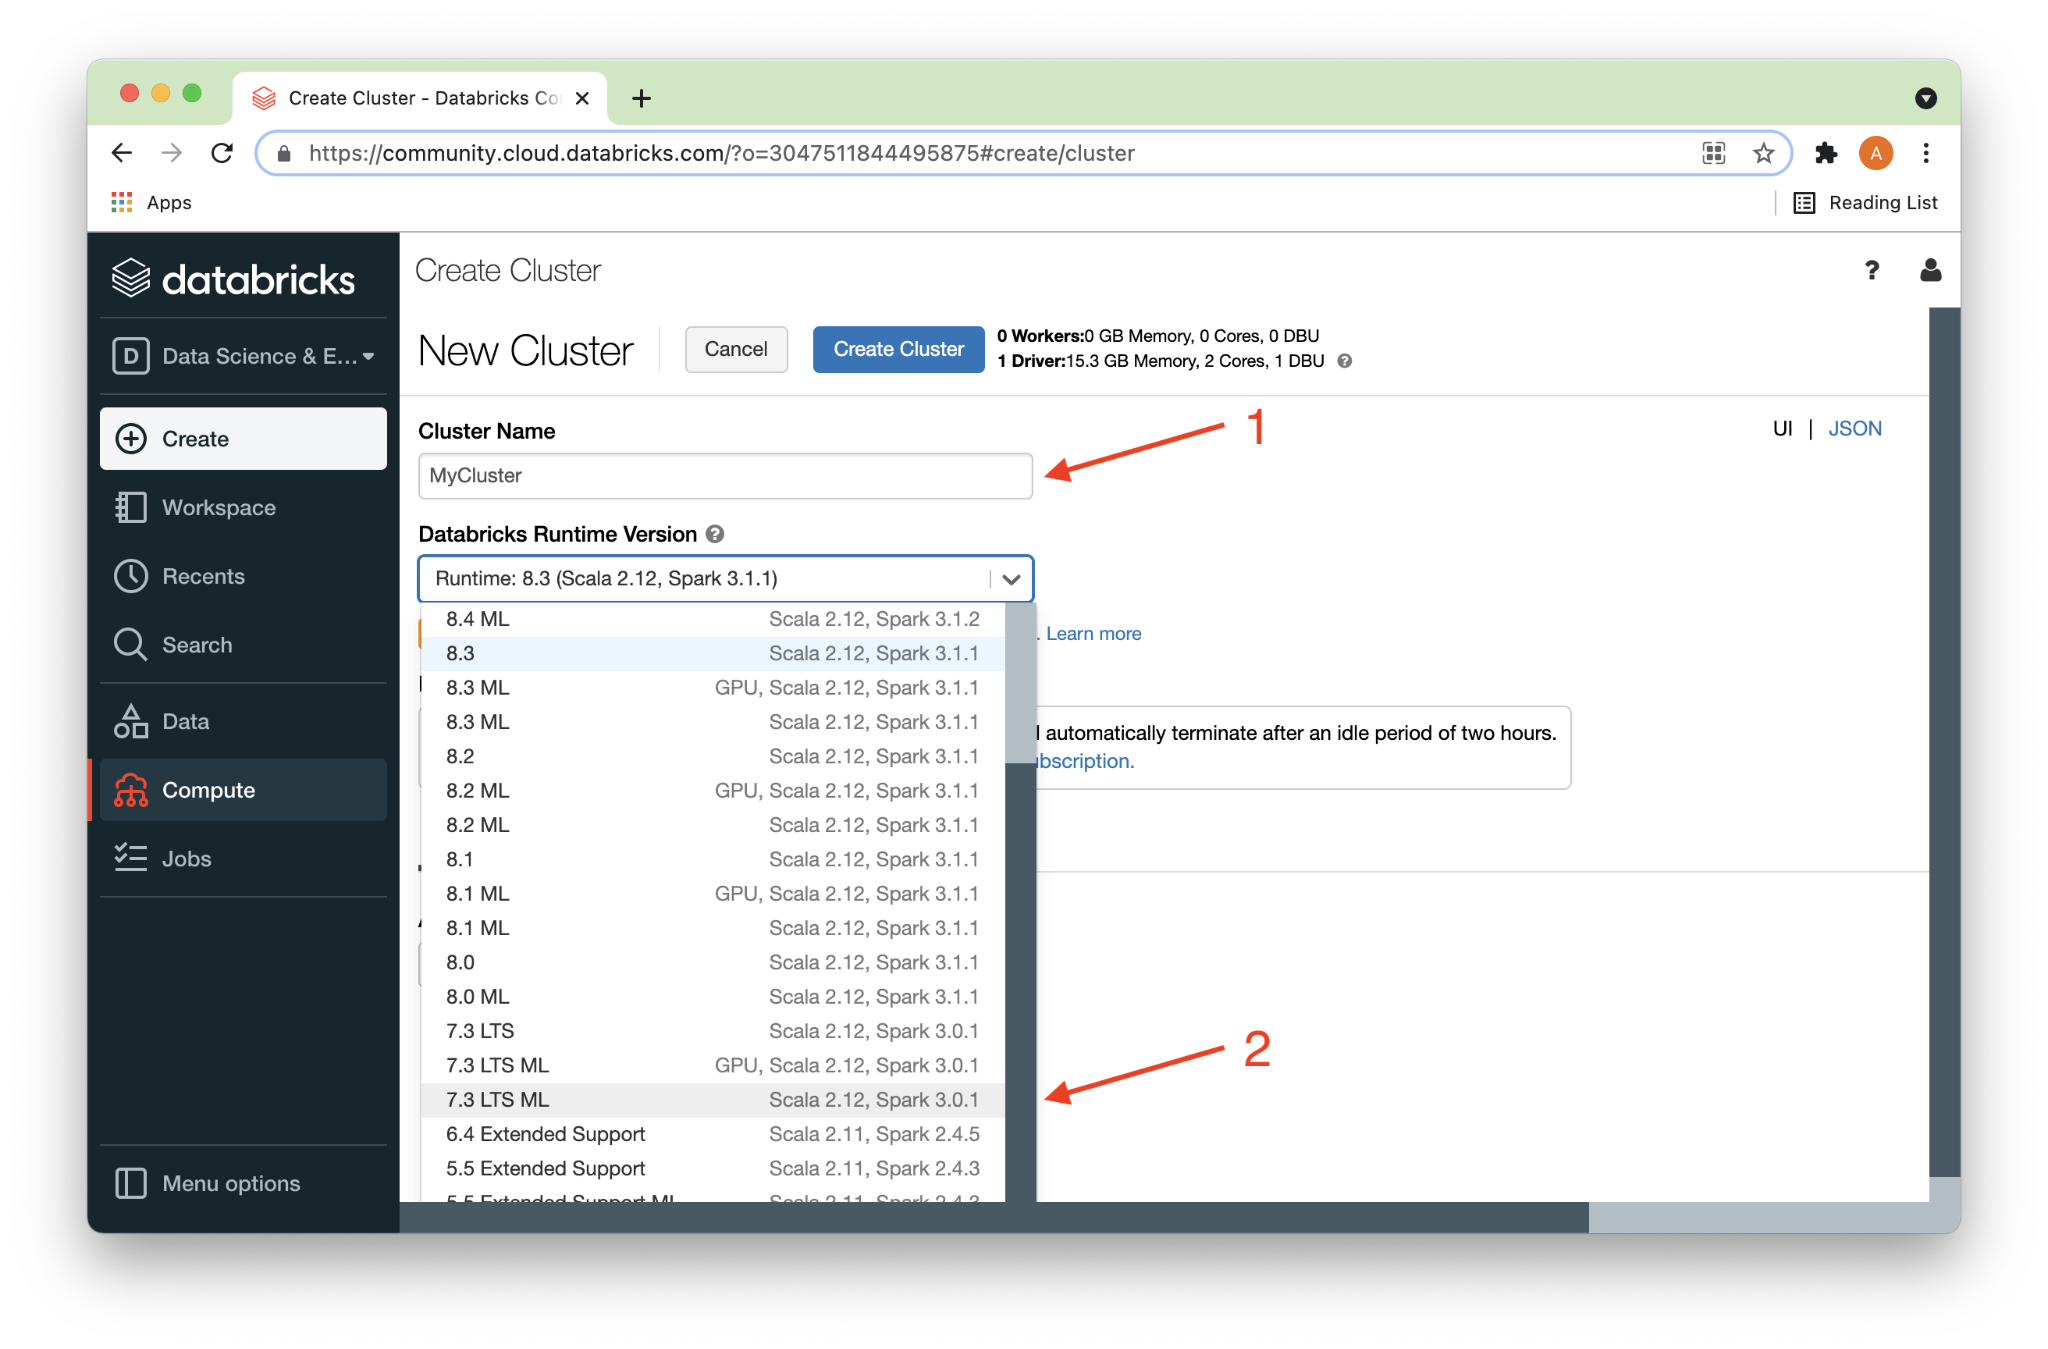
On the Create Cluster page, we’ll give the cluster a name (1) and select 7.3 LTS ML (2) for the Runtime Version, as shown in Figure 2 below.
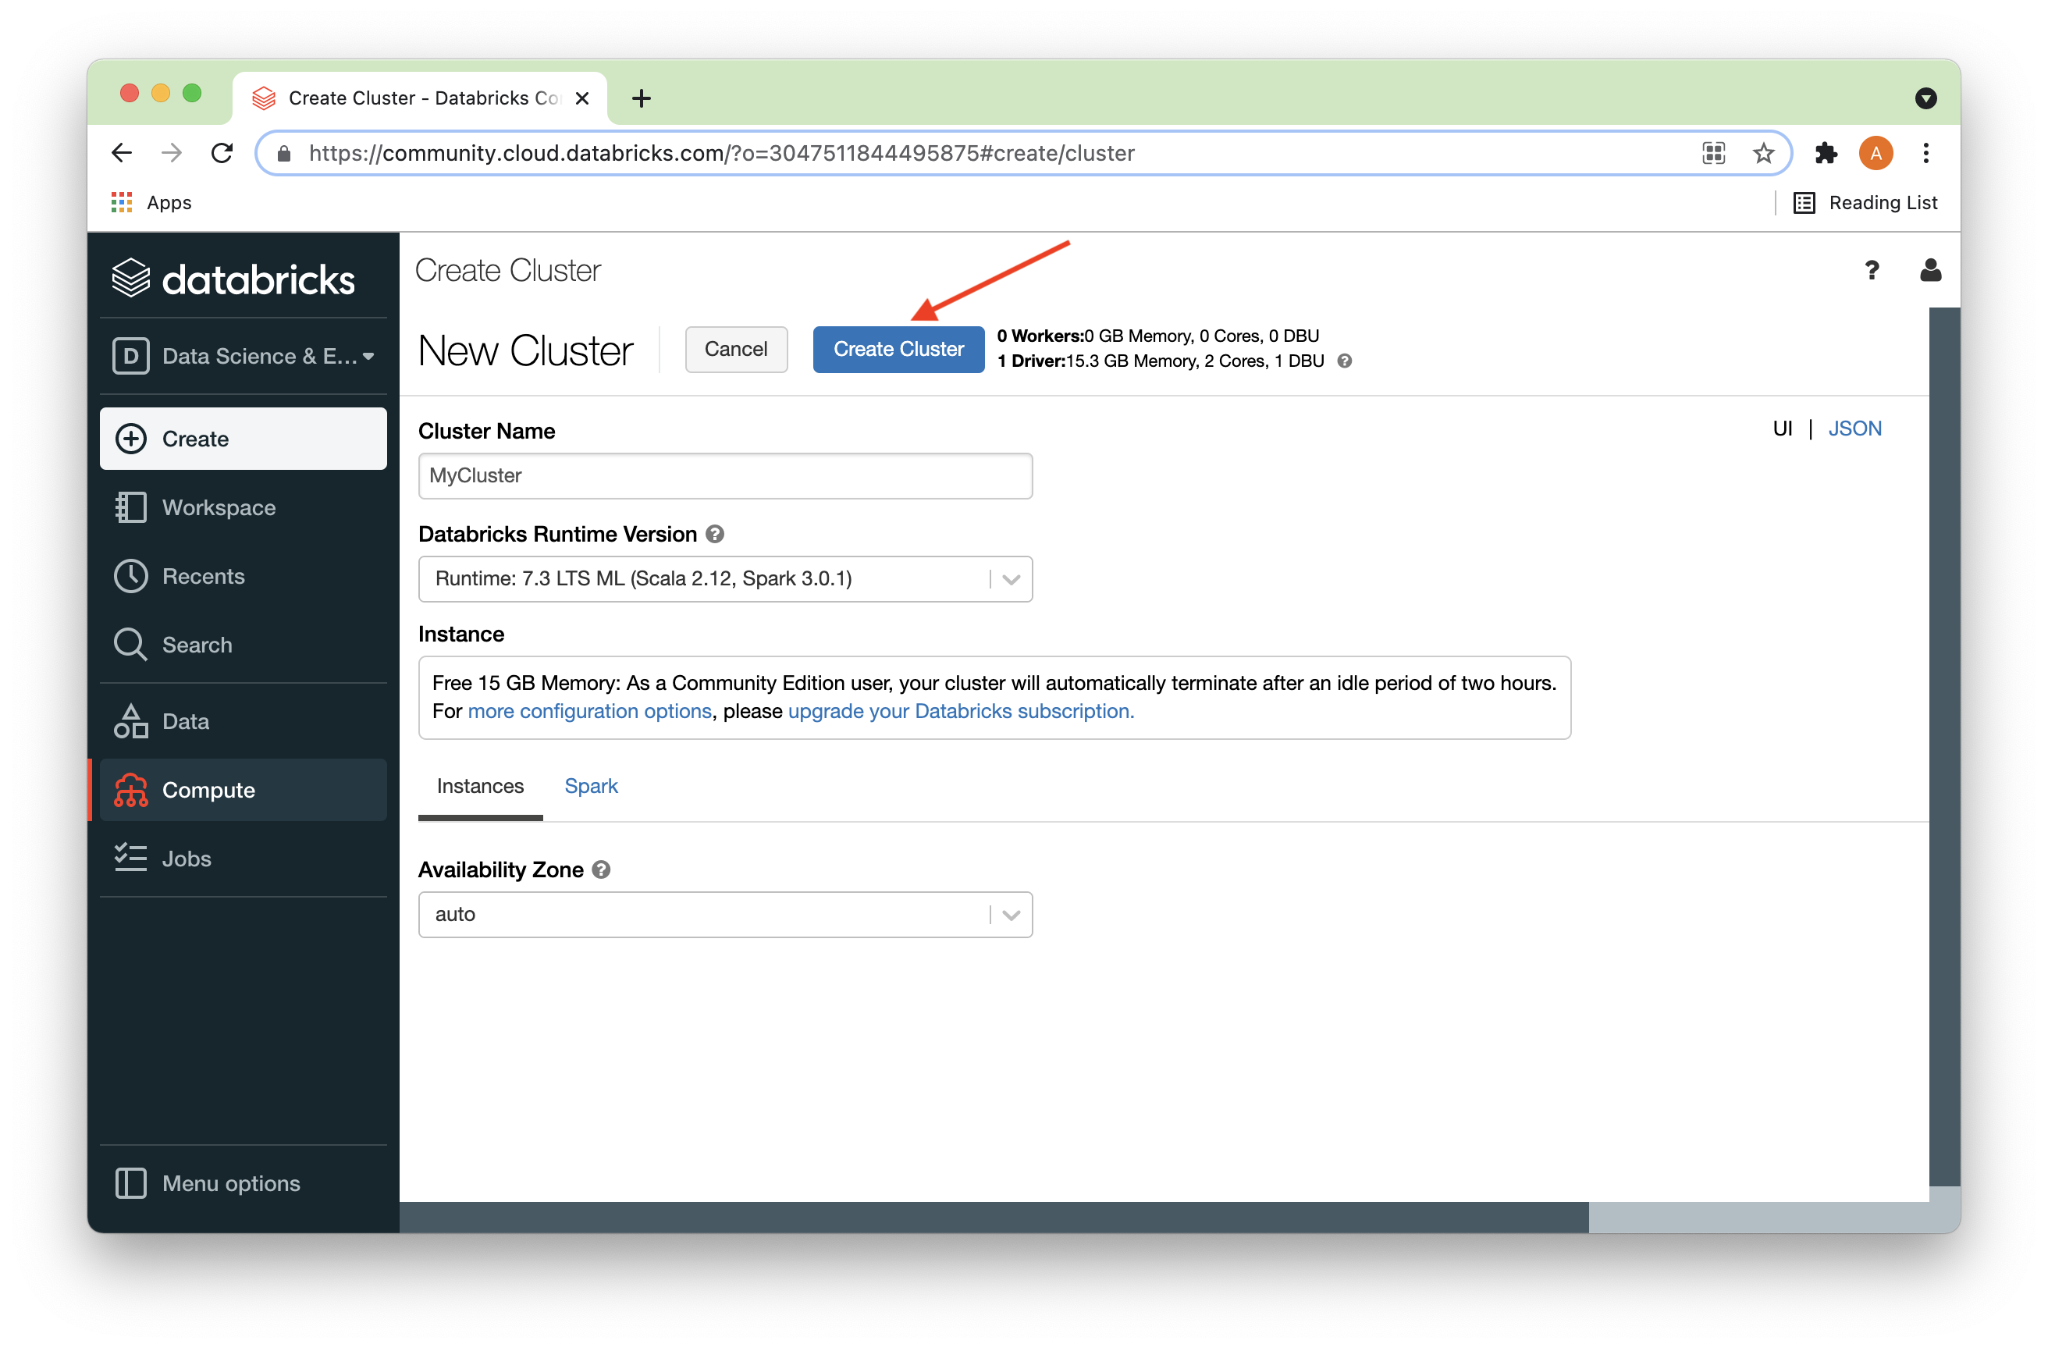
Next, we’ll click the Create Cluster button, as shown in Figure 3 below.
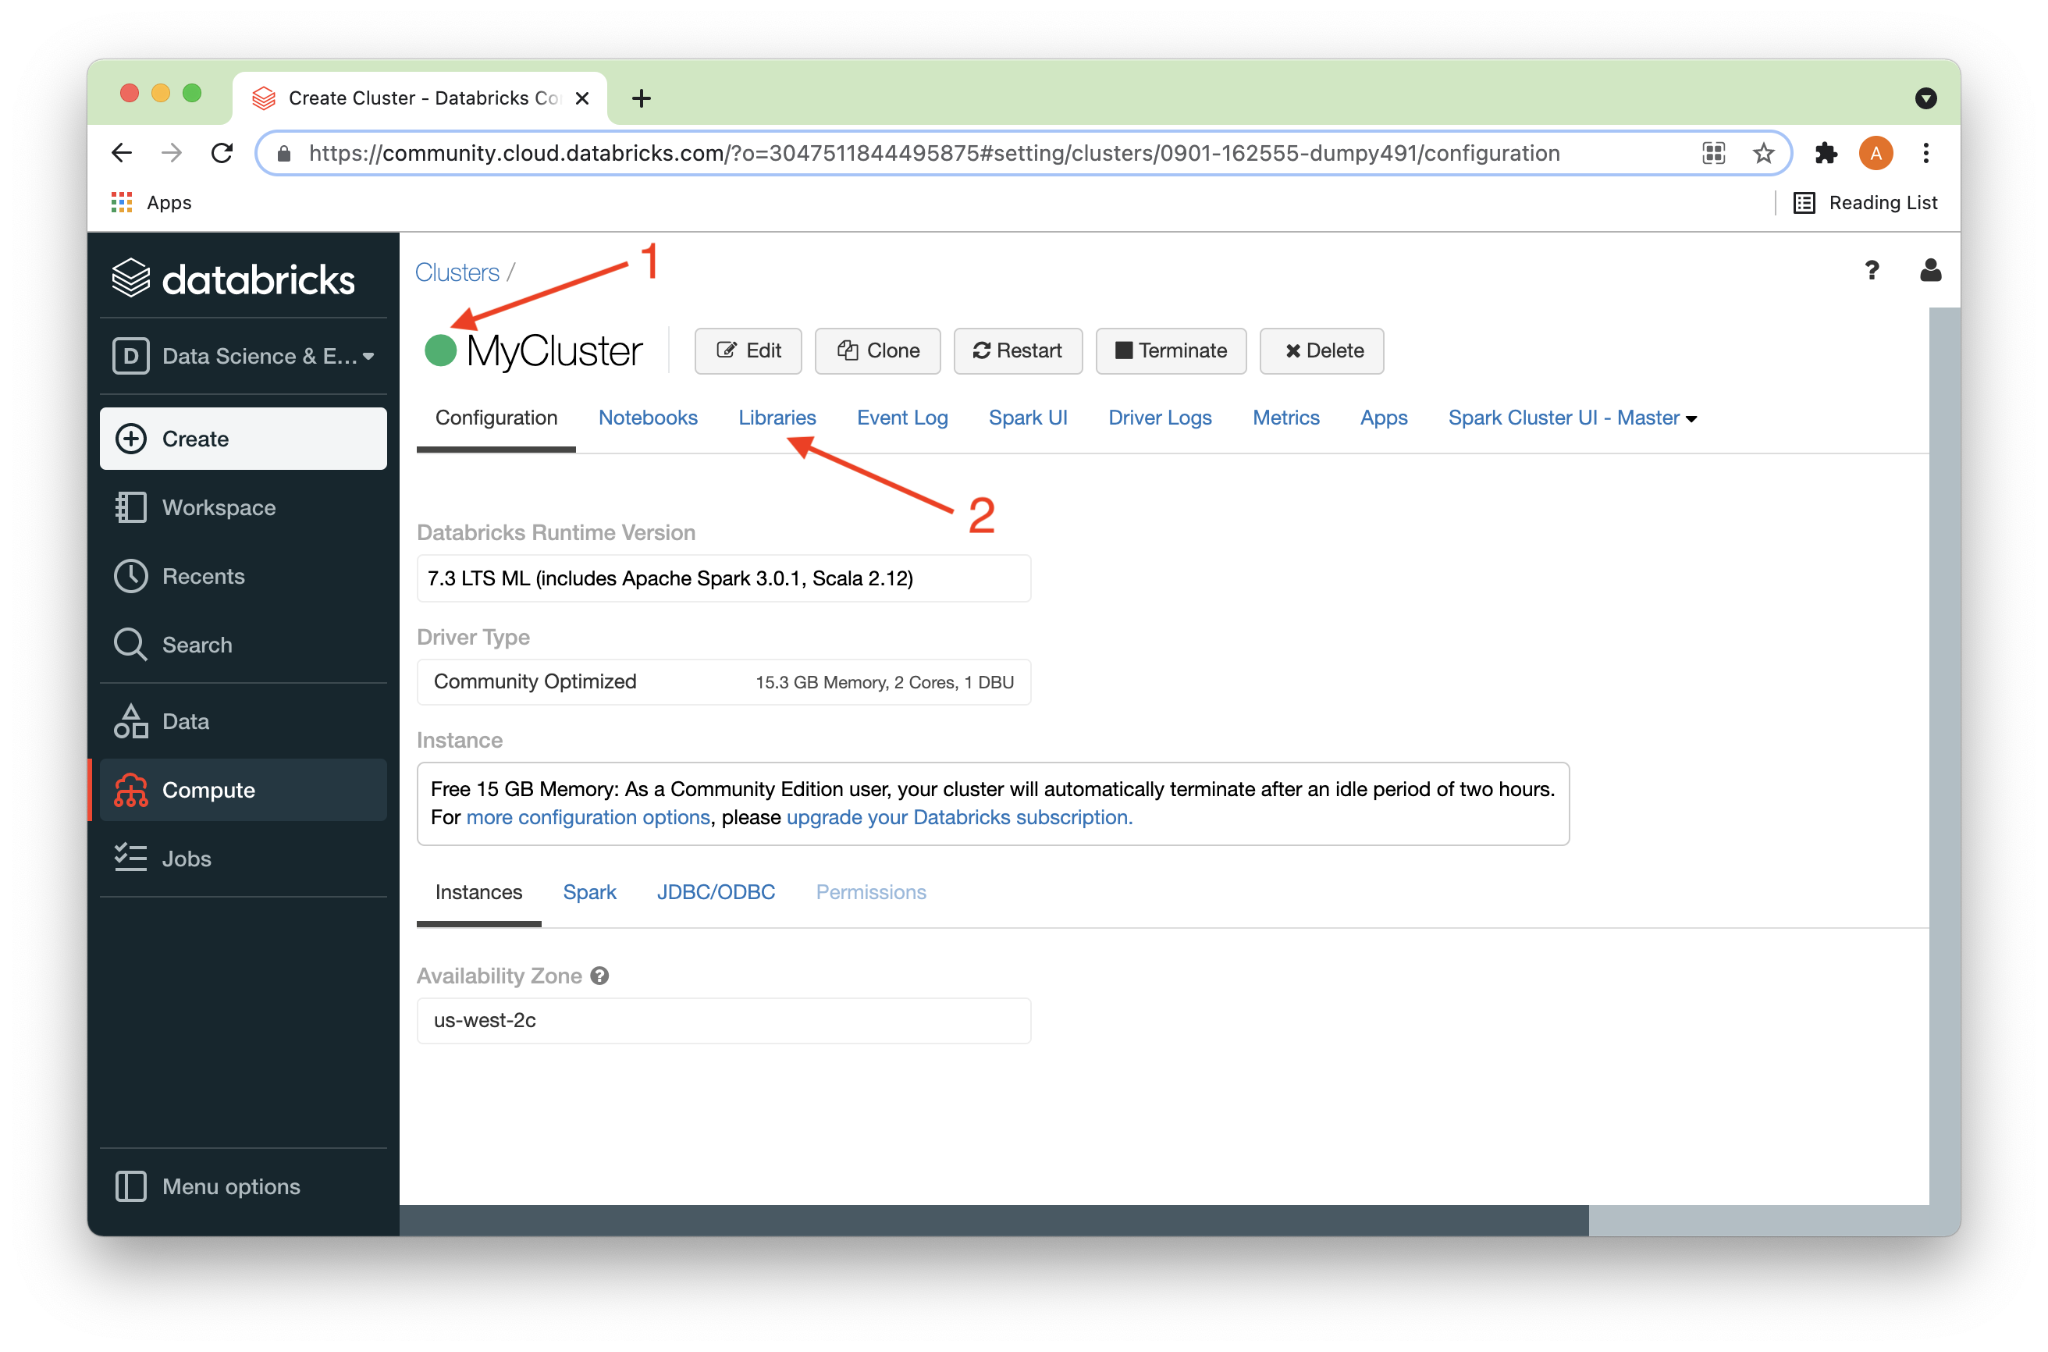
After a short time, a solid green ball should appear next to the cluster name (1), as shown in Figure 4 below. Next, we’ll click on the Libraries link (2).
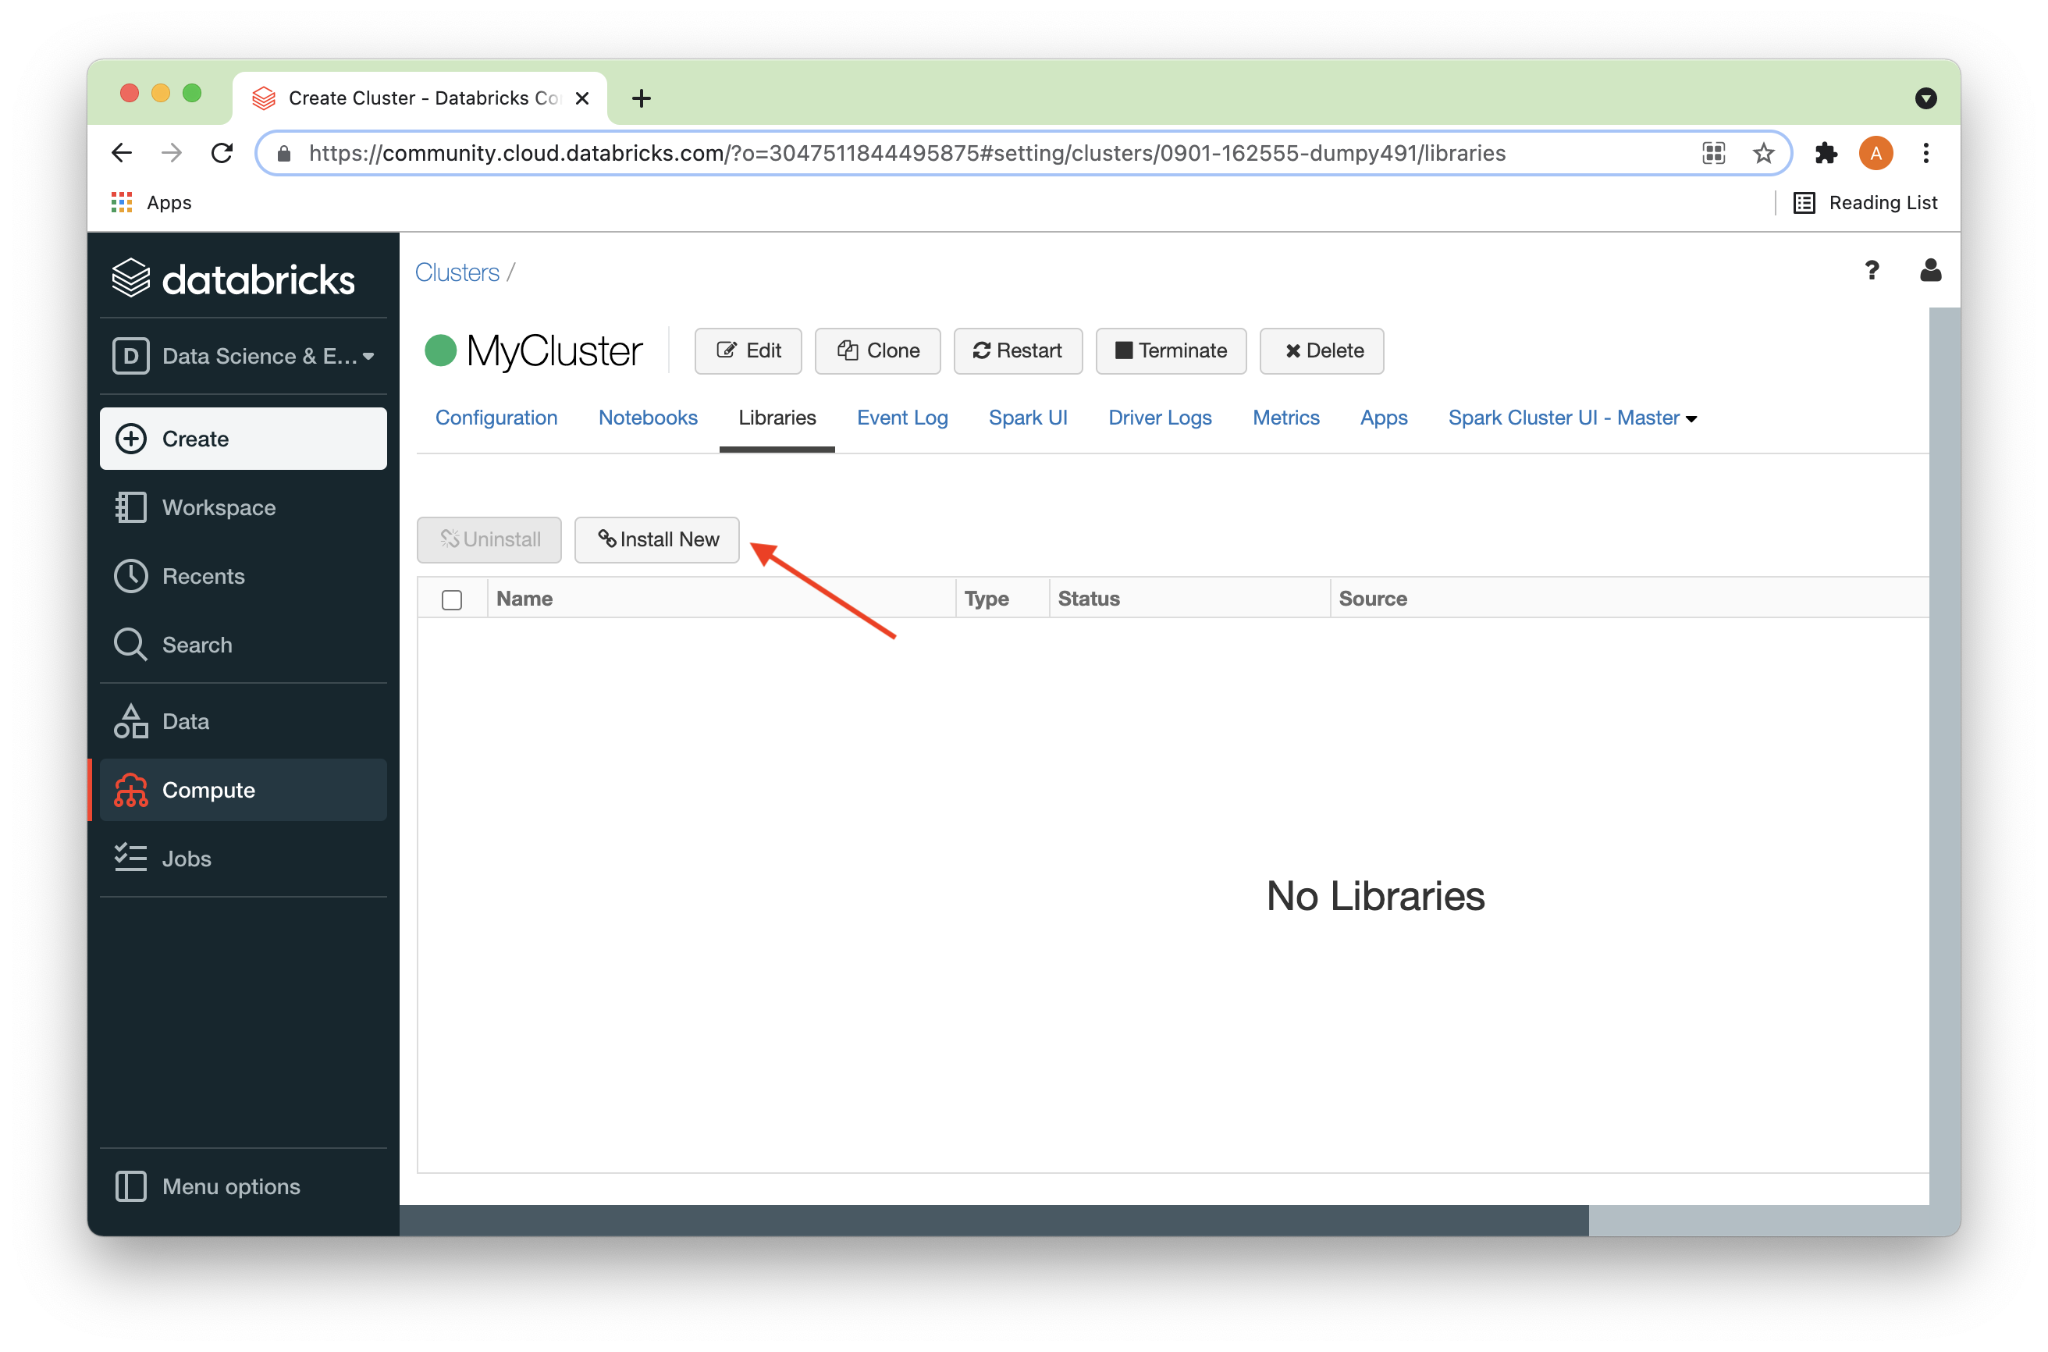
On the Libraries page, we’ll click on Install New, as shown in Figure 5 below.
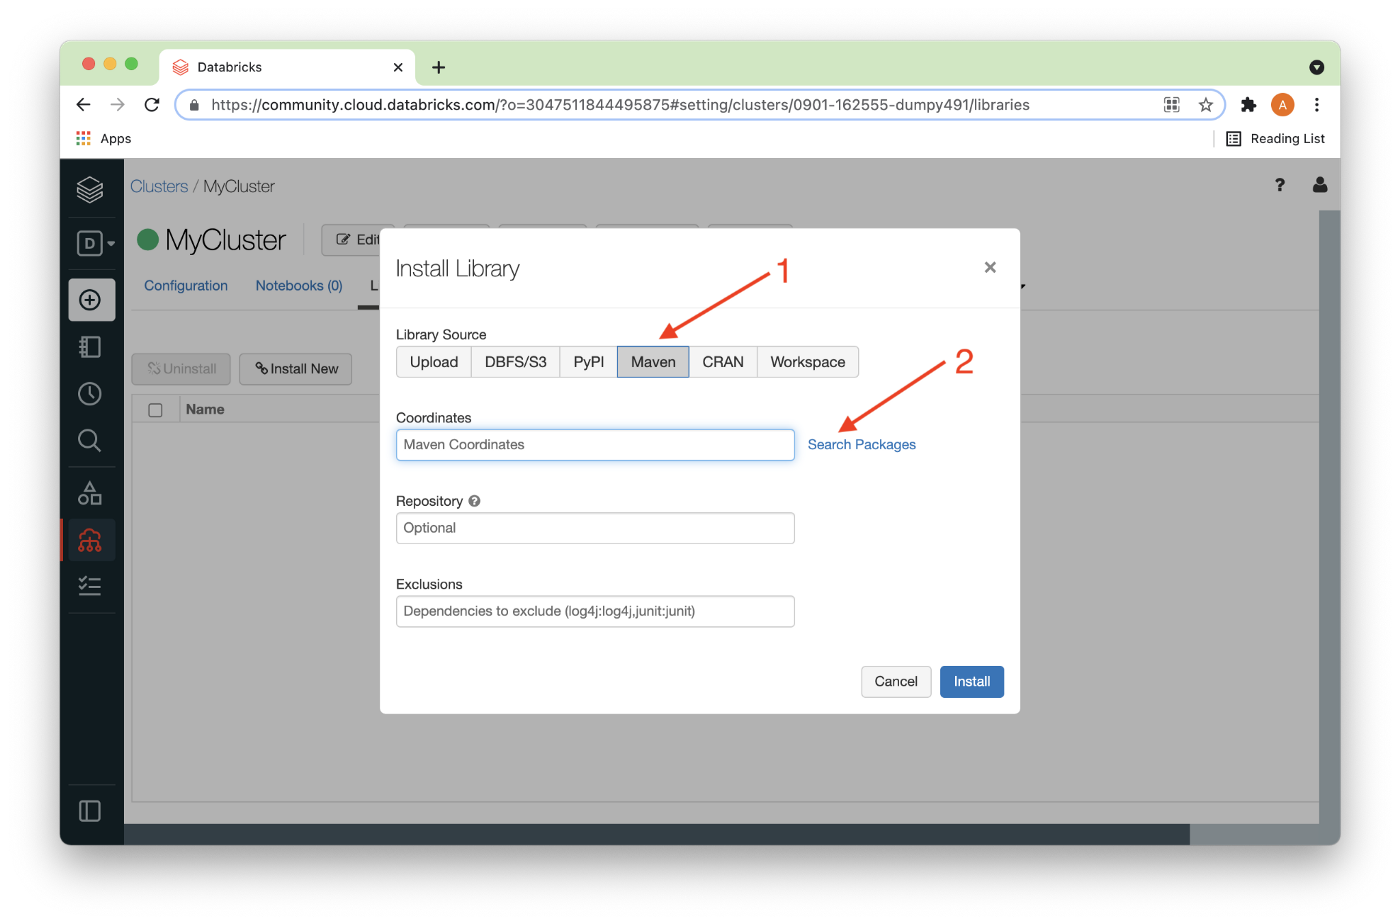
Under Install Library, we’ll select Maven (1) and then Search Packages (2), as shown in Figure 6 below.
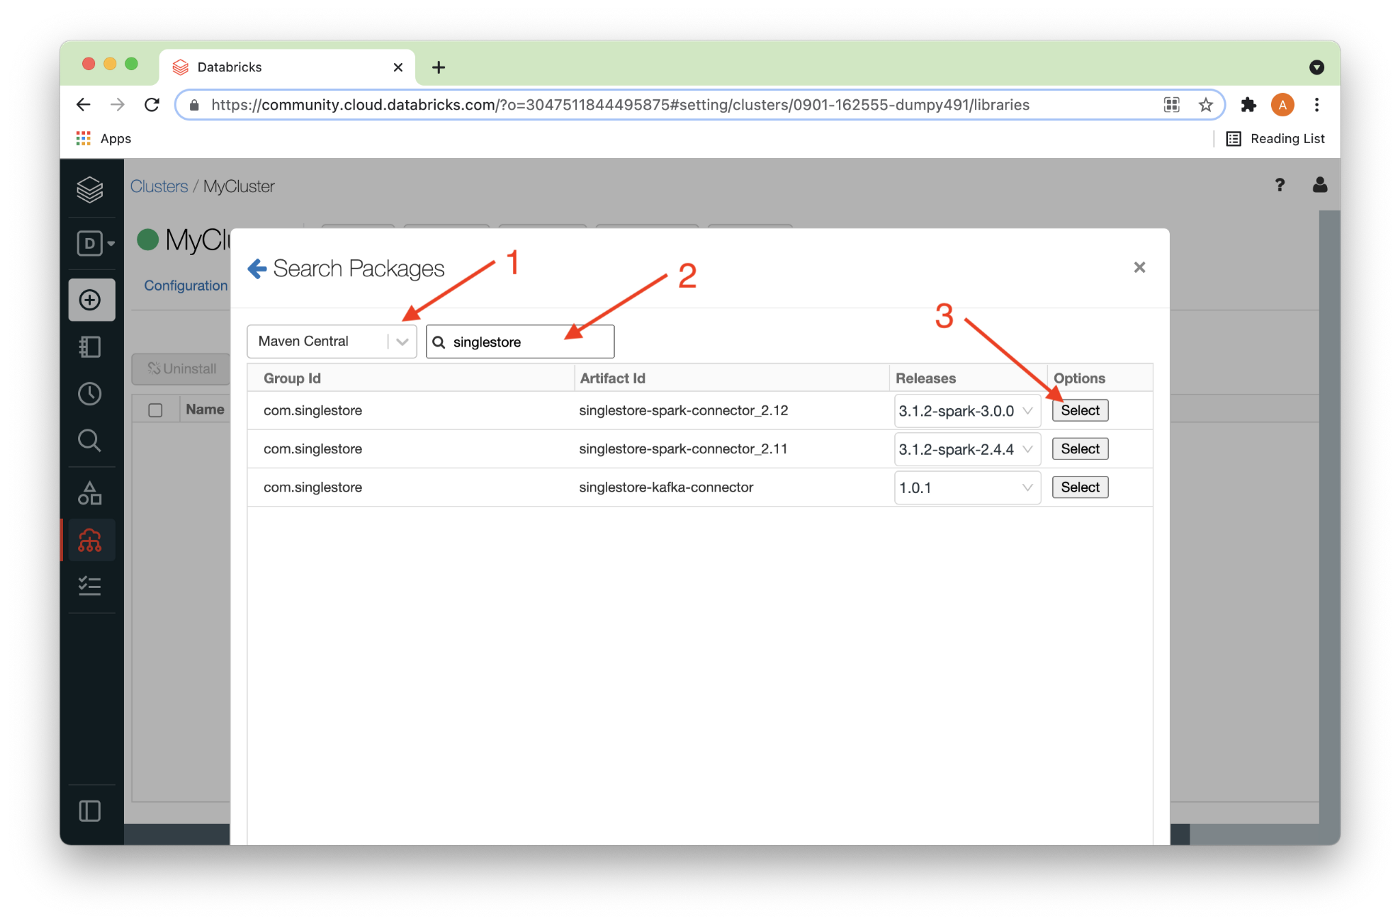
We’ll choose Maven Central (1) and enter singlestore (2) into the search box and a list of packages should appear, as shown in Figure 7. We’ll choose the highest version of the connector for Spark (3), as shown below.
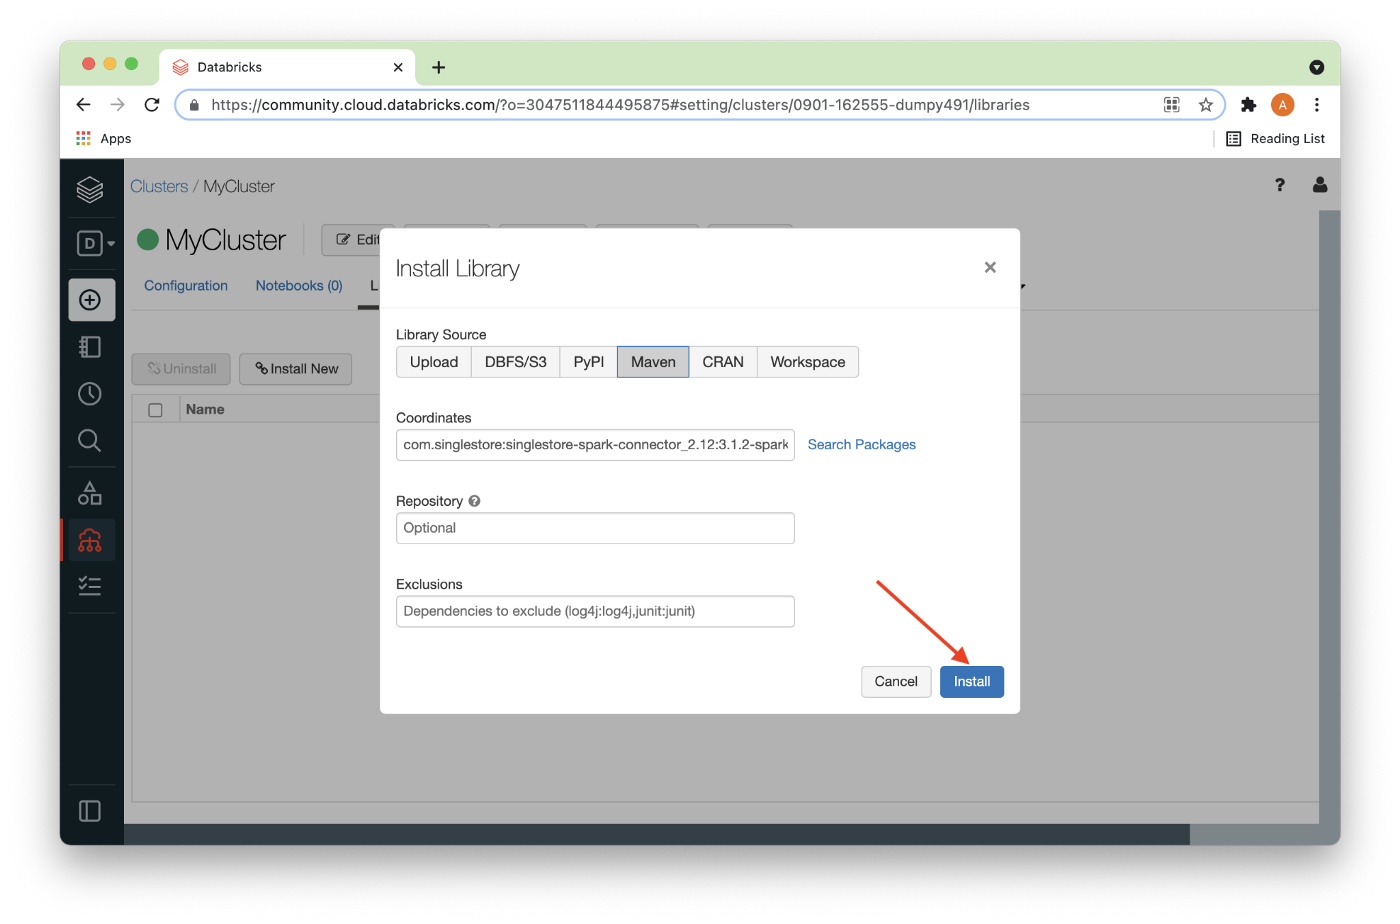
Now, we’ll click Install, as shown in Figure 8 below.
After a short delay, the connector should be installed as shown in Figure 9 below.
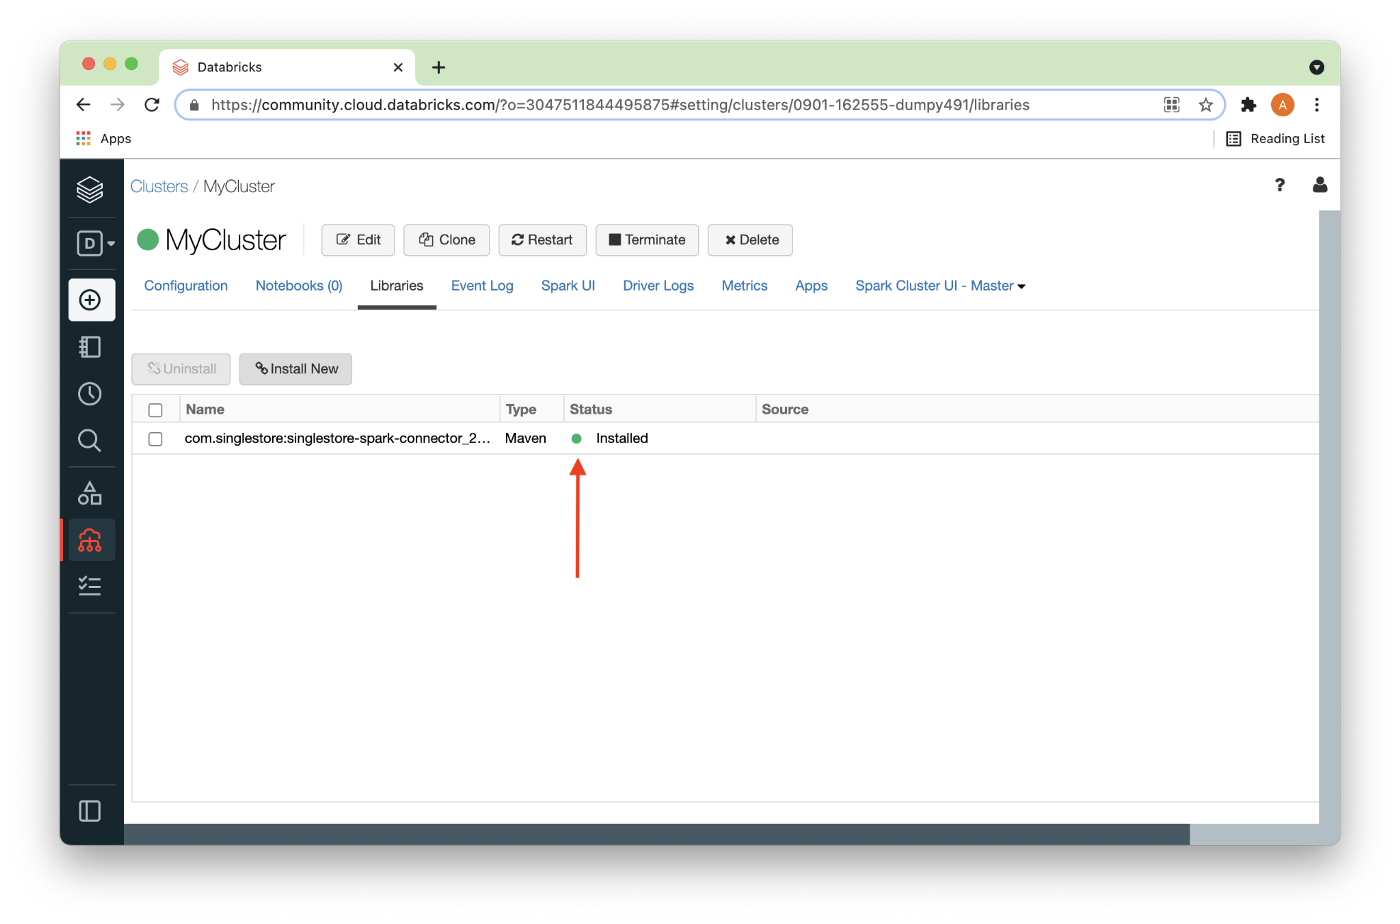
In order to correctly set up the Databricks environment for SingleStore, the MariaDB JDBC driver is also required. Downloaded the JAR file from the MariaDB download site. At the time of writing this article, the latest version was Java 8 Connector/J 2.7.4.
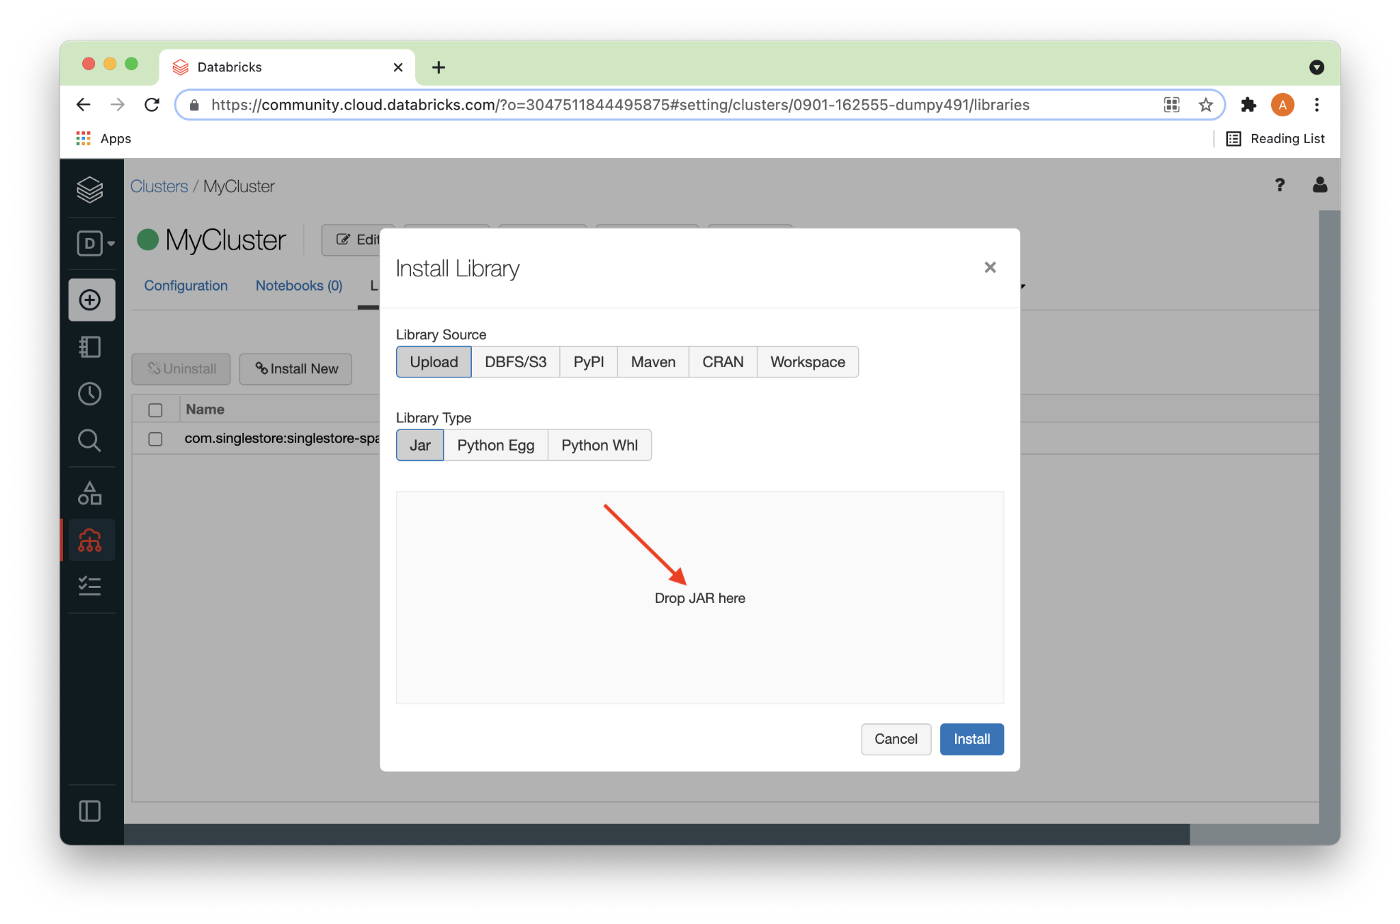
Now, we’ll select Install New again to load the MariaDB JDBC JAR file mentioned above. In Figure 10, we can either drag the JAR file where it says Drop JAR here or use the file browser to locate the JAR file.
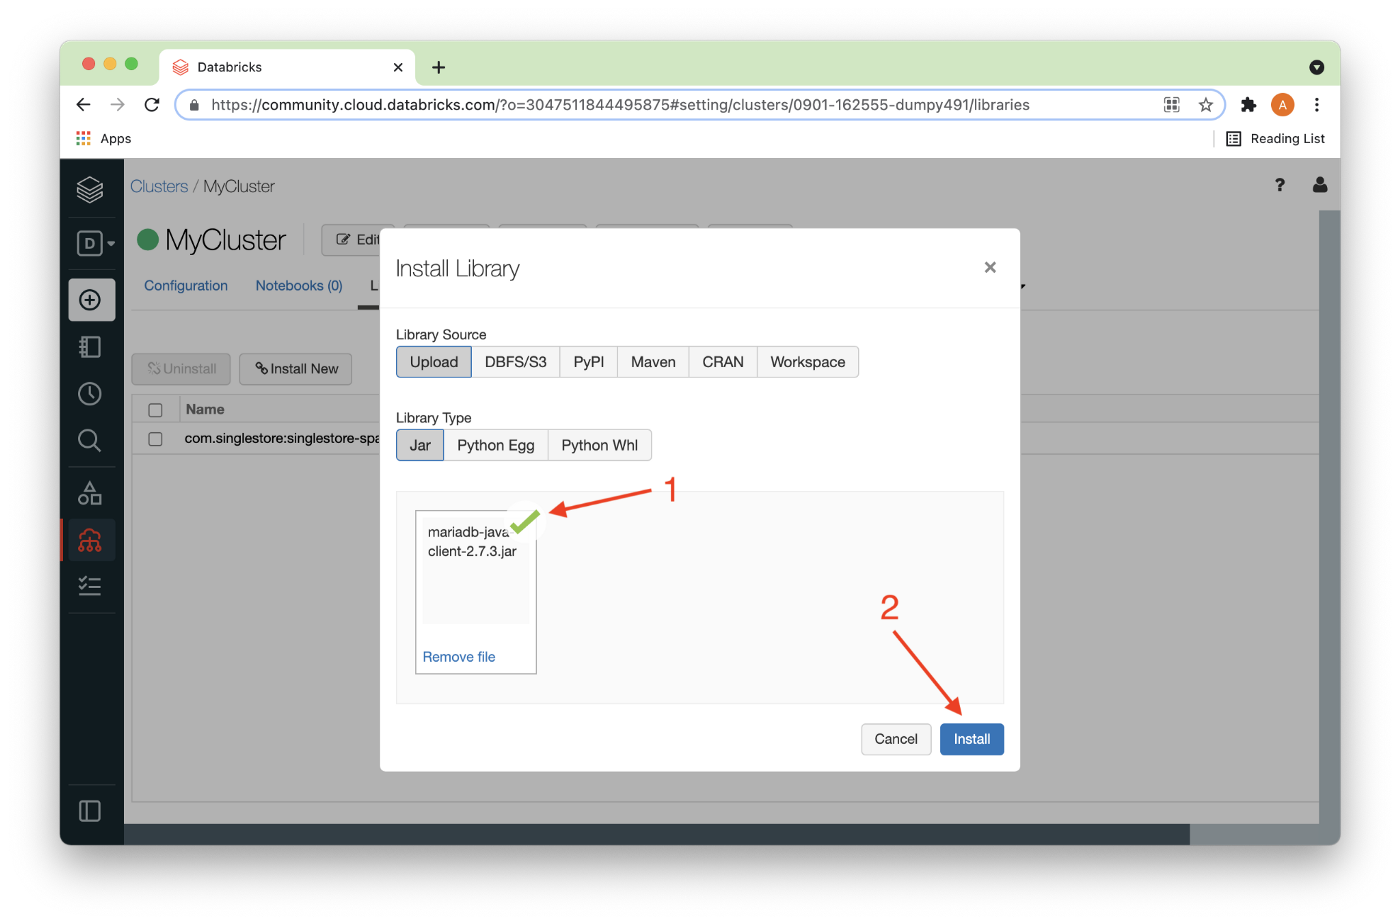
Once the JAR file has successfully uploaded, there should be a checkmark next to the file (1) and it can be installed (2) as shown in Figure 11.
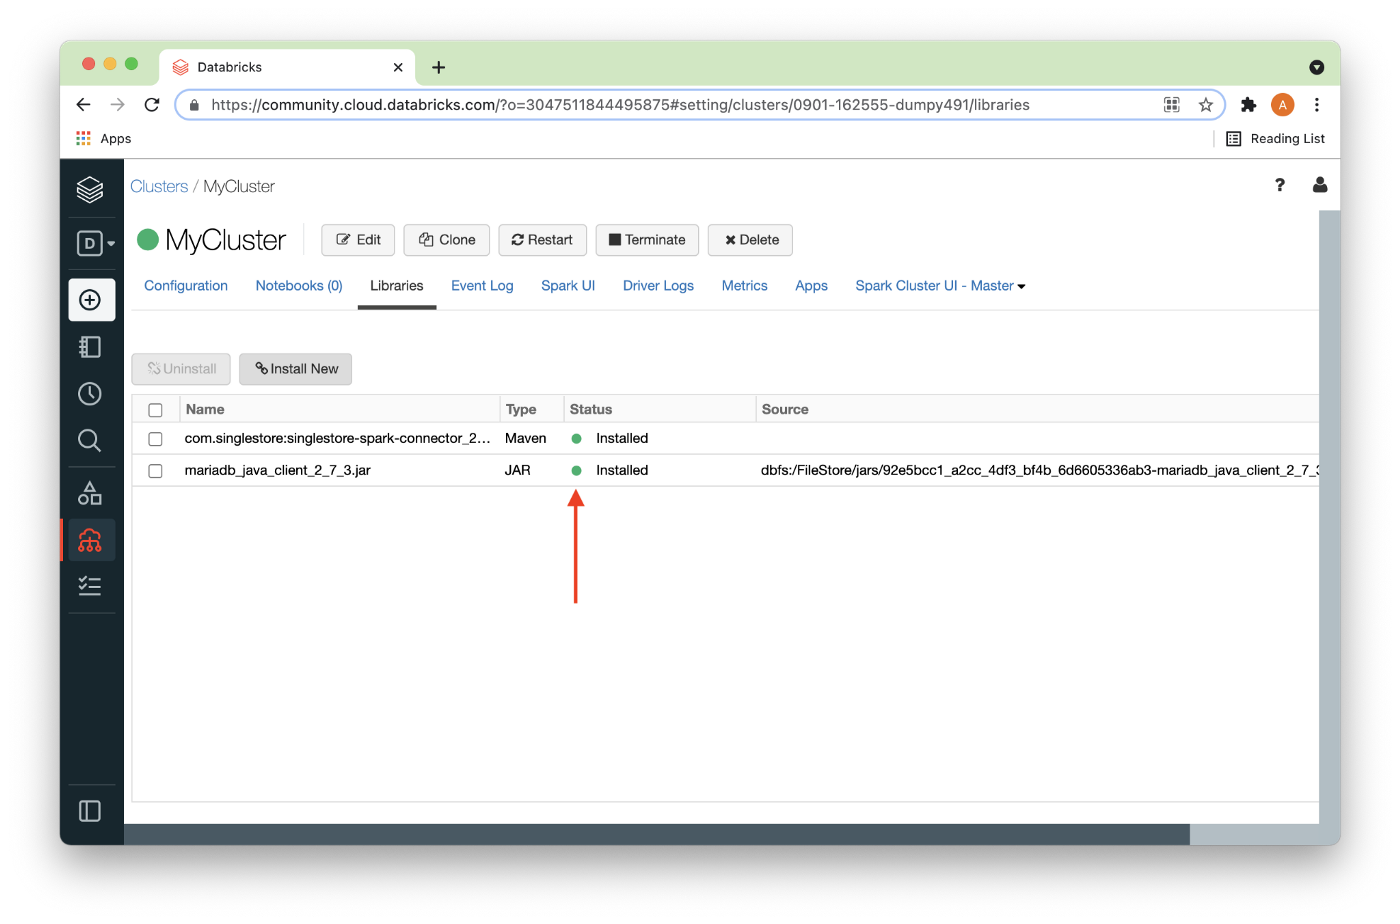
After a short delay, the JAR file should be installed as shown in Figure 12.
All the required libraries have now been installed, so we can now create a new Python notebook by selecting Workspace from the left navigation pane and then drilling down, as shown in Figure 13 below.
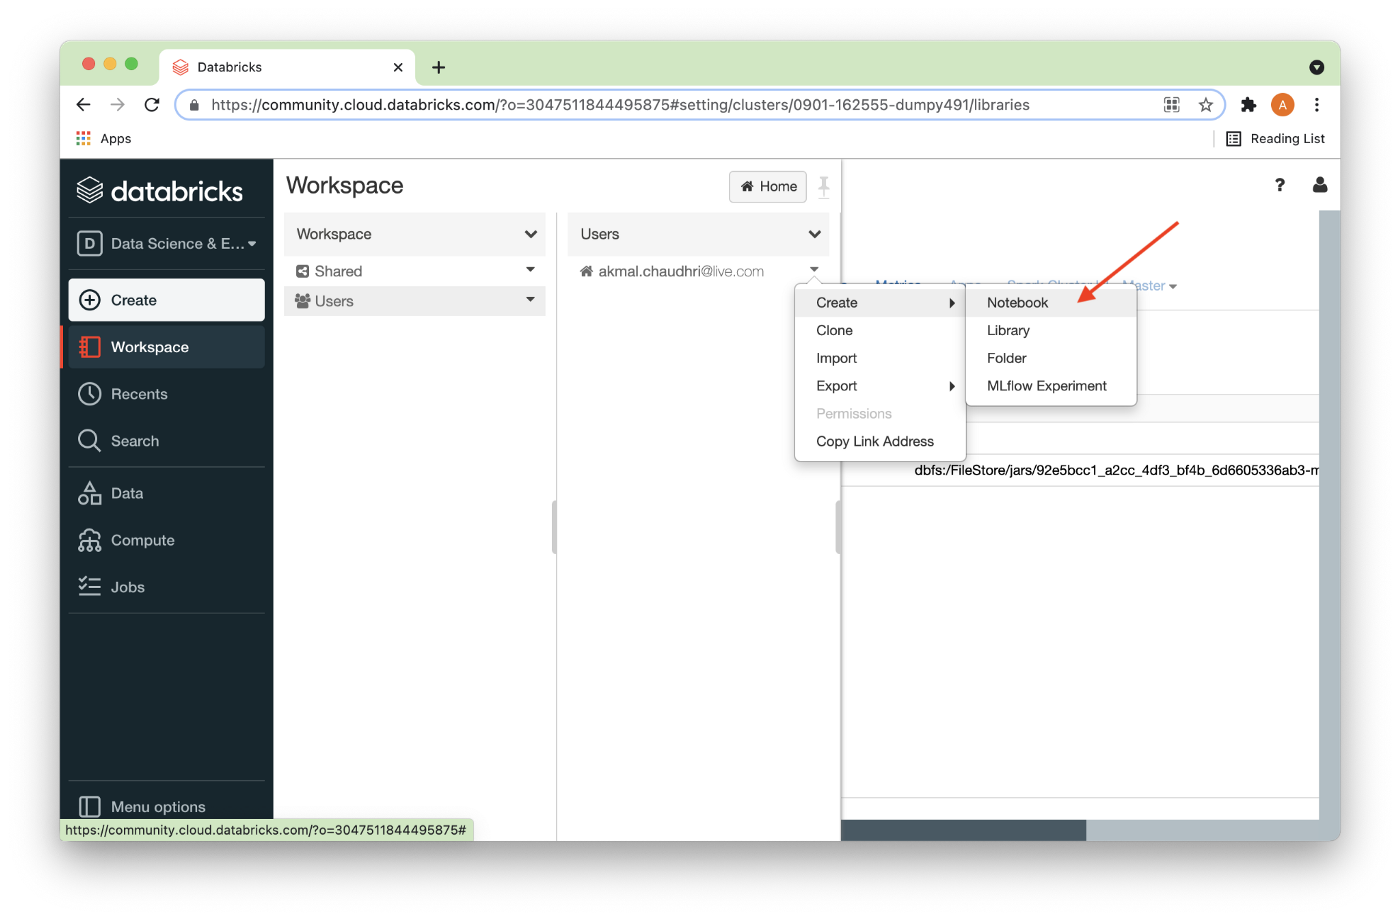
We’ll call this Notebook Setup (1), and then Create it (2), as shown in Figure 14 below.
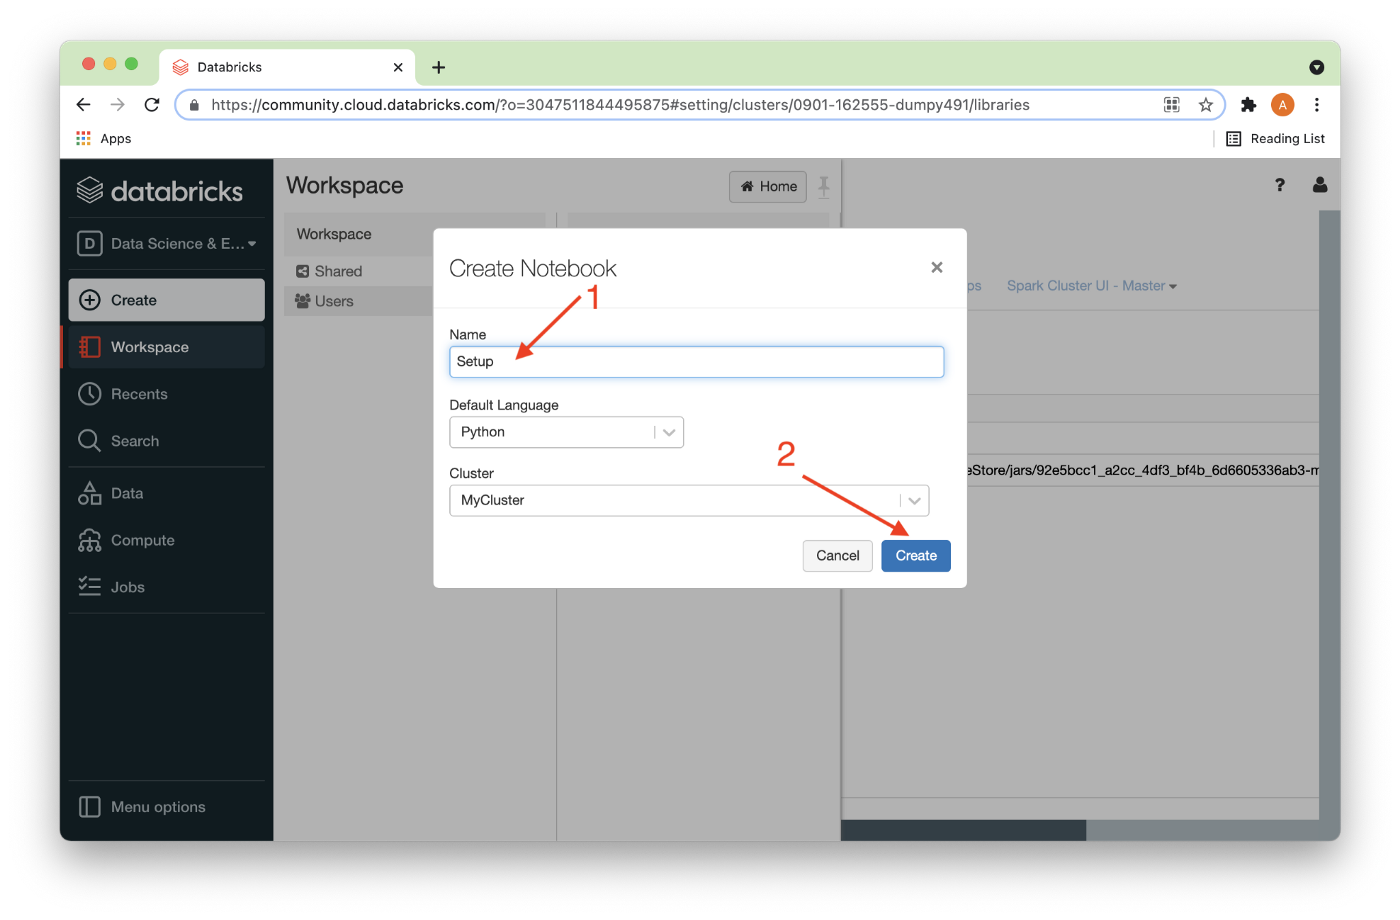
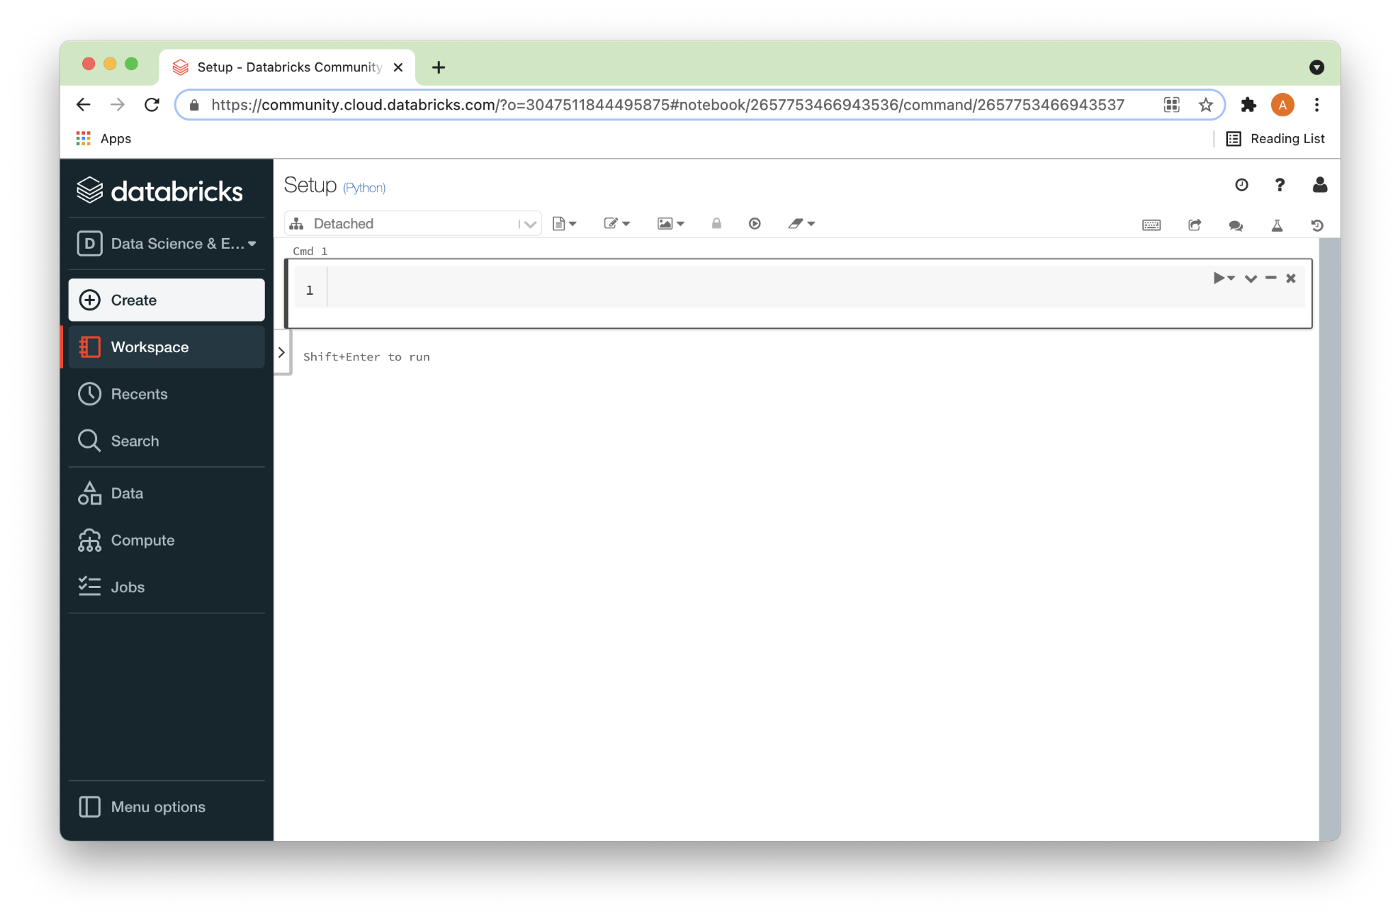
The notebook should open up as shown in Figure 15 below.
In the code cell, we can enter the following, as shown in Figure 16 below.
server = "<TO DO>"
password = "<TO DO>"

port = "3306"
cluster = server + ":" + port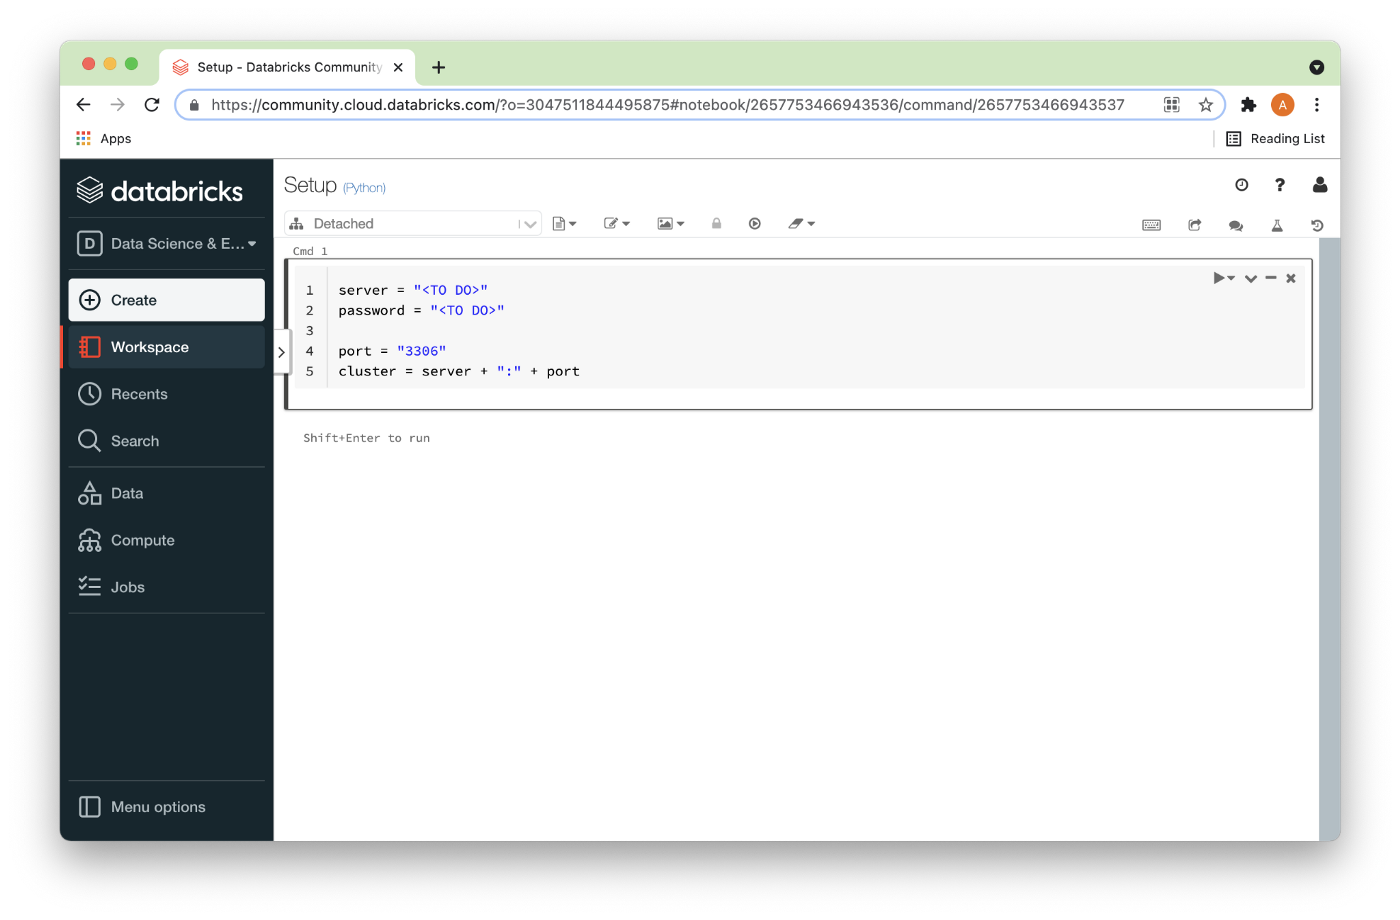
The <TO DO> for server and password should be replaced with the values obtained from the SingleStore Managed Service when creating a cluster. As a reminder, we can create a Managed Service account by following the Sign Up to Get Started section of a previous blog post.
Finally, the SingleStore Managed Service provides a firewall. Therefore, we need to add the public IP address of the Databricks CE Cluster on AWS to the firewall to allow incoming connections to SingleStore. To find the public IP address of the Databricks CE Cluster on AWS, we can use some Python code in a notebook. For example:
hostname = spark.conf.get("spark.databricks.clusterUsageTags.driverPublicDns")

address = hostname.split(".")[0]
address = address.replace("ec2-", "")
address = address.replace("-", ".")

print(address)
Summary
In this article, we have taken our first steps to using SingleStore with Spark. Using a Databricks CE account, we have created a Spark cluster, attached the appropriate libraries, and prepared a notebook that contains our connection information to a database cluster running in our SingleStore Managed Service account.
In the next article, we’ll load credit card data into our Spark environment. We’ll also compare the performance of the SingleStore Spark Connector against JDBC for loading our data into SingleStore from Spark.
Published at DZone with permission of Akmal Chaudhri. See the original article here.
Opinions expressed by DZone contributors are their own.

Comments