How to Use Shipa to Make Kubernetes Adoption Easier for Developers
Kubernetes can be complex. An application-as-code strategy can help developers get over some of the biggest hurdles when it comes to simplifying certain Kubernetes tasks.
Join the DZone community and get the full member experience.
Join For FreeKubernetes offers developers tremendous advantages… if they can overcome the platform’s inherent complexities. It can be a big "if." Without additional tooling, developers aren’t able to simply develop their applications on Kubernetes, but must also become experts in writing complex YAML templates to define Kubernetes resources. A relatively new tool called Shipa provides an application management framework that largely relieves developers of this burden, enabling dev teams to ship applications with no Kubernetes expertise required.
Having recently put the tool to the test, this article will demonstrate how to install and utilize Shipa to simplify Kubernetes and ease some common developer frustrations.
Getting Started
While this walk-through example uses Amazon EKS, it’s possible to deploy Shipa on any Kubernetes cluster (including Minikube, EKS, GKE, AKS, RKE, OKE, and on-prem). To follow along with this example using your own cluster, first read the Shipa installation requirements, and download the Helm command-line tool which we’ll use to install Shipa on Kubernetes.
Installing Shipa
To install Shipa, first add Shipa’s Helm repository.
$ helm repo add shipa-charts https://shipa-charts.storage.googleapis.com
$ helm repo update
Next, deploy Shipa via Helm. Make sure to set your adminUser and adminPassword.
helm upgrade --install shipa shipa-charts/shipa \
--timeout=15m \
--set=auth.adminUser=myemail@example.com \
--set=auth.adminPassword=mySecretAdminPassw0rd \
--namespace shipa-system --create-namespace
To observe the Shipa deployment, list all pods in the shipa and shipa-system namespaces:
$ kubectl get pods --all-namespaces -w | grep shipaRun shipa version to check that the Shipa installation was successful. In this article’s example, we’ll use version 1.6.3.
Adding a Target
To enable interactions with Shipa via the CLI, configure a target so that the CLI can locate Shipa in the Kubernetes cluster.
First, find the IP address (or DNS name) of Shipa’s Nginx server by running:
export SHIPA_HOST=$(kubectl --namespace=shipa-system get svc shipa-ingress-nginx -o jsonpath="{.status.loadBalancer.ingress[0].ip}") && if [[ -z $SHIPA_HOST ]]; then export SHIPA_HOST=$(kubectl --namespace=shipa-system get svc shipa-ingress-nginx -o jsonpath="{.status.loadBalancer.ingress[0].hostname}") ; fiThis code finds the DNS name of the elastic load balancer (if on AWS) that serves traffic to the Nginx server, which then goes to Shipa. The output of the shipa target add command will look like this:
shipa target add shipa $SHIPA_HOST -sNew target shipa -> https://XXXXXXXXXXXXXX.ap-southeast-1.elb.amazonaws.com:443 added to target list and defined as the current targetThen finally login to the CLI.
shipa loginAccessing the Shipa Dashboard
Following a few moments of preparation, the Shipa dashboard will be accessible.
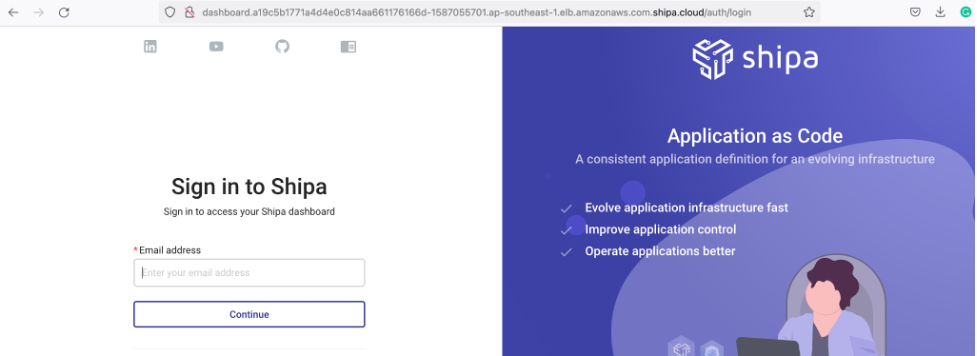
Paste the Shipa target address into your browser (ex: https://XXXXXXXXXXXXXX.ap-southeast-1.elb.amazonaws.com) to reach Shipa’s API welcome page:

Click the "Go to my Dashboard" link, and log in with your bootstrap credentials. There is an admin verification/activation step (Shipa is free by default).
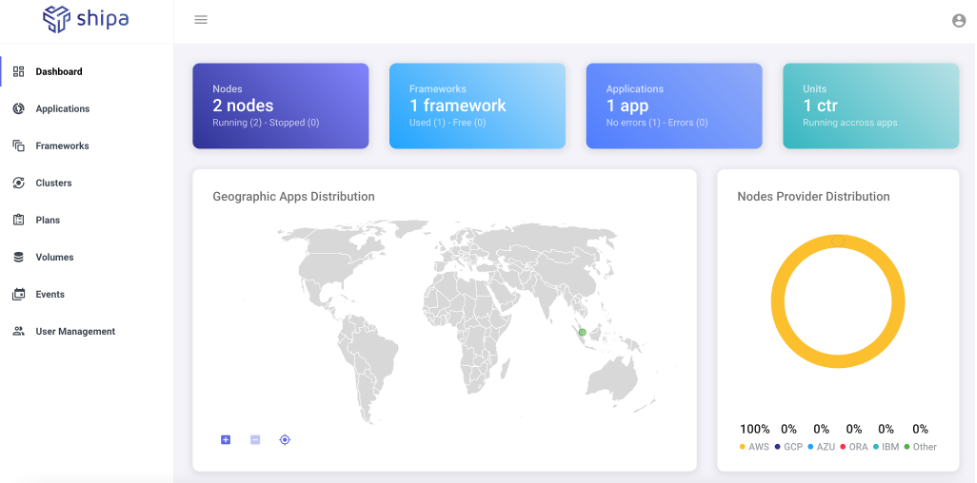
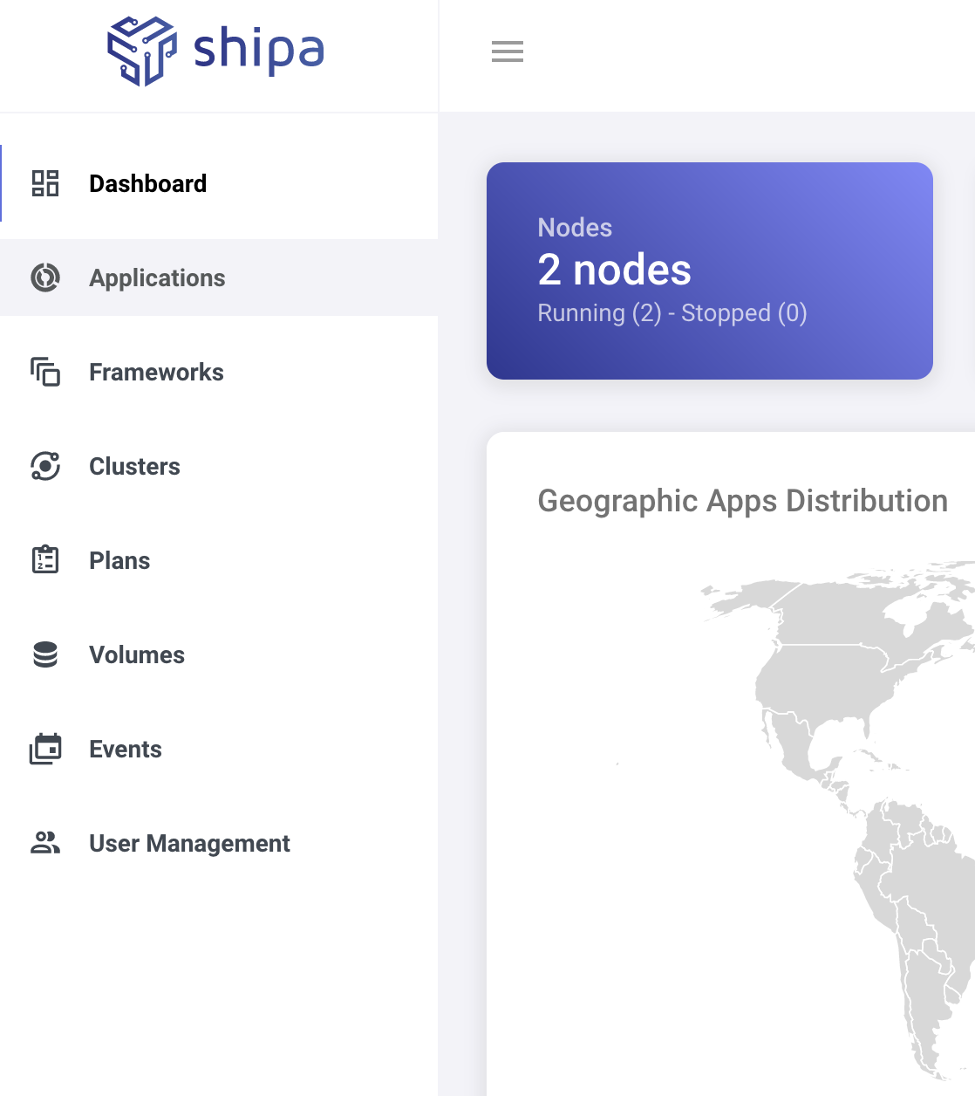
The main dashboard page displays information on your Kubernetes cluster, such as the number of nodes and where apps are running geographically.
With Shipa prepped, we’ll look at deploying applications.
Adding a Framework
The first step in leveraging Shipa is creating a framework. A framework in Shipa is a logical grouping of the abstractions and rules your application will be deployed to.
In the Shipa UI, head to "Frameworks" and then click "Create Framework." The reasonable default option is fine for an example.
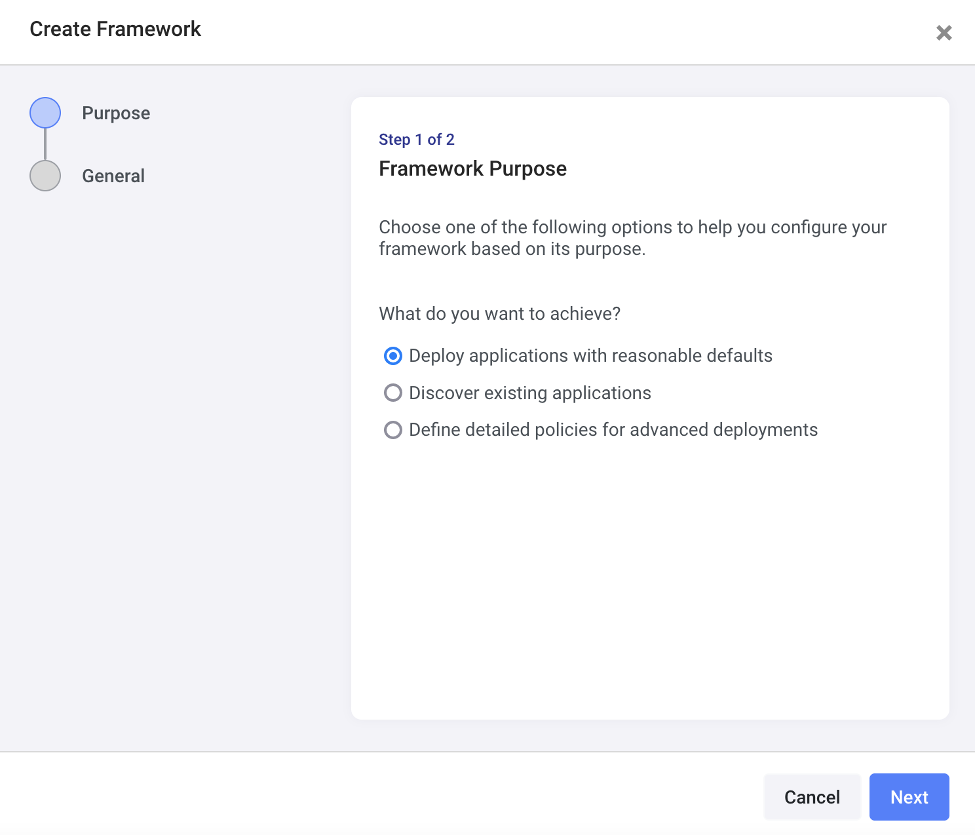
Click "Next" and then name your framework something like "firstframework."
Shipa by default has a plan (resource limits) called shipa-plan and a default team shipa-admin-team to pick. Since you installed Shipa into a Kubernetes cluster, you can use that same cluster to deploy workloads by connecting to shipa-cluster/nginx.
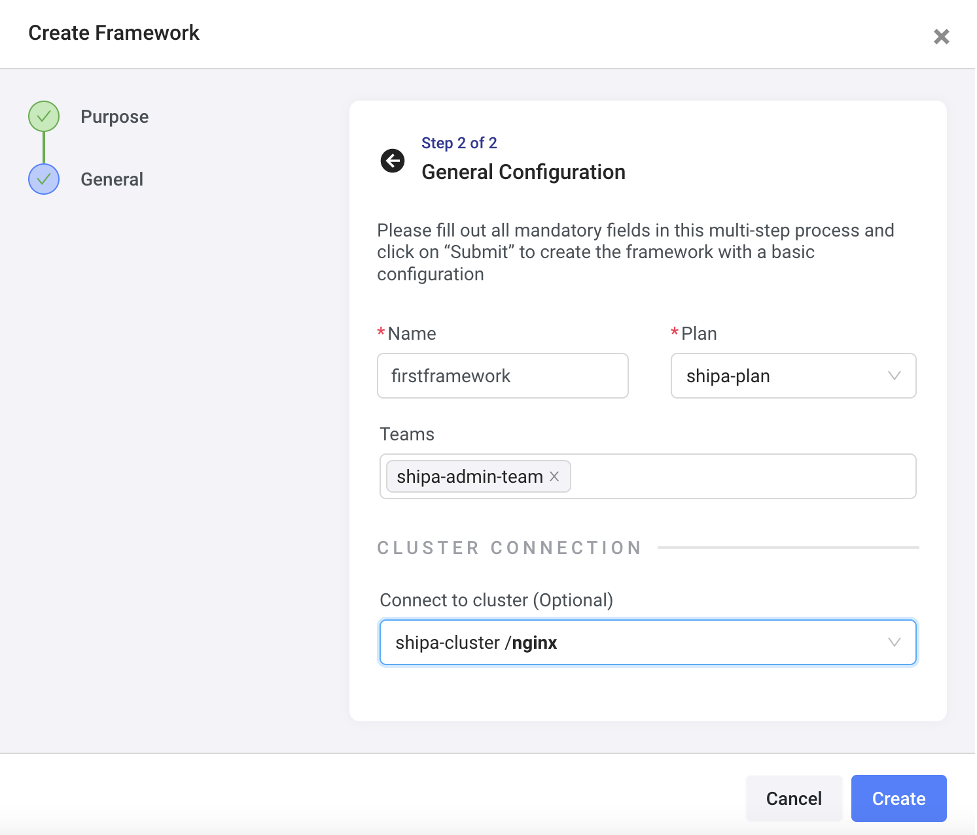
Click "Create" and you now have a framework that is ready to be deployed to.
Shipa can run applications written in Go, Java, Python, Ruby, and several other programming languages.
Creating an Application
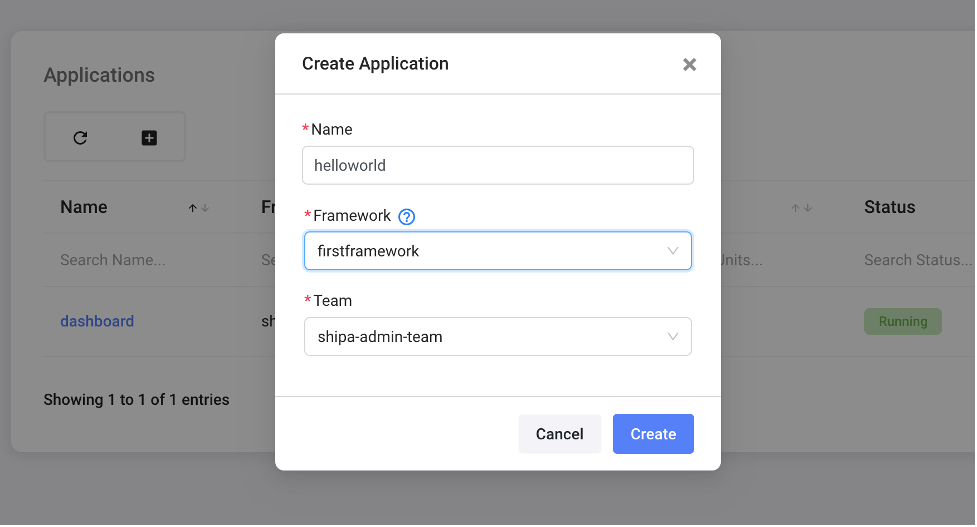
To create an application we need the application’s name, framework, and the team that controls it. Upon installation, Shipa automatically creates a shipa-admin-team and a shipa-system-team, whose permissions and details you can see in the Shipa UI via User Management -> Roles -> Update.

It’s pretty straightforward to implement role-based access controls (RBACs), giving each team the correct permissions.
Now we’ll create a “helloworld” application, owned by the shipa-admin-team via the Shipa UI by Applications -> +Create Application:
Deploying an Application
The application is now created and has a URL, but isn’t yet deployed.
$ shipa app list
+-------------+-----------+--------------------------------------+
| Application | Status    | Address                              |
+-------------+-----------+--------------------------------------+
| dashboard   | 1 running | http://dashboard.<ELB>.shipa.cloud   |
+-------------+-----------+--------------------------------------+
| helloworld | created   | http://hello-world.<ELB>.shipa.cloud |
+-------------+-----------+--------------------------------------+
Here you can see that the dashboard itself is a currently running application, deployed by Shipa during installation. Each URL is a CNAME record in the shipa.cloud DNS zone. Also, each app is behind the same elastic load balancer, each with its own subdomain. This is because Shipa leverages Ingress Controllers and Ingress resources. You don’t manage the shipa.cloud DNS zone and that zone isn’t created in Route53 in your AWS account. (You can add your own subdomain if you like.)
To deploy the application, git clone this repository, and cd into python-sample. A Docker Engine will need to be running on the machine that you will be deploying from, assuming you have a Docker Registry (e.g Docker Hub with a repository or pythonsample), then run the following:
$ shipa app deploy -a helloworld . -i  $YOUR_DOCKER_REGISTRY/pythonsample:1.0 --shipa-yaml ./shipa.yml

===> DETECTING
heroku/python   0.3.1
heroku/procfile 0.6.2
===> ANALYZING
Previous image with name "rlachhman/pythonsample:1.0" not found
===> RESTORING
===> BUILDING
-----> No Python version was specified. Using the buildpack default: python-3.10.4
   	To use a different version, see: https://devcenter.heroku.com/articles/python-runtimes
-----> Installing python-3.10.4
-----> Installing pip 21.3.1, setuptools 57.5.0 and wheel 0.37.0
-----> Installing SQLite3
-----> Installing requirements with pip
   	Collecting Flask
     	Downloading Flask-2.0.3-py3-none-any.whl (95 kB)
   	Collecting Jinja2>=3.0
     	Downloading Jinja2-3.1.0-py3-none-any.whl (132 kB)
   	Collecting Werkzeug>=2.0
     	Downloading Werkzeug-2.0.3-py3-none-any.whl (289 kB)
   	Collecting itsdangerous>=2.0
     	Downloading itsdangerous-2.1.2-py3-none-any.whl (15 kB)
   	Collecting click>=7.1.2
     	Downloading click-8.0.4-py3-none-any.whl (97 kB)
   	Collecting MarkupSafe>=2.0
     	Downloading MarkupSafe-2.1.1-cp310-cp310-manylinux_2_17_x86_64.manylinux2014_x86_64.whl (25 kB)
   	Installing collected packages: MarkupSafe, Werkzeug, Jinja2, itsdangerous, click, Flask
   	Successfully installed Flask-2.0.3 Jinja2-3.1.0 MarkupSafe-2.1.1 Werkzeug-2.0.3 click-8.0.4 itsdangerous-2.1.2
[INFO] Discovering process types
[INFO] Procfile declares types -> web
===> EXPORTING
Adding layer 'heroku/python:profile'
Adding 1/1 app layer(s)
Adding layer 'launcher'
Adding layer 'config'
Adding layer 'process-types'
Adding label 'io.buildpacks.lifecycle.metadata'
Adding label 'io.buildpacks.build.metadata'
Adding label 'io.buildpacks.project.metadata'
Setting default process type 'web'
Saving rlachhman/pythonsample:1.0...
*** Images (sha256:4d654deb38cad4d4905c25ea1d0ae5c0d8eb6efc1ad64989f878a90fdc1767ef):
  	your_user/pythonsample:1.0
Adding cache layer 'heroku/python:shim'
The shipa app deploy creates an image with the Shipa API. The API builds an image able to run Python binaries and uploads it to your Docker registry.
You can get the address to access the application using shipa app list, looking a the Shipa UI under Applications -> helloworld -> Endpoint, or by running:
$ kubectl get ingress -n shipa-firstframework | grep helloworldIf all steps were correct, the URL these commands provide will lead to the Python app deployed by Shipa, displaying this message:

You can reach the dashboard by changing "helloworld" to "dashboard" in the URL:
Visualizing Application Details
Shipa has capabilities for receiving fairly detailed application information, access to which would otherwise require knowing dozens of complex commands if using Kubernetes alone. Click "Applications" on the dashboard.
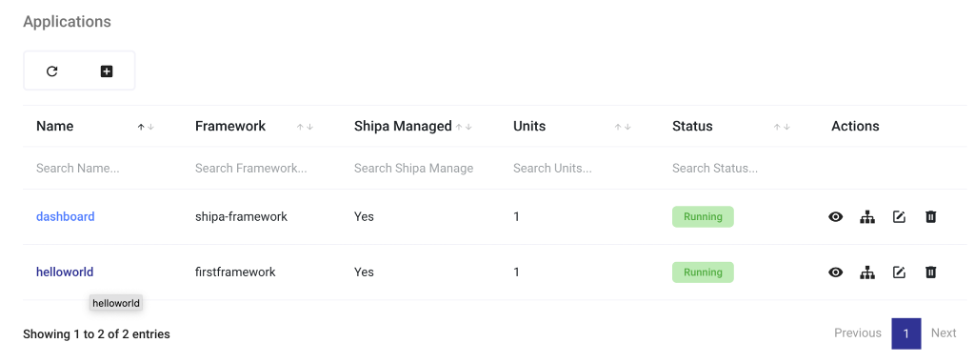
You’ll see a list of all applications running in the cluster. Click on "helloworld."
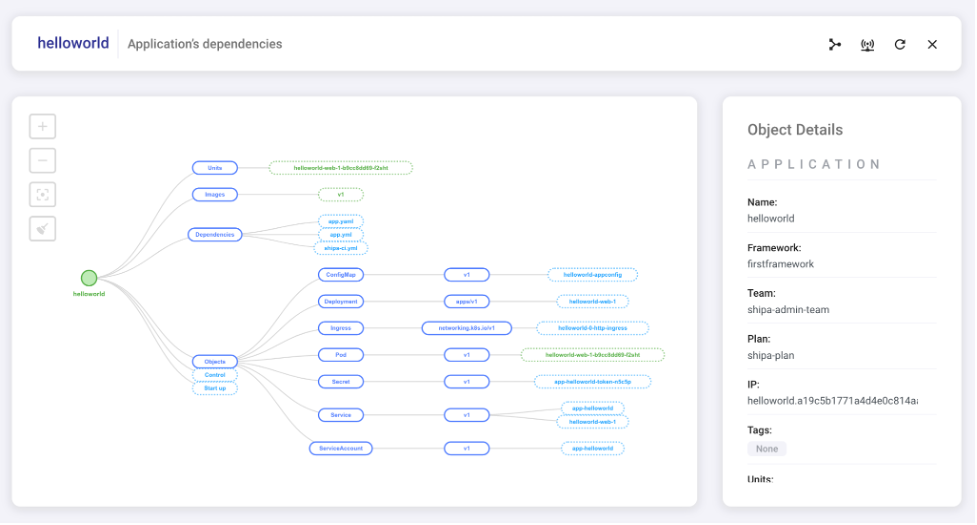
On the Application Map, you’ll see useful application metadata.
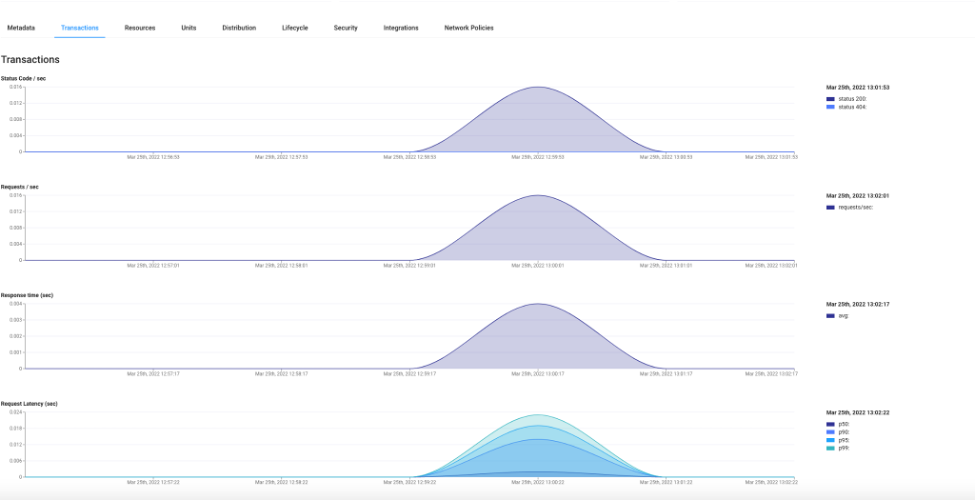
You can also view transaction details including requests per second, average response time, request latency, and more.
Shipa provides basic application monitoring as well, including CPU usage per container, memory usage per container, the number of open connections, and more.

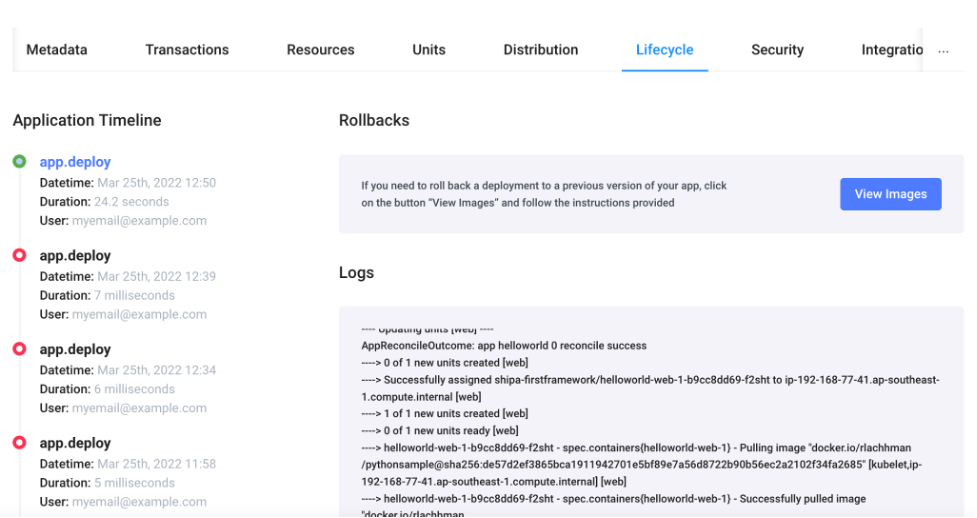
You can check information on the application lifecycle and application logs, including when an application was created and deployed (all very useful for auditing purposes). Shipa also enables you to easily roll back applications with a few clicks, offering a far simpler and less error-prone technique than using Kubernetes’ kubectl rollout to view and roll back revisions.
Wrapping Up
I’ve found that Shipa simplifies the effort required to deploy applications on Kubernetes. Developers don’t have to write even one Docker file — or set up complex name-based virtual hosting — to launch their applications. While it’s useful for developers to understand how Kubernetes functions to some degree, it’s far more valuable to be able to begin harnessing the power of Kubernetes with some of its most tricky challenges removed.
Opinions expressed by DZone contributors are their own.

Comments