How to Install Jenkins With a WAR File
Jenkins is an open source tool that can be used for test automation with continuous integration and deployment. Check out this post to learn how to install Jenkins!
Join the DZone community and get the full member experience.
Join For FreeOpen source Jenkins is a popular tool for test automation and implementing shifting left through continuous integration and continuous deployment. Followed by two blogs introducing how to install Jenkins on Windows (click here) and on Ubuntu (click here), a third way is to install Jenkins with a WAR (Web application ARchive) file version of Jenkins. This option can be used on any Java-supporting platform or OS.
First, you will need to install JDK. Jenkins supports Java 8. If you don’t know how to install Java, look at this blog. Now that Java is installed, we can proceed with Jenkins.
Installing Jenkins
1. Click here to download the latest Jenkins WAR file.
2. Copy the jenkins.war file to the folder you want. I created a folder named Jenkins in the path C:\Program Files (x86) and copied the jenkins.war file to it.

3. Open the command prompt window and browse to the directory where the jenkins.war file is present, through the command cd C:\Program Files (x86)\Jenkins.

4. Run the command java -jar jenkins.war.
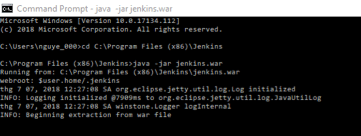
5. Wait until the process is complete.
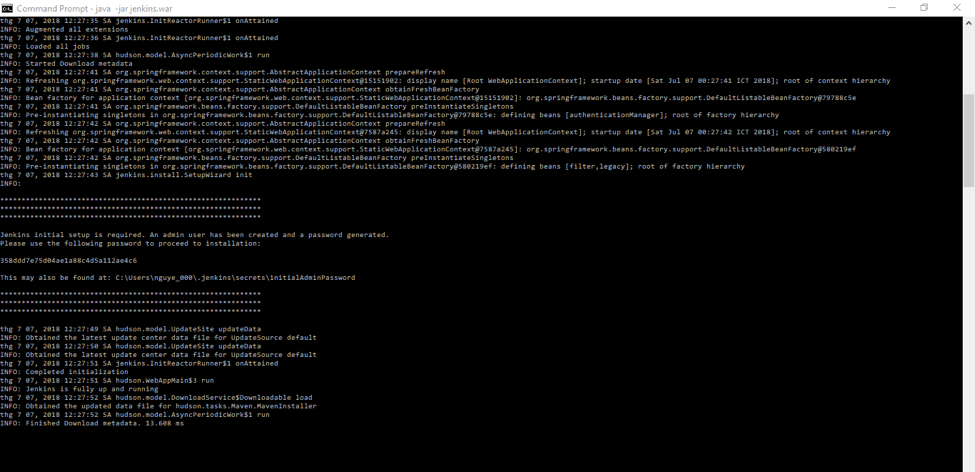
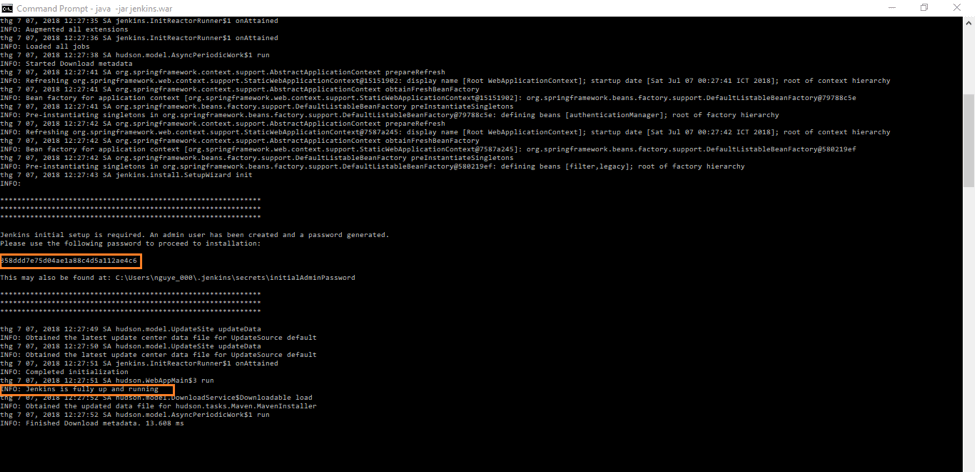
6. Take a look at the line “INFO: Jenkins is fully up and running” that indicates that Jenkins is running. Write down the random password that is auto-generated. We will use this password for the initial login later.
7. Paste the URL http://localhost:8080 in your browser to browse to the Jenkins page.
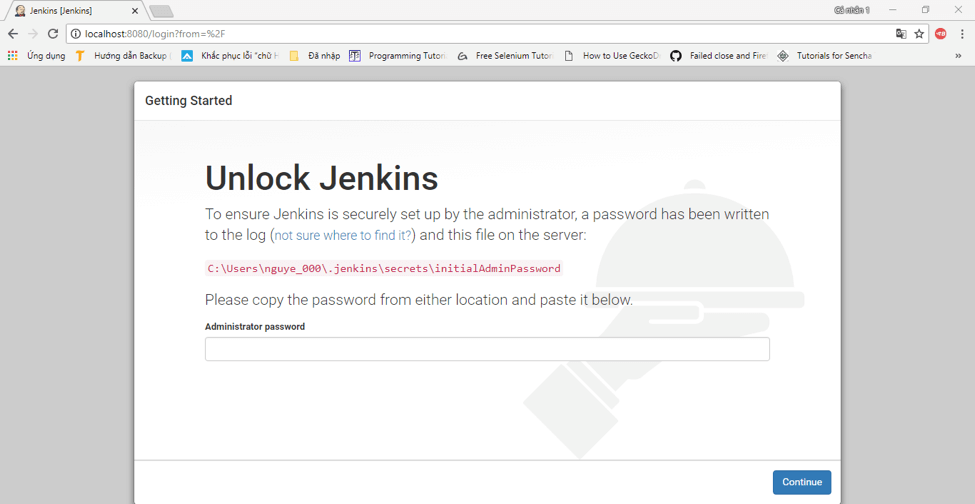
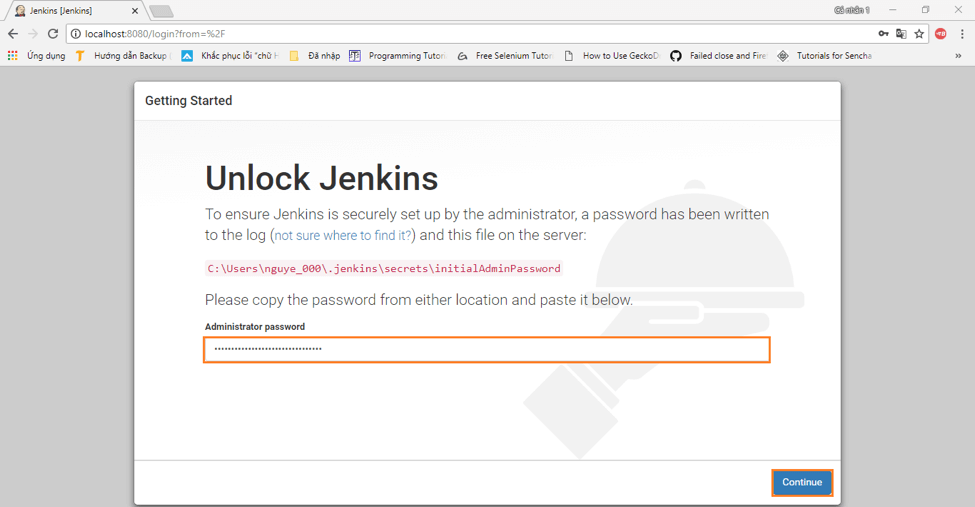
8. To unlock Jenkins, paste the random password that you wrote down in the previous step or copy it from the user account folder, from the file C:\Users\<your_user_account_folder_name>\.jenkins\secrets\initialAdminPassword. Paste it in the Administrator password field and click on the “Continue” button.
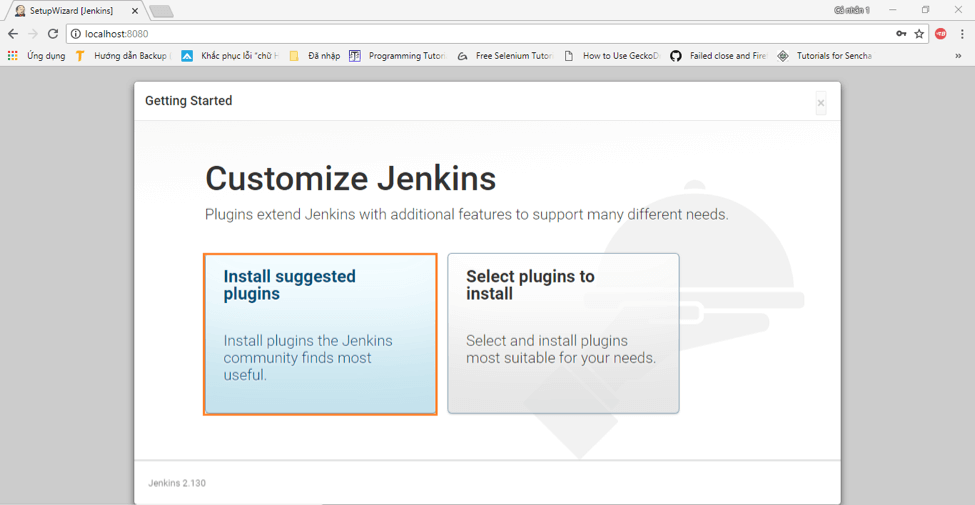
9. Install the suggested plugins or customize plugins installation according to your needs. We will install the default suggested plugins.
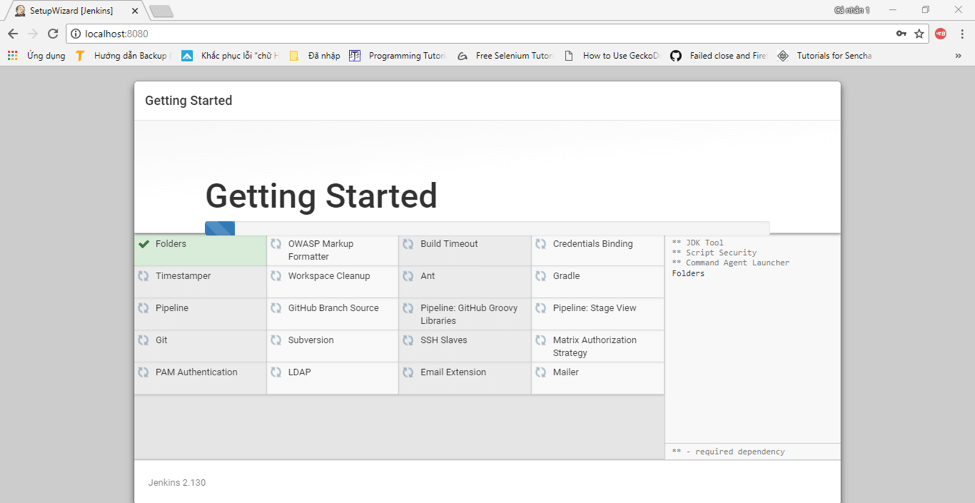
10. Wait for the plugins to complete the installation.
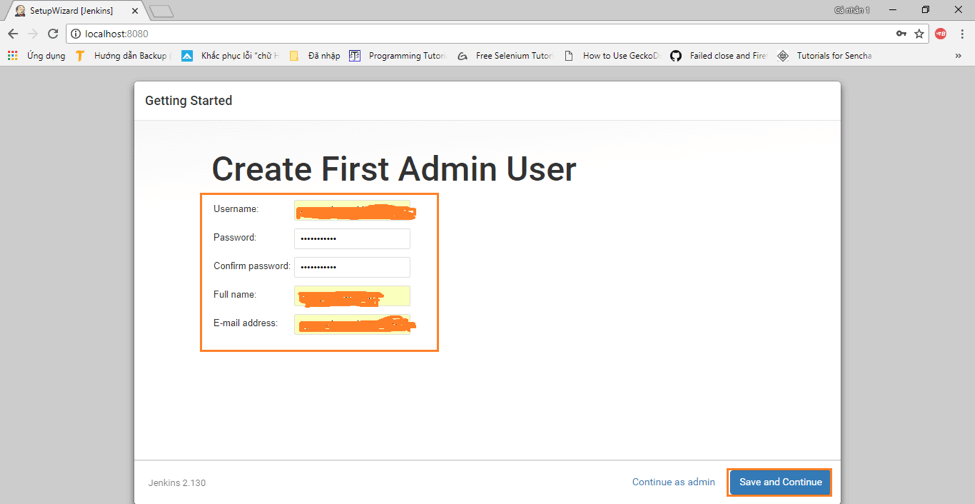
11. Create an admin user and click “Save and Continue.”
12. Click “Save and Finish” to complete the process.
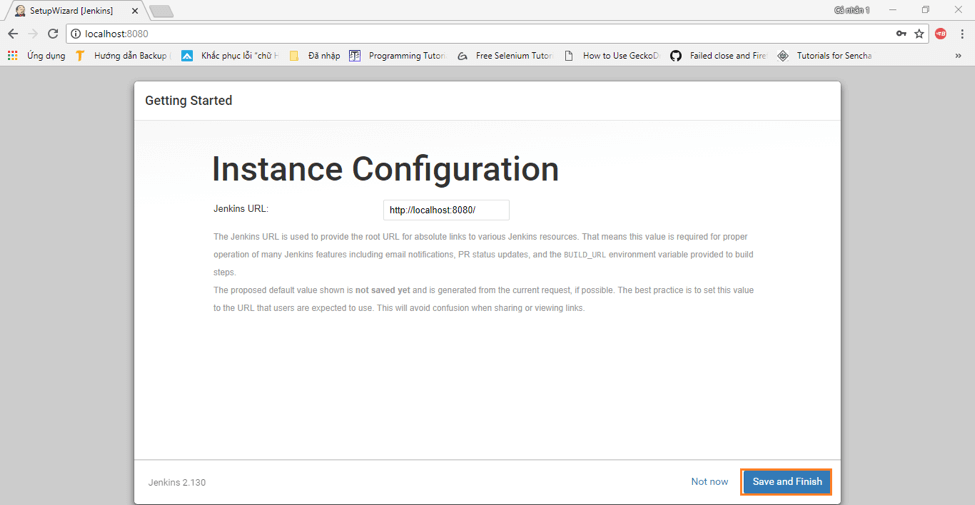
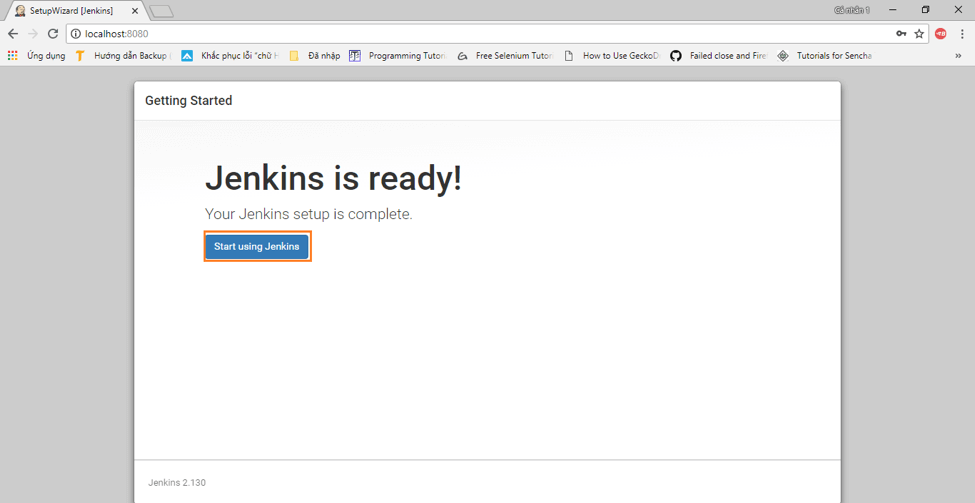
13. Finally! Click “Start using Jenkins” to start Jenkins.
14. Here is the default Jenkins page. You can create your first job!
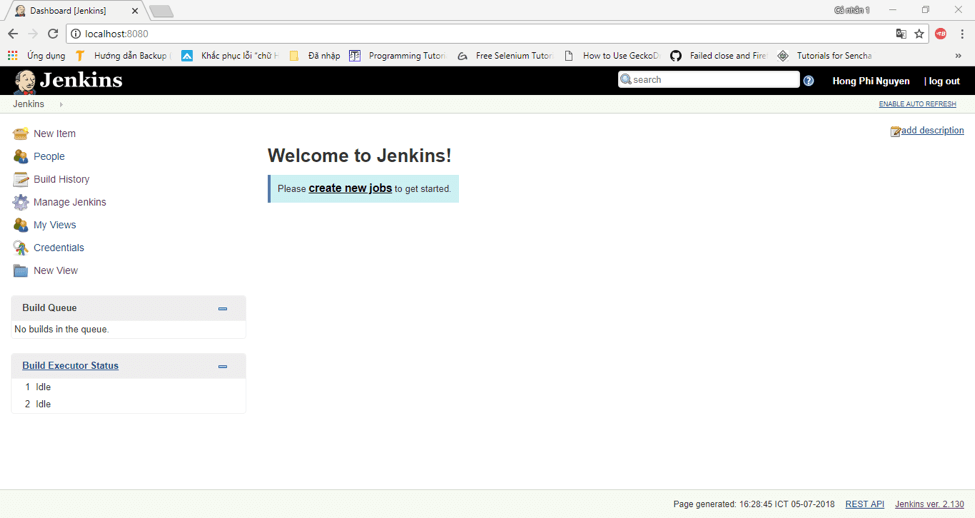
Great! Everything is ready! Now, you can start creating your workflows. To learn how to use Jenkins, check out these resources:
- The Continuous Testing academy
- 2 Ways to Integrate JMeter Tests into Jenkins
- How to Include Load Testing in your Continuous Integration Environment
- Are You Using Jenkins the Right Way?
- Running a JMeter Test via Jenkins Pipeline - A Tutorial
- BlazeMeter’s Jenkins Plugin
- Top Jenkins Plugins You Can’t Miss
Published at DZone with permission of Phi Nguyen, DZone MVB. See the original article here.
Opinions expressed by DZone contributors are their own.

Comments