How to Create a 1-to-1 Messaging App Using Ejabberd and Erlang?
Let's take a look at how to create a 1-t-1 messaging app using ejabberd and erlang. Also, explore the installation and setting up erlang on Ubuntu.
Join the DZone community and get the full member experience.
Join For Free
There are tons of chat communication platforms available in the market transmitting millions of messages every day over the servers. And the contributors to create a 1-to-1 messaging app is more or less increasing due to the abrupt growth of the chat app market value. Coming to the discussion, building yet another instant messaging system is not fair enough since most people already have a lot of messenger apps on their smartphones. But considering a real-time chat system as an addition or replacement for the messengers is possible only by relying on Ejabberd and Erlang.
Serving as a decentralized communication infrastructure Ejabberd (an application server with tons of ejabberd chat tutorials) allows you to create a 1-to-1 chat app with erlang that can run under many operating systems. Yet another purposeful, functional programming language which can be distributed on different networks provide to create a unified 1-to-1 messaging app.
In this article, we are going to develop a one-to-one chat system with help of Contus fly’s source code and also combination with powerful technologies such as Ejabberd (Framework) and Erlang (language), XMPP Protocols, MySQL (Database). In order to initiate the process of development, certain consideration is involved to create your one-on-one chat application. To handle the deployment we use open-source operating system and Linux distribution, Ubuntu’s latest version.
- Erlang
- MySQL
- Ejabberd
- PSi+
Installation and Setting Up Erlang on Ubuntu
Step-by-step procedure for the installation of Erlang in the Ubuntu server:
Step 1: Download Erlang in the Ubuntu Server
- Download the source file in the Linux server using the link mentioned. To make the process running, Erlang Version of 18.0 requires and it demands regular update.
$ wget http://erlang.org/download/otp_src_18.0.tar.gz- The Wget Command is program used to retrieve the content and download the erlang source files.
Step 2: Extraction Erlang tar File
Extract the entire tar file downloaded using the command.
$ tar -xvzf otp_src_18.0.tar.gzStep 3: Addition of Dependencies in the Command
In order to perform a specific task, there demands dependencies in a single library that will do the certain task. The dependencies are given below.
$ sudo apt-get install gcc make build-essential libncurses5-dev openssl libssl-dev fop xsltproc unixodbc-dev libwxbase3.0 libwxgtk3.0-dev libqt4-opengl-dev autoconfStep 4: Beginning the Compilation and Install the Erlang
In order to compile the source code use “make” command to initiate the execution of the file and install the Erlang through “make install” on the linux server. To verify the dependencies “configure” command will assist with.
 $ sudo ./configure
 $ sudo make
 $ sudo make install
Now Install MySQL Database and Import Ejabberd Database
Installation of MySQL database can be performed using the command.
$ sudo apt-get install mysql-server-5.6
- The installation of MySQL Server package will lead to a screen in order to set up the MySQL root on your terminal, enter the user root password of MySQL.
- Confirm the action again in the dialogue box.
- Once the installation process of MySQL server is carried, the MySQL service automatically runs where you can login the MySQL server with the user root password.
- In order to review the status of MySQL server, the mentioned command will help you out.
$ sudo service mysql status5. The creation of database can be carried with the following command.
$ mysql -u root -p6. This leads to rise of Pop-up to enter the password and thereby to create a database for one-on-one chat between the users.
 $ mysql> create database chat;
 $ mysql > \q;
Copy the Ejabberd MySQL database structure from the mentioned link and thereby Save the code in the respective mysql.sql file.
https://github.com/processone/ejabberd/blob/16.08/sql/mysql.sqlTo import the ejabberd database structure to chat database, use the following command.
$ mysql -u root -p chat < mysql.sqlAs the process of installation of MySQL database is carried out, the installation of Ejabberd, XMPP server on Ubuntu.
Installation of Ejabberd XMPP Server on Ubuntu
The installation is to be processed on Ubuntu 14.4/16.04 in explained in detail. And also can be processed on ejabberd XMPP server over BOSCH.
Step 1: Downloading of Ejabberd in the Ubuntu Server
Ejabberd source file can be downloaded in the linux server through the following link and this requires 16.08 Ejabberd version and demands updates. The Wget Command will help out to download the Erlang source files.
$wget https://www.processone.net/downloads/ejabberd/16.08/ejabberd-16.08.tgzStep 2: Extraction of the Erlang tar File.
The erlang tar file can be extracted through the following command.
$ tar -xvzf ejabberd-16.08.tgzStep 3: Addition of Dependencies in the Command
In order to perform a specific task, there demands dependencies in a single library that will do the certain task. The dependencies are given below.
$ sudo apt-get install rebar libyaml-dev libexpat1-devStep 4: Fixation and Verification of the Issue
In order to compile and verify the initial issues and correspondings, make use of
autogen.sh.Step 5: Installation and Execution Part of Ejabberd
In order to compile the source code, use “make” command to initiate the execution of the file and install the Erlang through “make install” on the Linux server. To verify the dependencies “configure” command will assist with.
 $ sudo ./configure
 $ sudo make
 $ sudo make install
Step 6: Accessing the Ejabberd Configuration File
Set the database with Ejabberd file through the following command.
$ sudo nano /etc/ejabberd/ejabberd.ymlConfirm the action with MySQL database IP, Username, Database name and Password.
 auth_method: sql
 sql_type: mysql
 sql_server: “localhost″ (Mysql Database IP)
 sql_database: “chat” (Database name)
 sql_username: “root” (Database user name)
 sql_password: “password” (Database password)
Save the file as follows file /etc/ejabberd/ejabberd.yml
Step 7: Run the Ejabberd
Run the ejabberd while after the modifications are made.
$ sudo ejabberdctl startStep 8: Reviewing the Status through Local Host
In order to review and verify the status of Ejabberd installation, the mentioned command will help you out.
$ sudo ejabberdctl statusOnce the verification are made, the node ejabberd at Localhost initiates the command and leading to the running of ejabberd 0.0. A localhost IP http://localhost:5222” displays the similar XML text.
<!--?xml version=’1.0'?-->
The registration of users in ejabberd can be carried with the following code:
$ ejabberdctl register user1 localhost password
$ ejabberdctl register user2 localhost password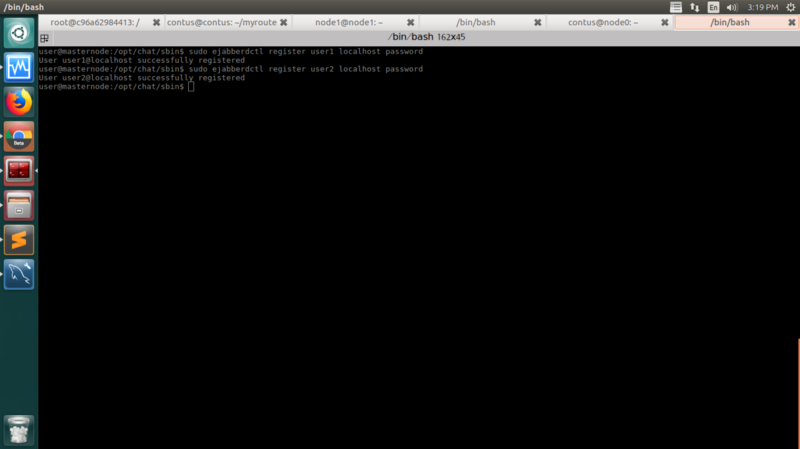
Installation of PSi+ Software for One-to-one Chat
Download & install the PSi+ Software through Ubuntu Software Centre.
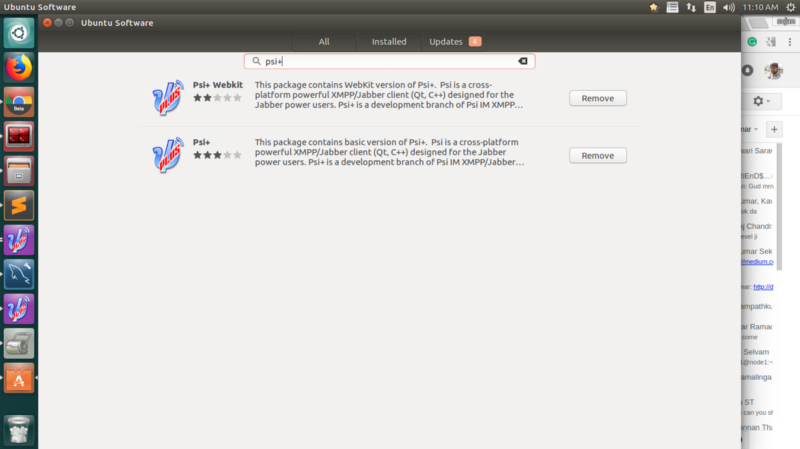
The following guidelines and Screenshots can be followed in order to register the user and create a 1 on 1 chat app.
- Click on the indicated icon for setting of account “User1”.
![]()
2. Move to Account Setup in order to validate the “User1” and Follow with “add button”.
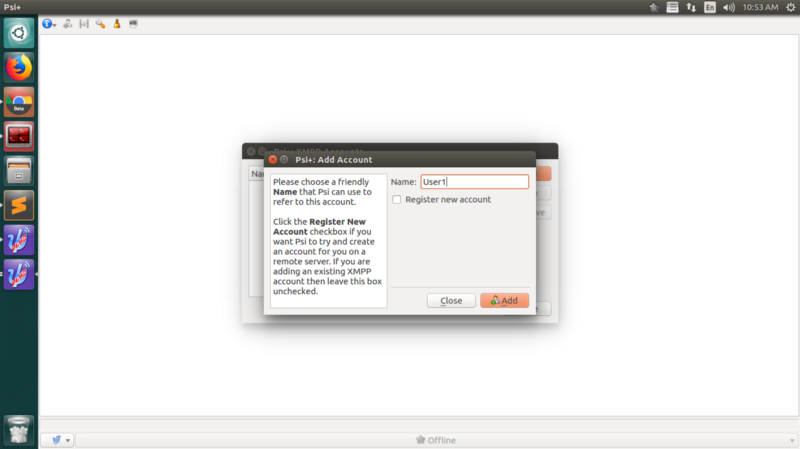
3. In the respective dialogue box enter the XMPP address as “user1@localhost” or server IP and Password on the dialogue box.
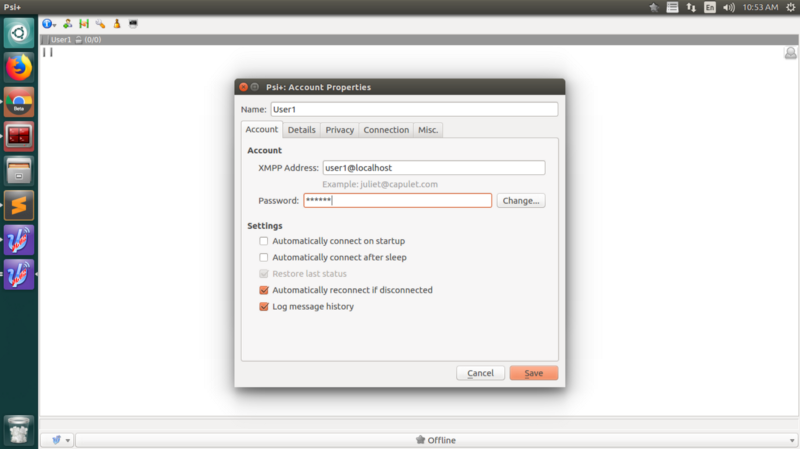
4. Close the dialogue box in order to blank the personal information of the user.
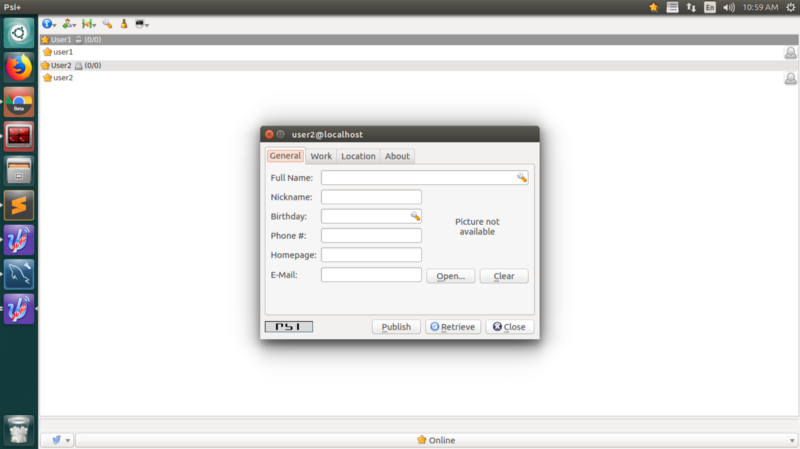
5. In order to enable the “Online” status, click on the online icon on right for both the users.
6. Follow up the steps given from 1 to 3 in order to register the “User2”
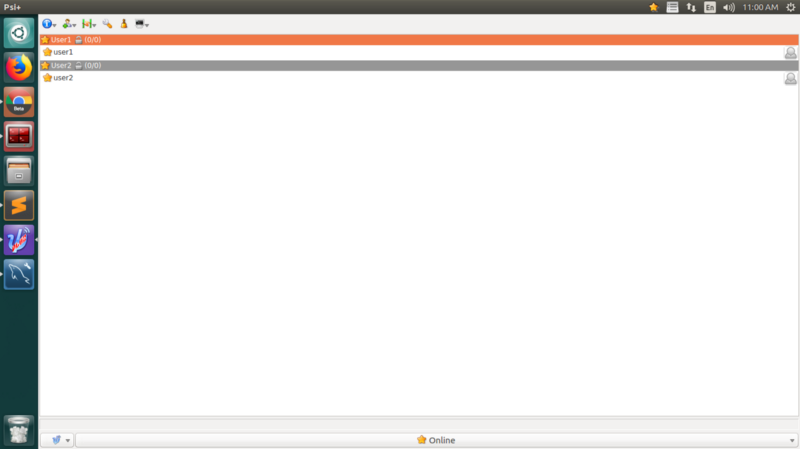
7. Enter the XMPP address as “User” i.e (User1@localhost) to add contact in the “User2”.
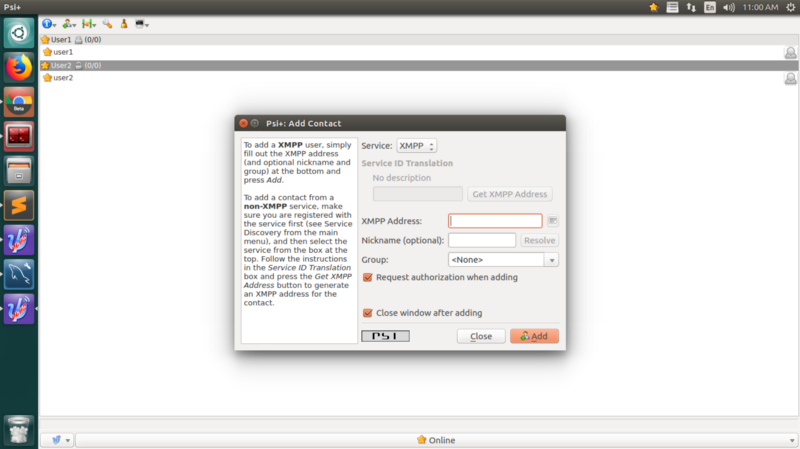
8. Follow up the screenshot guidance to add “User2” in the list “User1”.
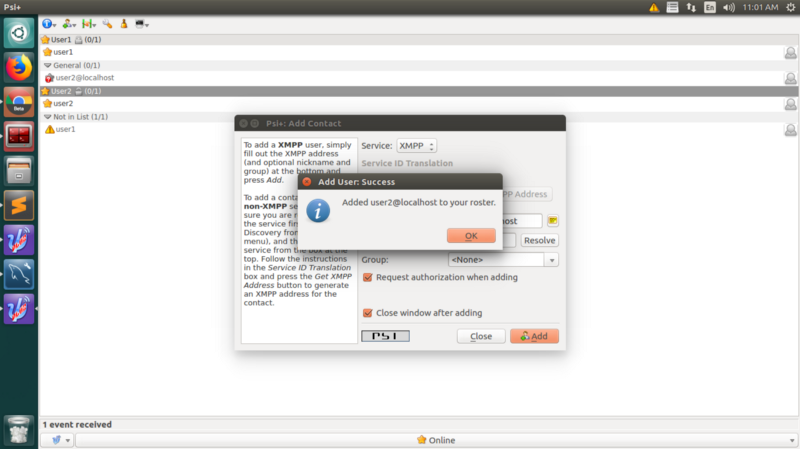
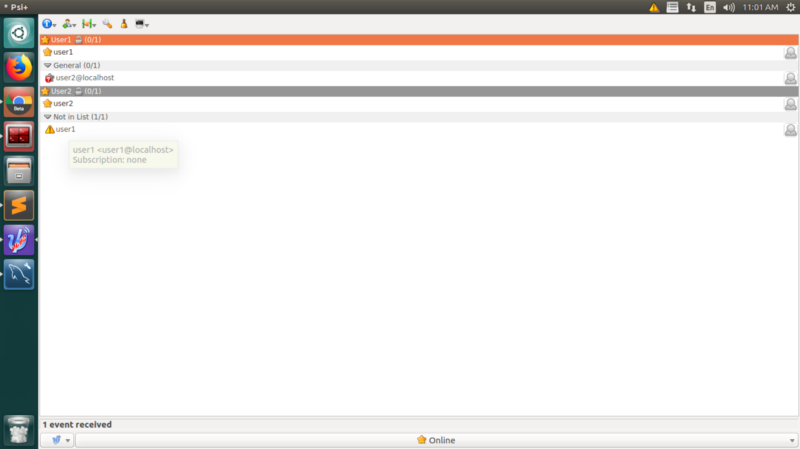
9. Close the dialogue screen by clicking on “add/auth”.
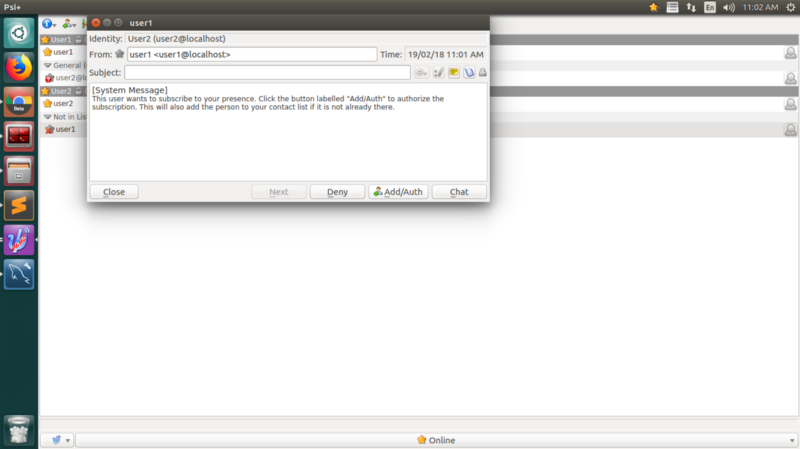
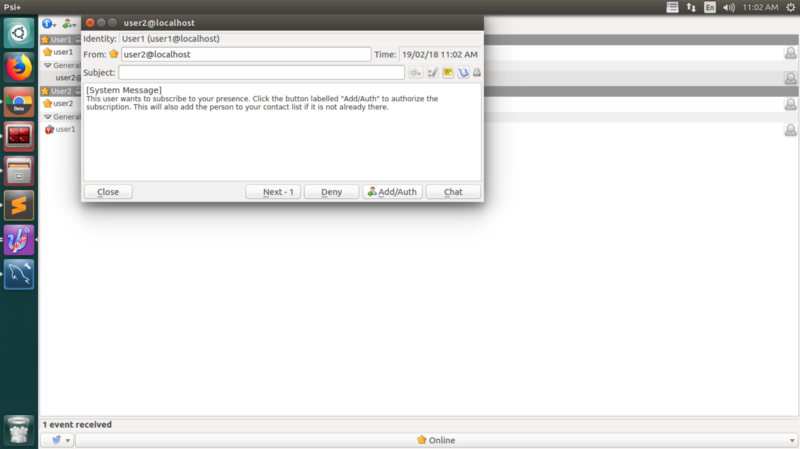
10. Make sure to double click on the “User1” to enter the messaging to get received by the “User2” in the following popup screen.
The same process can be followed for “User2”
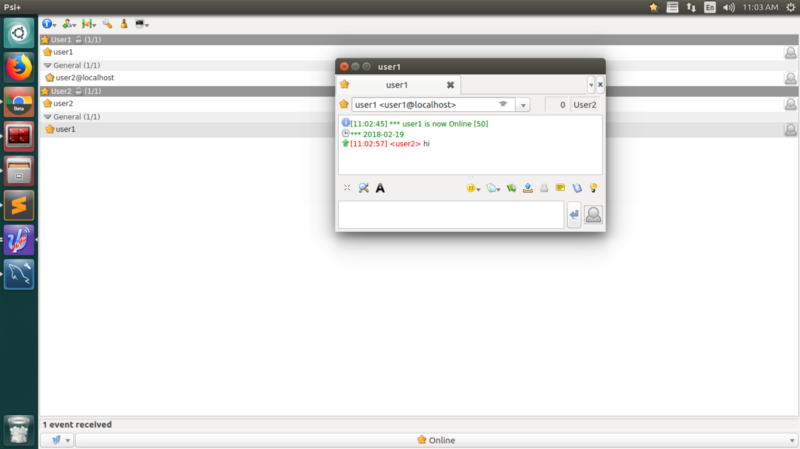
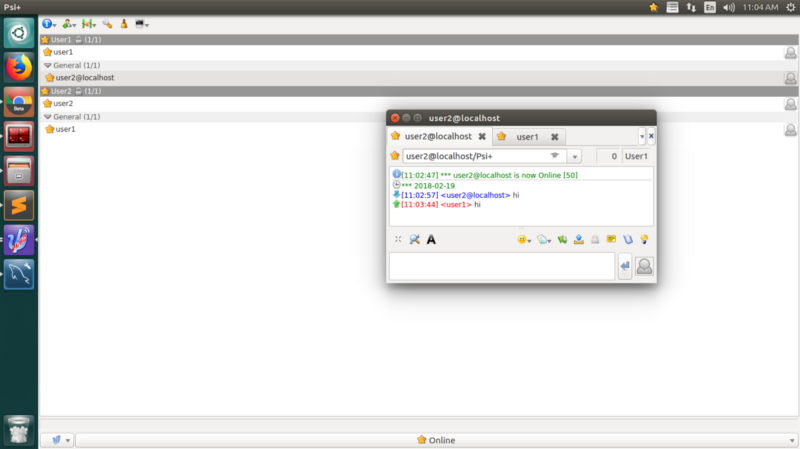
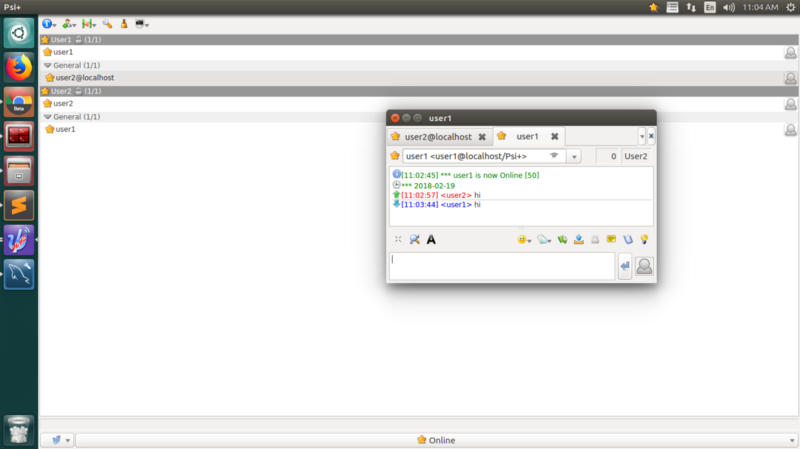
11. In order to obtain the XMPP protocol format, right click on “User1” and follow the process - Account -> XML console -> Enable & Filter option.
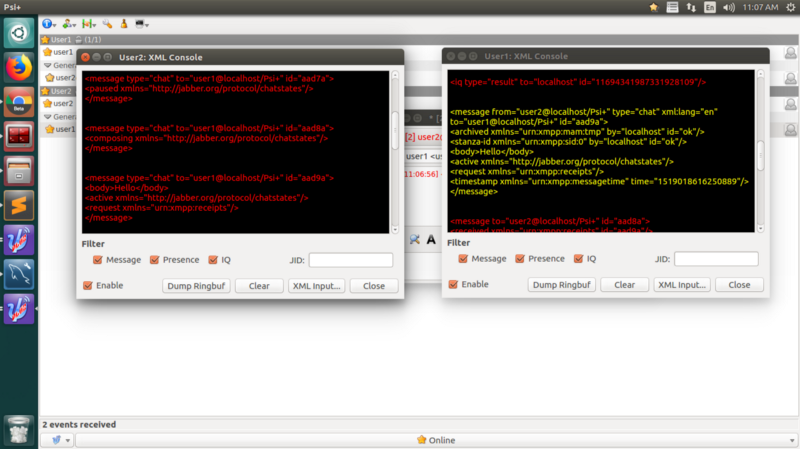
Here, we get to the overall procedure to build a chat app and 1-to-1 chat with erlang. I hope the process was very interesting, and if you are very much interested to build a chat app for mobile and web using javascript and ejabberd, you can get in touch with me or our team of experts who have insightful experience in developing chat applications.
Opinions expressed by DZone contributors are their own.

Comments