How to Connect to Splunk Through Anypoint Studio in 10 Steps
A quick, step-by-step tutorial on how to create a Splunk account and connect it to Anypoint Studio using the cloud platform provided by Splunk.
Join the DZone community and get the full member experience.
Join For Free1. Create a Splunk Account using the below link:
We can use either the cloud option or the download option.
In this blog, we will be using the cloud option. An email will be triggered for verification and once verification is complete we will get our Splunk credentials like below:
Note: Save the Cloud-URL. We will be using this in the following steps.

2. Log in to the URL received via email:
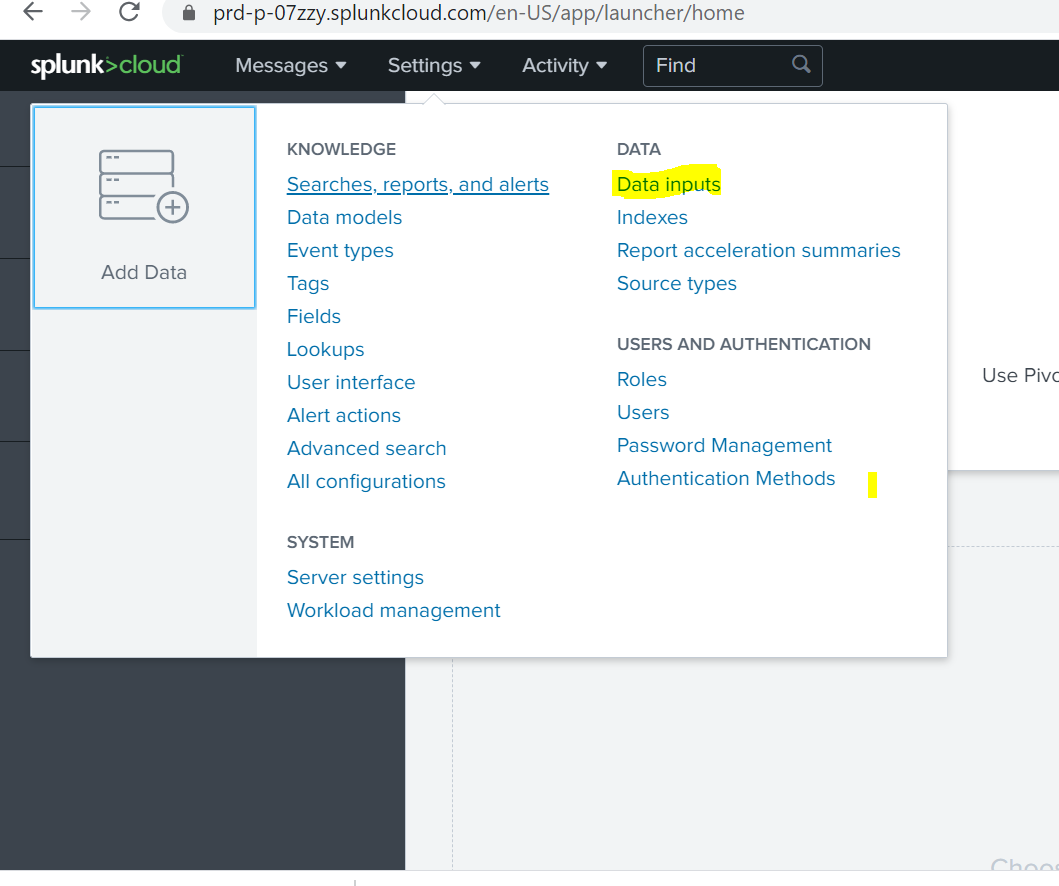
Navigate to Settings -> Data Input

3. Open the HTTP Event Collector and click 'New Token':

4. Add the below config in the new token Config. Once we submit, we will get the token. Save the Token. We will be using this token in the next steps:

5. Create one sample project.
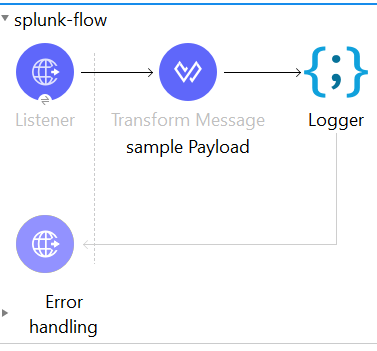
Here we are using an HTTP Listener and create a sample payload. The same payload is being logged using the JSON logger.
Project flow:

Project XML:
xxxxxxxxxx
<mule xmlns:json-logger="http://www.mulesoft.org/schema/mule/json-logger" xmlns:ee="http://www.mulesoft.org/schema/mule/ee/core"
xmlns:http="http://www.mulesoft.org/schema/mule/http"
xmlns:sockets="http://www.mulesoft.org/schema/mule/sockets" xmlns="http://www.mulesoft.org/schema/mule/core" xmlns:doc="http://www.mulesoft.org/schema/mule/documentation" xmlns:xsi="http://www.w3.org/2001/XMLSchema-instance" xsi:schemaLocation="http://www.mulesoft.org/schema/mule/core http://www.mulesoft.org/schema/mule/core/current/mule.xsd
http://www.mulesoft.org/schema/mule/sockets http://www.mulesoft.org/schema/mule/sockets/current/mule-sockets.xsd
http://www.mulesoft.org/schema/mule/http http://www.mulesoft.org/schema/mule/http/current/mule-http.xsd
http://www.mulesoft.org/schema/mule/ee/core http://www.mulesoft.org/schema/mule/ee/core/current/mule-ee.xsd
http://www.mulesoft.org/schema/mule/json-logger http://www.mulesoft.org/schema/mule/json-logger/current/mule-json-logger.xsd">
<http:listener-config name="HTTP_Listener_config" doc:name="HTTP Listener config" doc:id="2ebe7a73-f253-4265-a34b-06503551c083" >
<http:listener-connection host="0.0.0.0" port="8081" />
</http:listener-config>
<json-logger:config name="JSON_Logger_Config" doc:name="JSON Logger Config" doc:id="2b1840f8-7446-42f3-b934-e75fa8f14f96" environment="dev" applicationName="Testing" applicationVersion="1.0.0"/>
<flow name="splunk-flow" doc:id="3d2e9b4b-043f-42b4-8a53-60f278806e51" >
<http:listener doc:id="03371965-d3d4-4b7c-bcd8-6cc65d3c6bea" doc:name="" path="/test" config-ref="HTTP_Listener_config"/>
<ee:transform doc:name="sample Payload" doc:id="c3ab8cfe-5d72-47f6-9a5a-56ef49287c45" >
<ee:message >
<ee:set-payload ><![CDATA[%dw 2.0
output application/json
---
{
"test": "Success"
}]]></ee:set-payload>
</ee:message>
</ee:transform>
<json-logger:logger doc:name="Logger" doc:id="833a4e93-bcf0-4ad3-9d64-3c0b7ca35d40" config-ref="JSON_Logger_Config" message="testing"/>
</flow>
</mule>
6. Update the POM to include the below dependency and repository:
xxxxxxxxxx
<dependency>
<groupId>com.splunk.logging</groupId>
<artifactId>splunk-library-javalogging</artifactId>
<version>1.7.3</version>
</dependency>
<dependency>
<groupId>org.apache.logging.log4j</groupId>
<artifactId>log4j-core</artifactId>
<version>2.10.0</version>
</dependency>
<dependency>
<groupId>org.apache.logging.log4j</groupId>
<artifactId>log4j-api</artifactId>
<version>2.10.0</version>
</dependency>
<repositories>
<repository>
<id>Nexus</id>
<name>Nexus Public Repository</name>
<url>https://repository-master.mulesoft.org/nexus/content/groups/public/</url>
<layout>default</layout>
</repository>
<repository>
<id>anypoint-exchange</id>
<name>Anypoint Exchange</name>
<url>https://maven.anypoint.mulesoft.com/api/v1/maven</url>
<layout>default</layout>
</repository>
<repository>
<id>mulesoft-releases</id>
<name>MuleSoft Releases Repository</name>
<url>https://repository.mulesoft.org/releases/</url>
<layout>default</layout>
</repository>
<repository>
<id>splunk-artifactory</id>
<name>Splunk Releases</name>
<url>https://splunk.jfrog.io/splunk/ext-releases-local</url>
</repository>
</repositories>
<pluginRepositories>
<pluginRepository>
<id>mulesoft-releases</id>
<name>mulesoft release repository</name>
<layout>default</layout>
<url>https://repository.mulesoft.org/releases/</url>
<snapshots>
<enabled>false</enabled>
</snapshots>
</pluginRepository>
</pluginRepositories>
7. Copy the below Log4j file and replace the existing Log4j under src/main/resources.
Note: This is a minimum Log4j configuration to send the data to Splunk. Update the Your-CloudURL and Your-Token which you received in the previous steps.
x
<Configuration status="INFO" name="cloudhub" packages="com.mulesoft.ch.logging.appender, com.splunk.logging ,org.apache.logging.log4j">
<Appenders>
<SplunkHttp name="splunk" url="<<Your-CloudURL>>:8088/" token="<<Your-Token>>" index="main" disableCertificateValidation="true">
<PatternLayout pattern="%-5p %d [%t] [event: %X{correlationId}] %c: %m%n" />
</SplunkHttp>
</Appenders>
<Loggers>
<AsyncLogger name="org.mule.service.http" level="WARN" />
<AsyncLogger name="org.mule.extension.http" level="WARN" />
<!-- Mule logger -->
<AsyncLogger name="org.mule.runtime.core.internal.processor.LoggerMessageProcessor" level="INFO" />
<AsyncRoot level="INFO">
<AppenderRef ref="splunk" />
</AsyncRoot>
</Loggers>
</Configuration>
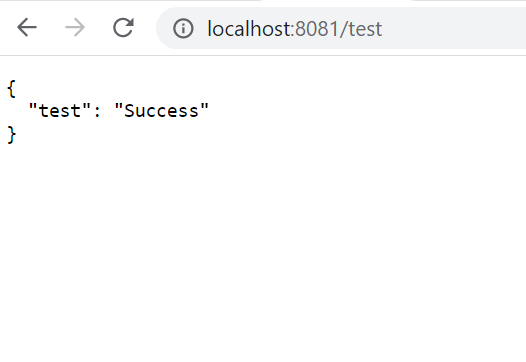
8. Run the application and hit the below local URL:

9. Open the Search Reporting section in Splunk using the same cloud URL:

10. We can search the logs using the message part which we sent using the JSON logger:

Opinions expressed by DZone contributors are their own.

Comments