How to Change a Job Configuration Without Worrying
Learn how to use Job Configuration History and plugins in Jenkins to confidently change job configurations for continuous integration.
Join the DZone community and get the full member experience.
Join For FreeStarting with a new tech or solving a problem using a different strategy sometimes may be a bit scary. Tracking the history or checking the progress could increase significantly the confidence of making changes. Even more when it is a natural and automatic process.
Understand how a simple plugin could help you a lot on this journey, tracking the jobs and the system configurations. It is useful when you are starting with Jenkins but also if you are already automating your projects.
Job Configuration History
Job Configuration History plugin is very simple but extremely useful. The main objective is to save every change made on a job or on the system configurations. Considering that Jenkins store their information into files, the plugin just maintains the previous state of the configuration.
There are two main benefits of using this plugin. The first one is to track the history of any change that happened. This can save you lots and lots of time when a job suddenly stop working. Checking the history enables to quickly find the changes that cracked the job. The second, if it is used in a good way, could improve a lot the team learning. Each configuration change saves the user who made it. So if you want to learn with the user who made the change, you can. And you can also help or teach who made the mistake causing the job error showing exactly where was the problem.
Installing
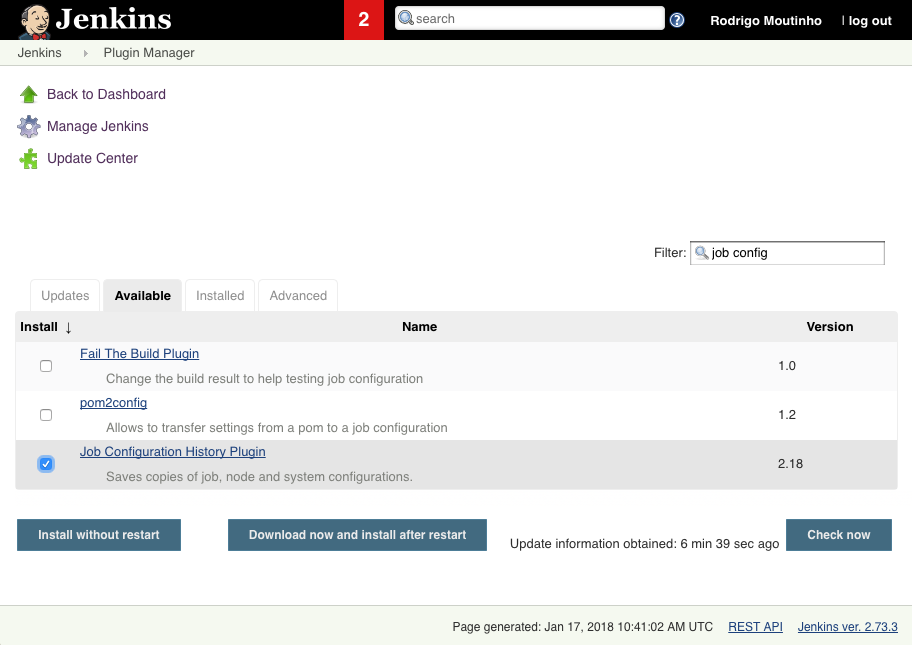
If you already read the article How to Install a Jenkins' Plugin in 5 Minutes, you may notice that I fooled you. Sorry, but you will take less than a minute to install this plugin and get it ready to use!
Note that you only need to type part of the name, select the item and click the button Install without restart. Jenkins will redirect to an installation page showing the progress. It should be a very quick operation.

Hands-on
To ease this process, let’s consider the same operations done at Getting Started with Jenkins - The Ultimate Guide. They are simple changes related to Maven that will show system and jobs configuration changes.
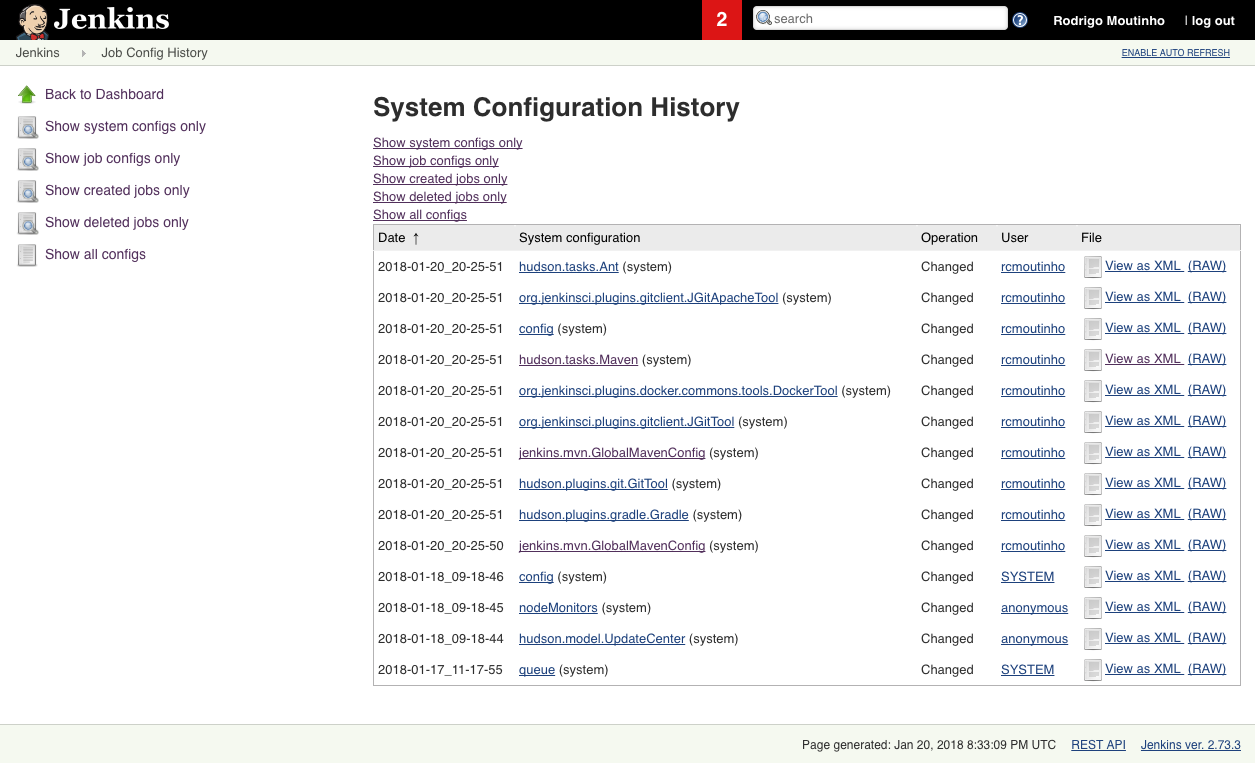
After the plugin’s installation, at Jenkins home page, a new menu will be available, Job Config History. This page will show absolutely everything that has changed on your entire Jenkins. Useful to view created and deleted (maybe accidentally) jobs but mainly to check system configuration changes.

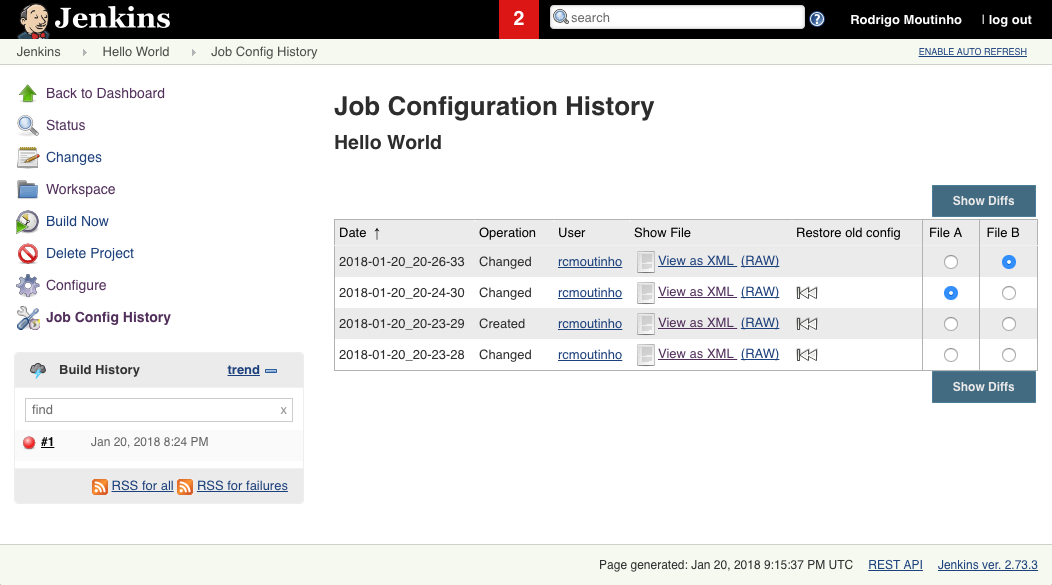
This new menu also appears in each available job. Now every change can be tracked along the automation.

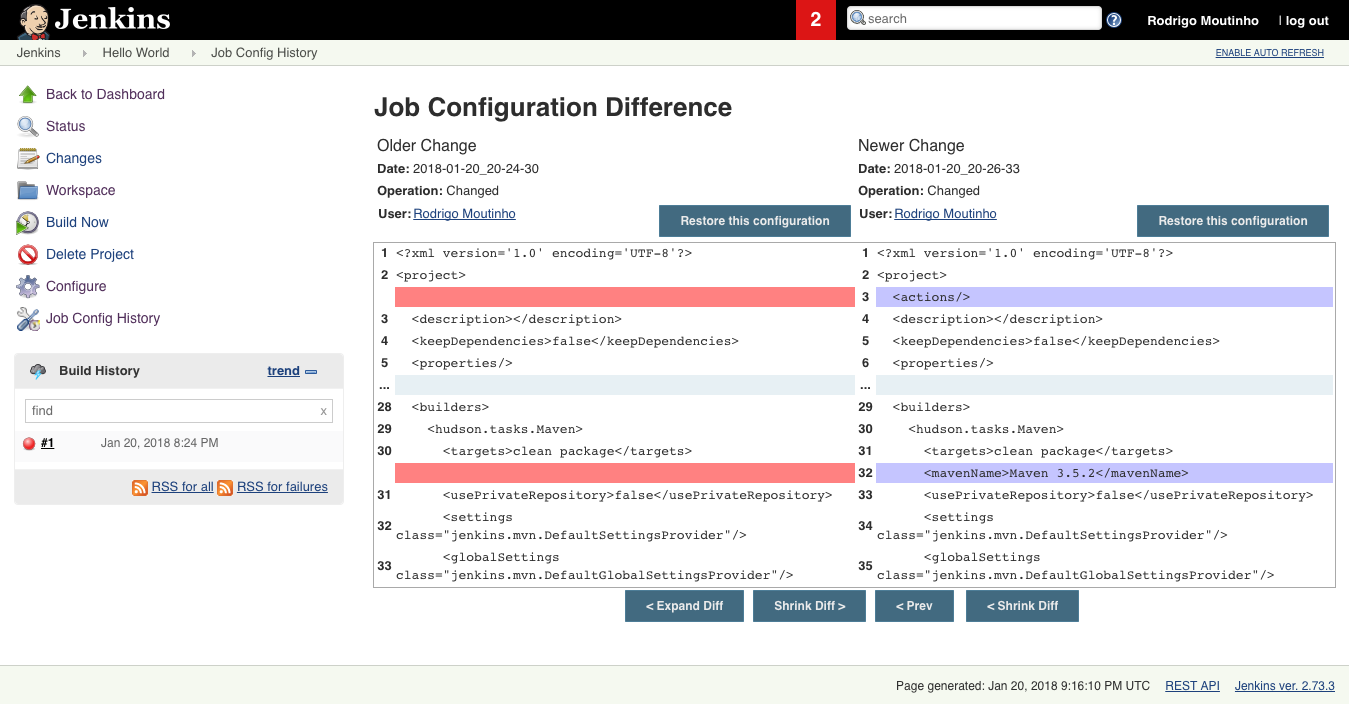
This plugin provides extra options like pages showing the differences and a restore process with a previous configuration. Realize how simple it is to notice the only change made, that Maven version is now specified.

This plugin has extra configurations like the maximum number of history entries to keep, the maximum number of days to keep history entries, and so on. You can change those configurations at Manage Jenkins > Configure System, at Job Config History session. These changes will also be tracked.
What's Next
Installing this plugin will help you to understand why a new deployment is not working compared to the previous one, track the performance based on the job changes, or even check the messy or a great job done by a teammate.
Start to improve your automation. Comment here how useful this plugin was on this journey.
Let’s automate!
P.S.: The Cyborg Developer initiative offers a FREE email course about software automation in 3 steps. You can subscribe here. You will also receive tips and tricks about automation directly to your mailbox (relax, I hate spam as much as you do). Follow me on Twitter @rcmoutinho.
Published at DZone with permission of Rodrigo Moutinho. See the original article here.
Opinions expressed by DZone contributors are their own.

Comments