How to Build OpenJFX 8 on Windows From Source
JavaFX is also affected by Oracle's recent announcements concerning its roadmap — if you're still using it, what can you do?
Join the DZone community and get the full member experience.
Join For FreeSo you've heard the news. Oracle shook up the world and changed the support roadmap, release cycle, and other things for Java and related technologies. However, your business' JavaFX application(s) (and their dependencies) run on Oracle JDK 8. You like stability because if you don't, your business software might fail, costing you money or worse — putting you out of business and/or in debt.
So what does this mean for business consumers of Oracle JDK/JavaFX 8? Two things:
The first, the free, public support that we’ve been nursed to over the years, as if a birthright, will soon end.
After January 2019, public updates for Oracle JDK 8 will not be provided for “business, commercial, or production use” without a commercial license from Oracle.
The second, JavaFX support will also soon end.
Free support for JavaFX 8 will be provided until March 2022, and JavaFX will be removed from the Java SE as of Java SE 11, which is already upon us.
“Winging” it is not an option for serious businesses as using Oracle JDK 8 without security updates, bug fixes, or other support is at best a dire risk and at worse catastrophic; as of Java 11 businesses may not use Oracle JDK 11 in production without a license.
In Case You Missed It
- Faster and Easier Use and Redistribution of Java SE
Exec Summary: Oracle is proposing to increase the release cadence of Java SE to every six months Oracle will simplify... - The Future of JavaFX and Other Java Client Roadmap UpdatesStarting with JDK 11, Oracle is making JavaFX easier to adopt by making the technology available as a separate…
- Java Future Release NoticesIf you are a CONSUMER using Java for an individual, personal use, you will continue to have the same access to Oracle Java…
- Oracle Java SE Support Roadmap
Oracle Java SE Support Roadmap.
So What Now?
The solution: OpenJDK. By this point, it’s clear that the OpenJDK is the future of Java and the JVM; see here for more information. In a way, this is a near facsimile of what Sun wanted all along — a free and open Java. With the aforementioned changes, Oracle provides binary OpenJDK releases for Linux, Mac, and Windows. However, it does not maintain or provide OpenJDK 8 binaries. If you are running on a Linux machine, this may not be an issue, as there are maintained OpenJDK distributions across many Linux platforms. But what if you are on Windows? The situation here is a bit different.
There are a few folks (@chriswhocodes and Sky Land Universal Corporation, for example) who provide their own OpenJFX builds. However, relying on these third parties to provide your OpenJFX builds may not fit your needs. They owe you nothing and can shut down tomorrow without warning. Furthermore, you will be reliant on the integrity of the builds that they provide.
However, the great news is, because of OpenJFX (an OpenJDK project that is the Oracle JFX upstream), you can compile and build against JavaFX in the open — under the GPL v2 w/ Classpath Exception.
Furthermore, as JavaFX is detached from the JVM moving forward, switching to OpenJFX will align your business directly into the future way of doing things, hopefully, making for smoother upgrades. Note, however, that a company called Gluon, which is the de facto community steward of OpenJFX, provides OpenJFX 11 builds for when you are ready to make the switch. The beauty of it all? You don’t have to use Gluon’s builds if you don’t want to, although they are exceptionally supportive and are the driving force of evolution in the JavaFX community.
Support From the OpenJDK Community
Up to this point, the issue of Java 8 support beyond January 2019 has not been addressed. Here is where the magic is. Members of the community, including but not limited to, IBM, RedHat, Azul, Eclipse, and AdoptOpenJDK have provided plans for supporting Java 8 support until 2023 (most of them), which is one year after the date that Oracle intends to end public support for JavaFX.
It follows then, that running OpenJFX atop a distribution such as AdoptOpenJDK, would allow your business to viably remain on JavaFX 8 for at least until March 2022. In addition, AdoptOpenJDK provides binaries for OpenJDK, releasing you from having to build OpenJDK binaries from source.
For the purposes of this article, we will show how one can set up an open Java/JavaFX solution on Windows.
Update (12/07/2018): One hour after the publication of this article, Simon Ritter from Azul Systems and the JCP Executive Board published a brief announcement that they are providing OpenJDK builds that include OpenJFX. These builds are called “ZuluFX,” and they are available for Windows, macOS, and Linux.
It is important to note that Azul only provides these ZuluFX builds for x64 bit machines; builds for x86 machines are presently not available from Azul Systems.
- Zulu Gets Graphical With OpenJFX Via the Azul Systems Blog
JavaFX provides a rich set of libraries to create graphical applications in Java. ZuluFX provides JavaFX functionality. You can download their builds here: - Download ZuluFX OpenJFX With OpenJDK Windows Linux macOS
Consequently, this article will explain how to compile OpenJFX as an overlay from source with OpenJDK builds provided by AdoptOpenJdk, which provides various prebuilt OpenJDK Binaries.
Please note that this approach will not work with Java 9+, and I strongly recommend to use the Gluon OpenJFX builds for Java 11, should you intend to migrate from Java 8, as Java 9 and 10 are short-term support versions, and Java 11 is the incumbent LTS Java release as of the date of this article’s publications.
On Maven Central
With Maven
With Gradle
Want the source? Grab it here.
This build was last created on 12/24/2018. As such, the proceeding instructions are accurate only as of the aforementioned date. Absolutely no guarantees, expressed or implied, are given about the nature or integrity of these builds or the source code provided.
Prerequisites
- Patience and hope
- Windows 10 x64 (earlier versions and other architectures may also work)
- A code (text) editor like Notepad++ or Sublime is preferred.
- 10+ GB of free space
Directions
- Open a text editor and a terminal.
- Download AdoptOpenJDK 8 x64. You may choose whichever JVM you like; note, however, that for the purposes of this tutorial, I chose HotSpot.
- Extract the contents of “OpenJDK8U-jdk_x64_windows_hotspot_8u192b12.zip” or whichever is the name of the archive containing the OpenJDK and copy to a path you will remember, for example, C:\java\adoptOpenJDK\java8\. Copy the plain text of this path as well as C:\java\adoptOpenJDK8\java8\bin to a new text file, in your text editor of choice.
- Download and Install Cygwin. Continue with the defaults (Install from the Internet, C:\cygwin64, All users, Download directory…, Use System Proxy Settings, choose a mirror…) For me, I created C:\cygwin64\downloads and used that as the Download directory (mkdir C:\cygwin64\downloads from the command prompt.) Copy C:\cygwin64\bin to your text file, which should now have three directories in your list.
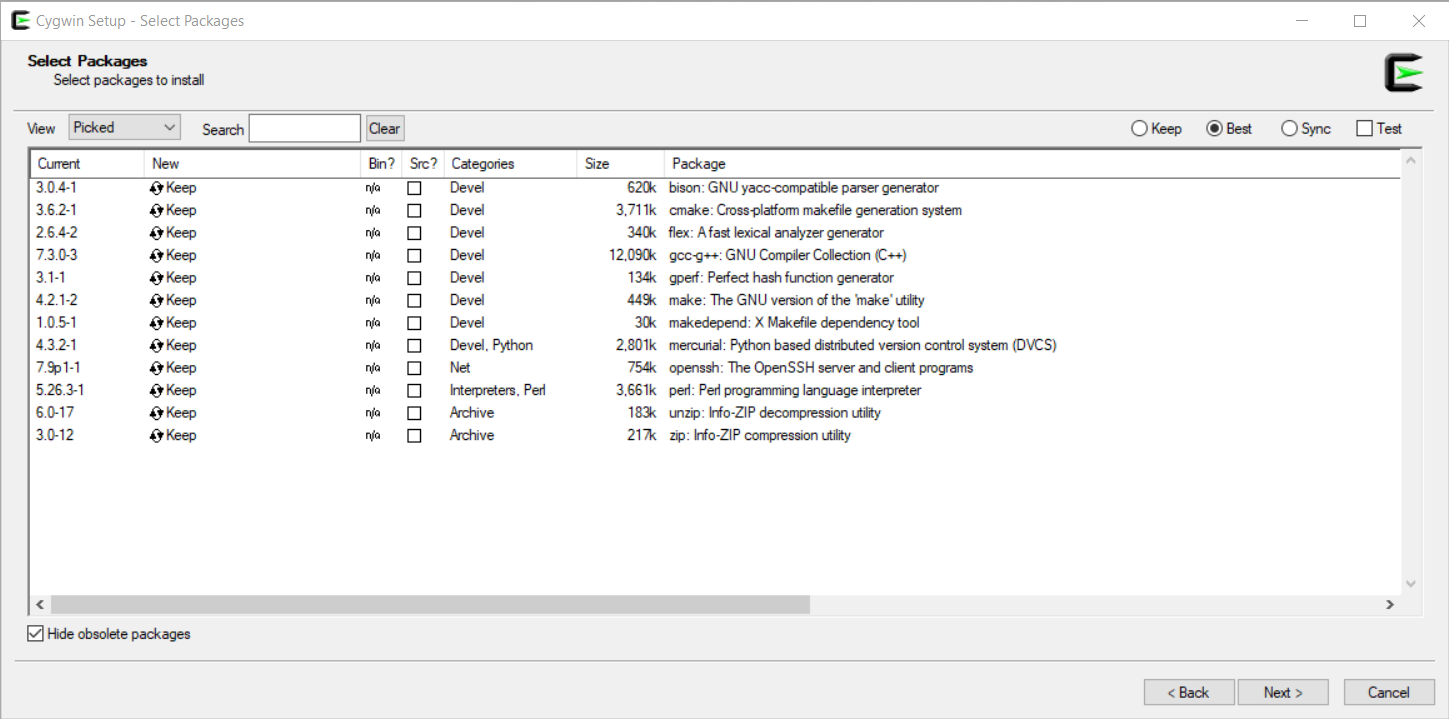
- In the select packages stage of setup prompt, select and install the following packages. When you change the view to pending, you should find all of these selected:
- openssh
- bison
- flex
- gcc-g++
- gperf
- cmake
- make
- makedepend
- mercurial
- perl
- zip
- unzip
After you exit the setup-x86_64.exe program for cygwin, run it again, go through the prompts until you reach the package install page again. Selected “picked” from the drop-down menu. It should look like this:

6. Download and Install “Direct SDK June 2010” to C:\Program Files\Microsoft DirectX SDK (June 2010). Paste “DSDK_DIR “C:\Program Files\Microsoft DirectX SDK (June 2010)\” to your text file.
7. Uninstall the Microsoft Visual C++ 2010 x86 and x64 Redistributables.
8. Restart your machine.
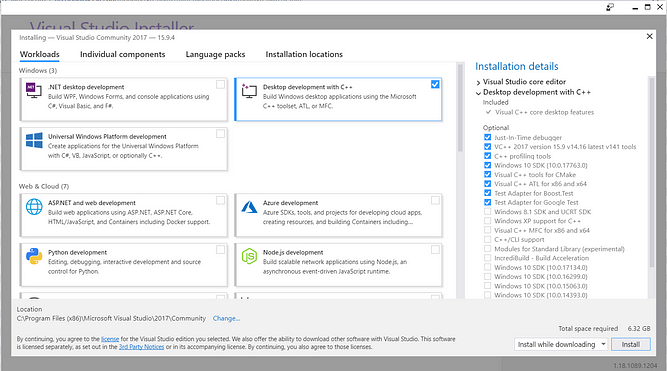
9. Download and install Microsoft Visual Studio 2017 Community Edition or search for “Visual Studio 2017” on the Microsoft Downloads portal. Select “Desktop development with C++” and hit Install. Contrary to the documentation you might find on the OpenJFX wiki, Visual Studio 2017 (15.0) is the presently supported version.

10. In your text file, paste “VS100COMNTOOLS C:\Program Files (x86)\Microsoft Visual Studio\2017\Community\Common7\Tools” to the file.
11. Download and install Mercurial w/ TortoiseSVN x64. Paste “C:\Program Files\TortoiseHg\” to your file. You should now have five entries in your text file.
12. Download Gradle 4.8, extract the zip, and copy the contents of ~\Downloads\gradle-4.8-all\gradle-4.8 to C:\gradle\4.8. (mkdir C:\gradle\4.8). Paste “C:\gradle\4.8\bin” to your text file.
13. Download Apache Ant and extract the contents of the compressed zipped folder to C:\apache\ant-1.8.2\. Add “C:\apache\ant-1.8.2\bin” to your text file list. You should now have eight entries.
14. Set PATH and Environmental variables.
- Open up the Windows File Explorer.
- Drag the cursor to the leftmost pane and right click “This PC”
- Under the context menu, select “Properties”
- You will now be in a directory displaying basic information about your PC (Control Panel\All Control Panel Items\System). In the left-hand pane, you will notice “Advanced system settings." Select this.
- Navigate to the “Advanced” tab and select “Environmental Variables."
- You will see two main boxes. The first will be entitled “User variables for <user name here>, the bottom one will be entitled “System variables”.
- Double click the “Path” system variable.
- WARNING: Be very careful in editing any user or environmental variables. Proceed at your own risk. Failure to properly configure your environmental variables may result in your PC operating incorrectly.
- From your text file, add or ensure that the following directories are present in your system variable named Path and hit OK.
C:\java\adoptOpenJDK\java8\bin
C:\gradle\4.8\bin
C:\apache\ant-1.8.2\bin
C:\cygwin64\bin
C:\Program Files\TortoiseHg
C:\Program Files (x86)\Microsoft Visual Studio\2017\Community\Common7\IDE
C:\Program Files (x86)\Microsoft Visual Studio\2017\Community\VC\Tools\MSVC\14.16.27023\bin\Hostx64\x64
- From your text file, add or ensure that the following variables and their correct values are included in your System variables list. They are presented here in the Variable — Value format.
JAVA_HOME — — C:\java\adoptOpenJDK8 \java8
JDK_HOME — — C:\java\adoptOpenJDK8\java8
DXSDK_DIR — — C:\Program Files\Microsoft DirectX SDK (June 2010)
VS100COMNTOOLS — — C:\Program Files (x86)\Microsoft Visual Studio\2017\Community\Common7\Tools
WINSDK_DIR — — C:\Program Files (x86)\Windows Kits\10
- From your text file, add or ensure that the following variables and their correct values are included in your User variables list. Do not include the asterisks in the variable definition.
MSVC_VER — 14.16.27023*
MSC_REDIST_VER — 14.16.27012**
* *This value is the name of the folder found in the following directory: C:\Program Files (x86)\Microsoft Visual Studio\2017\Community\VC\Tools\MSVC\. Verify that this is the exact number; change it, otherwise.
**This value is the name of the folder found in the following directory: C:\Program Files (x86)\Microsoft Visual Studio\2017\Community\VC\Redist\MSVC . Verify that this is the exact number; change it, otherwise.
15. Verify PATH properly set (you may check others if you so desire)
- Open a command prompt.
- run
echo %path% - run
java --version - run
ant -version - run
gradle --v - run
hg --version - Observe the output of the command for correctness.
Verify that the JVM being used by Gradle is the AdoptOpenJDK version and NOT another version! The build will fail if an Oracle JDK is used instead of the OpenJDK.
16. In the terminal, run the command mkdir C:\java\javafx
17. In the terminal, run the command chdir C:\java\javafx
Note that the following changes are specific to adoptOpenJDK’s distribution and that one is tasked with adjusting accordingly if using another JDK.
18. In the terminal, run the command hg clone http://hg.openjdk.java.net/openjfx/8u-dev/rt to clone the OpenJDK source to the current directory.
19. After the clone has successfully completed, open ~/rt/build.gradle in your text editor.
Navigate to line 745. You will see the line int ib = v.indexOf(" (build ");. Change this to the following: int ib = v.indexOf("(build");.
#Original
int ib = v.indexOf(" (build ");
#Change
int ib = v.indexOf("(build");
Navigate to line 747. You will see the line String ver = v.substring(ib + 8, v.size() — 1);. Change this to the following: String ver = v.substring(ib + 7, v.size()-1);.
#Original
String ver = v.substring(ib + 8, v.size() — 1);
#Change
String ver = v.substring(ib + 7, v.size()-1);
Save the file.
20. Open ~/rt/buildSrc/win.gradle in your text editor. Navigate to lines 72–95. Replace the aforementioned lines with the following:
{ properties ->
		defineProperty("WINDOWS_VS_VSINSTALLDIR", properties, "C:/Program Files (x86)/Microsoft Visual Studio/2017/Community");
        defineProperty("WINDOWS_VS_WINSDKDLLINSTALLDIR", properties, "C:/Program Files (x86)/Windows Kits/10/Redist/10.0.17763.0/ucrt/DLLs");
        defineProperty("WINDOWS_SDK_DIR", properties, System.getenv().get("WINSDK_DIR"))
        defineProperty("WINDOWS_SDK_VERSION", properties, "")
        defineProperty("WINDOWS_VS_VCINSTALLDIR", properties, "$WINDOWS_VS_VSINSTALLDIR/VC")
        defineProperty("WINDOWS_VS_DEVENVDIR", properties, "$WINDOWS_VS_VSINSTALLDIR/Common7/IDE")
        defineProperty("WINDOWS_VS_DEVENVCMD", properties, "$WINDOWS_VS_DEVENVDIR/devenv.exe")
        defineProperty("WINDOWS_VS_MSVCDIR", properties, WINDOWS_VS_VCINSTALLDIR)
        defineProperty("WINDOWS_DXSDK_DIR", properties, System.getenv().get("DXSDK_DIR"))
        defineProperty("WINDOWS_VS_INCLUDE", properties, "$WINDOWS_VS_VCINSTALLDIR/Tools/MSVC/14.16.27023/include;" + "C:/Program Files (x86)/Microsoft SDKs/Windows/v7.0A/Bin/Include;")
        defineProperty("WINDOWS_VS_VER", properties, "150")
        defineProperty("WINDOWS_CRT_VER", properties, "150")
        defineProperty("WINDOWS_VS_LIB", properties, "$WINDOWS_VS_VCINSTALLDIR/Tools/MSVC/14.16.27023/lib;" + "C:/Program Files (x86)/Microsoft SDKs/Windows/v7.0A/Bin/Lib;")
        defineProperty("WINDOWS_VS_LIBPATH", properties, "$WINDOWS_VS_VCINSTALLDIR/Tools/MSVC/14.16.27023/lib;")
        def parfaitPath = IS_COMPILE_PARFAIT ? System.getenv().get("PARFAIT_PATH") + ";" : "";
        defineProperty("WINDOWS_VS_PATH", properties, parfaitPath + "$WINDOWS_VS_DEVENVDIR;" +
                "$WINDOWS_VS_VSINSTALLDIR/VC/Tools/MSVC/14.16.27023/bin;" +
                "$WINDOWS_VS_VSINSTALLDIR/Common7/Tools;" +
                "$WINDOWS_VS_VCINSTALLDIR/Tools/MSVC/14.16.27023/include/msclr;" +
                "C:/Program Files (x86)/Microsoft SDKs/Windows/v7.0A/Bin/NETFX 4.0 Tools;" +
                "C:/Program Files (x86)/Microsoft SDKs/Windows/v7.0A/Bin;" +
                System.getenv().get("PATH"))
    }
view raw
Important: You must verify that all the defined property locations exist on your filesystem.
Navigate to line 141. You will see the line def mscVer = System.getEnv("MSVC_VER") ? : <version number....> . Change the default number version number (in my case this is 14.10.25017 )to the number represented by your MSC_VER environmental variable (refer to the comments on step #14) and save. In my case, the version number is 19.16.27025.1.
Navigate to line 154 and make the following changes:
#Line 154, old
def winSdkBinDir = "$WINDOWS_SDK_DIR/Bin"
#Line 154, new
def winSdkBinDir = "$WINDOWS_SDK_DIR/bin/10.0.17763.0/x64”
Navigate to line 186. You will see the line def mscRedistVer = System.getEnv("MSVC_REDIST_VER") ? : <version number....> . Change the default number version number (in my case this is 14.10.25008 )to the number represented by your MSC_REDIST_VER environmental variable (refer to the comments on step #14) and save. In my case, the version number is 14.16.27023.
21. Create a file in ~/rt called gradle.properties. Populate the file with the following contents and hit save; You may reference gradle.properties.templateshould you desire to adjust additional properties.
BUILD_JAVADOC = true
BUILD_SRC_ZIP = true
FULL_TEST = true
RETAIN_PACKAGER_TESTS = false
JDK_DOCS = https://docs.oracle.com/javase/8/docs/api
CONF = Release
NUM_COMPILE_THREADS = 8
*Set the number of threads to 1.25x the amount of cores on your machine; adjust as desired.
22. Open ~/rt/buildSrc/genVSproperties.bat in your text editor. On line 39 ( set"VSVARS32FILE...), change .../Professional/ in the path to .../Community/. Do the same for line 43.
#Line 39, old
set "VSVARS32FILE=C:\Program Files (x86)\Microsoft Visual Studio\2017\Professional\VC\Auxiliary\Build\vcvars32.bat"
#Line 39, new
set "VSVARS32FILE=C:\Program Files (x86)\Microsoft Visual Studio\2017\Community\VC\Auxiliary\Build\vcvars32.bat"
#Line 43, old
if exist "%VSVARS32FILE%" set "VS150COMNTOOLS=C:\Program Files (x86)\Microsoft Visual Studio\2017\Professional\VC\Auxiliary\Build"
#Line 43, new
 if exist "%VSVARS32FILE%" set "VS150COMNTOOLS=C:\Program Files (x86)\Microsoft Visual Studio\2017\Community\VC\Auxiliary\Build"
23. In the terminal, run the command gradlew clean.
24. [Optional] Run the command gradlew tasks --all.This will show you all the available gradle tasks for this project.
25. In the terminal, run the command gradlew --info sdk -PCOMPILE_TARGETS=win -Dorg.gradle.java.home-C:\java\adoptOpenJDK\java8or simply, gradlew.
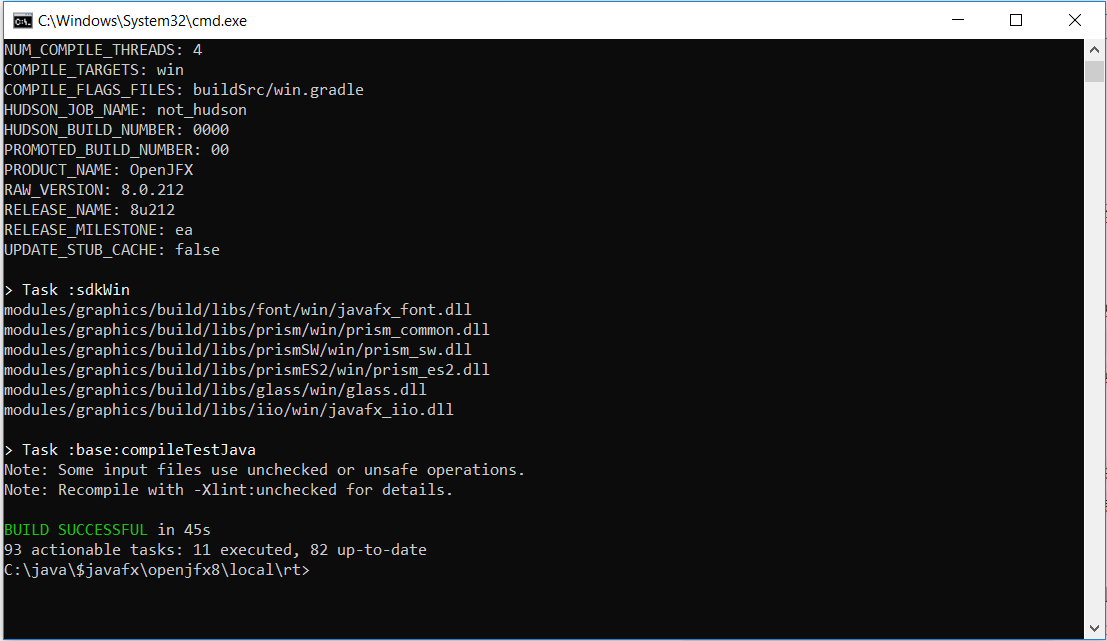
A successful build process will look something like this.

26. Run some tests. Notice that there are several projects within openJFX. Run a test on the base project by running the following command: gradlew :base:test. If successful, build reports will be available in ~rt/buildSrc/build/reports/tests/test/index.html

27. Navigate to ~/rt/apps/samples/build.xml and comment out ( <!- — ......- — >)lines 3 and 24.
28. Navigate to ~\rt\apps\scenebuilder\samples\build.xml and comment out everything between the tags: < project default="jar" basedir=".">.....<project/>.
29. In ~/rt/buid.gradle, comment out ( /* ... */ ) everything in compileTargets {t-> ... }. This should be lines 3299–3338.
Feel free to try your hand at the sample apps that come with the JavaFX SDK, however, for simplicity’s sake, building the sample apps is not apart of this tutorial.
Furthermore, you will note this comment in ~/rt/apps/samples/build.xml:
<!-- these apps have dependencies on Swing which is not part of the
         JFX_CORE, so we should not try to build them -->
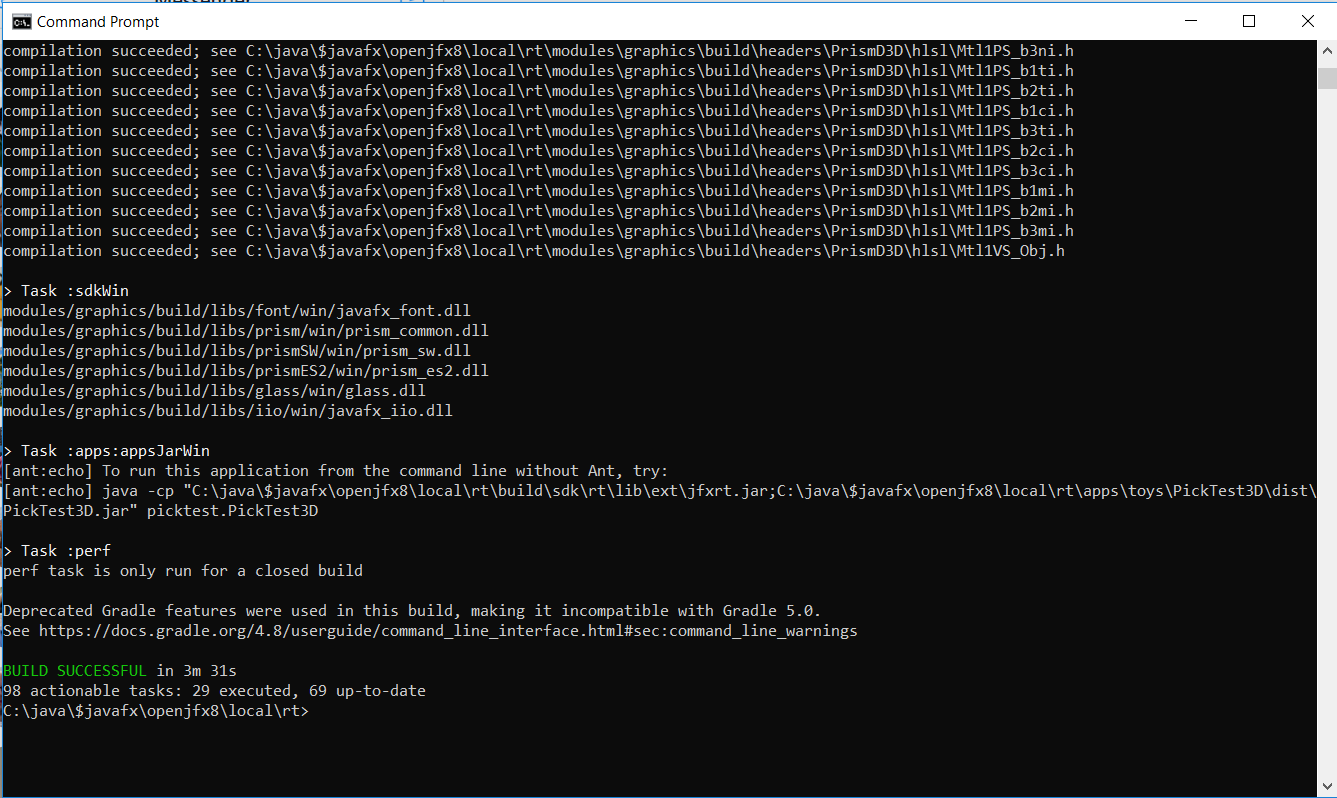
30. Run the command gradlew zips or gradlew zips --info -PCOMPILE_TARGETS=win -Dorg.gradle.java.home-C:\java\adoptOpenJDK\java8to create an overlay. If successful, it should look like this:

31. Extract ~\rt\build\bundles\javafx-sdk-overlay.zip.
Navigate to the location of your JAVA_HOME.
Copy the contents of ~\rt\build\bundles\javafx-sdk-overlay\bin to $JAVA_HOME\bin.
Copy ~\rt\build\bundles\javafx-sdk-overlay\docs to $JAVA_HOME.
Copy the contents of ~\rt\build\bundles\javafx-sdk-overlay\jre\bin to $JAVA_HOME\jre\bin.
Copy the contents of ~\rt\build\bundles\javafx-sdk-overlay\lib to $JAVA_HOME\lib.
Copy the contents of ~\rt\build\bundles\javafx-sdk-overlay\javafx-src.zipto $JAVA_HOME.
Delete the contents of~\rt\build\bundles.
32. Delete the extracted folder, ~\rt\build\bundles\javafx-sdk-overlay. Run some sample code against adoptOpenJDK8 + openJFX8.
Demo

The contents of this article were partially adapted from this webpage.
Special thanks to Chris Newland (Java Champion. Creator of #JITWatch / #DemoFX / #VMOptionsExplorer), Arunprasad Rajkumar ( Principal Member Of Technical Staff, Oracle India; openJFX Committer), and Carl Walker (President and Principal Consultant, Bekwam, Inc.) for assistance of the technical correctness of this article. The instructions posted in this article, however, are my own and do not necessarily reflect the opinions of the aforementioned individuals.
Published at DZone with permission of Adrian D. Finlay, DZone MVB. See the original article here.
Opinions expressed by DZone contributors are their own.

Comments