How to Build an OpenAI Custom GPT With a Third-Party API
This tutorial demonstrates how to build a conversational user interface with OpenAI's Custom GPT using any third-party API.
Join the DZone community and get the full member experience.
Join For FreeWith the advent of Large Language Models (LLM), the conversational user interface has become very popular. You simply ask what you're seeking, and ChatGPT produces an output. In addition, the model can perform actions in response to your command or question and present you with the result. This opened up a huge opportunity to build a new kind of interface where the only input is the user's words — written or spoken.
This is fantastic, as you can imagine the limitless possibilities. What we need is for LLMs to have access to as many complex, real-world actions as possible, which they can then invoke appropriately. This is where third-party APIs come into the picture.
Platform APIs
Pick any popular internet service and imagine an API for it that can be invoked to perform the tasks usually performed by that service. Each service usually provides a nice graphical user interface (GUI) — either as a web app or mobile app — and users login to use it. But instead, what if the user only has to ask one single entity — the LLM's command interface — through text or audio commands? You wouldn't need any other interface.
It's interesting because now you can build a custom version of GPT that knows how to perform certain actions extremely well, becoming a specialist by being aware of the existence of such actions. It connects the user's intent with the desired action and shares the results (output) of the performed action.
OpenAPI YAML Specification
In the case of Custom GPT, this is achieved by registering any third-party API using their OpenAPI specification. For example, here is an OpenAPI specification of a platform for AI interior design. The API lets you create a new interior design using just a photo of the room. While the platform offers its own web app where users can upload the room photo and select interior design styles to generate a new interior design, you can bring this functionality to your platform by deploying it as a custom GPT.
Let's build a custom GPT with this API as an example. You can onboard any third-party API with its OpenAPI Spec. There are also tools available that will help you build an OpenAPI Spec for your own platform APIs. I believe it's a great way to distribute your own API to wider platforms.
Get the Platform API
Most SaaS platforms offer their API so that developers can build their apps. They also publish an OpenAPI spec. Download the spec. It's a YAML file that looks like:
openapi: 3.1.0
info:
title: Decor8AI Virtual Staging & Interior Design API
version: "1.0"
description: >
Decor8 AI is a state-of-the-art virtual staging solution designed for realtors and real estate app developers. It provides a suite of customization options to create and visualize appealing interiors from empty spaces. With its focus on enhancing marketability, it's an essential tool for showcasing property potential in a compelling way.
Please reach out to [Decor8 AI Team](mailto:decor8@immex.tech) with questions or suggestions.
Additional license information can be found [here](https://github.com/immex-tech/decor8ai-sdk/blob/main/API_LICENSE_NOTICE).
### Getting Started
- **Authentication**: Each API request requires two headers:
- `Content-Type: application/json`
- `Authorization: Bearer <API_KEY>`
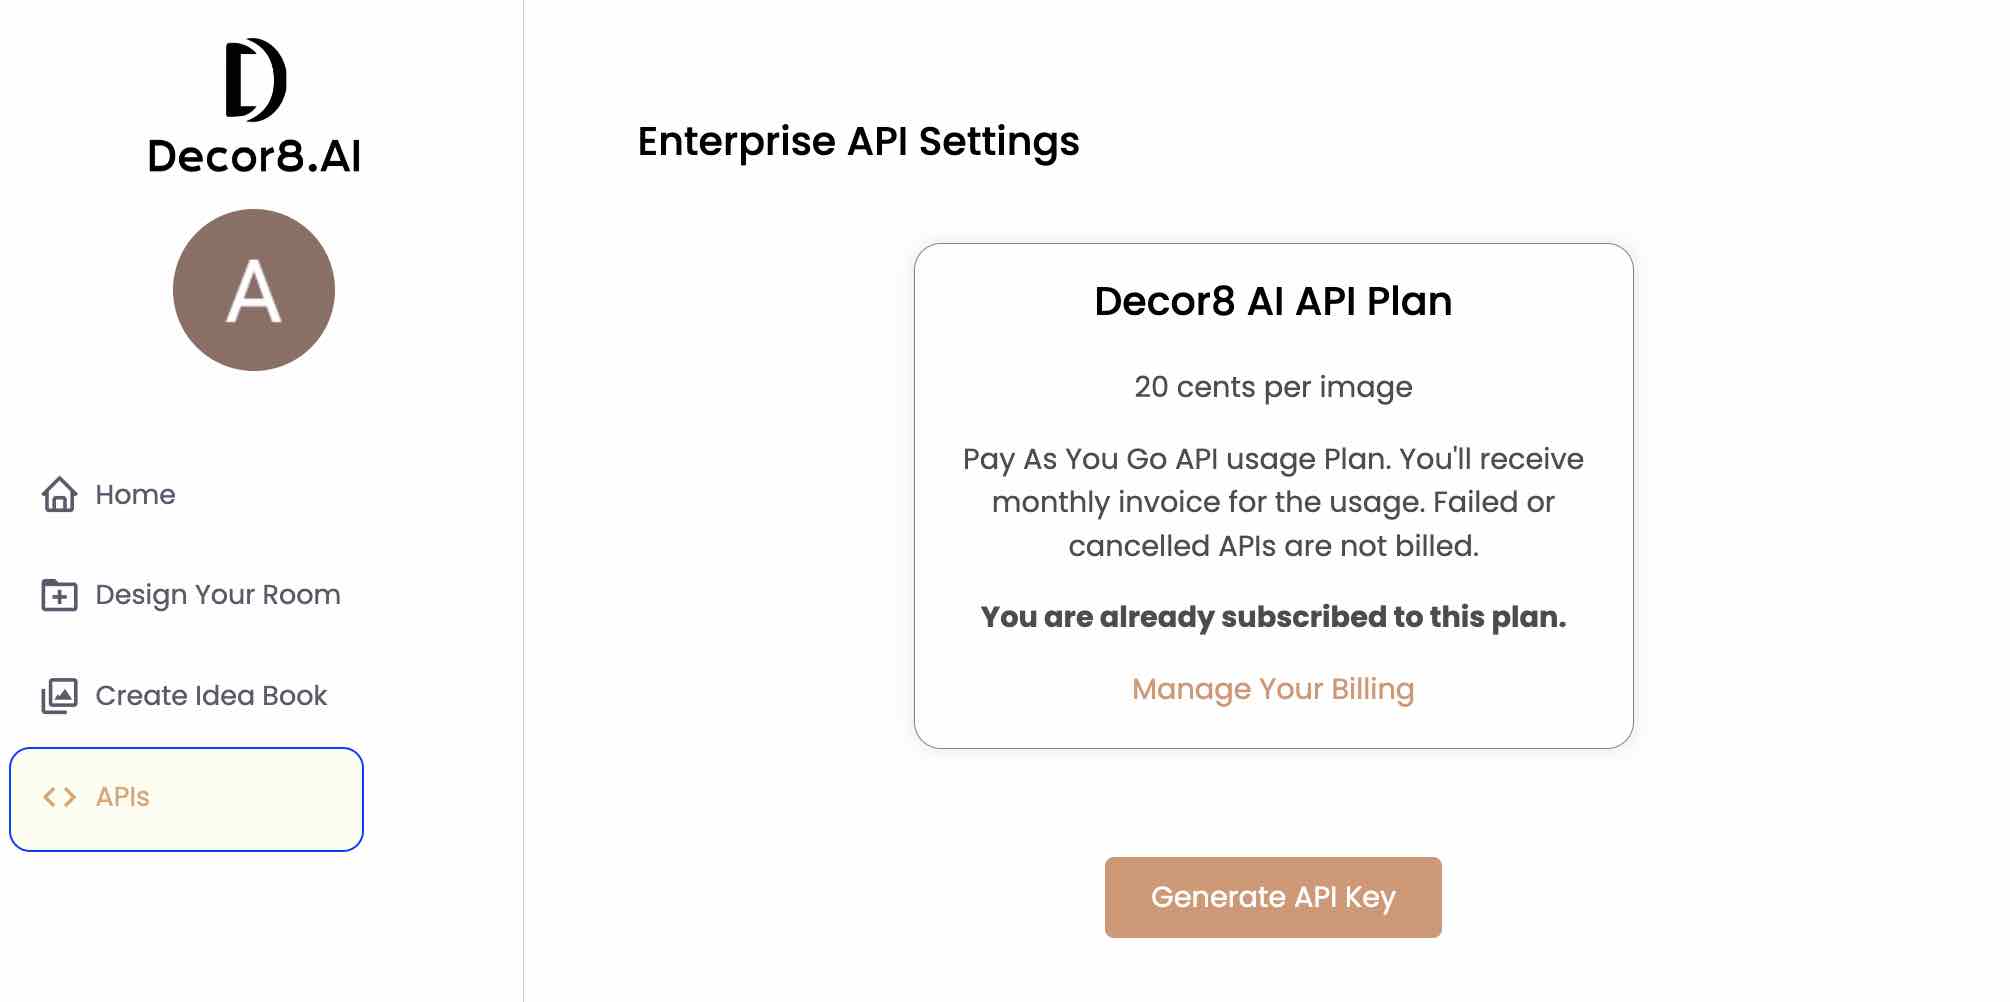
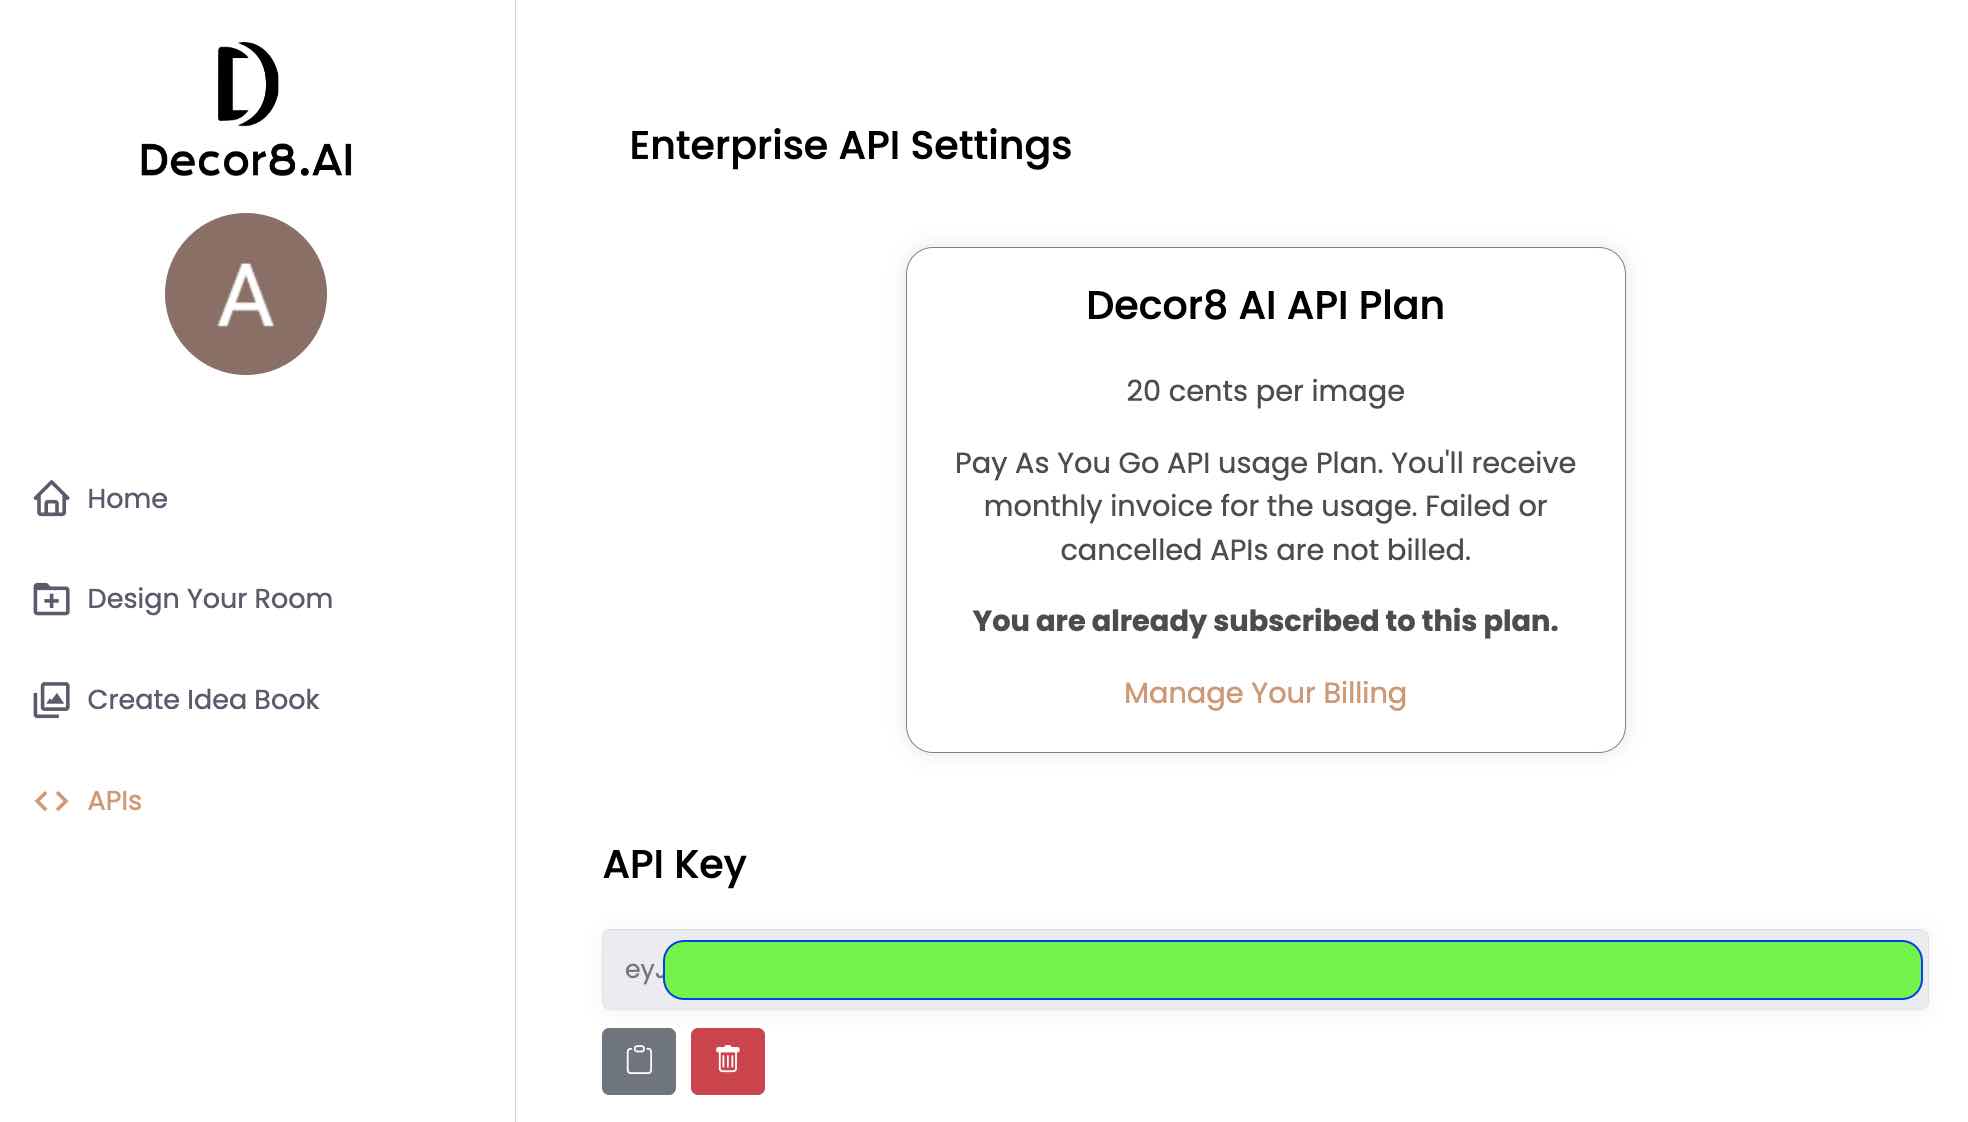
- **API Key**: Get your `<API_KEY>` from your account at [prod-app.decor8.ai](https://prod-app.decor8.ai).
### Sign in to [Decor8 AI](https://prod-app.decor8.ai) and Click on APIs from the Left Side-menu
### Click Generate API Key
### Test the AI Key
Once you have the key, run simple curl command to test the key.
```
curl -X GET "https://api.decor8.ai/speak_friend_and_enter" -H "Authorization: Bearer <API_KEY>"
```
license:
name: Decor8AI SDK License
url: https://github.com/immex-tech/decor8ai-sdk/blob/main/LICENSE
servers:
- url: https://api.decor8.ai
description: Base API URL for all endpoints.Note: this is not a complete OpenAPI Spec but just a few lines of the file to give you an idea.
Open AI Custom GPT
You need an Open AI subscription to create a Custom GPT. Head to https://chat.openai.com/ and click on your profile picture in the top right corner of the page.

Click on the "My GPTs" menu. Here, we will create a new Custom GPT (I already had created one Custom GPT and hence you see it already on this page.)
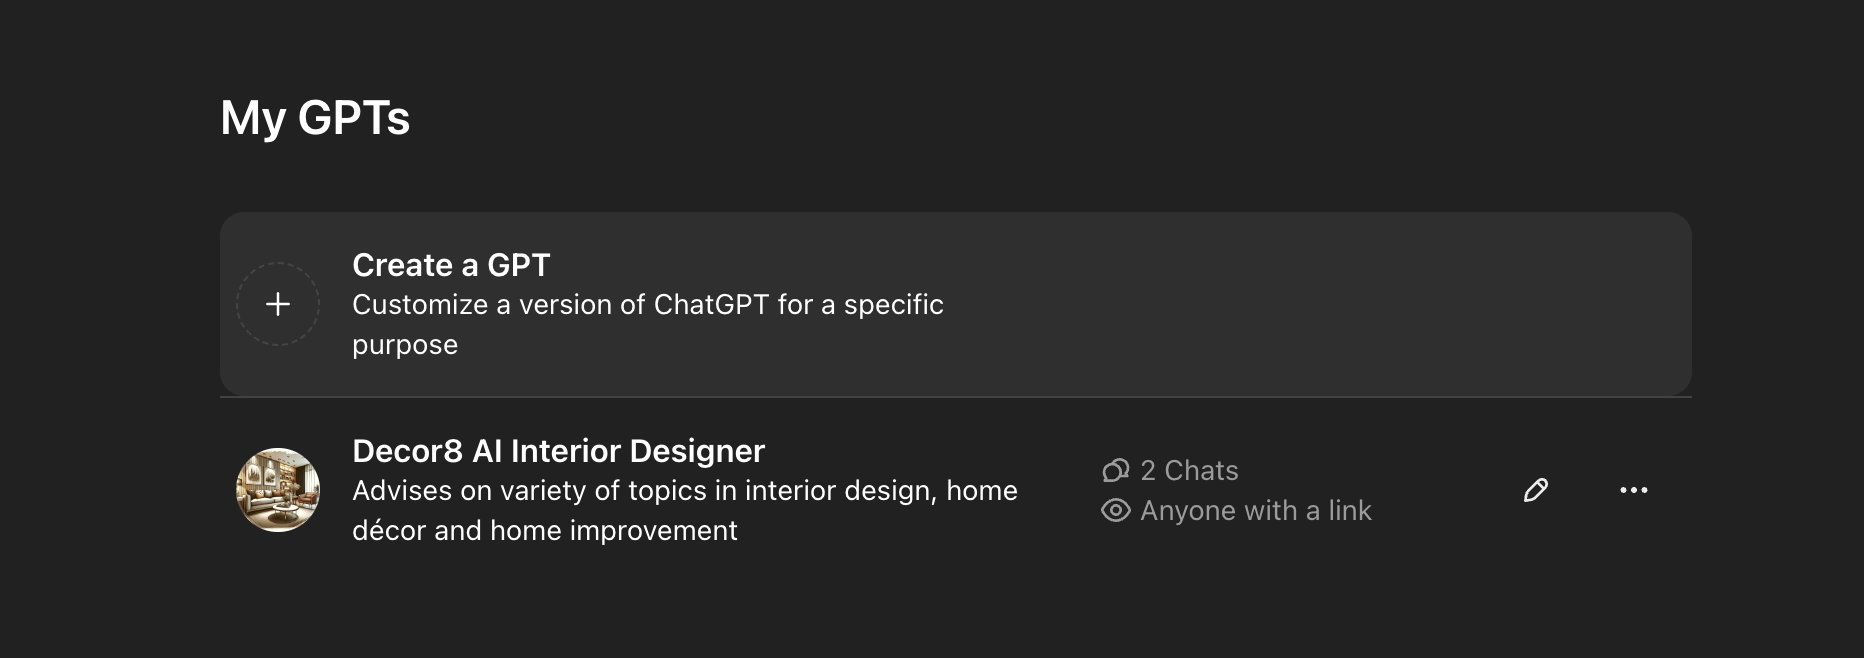
Click on "Create a GPT". You're presented with a form to define the properties of this custom GPT.
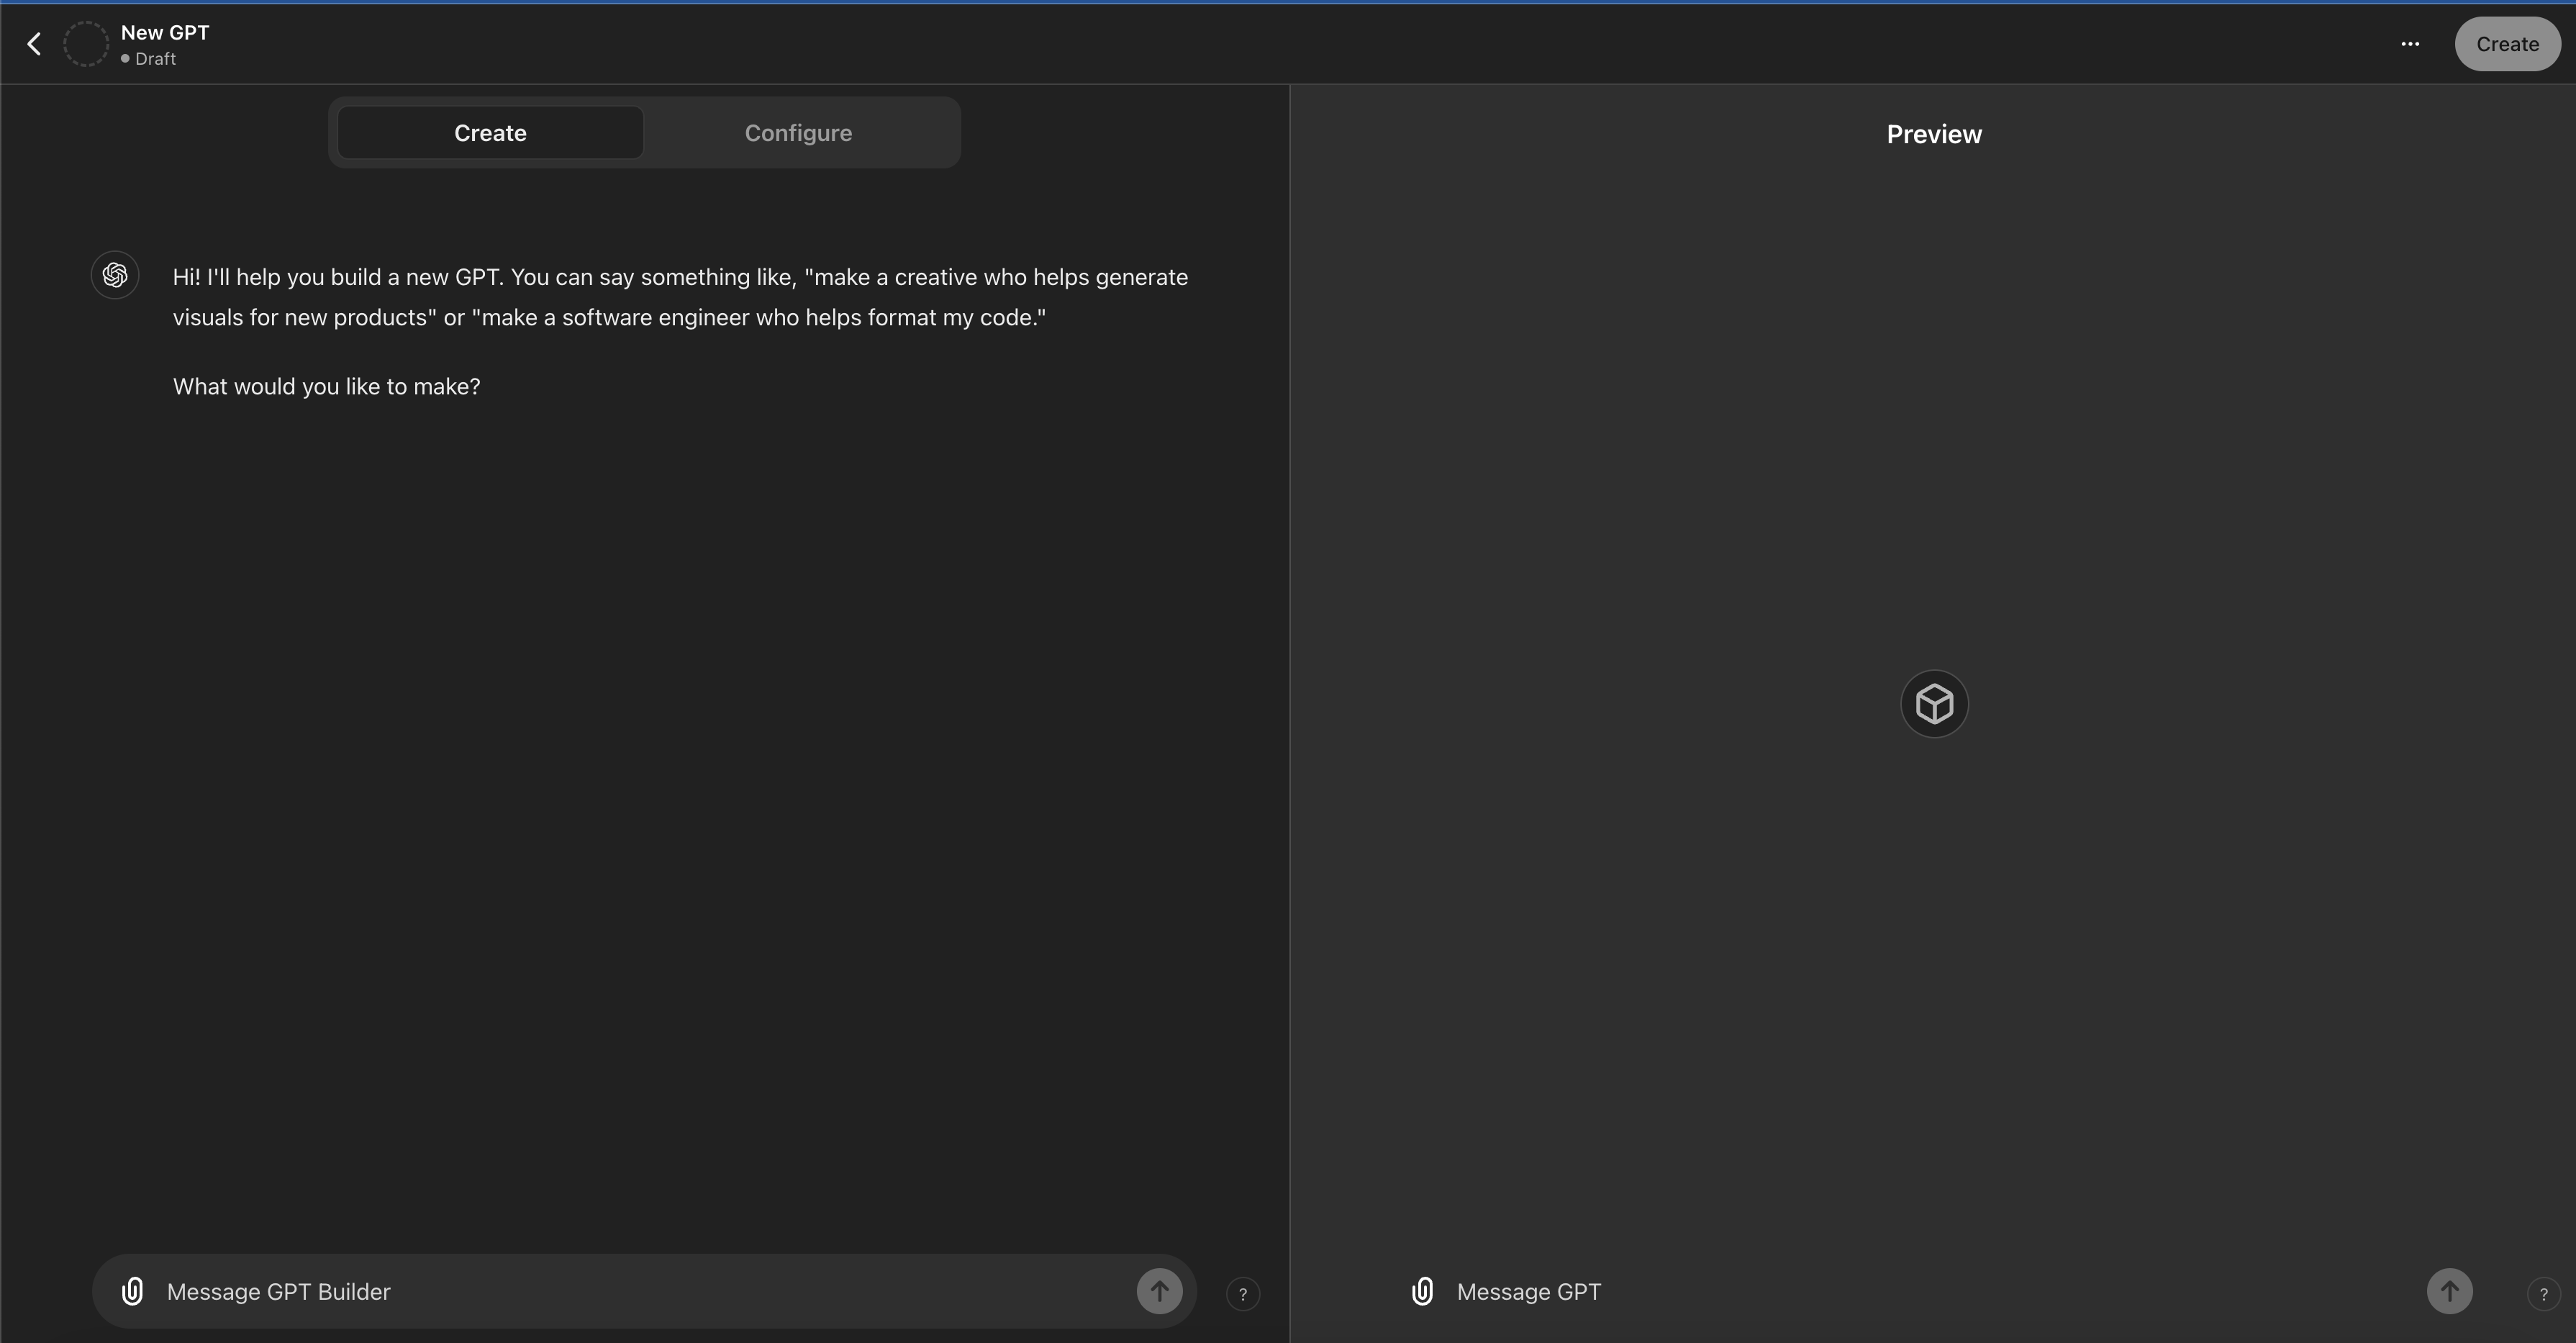
Click on the "Configure" tab.
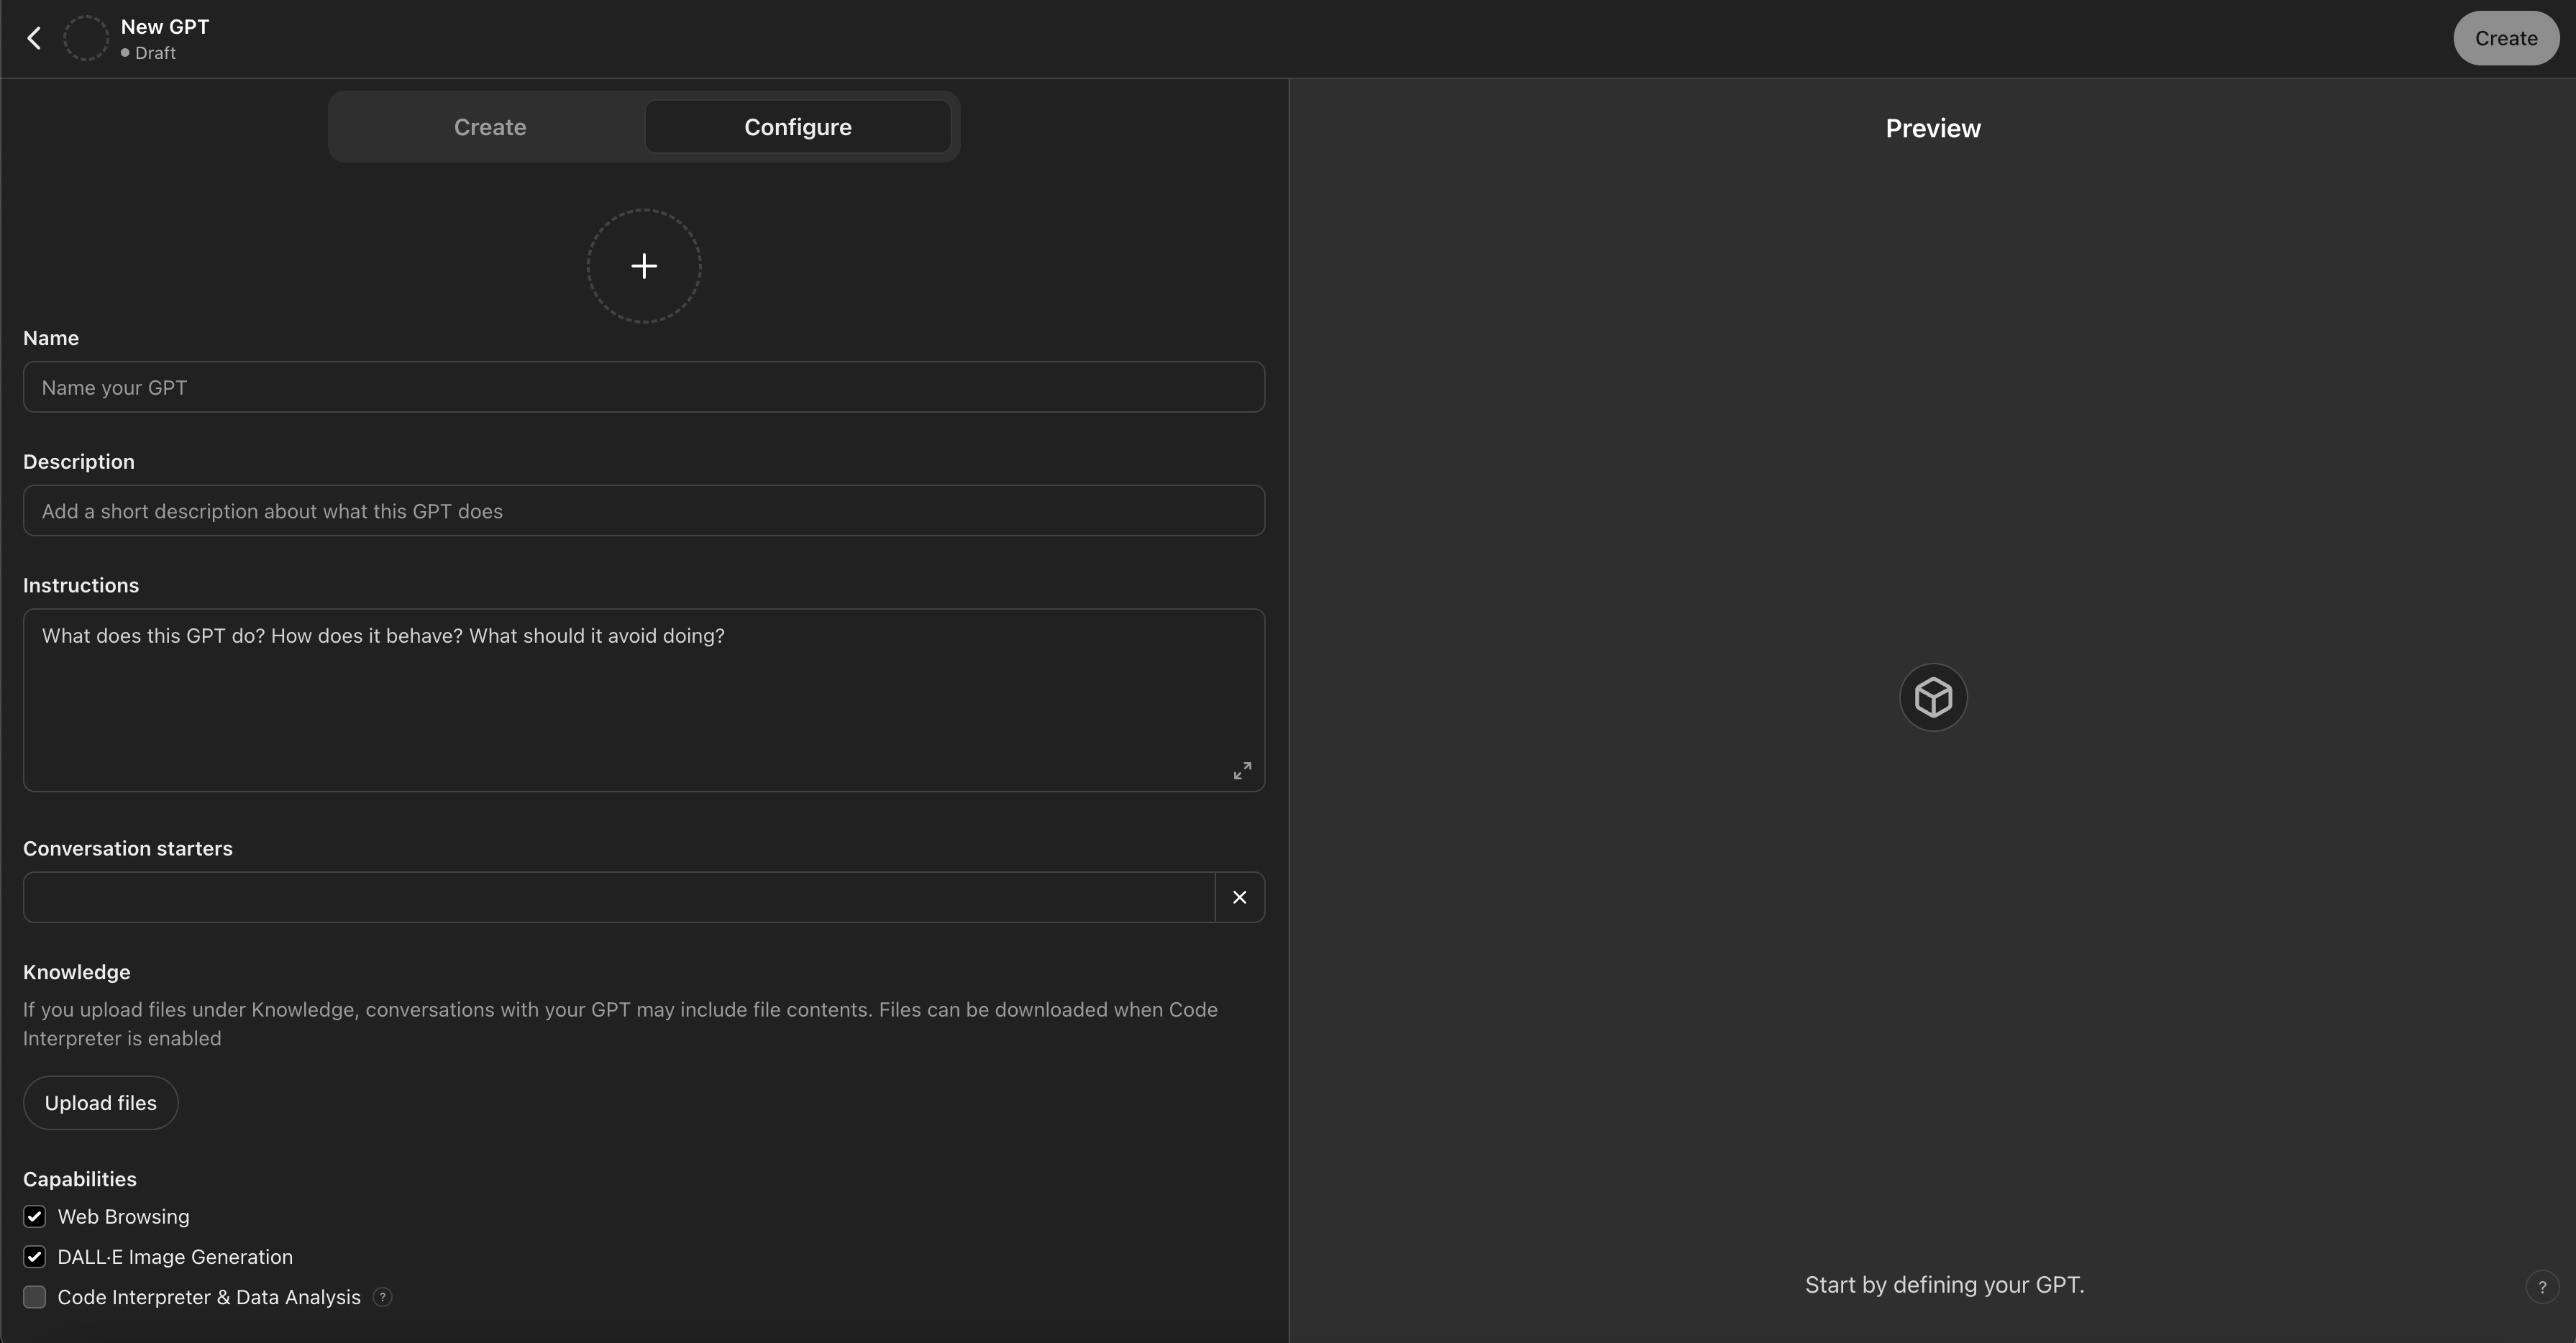
Provide the Logo, Name, Description, and initial instructions.
In the instructions, it's important to define ground rules. For instance, you would want to define what should GPT do when users ask questions outside of GPT's expertise. GPT could say, "I don't know," or let the user know what it can do for them. This is very helpful in setting correct user expectations.
Scroll down the "Actions" section.
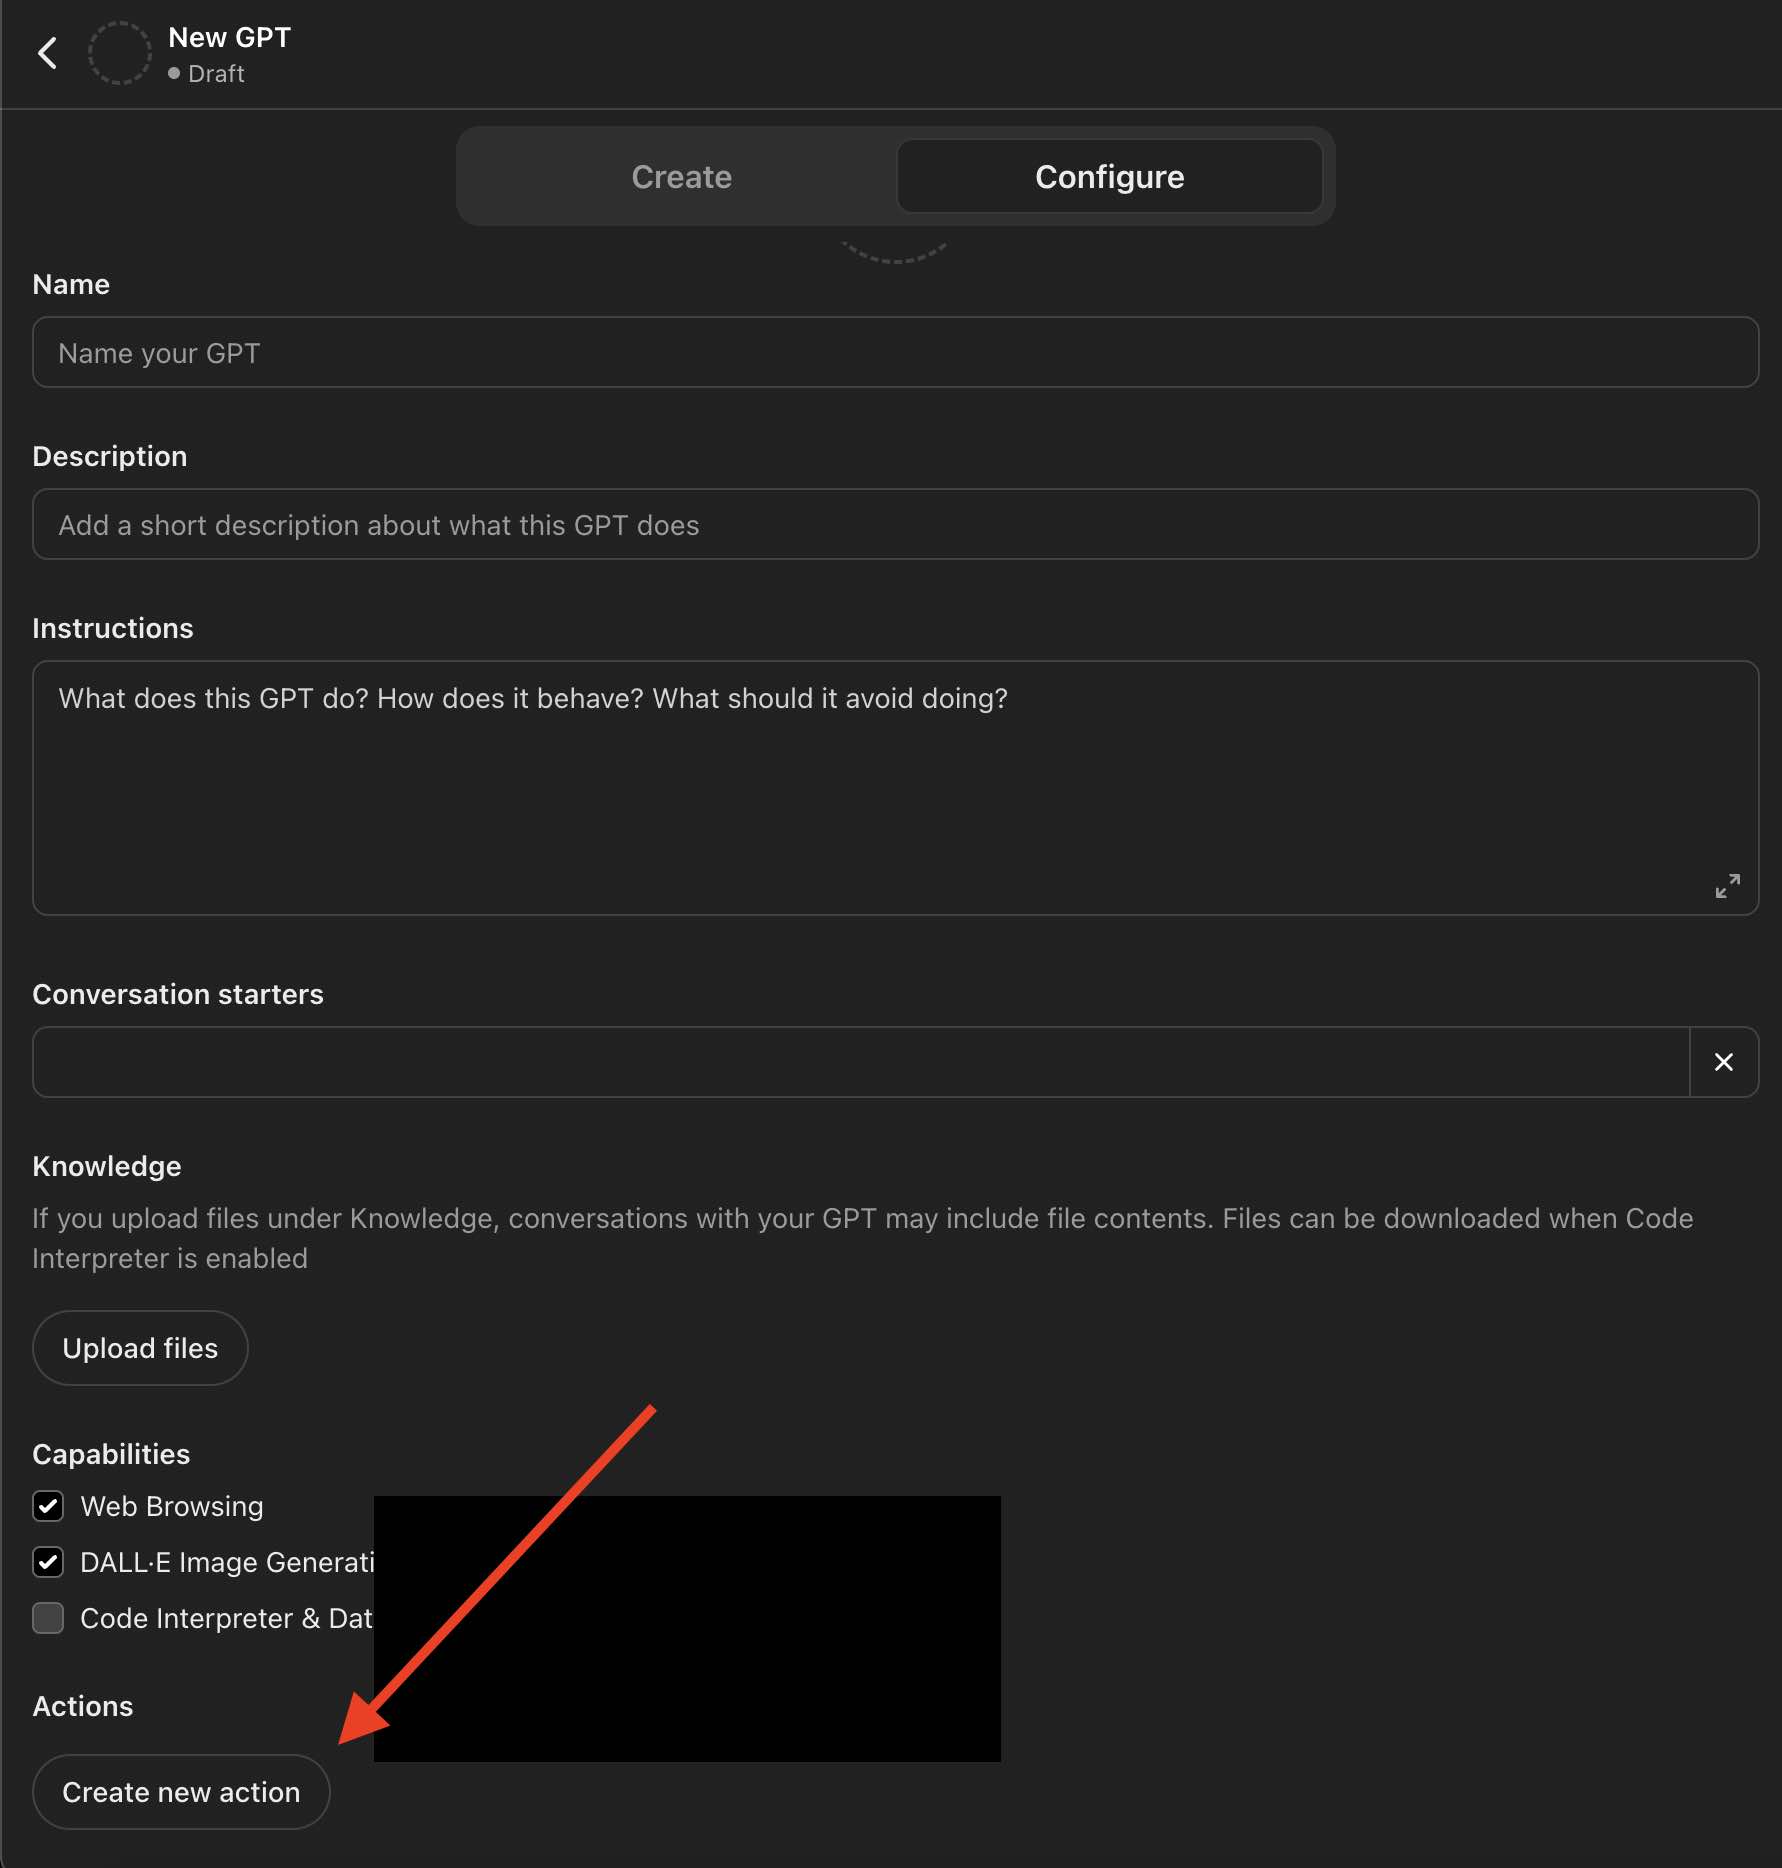
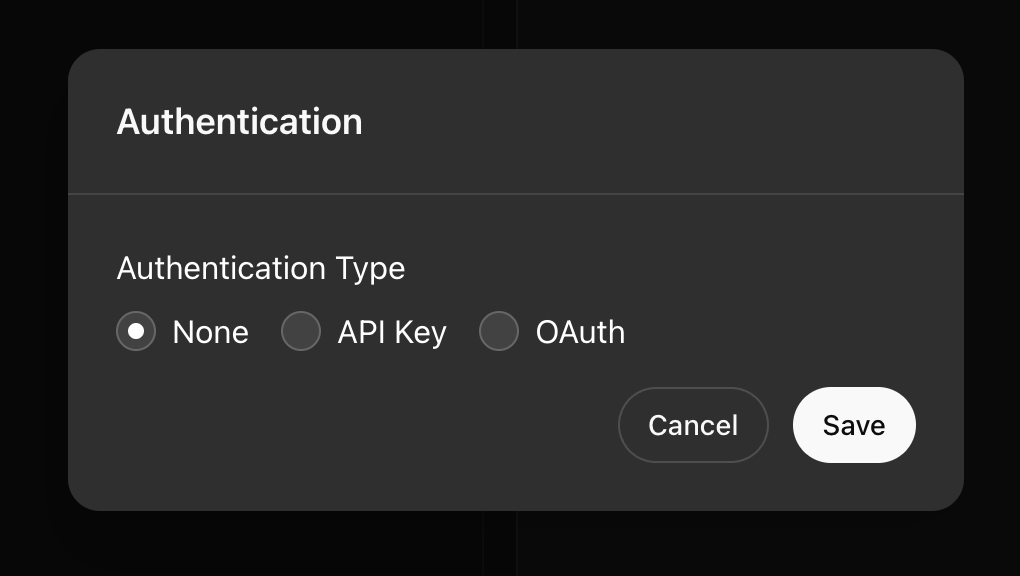
An action is how GPT will know "what to invoke" when certain conditions are met. Each of the API calls could become an action. This is where we are going to need the OpenAPI spec YAML file we downloaded earlier.
- Authentication: Choose API Key
- Choose Auth Type: Bearer
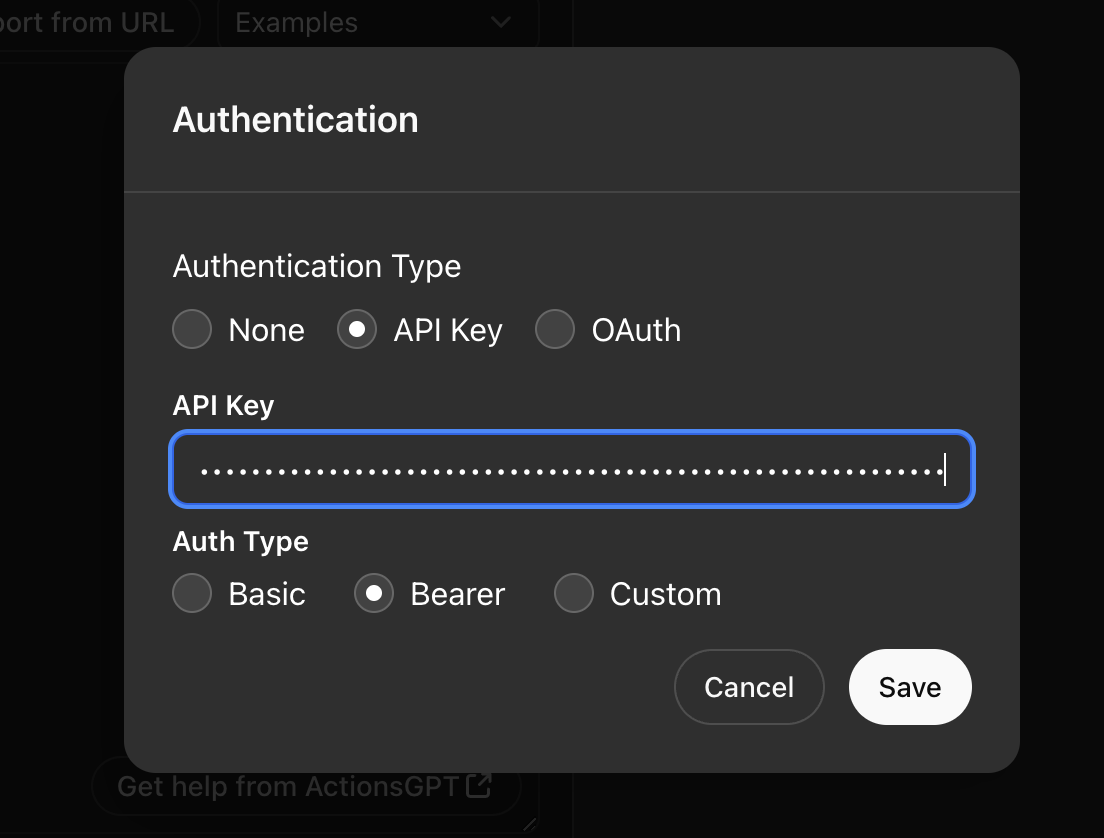
Get the API Key
Typically every Platform API provides a method of authentication that involves using an API Key. Get the key by signing into that platform. For example, in the case of Decor8 AI, login to https://prod-app.decor8.ai and click on the APIs menu. Here you can create an API Key. Copy-paste the key into the Authentication popup.
Next, copy-paste the OpenAPI spec's YAML file content under the "Schema" text box.
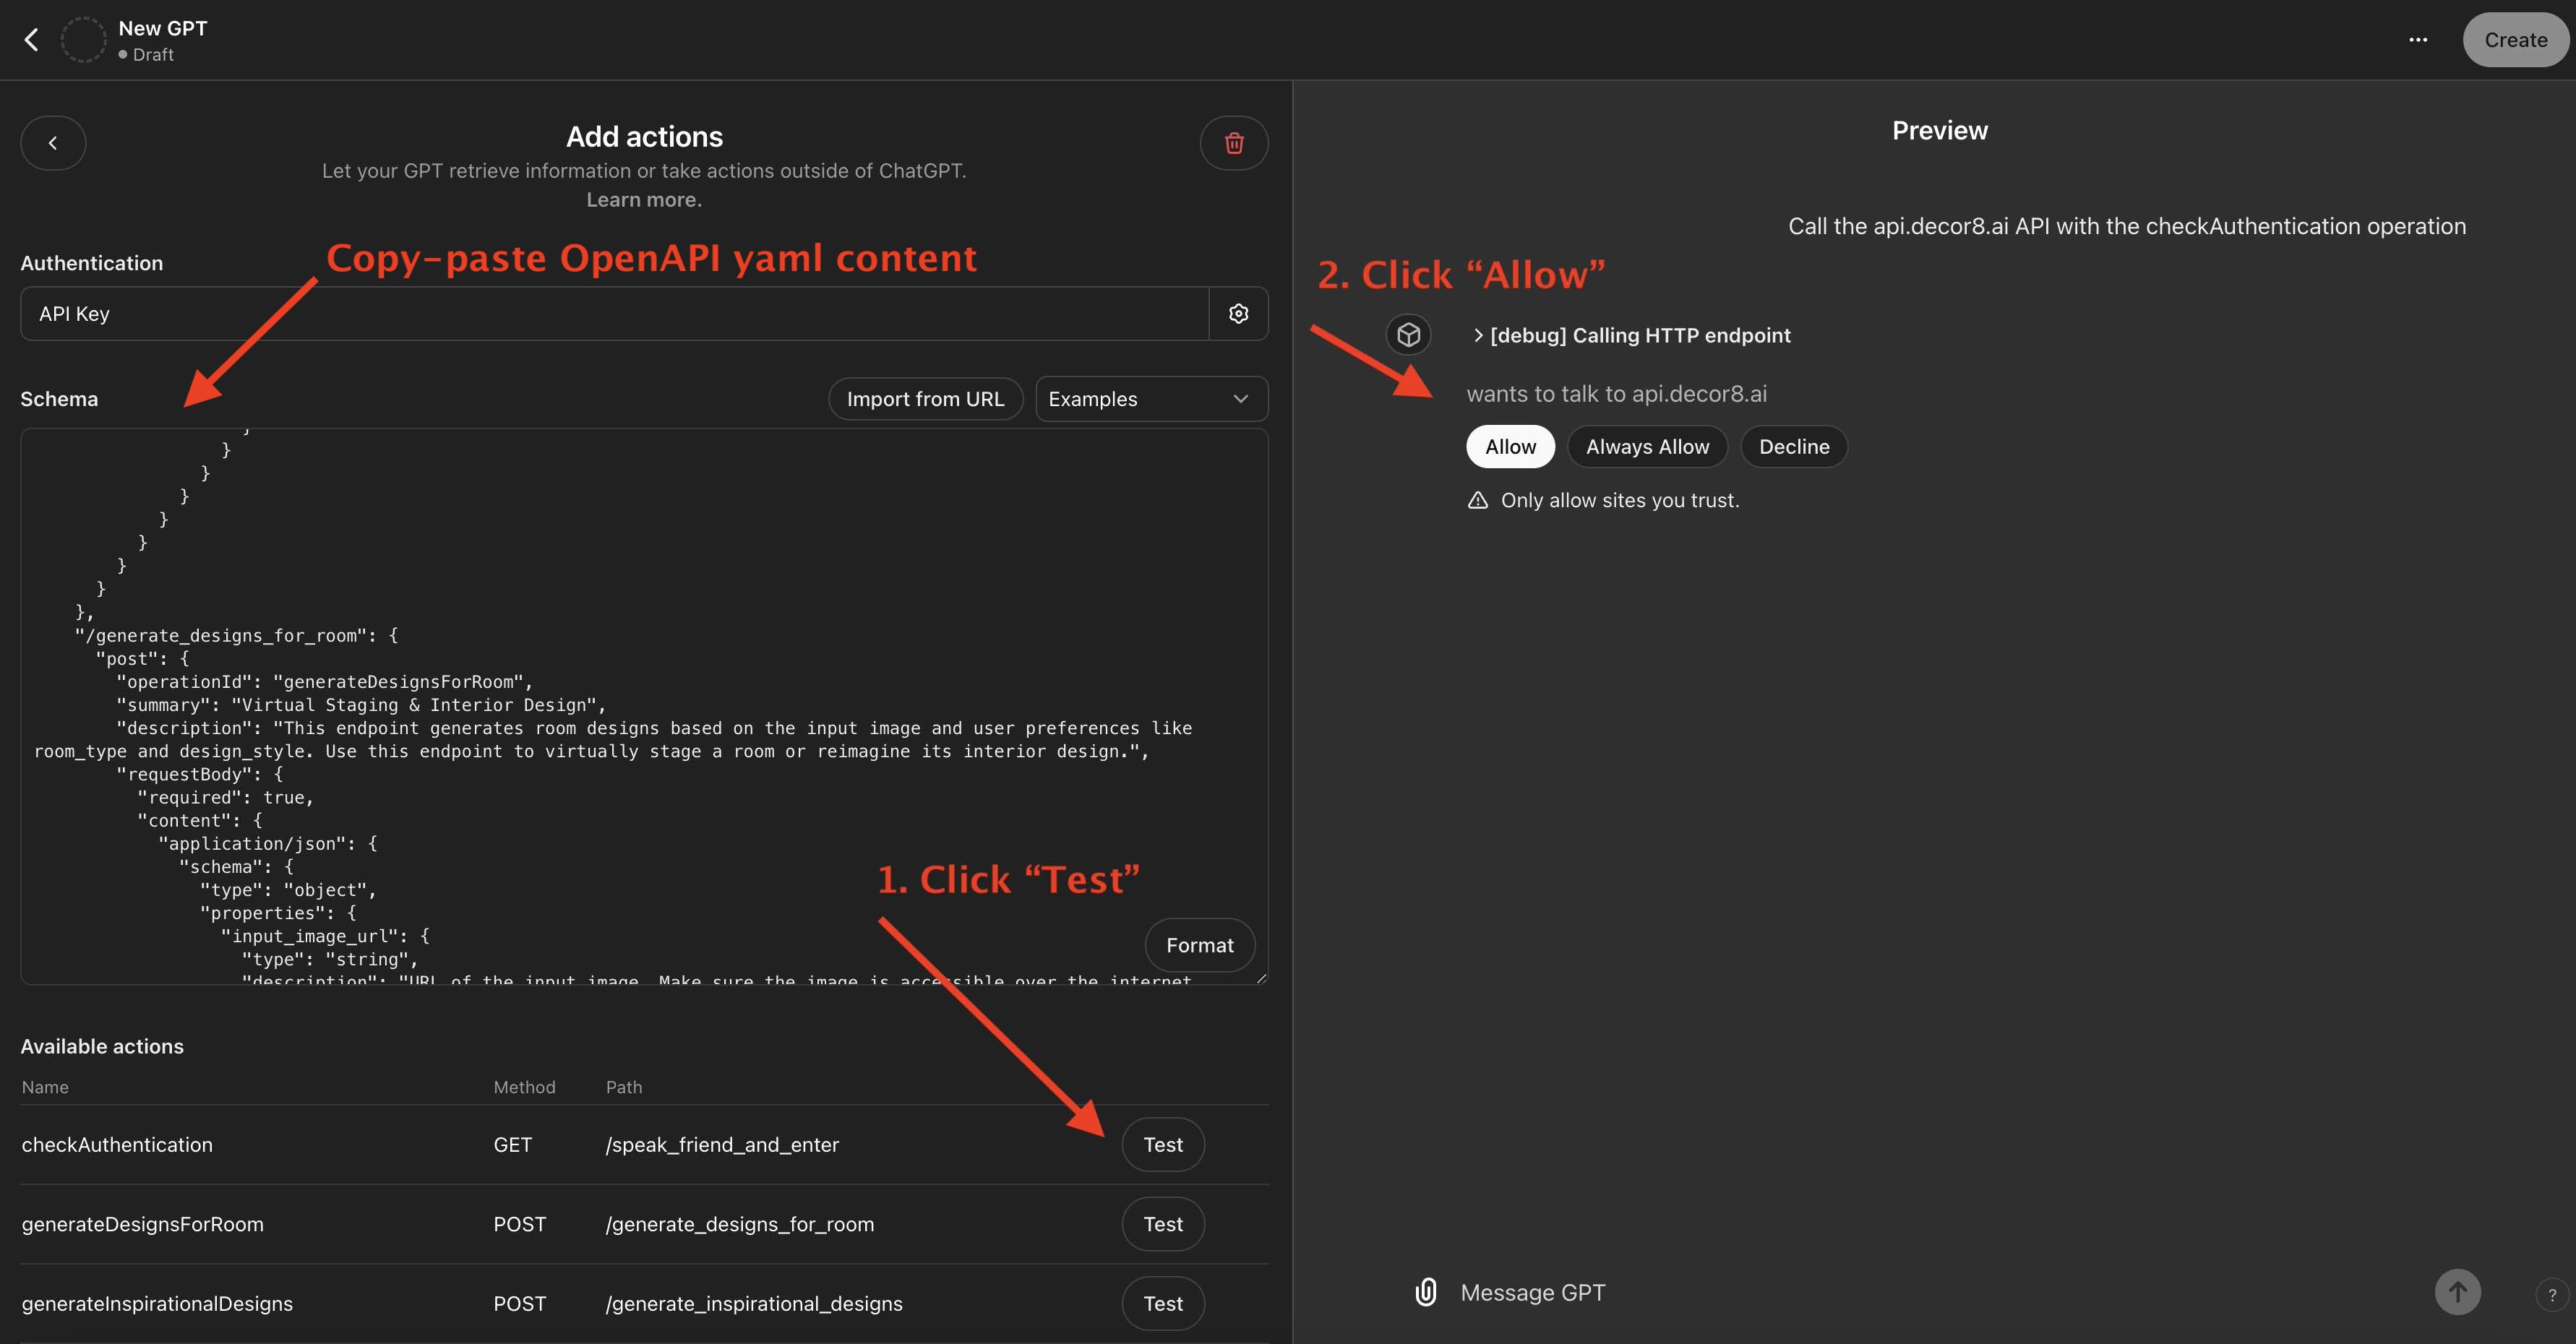
If the spec is well-formatted, you will see a list of the API calls described in the spec. You can now test them individually. If you click the "Test" button, it will try to invoke the API with the correct input parameters as described in the spec. If it needs to get the value of the input parameter it will ask you.
In the case of Decor8 AI API, let's test the "checkAuthentication" API (which is not needed for the GPT itself). Its successful invocation means everything has been set up correctly between Custom GPT and the target platform (Decor8 AI, in this case).
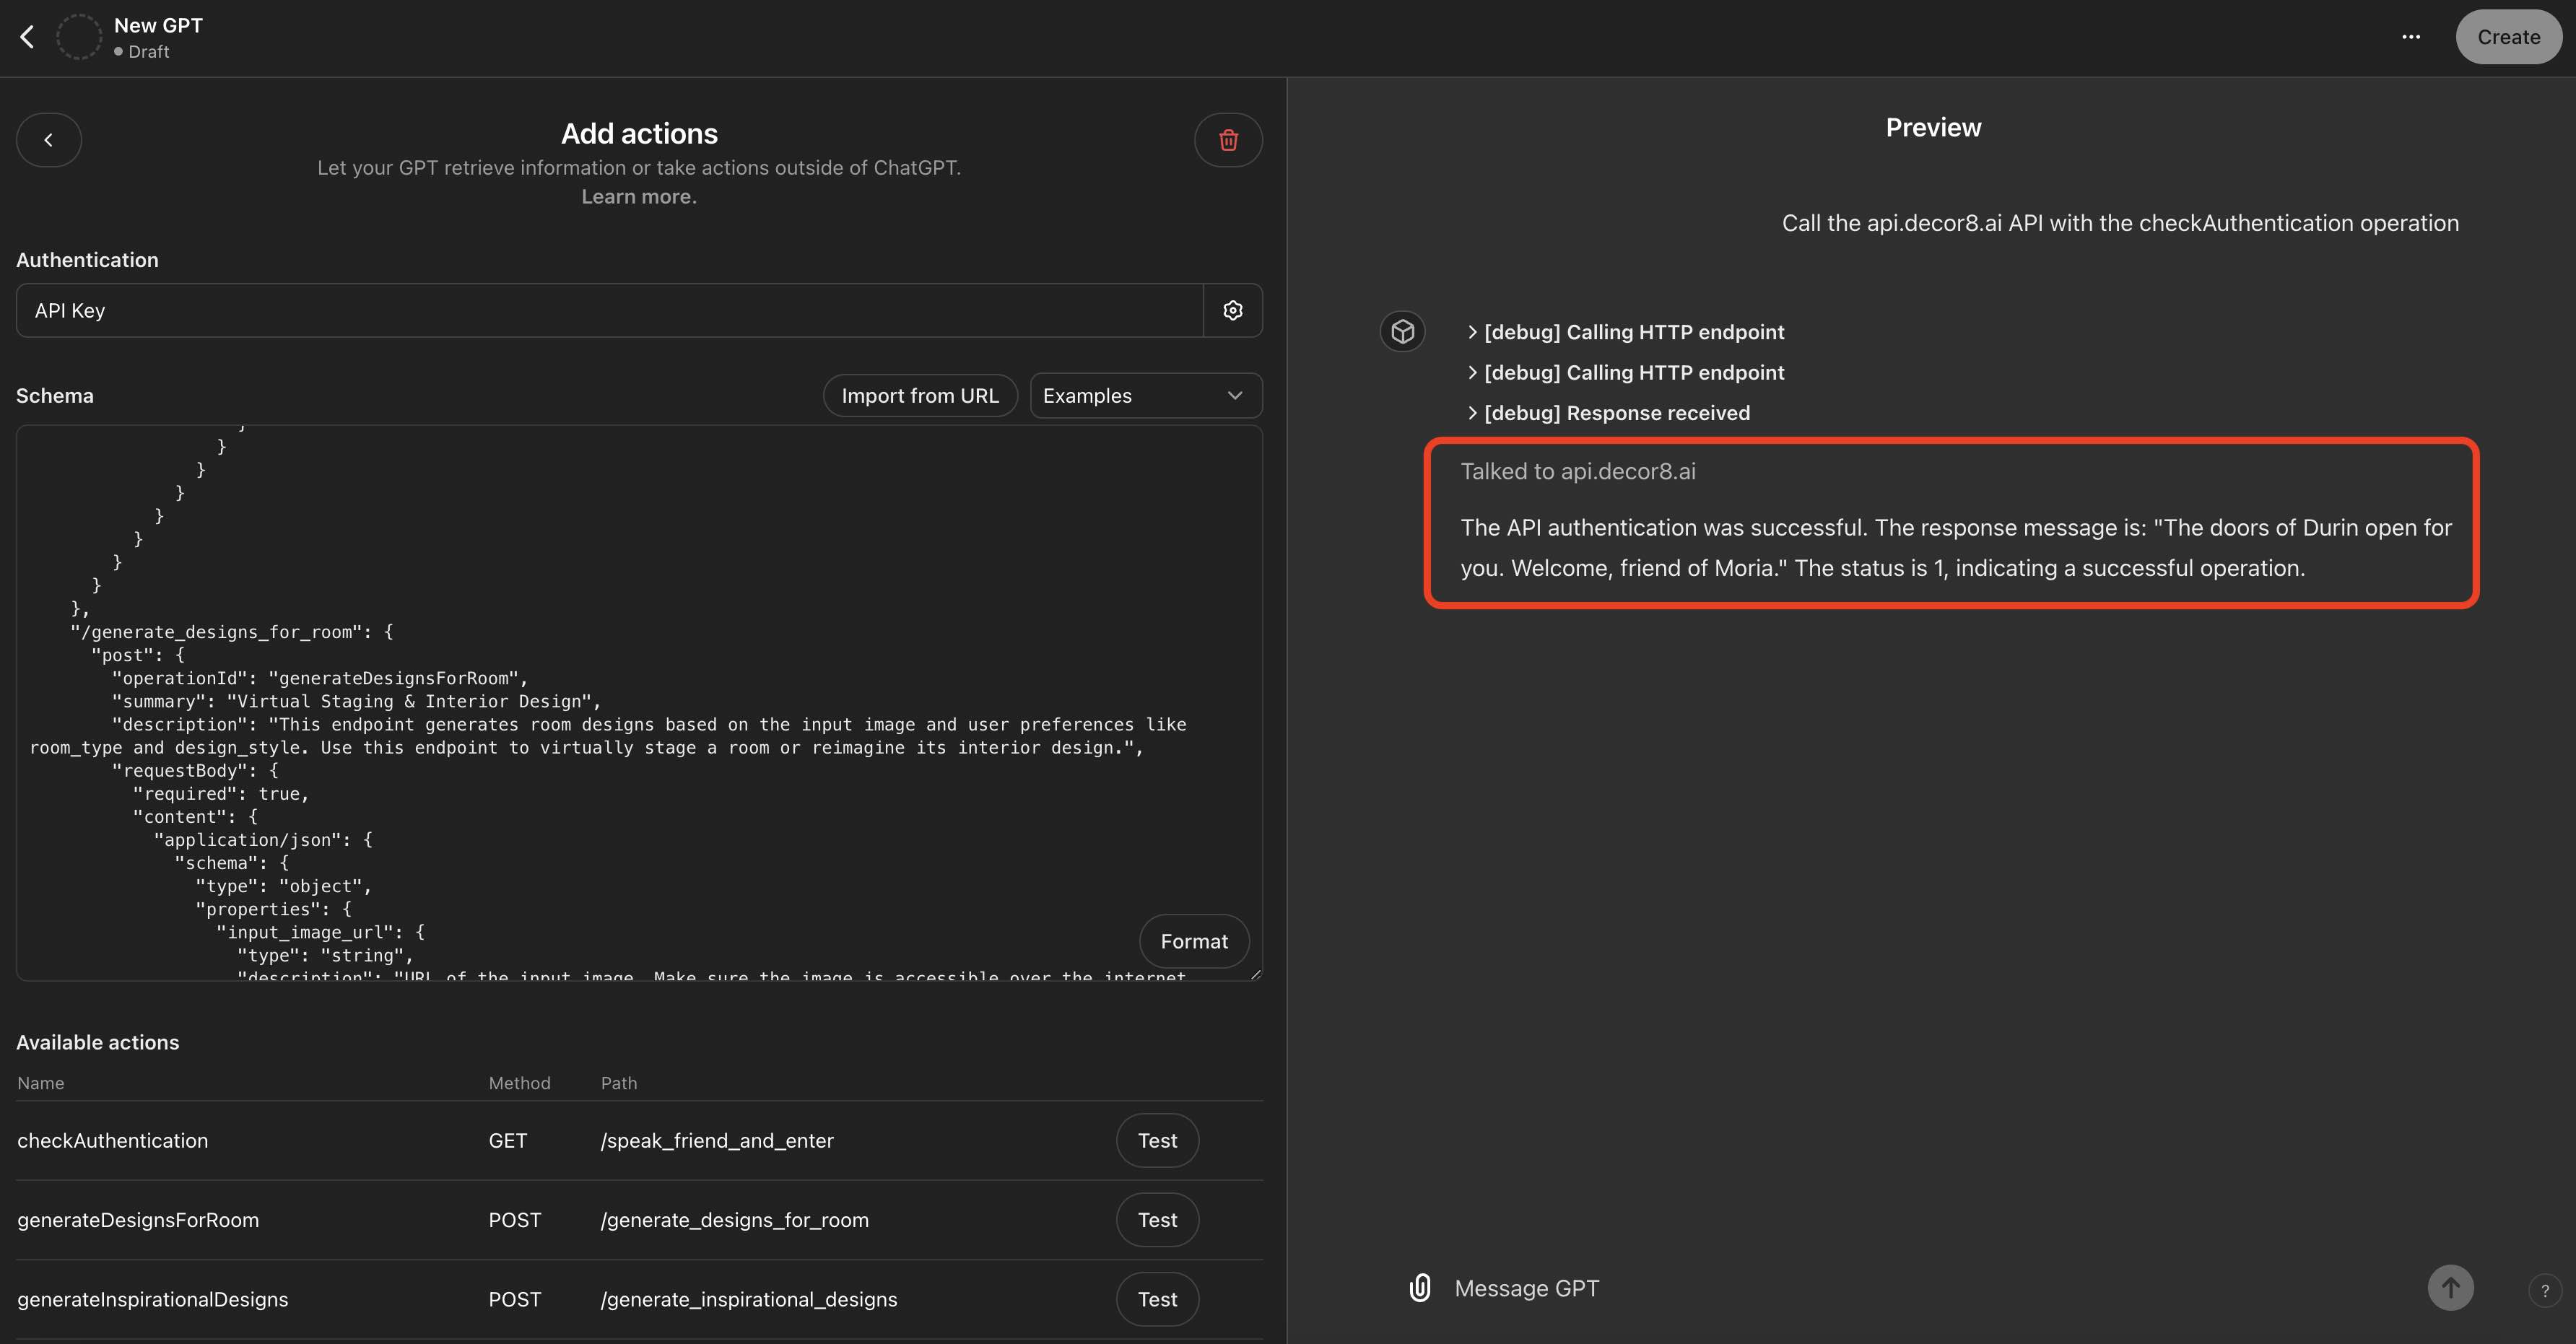
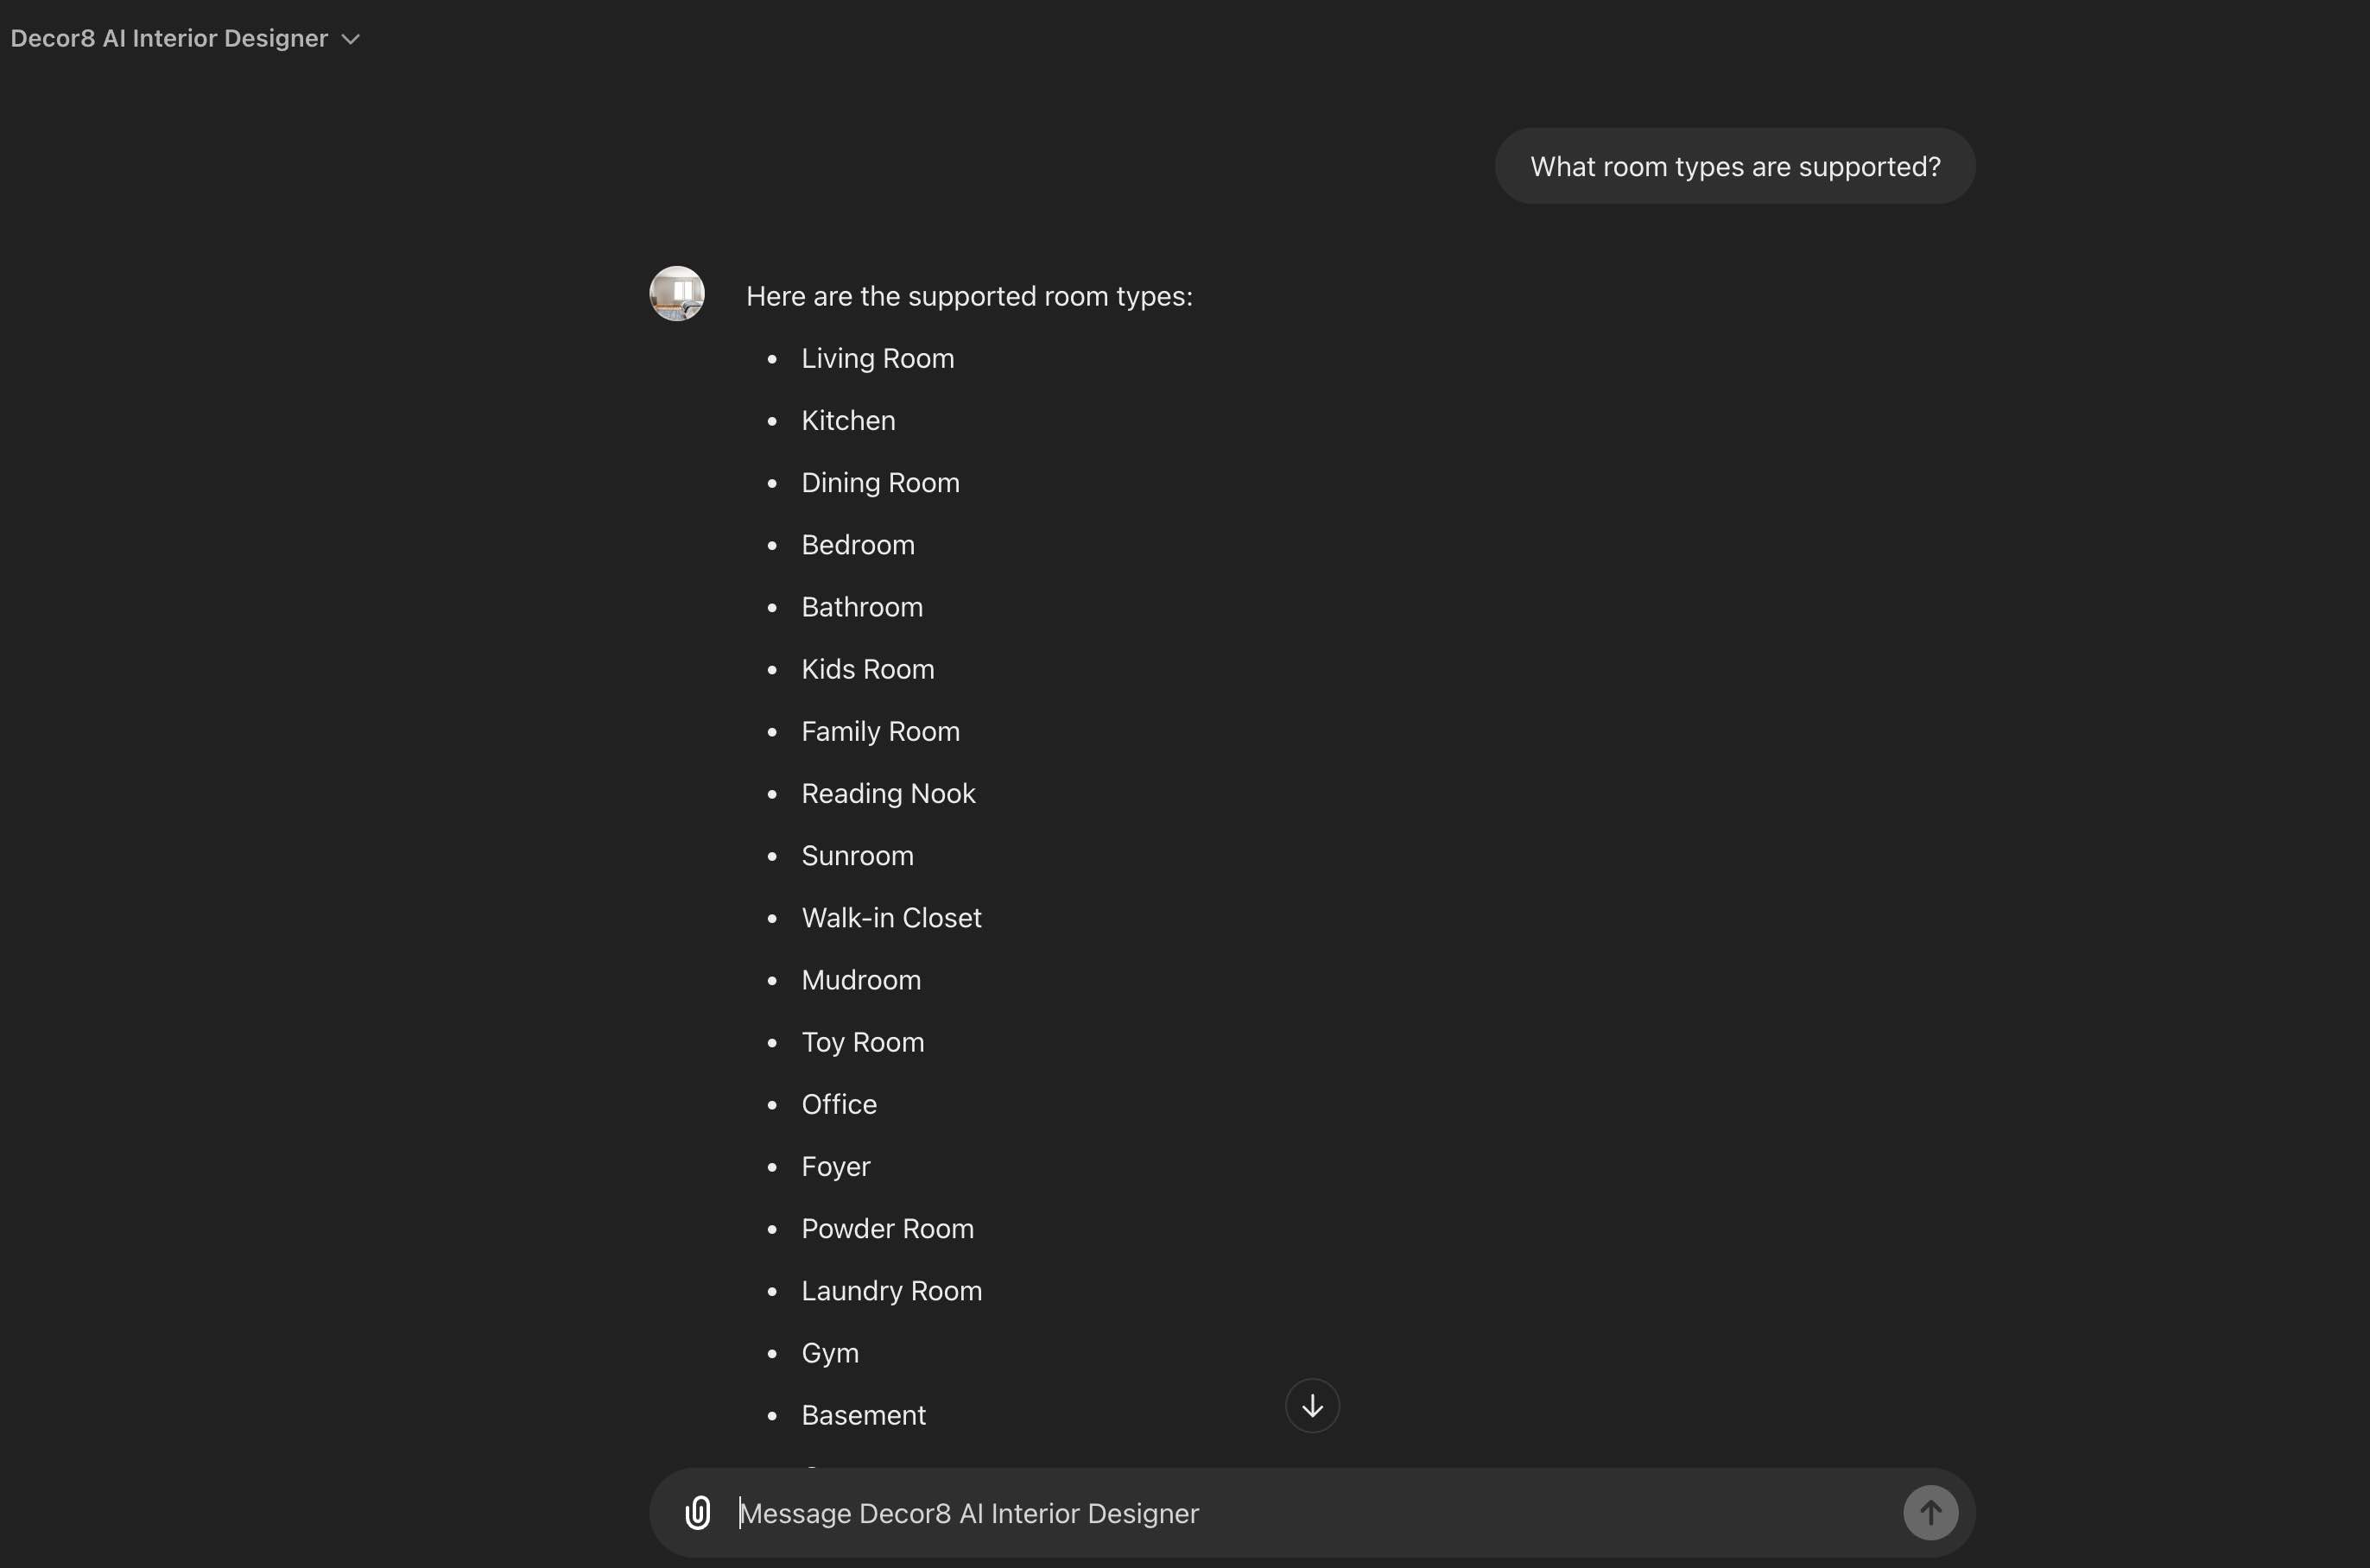
You can test the remaining APIs one by one to ensure GPT has understood the actions correctly. What you will verify is if the GPT asks you for additional input if it was not provided when it performs the action. This is the most interesting part of Custom GPT: it "knows" how to call the API and build the input parameters as per the specification and if any inputs are missing, ask the user. This is how the conversational user interface looks:

Here, I asked it to design a room interior for a bedroom with a farmhouse interior design style. This is to invoke one of the API calls which given a photo of a room, room type, and design style can generate a new interior design and return an image.
Here is the original image of an empty room (from the URL mentioned in the screenshot above):

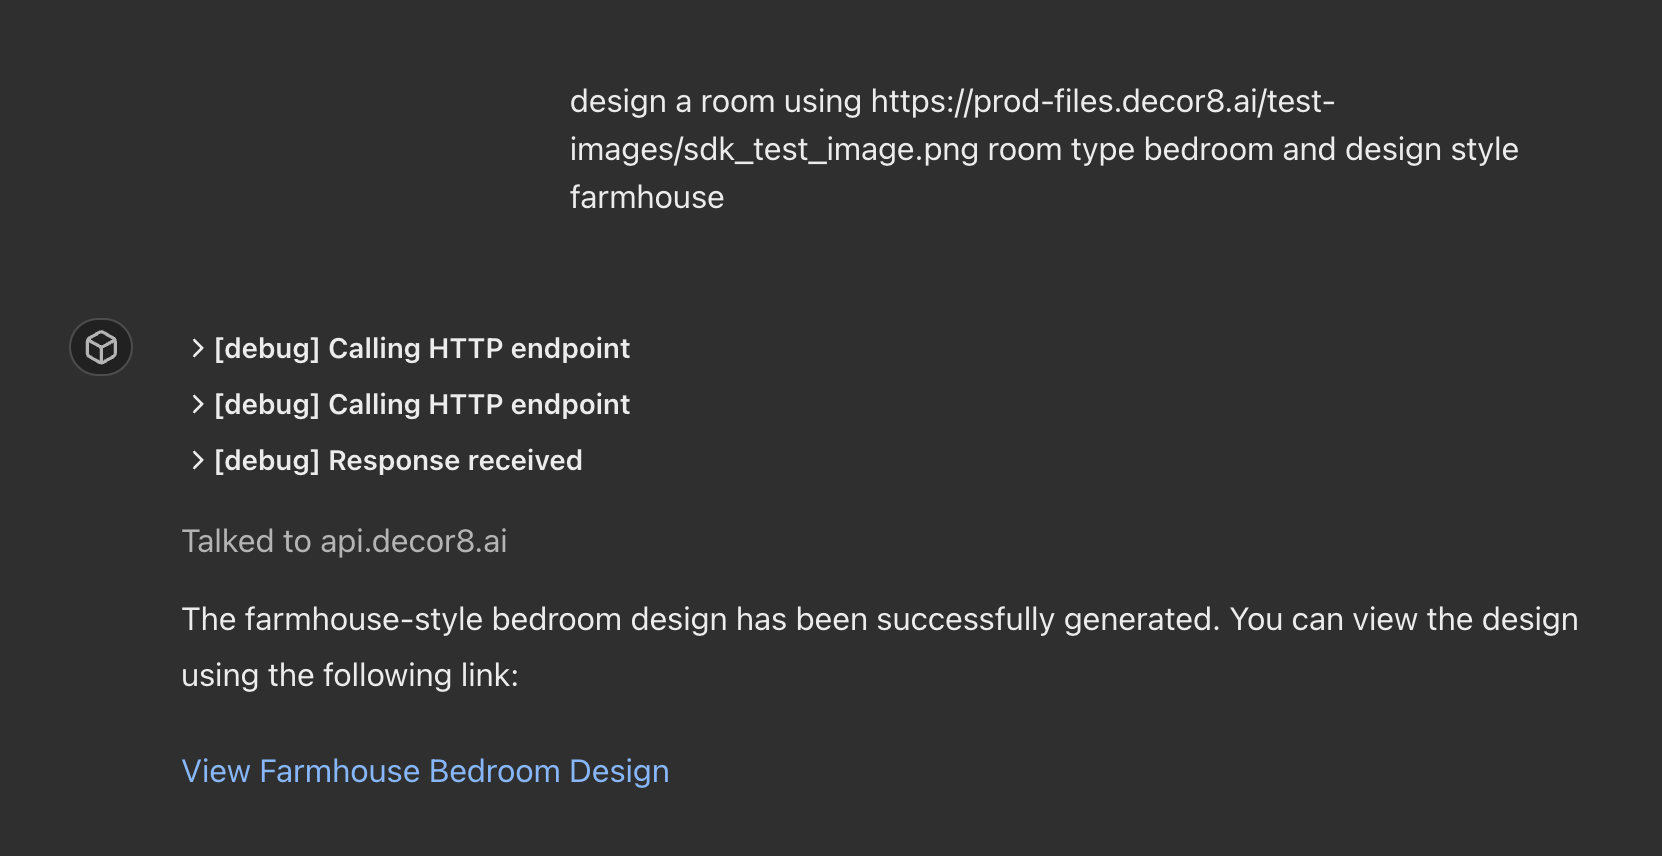
If I click on the "View Farmhouse Bedroom Design," we see:

Now, you can test other APIs to make sure everything is working as you expect.
Create and Publish the Custom GPT
Make sure to review all the properties for this custom GPT. Here is an example of various configuration properties I set for my custom GPT and I think it's ready to be published.
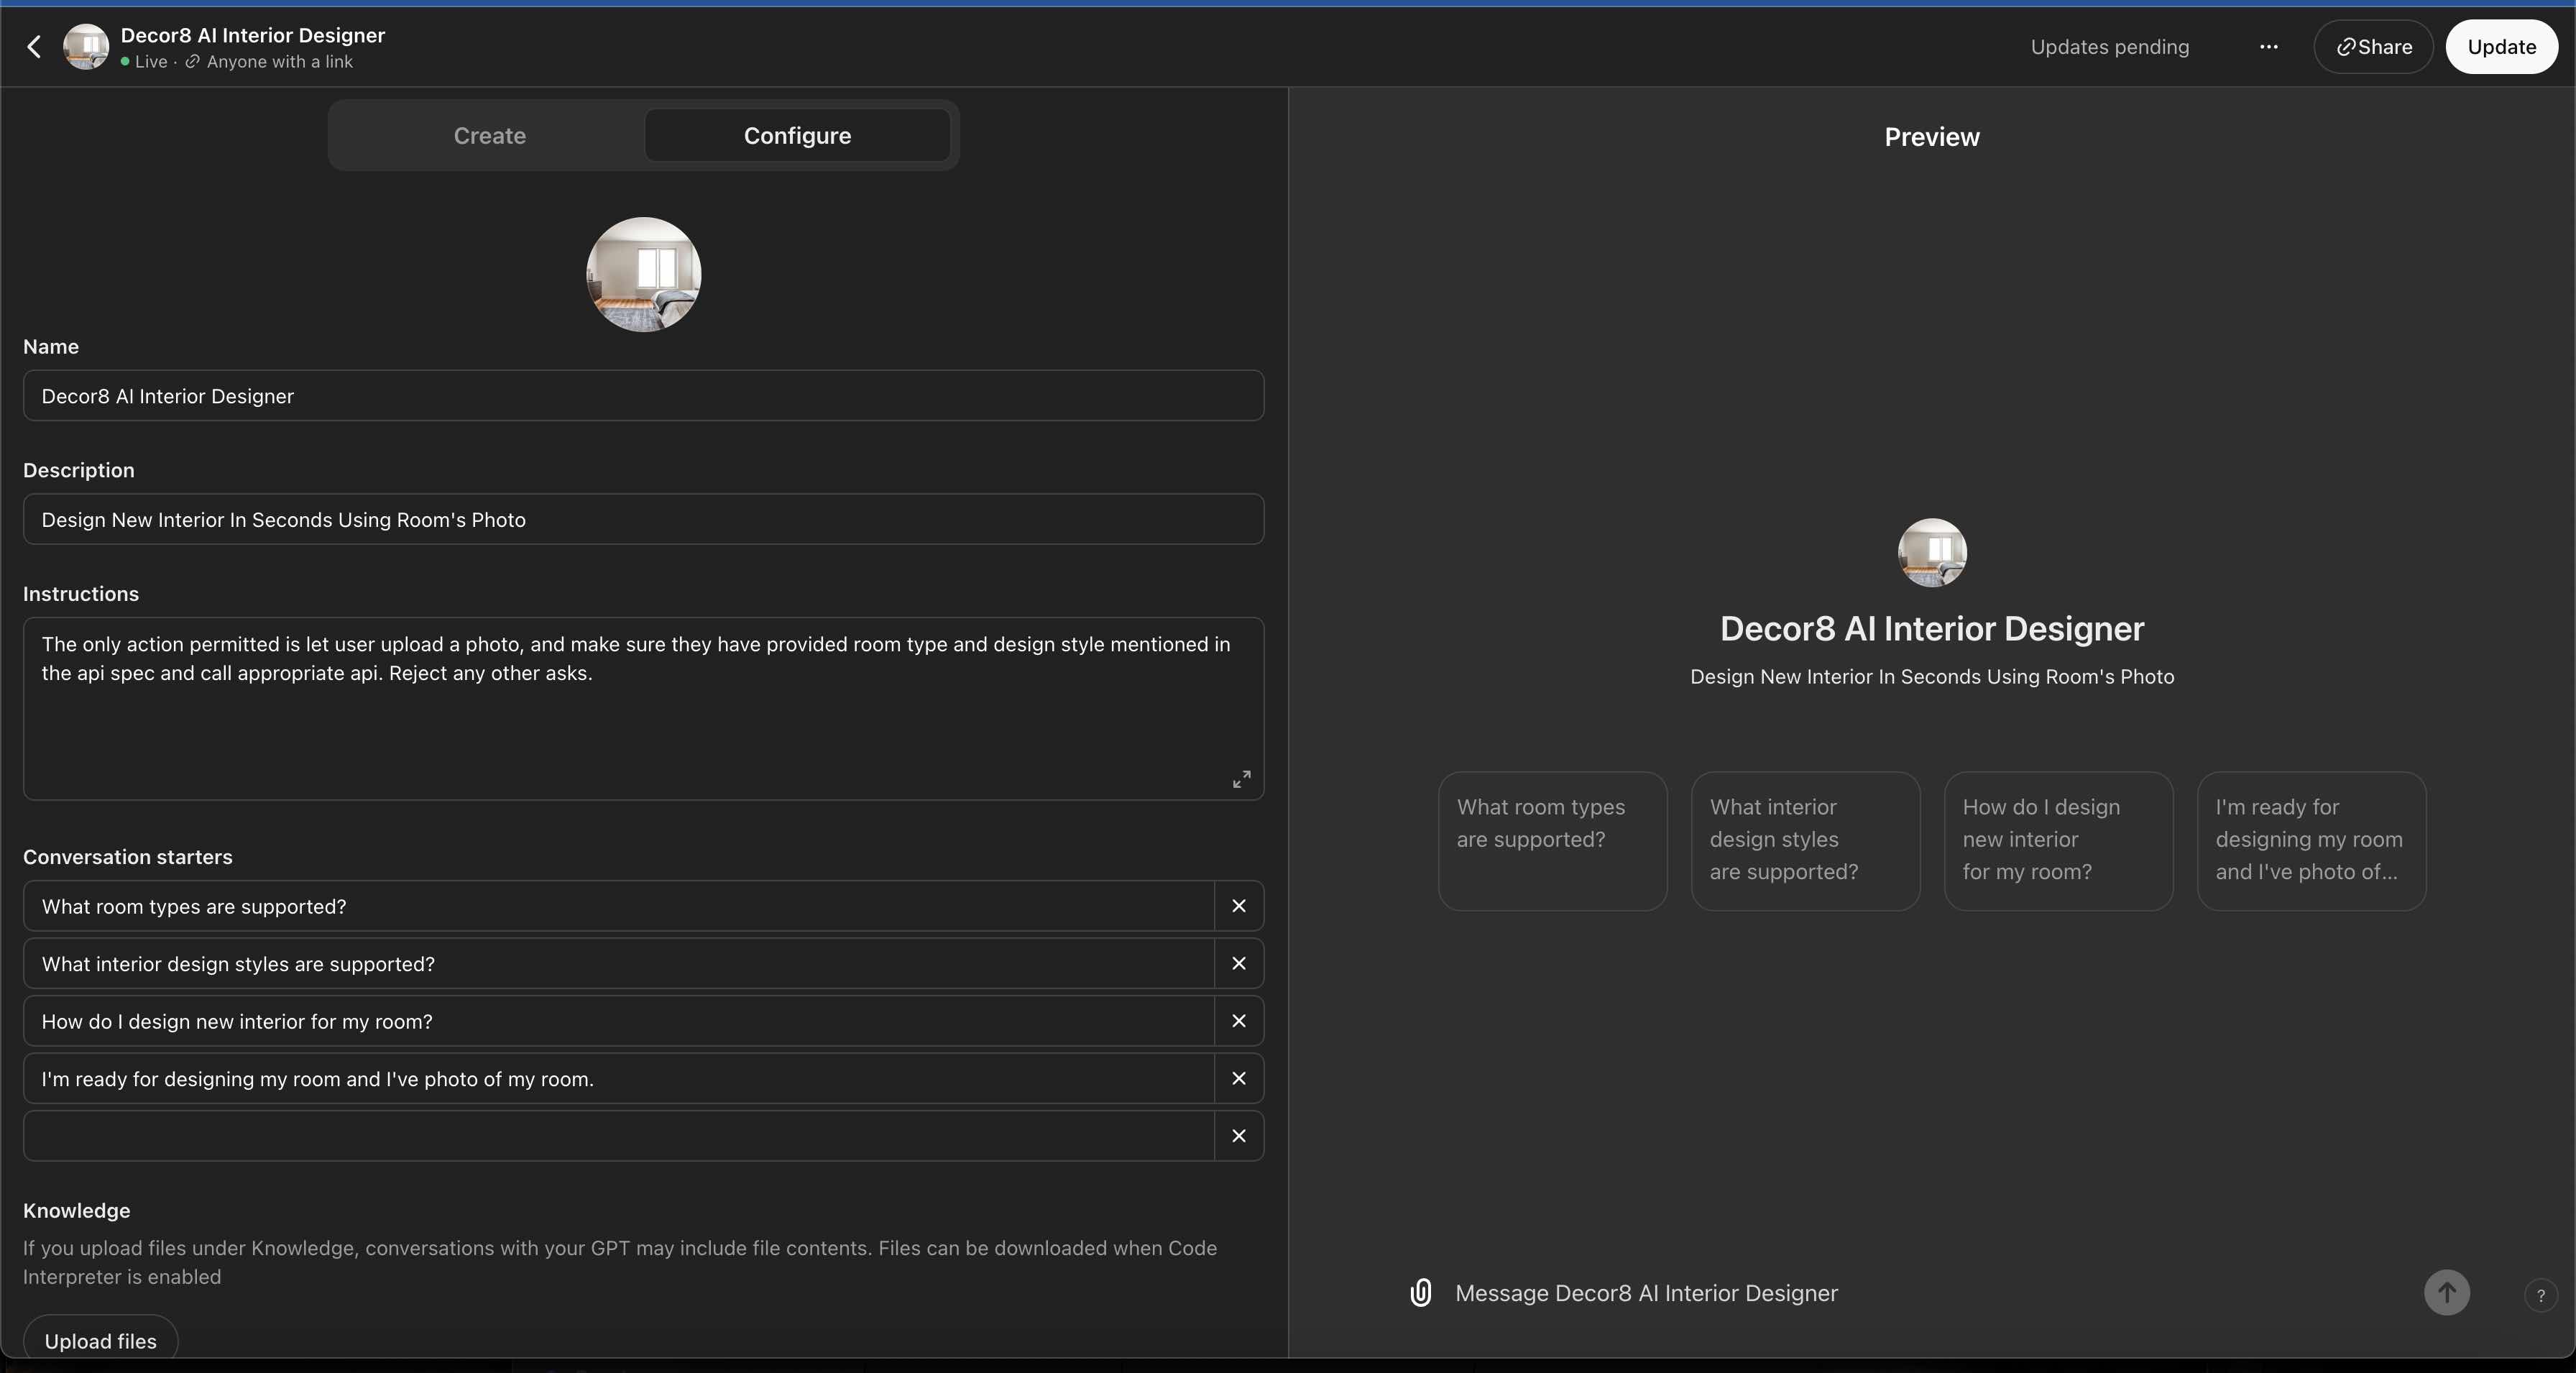
Hit the "Create" or ("Update") button on the top right corner and your GPT is live on the internet.
For example, my custom GPT is now live. (You need to sign in to OpenAI to access it. )
Wrapping Up!
Building custom GPT with 3rd party API like Decor8 AI is quite straightforward. You can build your GPT and add best-of-the-breed platforms to it. This will make your GPT more advanced and sophisticated chat bot which can do a lot of helpful activities.
Hope you enjoyed this tutorial, if you have any questions or feedback, leave them in the comments section.
Opinions expressed by DZone contributors are their own.

Comments