How To Build a Webex Chatbot in Node.Js
With hybrid work, developers can build tools like chatbots for any industry. In this tutorial, we'll walk through how to use Node.js to build a Webex chatbot.
Join the DZone community and get the full member experience.
Join For FreeWorkers in healthcare, education, finance, retail—and pretty much everywhere else—are clocking in by logging on from home. This has opened up opportunities for developers to build tools to support hybrid work for every industry, not just their own. One of those opportunities is in the area of ChatOps, the use of chat applications to trigger workflows for operations.
As software developers, we’ve been doing ChatOps for years—sending commands from inside a chat space to deploy applications, restart servers, and open pull requests. However, IT professionals aren’t the only ones collaborating through virtual meetings and team platforms these days. In 2020, everybody else started doing it, too.
Webex is one of the major hybrid work platforms. I was particularly interested in what ChatOps looked like in Webex. How hard is it to build a chatbot for it? As it turns out, it’s not that hard at all.
In this post, we’re going to walk through the steps for building a simple Webex chatbot with Node.js and the Webex-node-bot-framework. We’ll be able to add our chatbot to a Webex team space or direct messaging space. As long as the chatbot’s backend server is running, the chatbot will be able to respond in Webex—to you, or to anyone else in the team space.
For this first iteration, we’ll run the backend for our chatbot locally with a ngrok tunnel so that Webex messages can get to our server for the chatbot to provide a proper response. In a follow-up post, we’ll containerize our chatbot backend server and deploy it to the cloud.
Are you ready? Let’s go!
What Will Our Demo Chatbot Do?
I’m in a lot of virtual meetings. Sometimes, meetings devolve into a frenzy of acronyms, buzzwords, and blah-blah-blah. I suffer from imposter syndrome and don’t always feel like I can hang when it comes to contributing to the blah-blah-blah.
Enter our corporate-speak generator chatbot: Buzz. In Webex, I can send a message to Buzz and ask him to give me an action or a thingy:
- When I ask for an action, Buzz sends me back phrases like “benchmark virtual paradigms” or “innovate dynamic functionalities.” Perfect to throw out there when asked what our team’s next steps ought to be.
- When I ask for a thingy, Buzz responds with a phrase like “monitored mobile ability” or “stand-alone-holistic instruction set.” Just what I need when we’re talking about the feature set for our 2.0 MVP.
Set Up Webex
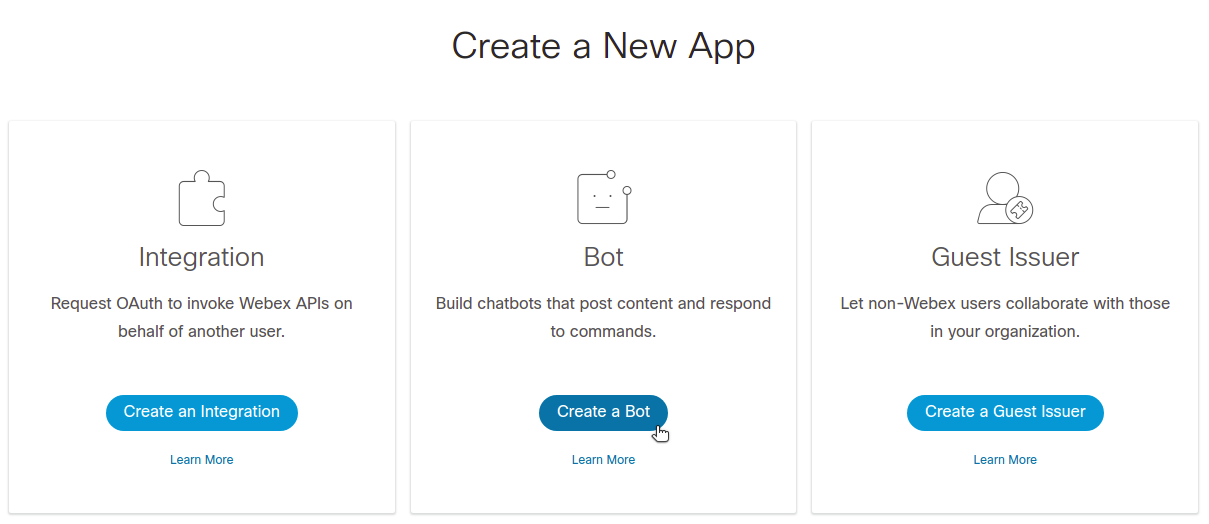
To get started, you’ll first need to set up a Webex account. From there, you can log into the Webex Developer portal and proceed to My Apps. Click on Create a New App. Select the option to Create a Bot.
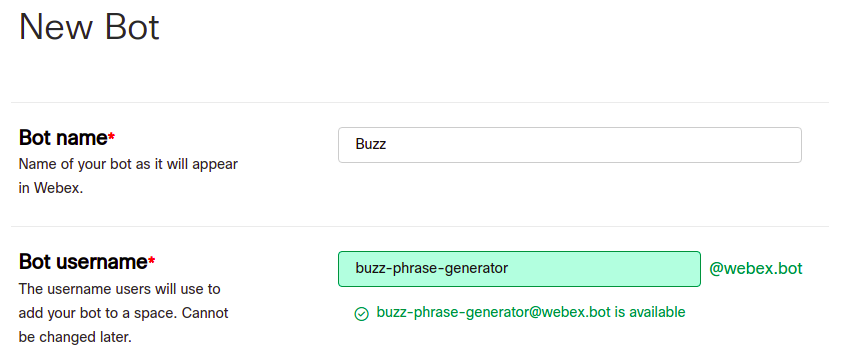
Choose a display name and username for your chatbot.
You can also upload a custom icon for your chatbot. I’ve decided to go with this one.
![]()
You can also enter a description for your chatbot. Then, click on Add Bot.
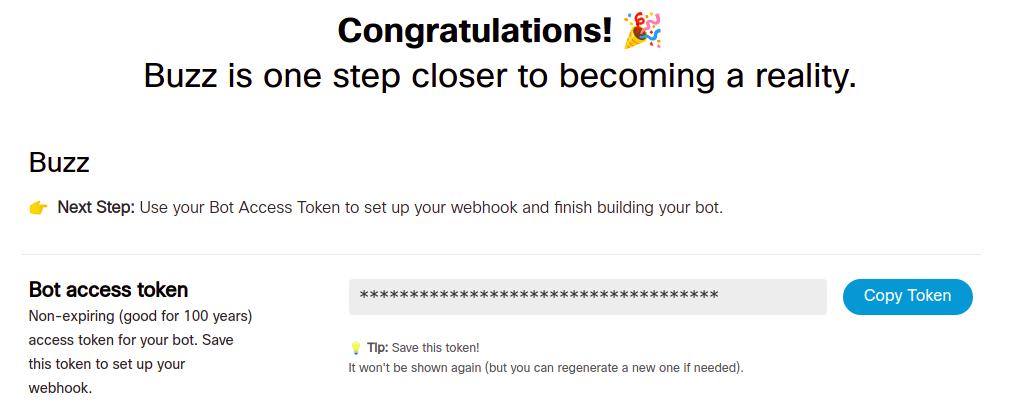
Copy your Bot access token. We’ll use it in a later step.
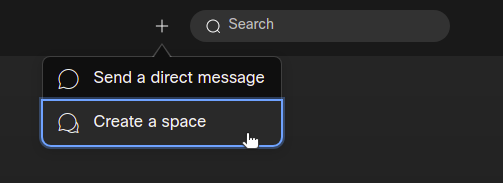
Next, go to your Webex spaces. Click on the plus sign and Create a space.
Choose a name for your space. Then, invite Buzz to the space by entering your chatbot’s email, which is the chatbot username you chose, followed by @webex.bot. In our example, that’s buzz-phrase-generator@webex.bot.
The first time you add a chatbot to your space, Webex may tell you that this user is new to Webex and you will need to invite them. If that’s the case for you, then click on Invite.
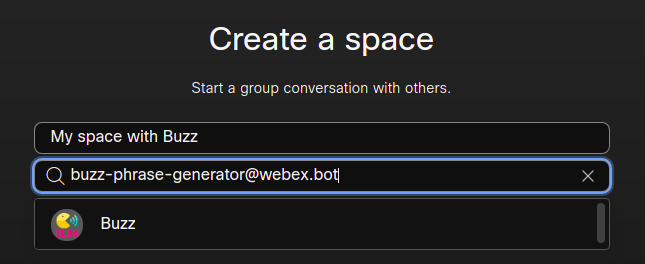
Click on Create. You now have a Webex space with Buzz.
Build the Chatbot Backend
Now, let’s give our chatbot some brains. You can follow along step by step, or see the full source code at the GitHub repository. Our chatbot backend will be a basic Node.js Express server which we will build on our local machine.
Initialize Project and Add Dependencies
First, we’ll initialize a new Node.js project for our server, using yarn. In a terminal on your local machine, do the following:
~/$ mkdir buzz-server

~/$ cd buzz-server

~/buzz-server$ yarn init


yarn init v1.22.10
question name (buzz-server): buzz-server
…

success Saved package.json
Done in 9.85
Next, we’ll add our dependencies.
~/buzz-server$ yarn add webex-node-bot-framework express faker@5.5.3Our chatbot uses the Webex-node-bot framework, which abstracts away the complexities of Webex bot creation, allowing you to build chatbot interaction through a Node.js Express server and event listeners.
We also use the faker package (locked to the version 5.5.3, since the latest version no longer works as expected). This library is often used for generating fake test data, but its API includes a set of calls for generating company buzz phrases. That’s what Buzz will use to generate the phrases we’re looking for.
In our project folder, we create a single file called index.js. Let’s walk through what the code does, one section at a time.
Walkthrough of index.js
After requiring all of our third-party packages, we initialize a new Express server (called app) and add in the middleware for parsing JSON.
Framework Configuration and Startup
Next, we set our framework configuration options:
var config = {
  webhookUrl: process.env.WEBHOOK_URL,
  token: process.env.BOT_ACCESS_TOKEN,
  port: 8080
};
The framework needs two pieces of information to initialize the connection with Webex:
webhookUrl: This is the URL where we will deploy our chatbot backend, and it’s where Webex will send requests whenever events involving our chatbot occur. For this post, we’ll deploy locally and tunnel with ngrok to get a URL.token: This is the bot access token Webex provided to us when we created our bot. When our chatbot backend starts up, it will use this token to authenticate with the Webex API in order to register for Webex team events involving our chatbot.
We’ll provide both of these values as environment variables when we start up our server.
Next, we start the framework:
var framework = new Framework(config);
framework.start();
Responding to What the Chatbot Hears
With our framework started, we can begin registering event listeners. While the framework provides several events you can listen for, we’re mainly concerned with the hears() function. With this function, our server waits for Buzz to hear a specific phrase (or match a phrase with a regular expression), and then it directs Buzz to respond in a certain way.
This is a simple implementation of how to tell Buzz to respond when he receives a message with the word “action” in it:
framework.hears(/action/i, (bot) => {
  bot.say("Here's an action for you...", faker.company.bs());
});
We call hears() with a regular expression to match for any message that includes the word “action” (case insensitive). When Buzz receives a matching message, we call the bot’s say() function. In this case, we get our corporate-speak phrase by calling company.bs() from the faker package.
We listen and respond similarly to messages to Buzz that include the word “thingy”:
framework.hears(/thingy/i, (bot) => {
  bot.say("Try this thingy...", faker.company.catchPhrase());
});
Those are the key listeners we want to have in place, but it’s also helpful to have a fallback response for any messages that don’t match our above cases. For the full implementation details, check out the GitHub repository.
Express Server Startup
Lastly, we tell Express to let the framework handle incoming requests on the root path, and we start up our server:
app.post('/', webhook(framework));

var server = app.listen(config.port, () => {
  console.log(`Listening on port ${config.port}...`);
});
With index.js done, it’s time to start it up and test!
Test Chatbot Backend
Since we’re running our backend server locally, we’ll use ngrok so that Webex can tunnel in to reach our server at port 8080.
Start ngrok
In a terminal window, run the following command:
~$ ngrok http 8080The ngrok process will run, and your window will look something like this:
ngrok by @inconshreveable (Ctrl+C to quit)

Session Status online
Account Alvin Lee (Plan: Free)
Version 2.3.40
Region United States (us)
Web Interface http://127.0.0.1:4040
Forwarding http://98-161-186-106.ngrok.io -> http://localhost:8080
Forwarding https://98-161-186-106.ngrok.io -> http://localhost:8080

Connections ttl  opn    rt1   rt5   p50   p90
              0    0   0.00  0.00  0.00  0.00
Copy the HTTPS forwarding URL provided by ngrok.
Start Server
Now, we’re ready to run node index.js. However, we’ll need to provide two environment variables at runtime. We’ll need to specify our WEBHOOK_URL, which is our ngrok forwarding URL, and we’ll need to specify our BOT_ACCESS_TOKEN, which Webex provided to us when we registered our bot.
Because ngrok needs to keep running, we’ll work in a new terminal window. Startup your chatbot backend server with the following command:
~/buzz-server$ WEBHOOK_URL=https://98-161-186-106.ngrok.io \
               BOT_ACCESS_TOKEN={ENTER-YOUR-TOKEN-HERE} \
               node index.js

Listening on port 8080...
Test in Webex
With our server listening, we can go to our space in Webex and send a message, making sure to mention @Buzz so that our backend server receives the message.
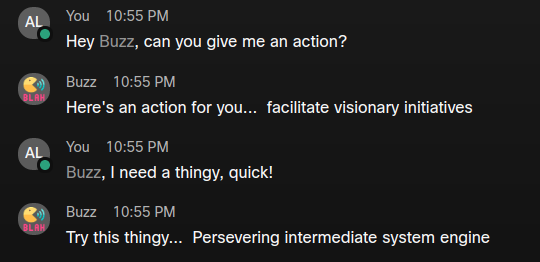
It works!
Oh, Buzz, I needed you in last week’s board meeting.
Take It Further
The framework also supports Buttons and Cards from Webex. Your chatbot responses can be nicely formatted and even contain additional actions which users can click on. We can give Buzz a little bit more polish with just a basic AdaptiveCard:
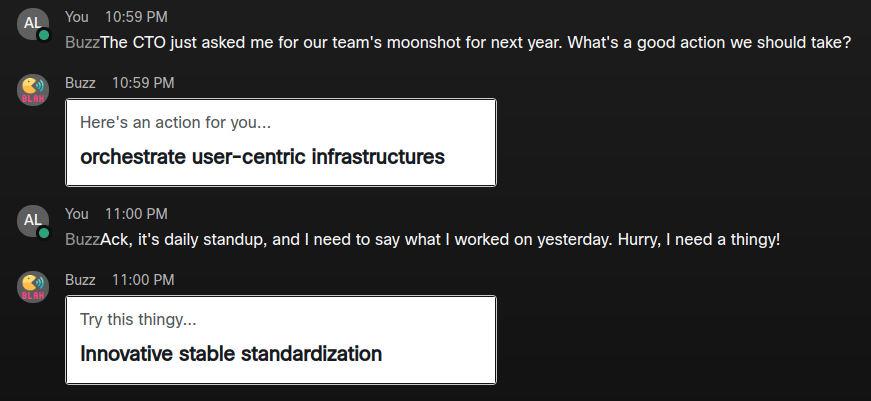
More Serious Use Cases
Sure, quirky, little chatbots like Buzz are fun and simple to build. However, the simplicity of the framework opens up many opportunities for building powerful and genuinely useful chatbots. Some possibilities for the chatbot backend include:
- Reaching out to third-party services (such as financial market data, flight status APIs, or social media platforms) to fetch specific data for the chatbot to return in the Webex space.
- Integrating with communications and productivity APIs. Imagine being able to do this in Webex: Hey, @PagerBot, send a text and an email to @JPeralta to tell him that “Daily standup started 5 minutes ago.”
- Triggering internal organization actions like generating financial reports or gathering yesterday’s school attendance numbers.
- Interacting with IoT or smart assistants.
We’ve only scratched the surface with Buzz.
Conclusion
In our demo mini-project for this post, we deployed our chatbot locally. Whether your chatbot is Buzz or the next hybrid work game-changer, what do you do when you actually want to deploy your chatbot to the cloud? In our follow-up post, we’ll Dockerize our chatbot backend server as a container image. Then, we’ll deploy it to the cloud. Get ready for it.
As more people—across all industries—are working from home, hybrid work platforms are seeing an explosion in use. With that increased use comes opportunities to build tools—like chatbots—to support the hybrid work revolution. If you’re going to build ChatOps tools for Webex, using the webex-node-bot-framework will get you up and running quickly.
Published at DZone with permission of Alvin Lee. See the original article here.
Opinions expressed by DZone contributors are their own.

Comments