How to Add Tomcat 8 to Eclipse Kepler
Join the DZone community and get the full member experience.
Join For Freethe article represents steps required to configure tomcat 8 with eclipse kepler.
- download tomcat 8 and place it within any local folder.
- download eclipse java ee kepler
-
as of date, tomcat 8 is not supported in eclipse javeee kepler. however, you could add the tomcat 8 by doing following:
- go to the wtp downloads page, select the latest version (currently 3.6), and download the zip. here’s the current link .
- copy the all of the files in features and plugins directories of the downloaded wtp into the corresponding eclipse directories in your eclipse folder (overwriting the existing files).
-
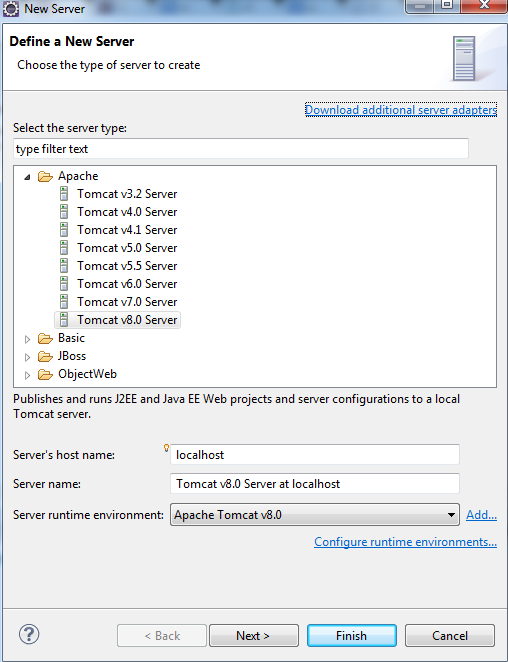
start eclipse and click on “servers” tab in the workbench. go ahead and try adding a new server. you would find option for tomcat 8 available for selection as shown below.

- after clicking finish, you would see a new server added with the name as “tomcat v8.0 server at localhost”. start the server.
- check http://localhost:8080 (provided you installed tomcat 8 and set http port as 8080)
- interestingly, you would not see the welcome page, but the 404 error page.
-
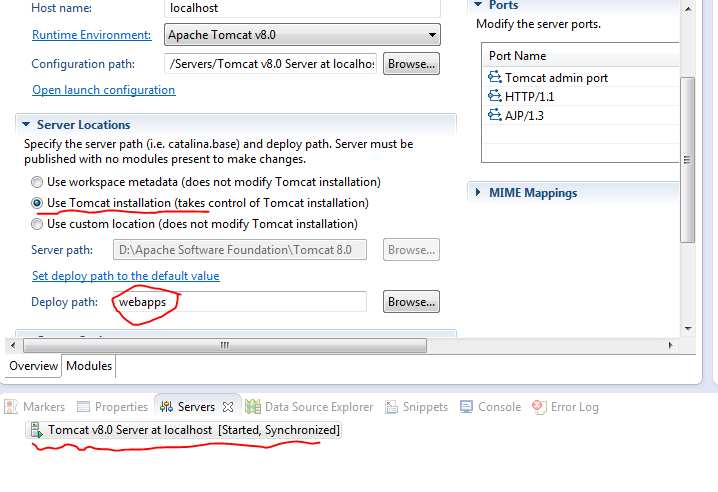
to get rid of that, double click on ”tomcat v8.0 server at localhost”. in the window that opens up, select “use tomcat installation” and, change deploy path from wtpwebapps to webapps. look at the figure below.

- restart the server and access http://localhost:8080 . you are all set.
Apache Tomcat
Eclipse
Kepler (software)
Published at DZone with permission of Ajitesh Kumar, DZone MVB. See the original article here.
Opinions expressed by DZone contributors are their own.

Comments