Handshaking in Mule
In this tutorial, we are demonstrating a step by step guide on how to implement One-Way and Two-Way SSL/TLS in MuleSoft Anypoint Studio.
Join the DZone community and get the full member experience.
Join For FreeIn this tutorial, we are demonstrating a step by step guide on how to implement One-Way and Two-Way SSL/TLS in MuleSoft Anypoint Studio. For reference, I am using it on Mule4 HTTP Connector.
Just for a recap, SSL (Secure Sockets Layer) is an encryption-based Internet security protocol. It was first developed by Netscape in 1995 to ensure privacy, authentication, and data integrity in Internet communications. SSL is the predecessor to the modern TLS (Transport Layer Security) encryption used today. TLS is an improved version of SSL. It works in much the same way as the SSL, using encryption to protect the transfer of data and information. The two terms are often used interchangeably in the industry although SSL is still widely used.
Reference: Cloudflare, WebSecurity
In Mule (either its Mule 3 or Mule 4), whenever we need to use HTTPS Protocol.... we need to configure the TLS.
There are two types of SSL/TLS handshakes;
- One-Way SSL
- Two-Way SSL (or Mutual SSL)
The difference between these two is that in one-way SSL, only the client validates the identity of the server (and the server doesn't care who is the client), whereas, in two-way SSL, both server and client validate each other's identity.
The difference between Keystore and the Truststore is that Keystore is used to store the private key, whereas Truststore is used to store the certificates. For further detailed reading, please see the below article.
https://dzone.com/articles/differences-between-Keystore-amp-Truststore
Below is a graphical difference between the two concepts.
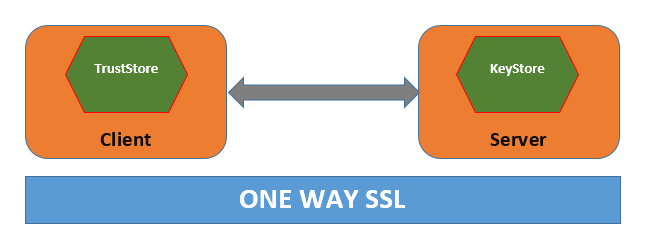
In one way SSL, the server (Mule Application) would configure the Keystore, whereas the client (Browser) would hold the certificate issued by the server's Keystore. It is roughly a simple implementation.
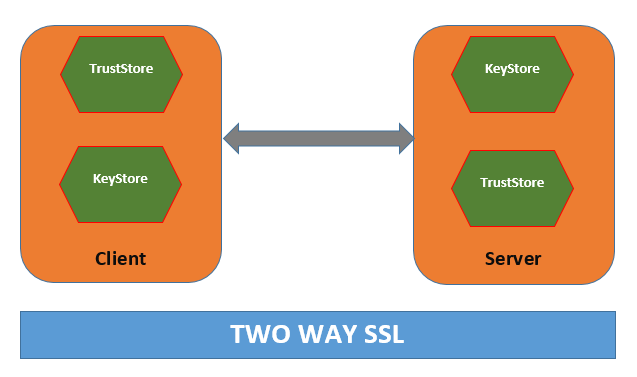
In two way SSL, the server (Mule Application) would configure the Keystore as well as the Truststore. In the server-side Truststore configuration, we need to import the certificate which is generated by the client side's Keystore. i.e.

We will generate the Keystore and Truststore through the Standard Java key tool which is shipped as a built-in feature to Java SDK installation.
Implementation
To show the demo, we will work on generating our certificates using Standard Java.
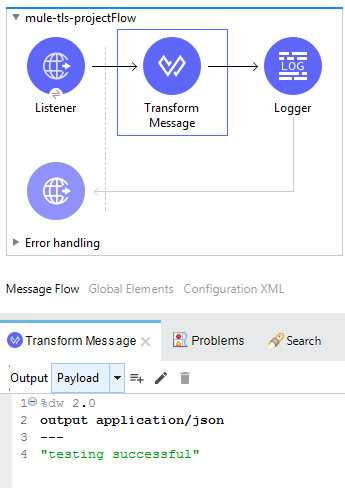
In Anypoint Studio, create a project mule-this-project and then create a simple flow in it that just returns a static string literal.
Testing by Having HTTP
Having HTTP Protocol in Listener Configuration.
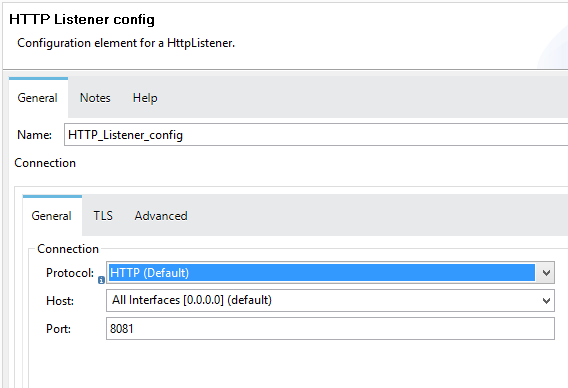
If we test the application by running it on localhost... we will get the string "testing successful" back on the browser.

Testing by Having HTTPS
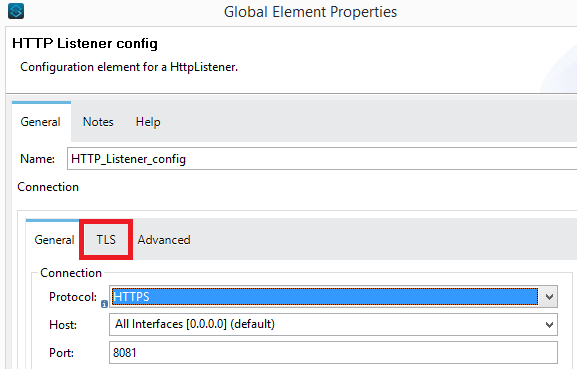
Having HTTPS Protocol in Listener Configuration.
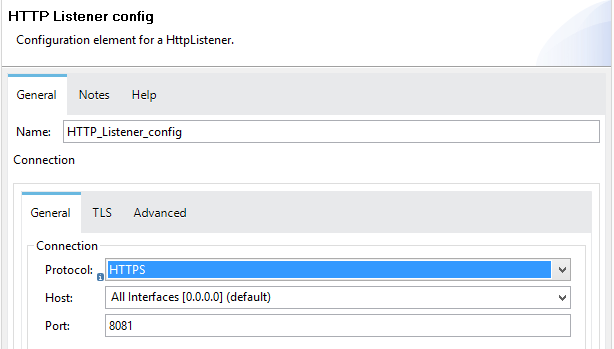
If we test the application by running it on the localhost without configuring the TLS... we will get a deployment failure message.

In simple words.... to use HTTPS, we need to configure the TLS as well.
Configuring One-Way SSL
As we now know that in One-Way SSL, the only server needs to generate a Keystore, therefore, by using the below command in the command prompt, we will create the server-side Keystore.
Generating server-side Keystore:

xxxxxxxxxx
Command: keytool -genkey -alias server_ks_a -keyalg RSA -Keystore server_ks.pfx -storetype PKCS12 -storepass serverpsw
Answers to questions can be as follows:
imranaziz_server_ks
myorgunit_server_ks
myorg_server_ks
Sydney
NSW
AU
-storetype can be PKCS12, JKS, or JCEKS (here I am using PKCS12)
Confirm that you are now having server_ks.pfx file generated on the given location of your choice. By having 'ks', we are distinguishing the file for Keystore.

Now we need to generate a public certificate by providing the above-generated server-side Keystore.
Generating public certificate from server-side Keystore

xxxxxxxxxx
Command: keytool -export -alias server_ks_a -file server_public.cer -Keystore server_ks.pfx
Provide the password we have provided while creating the server Keystore above, i.e. serverpsw
Confirm that you are now having server_public.cer file generated on the given location of your choice.

Double click on the server_public.cer and install the certificate.
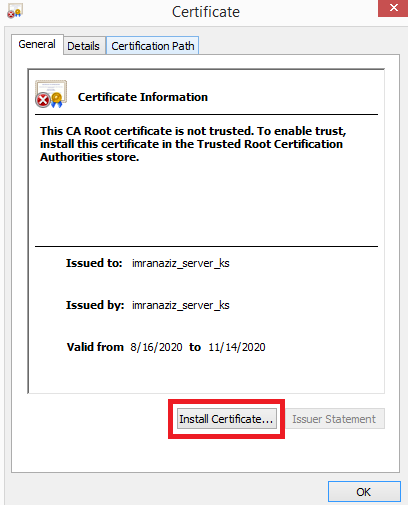
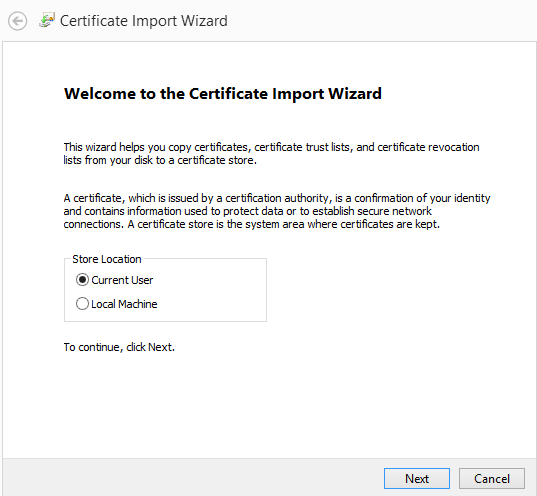
On the next page, click Current User then press Next.
Then
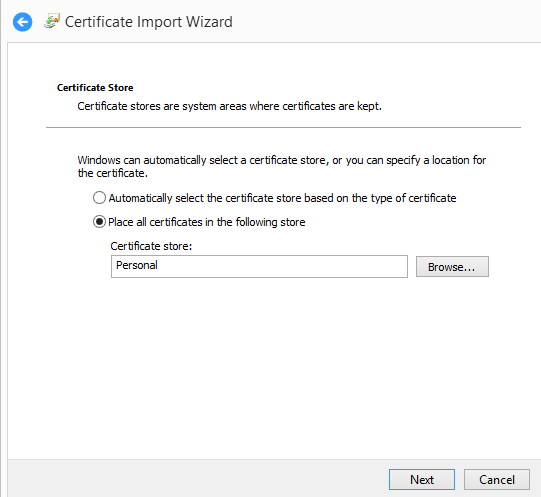
Then
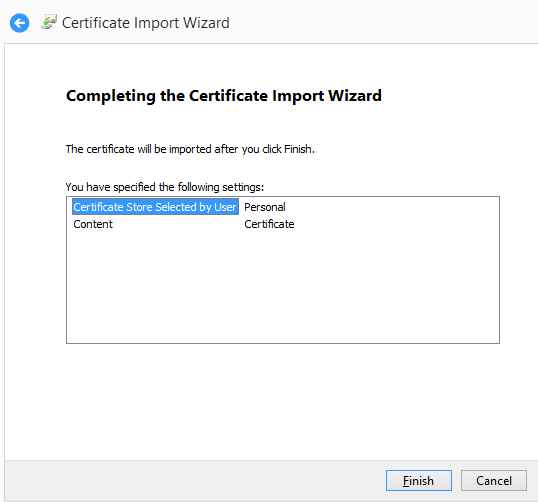
Click Finish to get this.
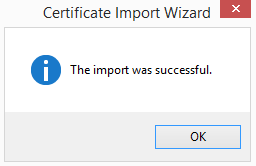
Configure the Keystore in MuleSoft Anypoint Studio connector
In HTTP Listener config, click on TLS and select 'Edit inline'.
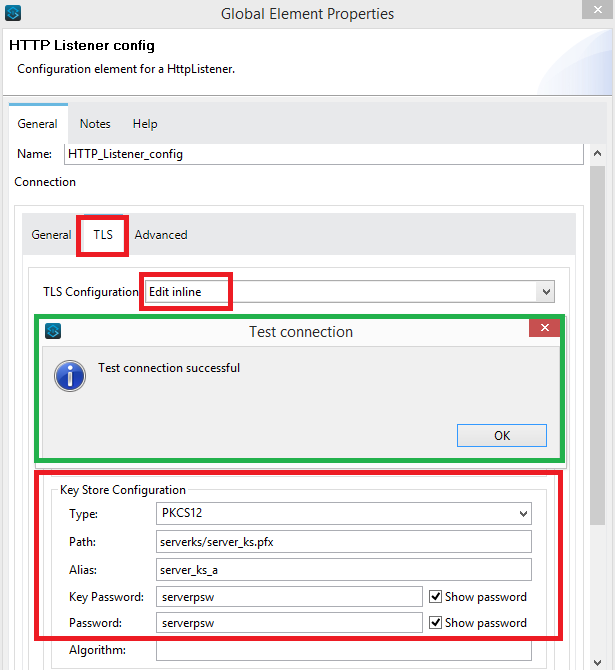
Fill the required above fields in 'Key Store Configuration' and click on Test Connection. You should get a successful connection message on the screen as shown in the above green highlighted box.
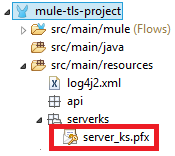
For Path, make sure that you import or copy/paste the server_ks.pfx file under the below location on your Anypoint Studio project's folder.
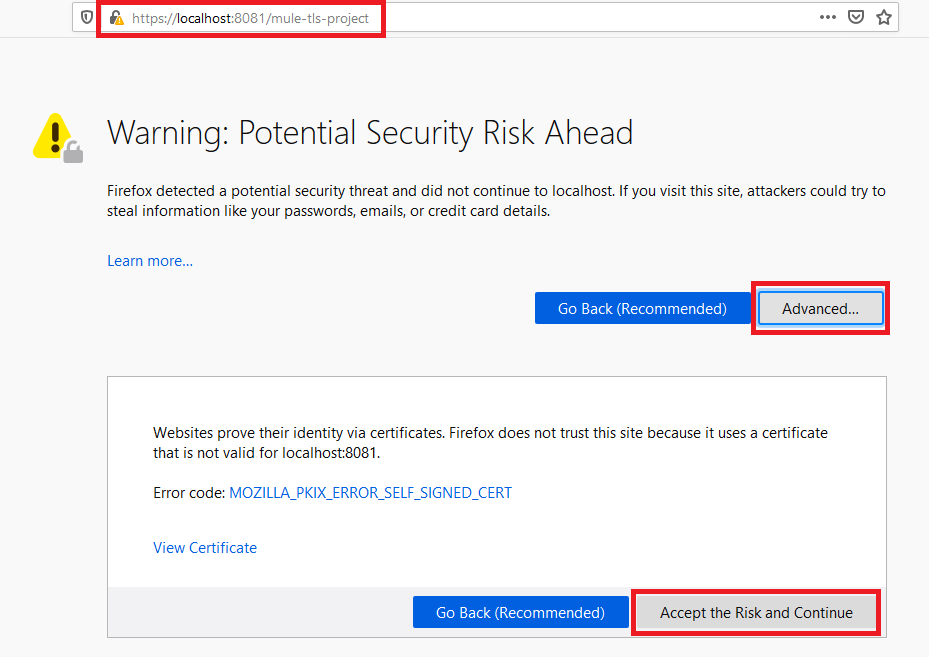
Open the browser and hit https://localhost:8081/mule-tls-project
You will get the below page. Click on Advance and then Accept the Risk and Continue.
You will get a successful execution message.

Configuring Two-Way SSL
As we now know that in Two-Way SSL, both parties ensure that they trust each other and for this purpose, the have there owned Truststore and Keystore i.e. both server and the client needs to generate a Keystore and both needs to generate certificates from their respective Keystores and pass to each other.
Taking the implementation further from One-Way SSL, as we have shown above, we already have a server-side Keystore and the certificate generated from it has already been installed on the client-side (browser). Therefore, now we further need to generate the client-side Keystore and also need to generate the certificate from that Keystore.
Furthermore, we will need to create the server-side Truststore and configure that Truststore by importing the certificate generated by the client-side Keystore.
In case, you are finding it complex, please have a look at my previously mentioned steps below once again.

According to the above six steps, we have already implemented steps 1, 2, and 6 in One-Way SSL. Therefore, taking it further, now we will implement step 4, then step 5, and then step 3.
Generating client side Keystore (step 4)

x
Command: keytool -genkey -alias client_ks_a -keyalg RSA -Keystore client_ks.pfx -storetype PKCS12 -storepass clientpsw
Answers to questions can be as follows:
imranaziz_client_ks
myorgunit_client_ks
myorg_client_ks
Sydney
NSW
AU
-storetype can be PKCS12, JKS, or JCEKS (here I am using PKCS12)
Confirm that you are now having client_ks.pfx file generated on the given location of your choice. By having 'ks', we are distinguishing the file for Keystore.

Now we need to generate a public certificate by providing the above-generated client side Keystore.
Generating public certificate from client side Keystore (step 5)

x
Command: keytool -export -alias client_ks_a -file client_public.cer -Keystore client_ks.pfx
Provide the password we have provided while creating the client Keystore above, i.e. clientpsw
Confirm that you are now having client_public.cer file generated on the given location of your choice.

Generating server-side Truststore (step 3)

x
Command: keytool -genkey -alias server_ts_a -keyalg RSA -Keystore server_ts.pfx -storetype PKCS12 -storepass servertspsw
Answers to questions can be as follows:
imranaziz_server_ts
myorgunit_server_ts
myorg_server_ts
Sydney
NSW
AU
-storetype can be PKCS12, JKS, or JCEKS (here I am using PKCS12)
Confirm that you are now having server_ts.pfx file generated on the given location of your choice. By having 'ts', we are distinguishing the file for Truststore.
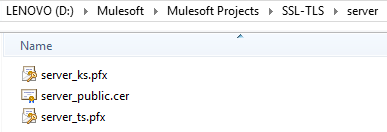
Configure server-side Truststore (step 3 continued)
We need to import the client-side certificate which is generated in the above step 5. For doing so, we need to use the below command.

x
Command: keytool -import -trustcacerts -Keystore server_ts.pfx -alias client_ks_public_cert_to_server_ts -file ..\client\client_public.cer
Provide the password we have provided while creating the server Truststore above, i.e. servertspsw
Now confirm that your server Keystore should have two certificates.

x
Command: keytool -list -Keystore server_ts.pfx
Provide the password we have provided while creating the server Truststore above, i.e. servertspsw
The output would have 2 entries.
server_ts_a (this is the server side Truststore alias)
client_ks_public_cert_to_server_ts (this is the public certificate generated from client side Keystore and imported in server Truststore)
Configure the Truststore in MuleSoft Anypoint Studio connector
In HTTP Listener config, click on TLS. We already have 'Key Store Configuration'., now we will add the 'Trust Store Configuration'.
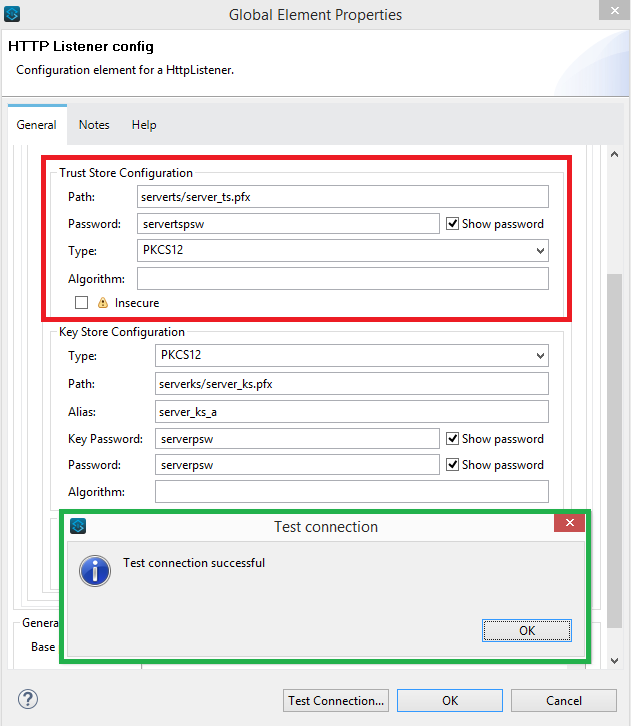
Fill the required above fields in 'Trust Store Configuration' and click on Test Connection. You should get a successful connection message on the screen as shown in the above green highlighted box.
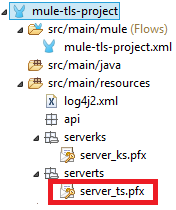
For Path, make sure that you import or copy/paste the server_ts.pfx file under the below location on your Anypoint Studio project's folder.
Now we need to import the client Keystore in the client side browser.
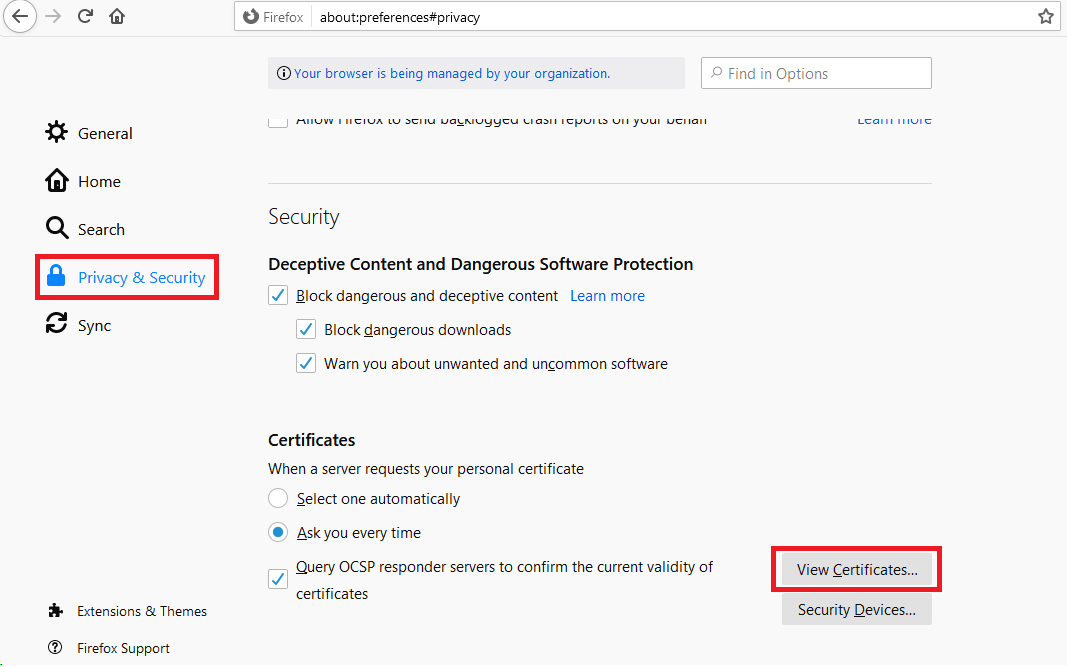
In Firefox, click on options then Privacy and Security. On the bottom, click on View Certificates.
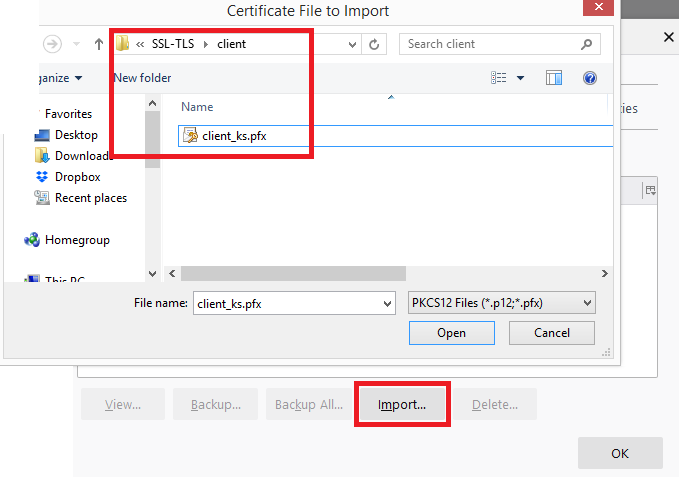
Click on the tab 'Your Certificates', click Import and choose client_ks.pfx from the client folder.
Enter the client Keystore password i.e. 'clientpsw' after selecting the file.
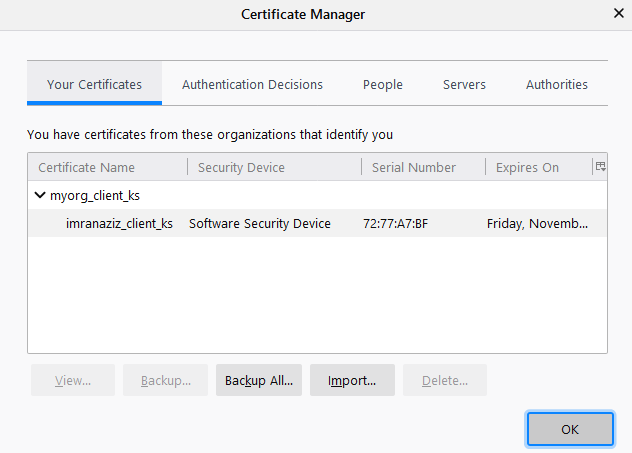
The client side Keystore has been imported in certificates.
After running the project and hitting the URL, we will get the below prompt asking which certificate to present as an identifier. We are only having one, so its already selected.
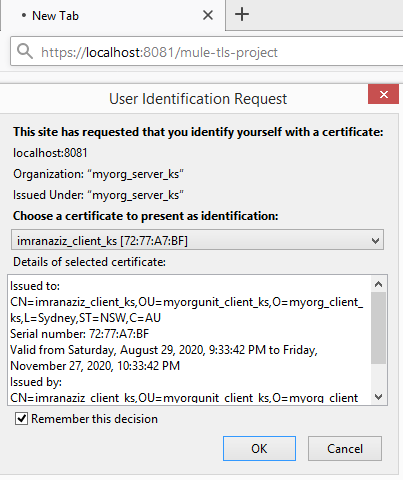
After clicking OK, we will again get the string "testing successful" back on the browser.

Conclusion
In this tutorial, we have seen how to implement One-Way SSL/TLS and Two-Way SSL/TLS in MuleSoft using self-generated Keystores and certificates.
Opinions expressed by DZone contributors are their own.

Comments