Handle Sensitive Data Securely With Skyflow
Learn some benefits of outsourcing your data privacy needs so that you can focus on your company’s core products while still remaining secure and compliant.
Join the DZone community and get the full member experience.
Join For FreeAny company working with sensitive data needs to make security a top priority. Sensitive data could include payment card industry (PCI) data like credit card info, personally identifiable information (PII) like social security numbers, protected health information (PHI) like medical history, and more.
PCI, PII, and PHI? When it comes to data security, that’s just the beginning. Data needs to be secure in transit, in use, and at rest. You need to ensure that proper access controls for authentication and authorization are in place. You also need to maintain data confidentiality, data integrity, and data availability. This can be further complicated when you need to replicate data across systems.
If all of that sounds daunting, you should consider using a data privacy vault service to help with your security needs. Not every company can afford to hire a team of security and data privacy experts, and that’s OK. What’s not OK is cutting corners. “Buy, don’t build” is the mantra you should adopt when dealing with critical parts of your application that are secondary to your company’s main focus.
In this article, I’d like to walk you through a simple demo of a secure credit card storage app I built using Skyflow’s Data Privacy Vault. We’ll look at some of the benefits of outsourcing your data privacy needs so that you can focus on your company’s core products while still remaining secure and compliant.
Let’s get started!
Demo App: Checkout Page

Imagine you’re an e-commerce company, and a user is making a purchase when shopping on your online store. They come to your checkout page and need to enter their credit card information. You want to be sure that you handle their credit card information securely, and you also want to store their credit card information so that it’s saved for them the next time they use your site.
There are several important considerations to keep in mind here:
Remember that data needs to be secure in transit, in use, and at rest. That means sending credit card info over the network using SSL/TLS (HTTPS rather than HTTP) and encrypting the data in your database rather than storing it in plain text.
You also need to ensure proper access controls are in place, meaning that once the data is stored, only the right people are able to access it.
When it comes to integrity and availability, you need to ensure that the data is stored correctly and isn’t inadvertently modified, and the data must be available when someone needs to retrieve it.
These are just a few of the requirements you need to meet in order to become PCI compliant.
Fast-Tracking the Demo App With Skyflow’s SDK
In building my checkout page, I used the Skyflow JavaScript SDK to provide the form field elements in the UI. These elements are implemented inside iframes which separate them from the rest of my frontend app, and that reduces my risk. When the user enters their credit card info and submits the form, the frontend Skyflow API makes a request to send the data to my Skyflow Data Privacy Vault.
The server responds with a unique ID and tokenized data representing the stored credit card info. This means that, in addition to not touching my app’s frontend, the credit card data also doesn’t touch my app’s backend at all either, further reducing my risk. The tokenized data can then be stored in my own database. This means I’m not directly storing the credit card info at all, just a tokenized reference to it.
Let’s dig into the code to see how I built this. All of the code is available on GitHub if you’d like to follow along there.
Creating the Credit Card Form
My app is built with a Node.js and Express backend and a vanilla JavaScript frontend. So no frontend frameworks — just some simple HTML, CSS, and JS.
Creating the credit card form is relatively straightforward, consisting of just a few steps. The high-level functions and their order look like this:
const init = () => {
  const skyflowClient = initializeSkyflowClient();

  const collectContainer = createCollectContainer(skyflowClient);

  const [cardHolderNameElement, cardNumberElement, expiryDateElement] =
    createCollectElements(collectContainer, collectStylesOptions);

  mountCollectElements(
    cardHolderNameElement,
    cardNumberElement,
    expiryDateElement
  );

  addFormSubmissionEventListener(collectContainer);
};

init();
Let’s walk through those steps, one by one.
First, I initialize my Skyflow client using my vault ID, vault URL, and a helper function to get a bearer token used for authentication:
const skyflowClient = Skyflow.init({
  vaultID: 'cce8a3de0d2548fa9551f0f47f4c09b3',
  vaultURL: 'https://ebfc9bee4242.vault.skyflowapis.com',
  getBearerToken,
});
The vault ID and vault URL can be obtained inside your Skyflow account. I followed the Core API Quickstart guide to create my first vault. For the sake of brevity and avoiding repetition, I’d invite you to check out the steps in the guide for this part.
Second, I create a container that will hold my form fields:
const createCollectContainer = (skyflowClient) =>
  skyflowClient.container(Skyflow.ContainerType.COLLECT);
The container doesn’t do anything on its own until we create elements inside it, so we’ll do that now.
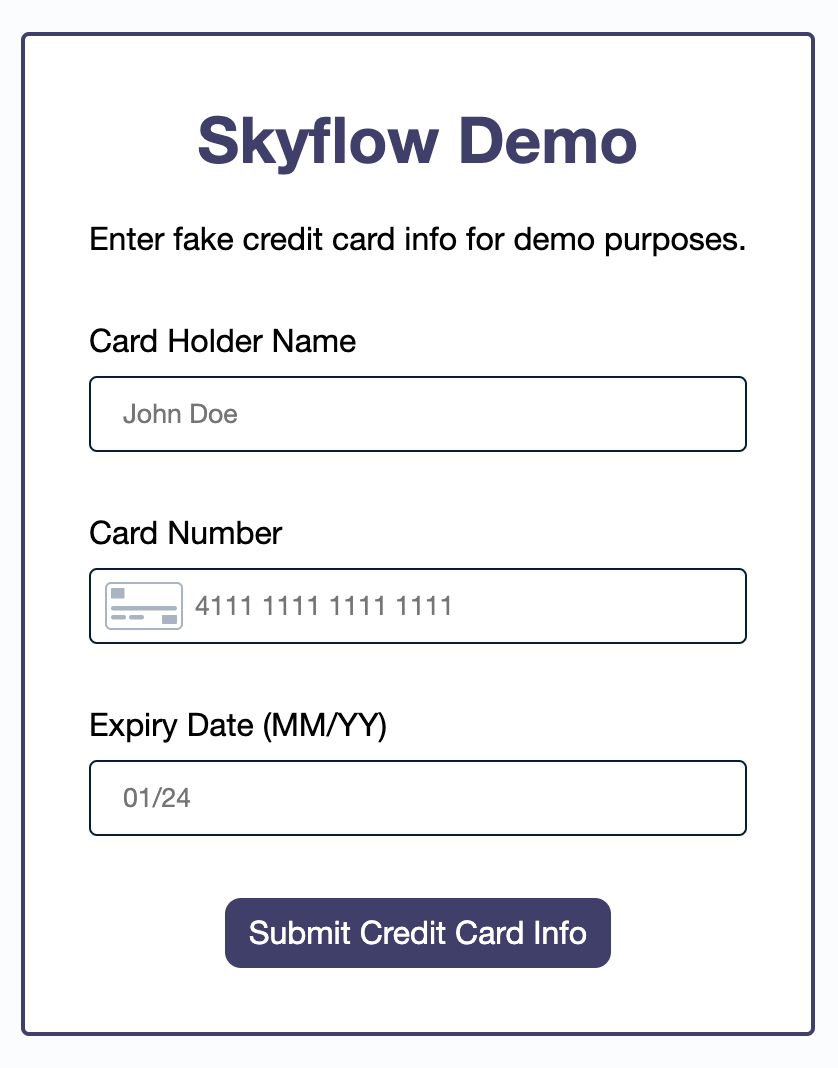
Third, I create the form fields to collect the user’s credit card info. This includes the cardholder’s name, the credit card number, and the credit card’s expiration date:
const createCollectElements = (collectContainer, collectStylesOptions) => {
  const cardHolderNameElement = collectContainer.create({
    table: 'credit_cards',
    column: 'cardholder_name',
    ...collectStylesOptions,
    label: 'Card Holder Name',
    placeholder: 'John Doe',
    type: Skyflow.ElementType.CARDHOLDER_NAME,
  });

  const cardNumberElement = collectContainer.create({
    table: 'credit_cards',
    column: 'card_number',
    ...collectStylesOptions,
    placeholder: '4111 1111 1111 1111',
    label: 'Card Number',
    type: Skyflow.ElementType.CARD_NUMBER,
  });

  const expiryDateElement = collectContainer.create({
    table: 'credit_cards',
    column: 'expiry_date',
    ...collectStylesOptions,
    label: 'Expiry Date (MM/YY)',
    placeholder: '01/24',
    type: Skyflow.ElementType.EXPIRATION_DATE,
  });

  return [cardHolderNameElement, cardNumberElement, expiryDateElement];
};const mountCollectElements = (
cardHolderNameElement,
cardNumberElement,
expiryDateElement
) => {
cardHolderNameElement.mount('#collectCardholderName');
cardNumberElement.mount('#collectCardNumber');
expiryDateElement.mount('#collectExpiryDate');
};Fifth, and finally, I add an event listener to my Submit button. Now, when the form is submitted, an API request is made to securely store the user’s credit card info in my Skyflow vault:
const addFormSubmissionEventListener = (collectContainer) => {
  const submitCreditCardForm = (e) => {
    e.preventDefault();
    const resultContainer = document.querySelector('#result');

    const collectResponse = collectContainer.collect();
    collectResponse
      .then((data) => {
        resultContainer.textContent = `Success! Stored tokenized data with ID: ${data.records[0].fields.skyflow_id}`;
        resultContainer.classList.remove('hidden');
      })
      .catch(() => {
        resultContainer.textContent =
          'Error. Unable to store credit card info.';
        resultContainer.classList.remove('hidden');
      });
  };

  const creditCardForm = document.querySelector('#creditCardForm');
  creditCardForm.addEventListener('submit', submitCreditCardForm);
};
That’s about it! These steps highlight the core snippets of code needed to work with the Skyflow JavaScript SDK. If you need the full working solution, refer back to the repository on GitHub, paying special attention to the index.html and script.js files in the public directory.
Checkout Page Demo In Action
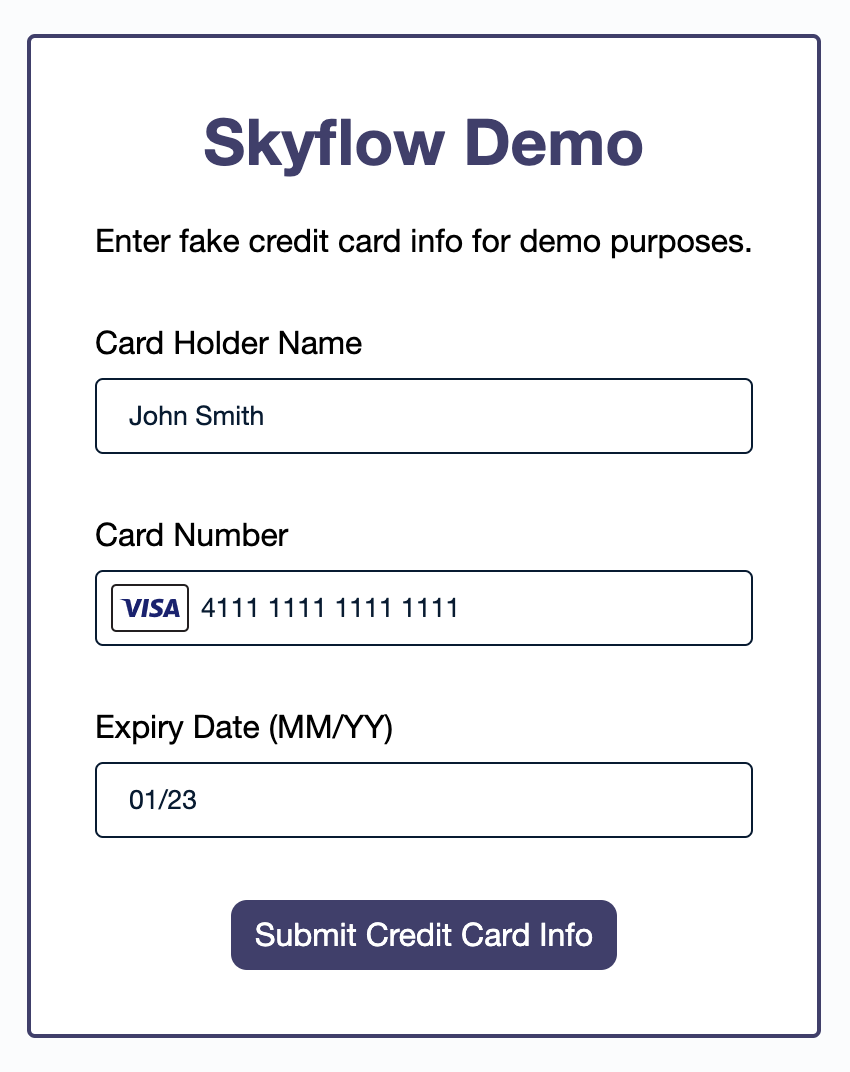
Now that we have a basic understanding of how the checkout page is built, let’s see it in action! The user enters their credit card info:

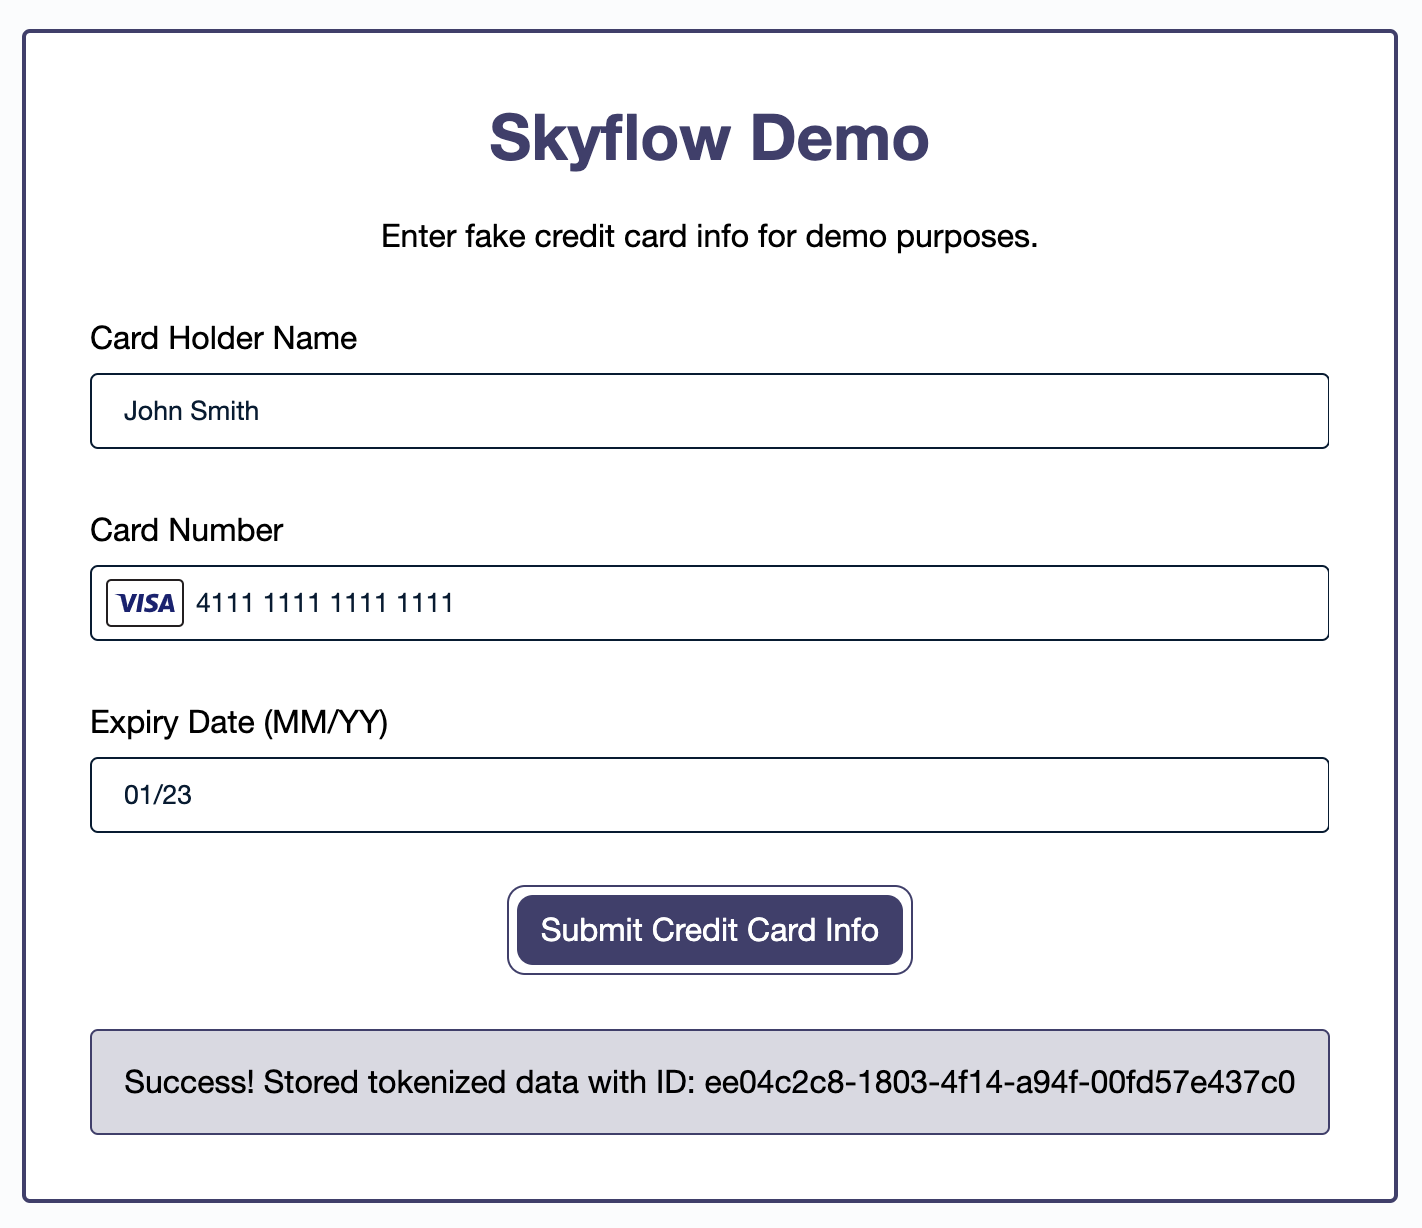
Then the user clicks the Submit button, which triggers an API request to save the credit card data and returns a Skyflow ID:

We’re showing the Skyflow ID here to make it easy to see in the demo, but you should note that this isn’t necessarily something you’d want or need to show your users in the UI.
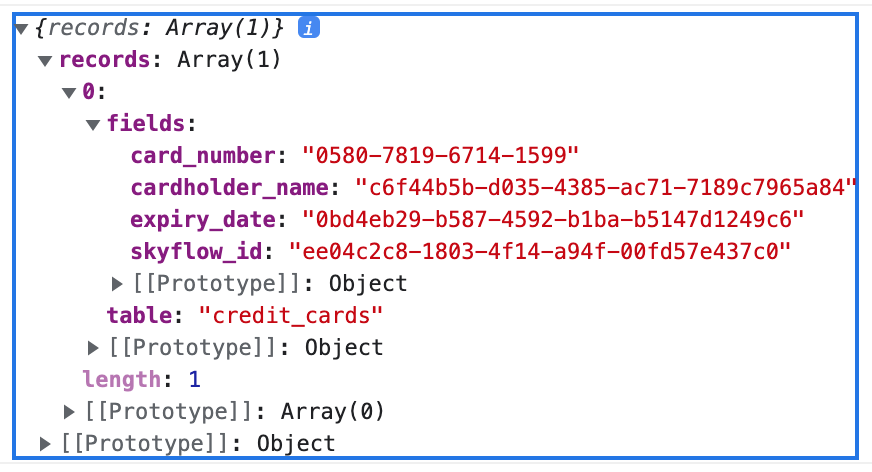
If we look at the response data, we can see that each of our pieces of sensitive data is tokenized, or replaced with a token value:

If we look in our Skyflow vault, the data looks like this. Note that it’s redacted and masked by default to protect sensitive data from apps that have vault access:

Admin users like ourselves can also choose to view the data in plain text if needed:

As a final step, we can then store the Skyflow ID for this record in our own database. In the future, we can use that ID to request the tokenized data and detokenize it.
Conclusion
We’ve covered a lot today! In addition to a Data Privacy and Security 101 lesson, we’ve also looked at Skyflow as one possible solution that can help us with our data privacy needs. Skyflow comes with everything you need, including access controls, encryption, and tokenization. Its solutions are SOC2, HIPAA, and PCI compliant, and support data residency, which is a common requirement included in most data privacy laws. Additionally, by storing PCI data in a vault rather than directly with a payment processor, you can avoid vendor lock-in and even work with multiple payment processors to help you better adapt to various markets.
Remember that you don’t need to be a data privacy expert in order to implement best practices. Startups, small teams, and even midsize to enterprise-level companies can all benefit from outsourcing needs that are external to their product’s core features. Offloading this kind of work to domain experts allows you to focus on the core parts of your business.
Opinions expressed by DZone contributors are their own.

Comments