How to Design a RAML-Based REST API With Mulesoft Anypoint API Manager
There are tons of benefits to creating RAML-based REST APIs, including standardization, reusability, and easy readability.
Join the DZone community and get the full member experience.
Join For FreeRAML (Rest API Modeling Language) is based on YAML format, which is used to design REST APIs. RAML provides various features, including standardization, reusability, easy readability, and much more.
Now, we will walk through how to create REST APIs using API Manager.
1. Create an Anypoint MuleSoft Account
Create an Anypoint MuleSoft account and sign into the Anypoint MuleSoft platform.
2. Add a New API
First, go to API Manager as shown below:
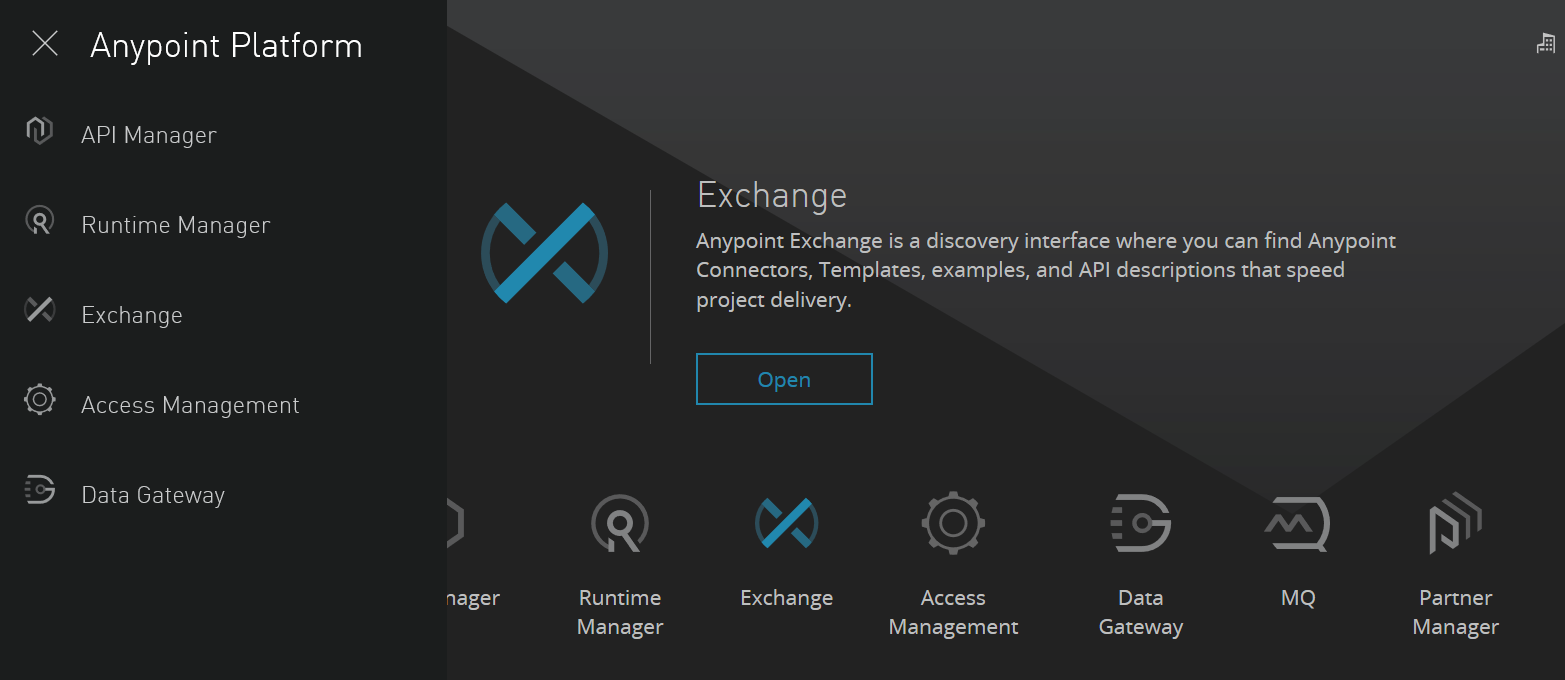
Click API Manager to reach the API Manager Screen. Then, click Add New API. Fill in the details like API name and Version name. Description and API endpoint are optional.
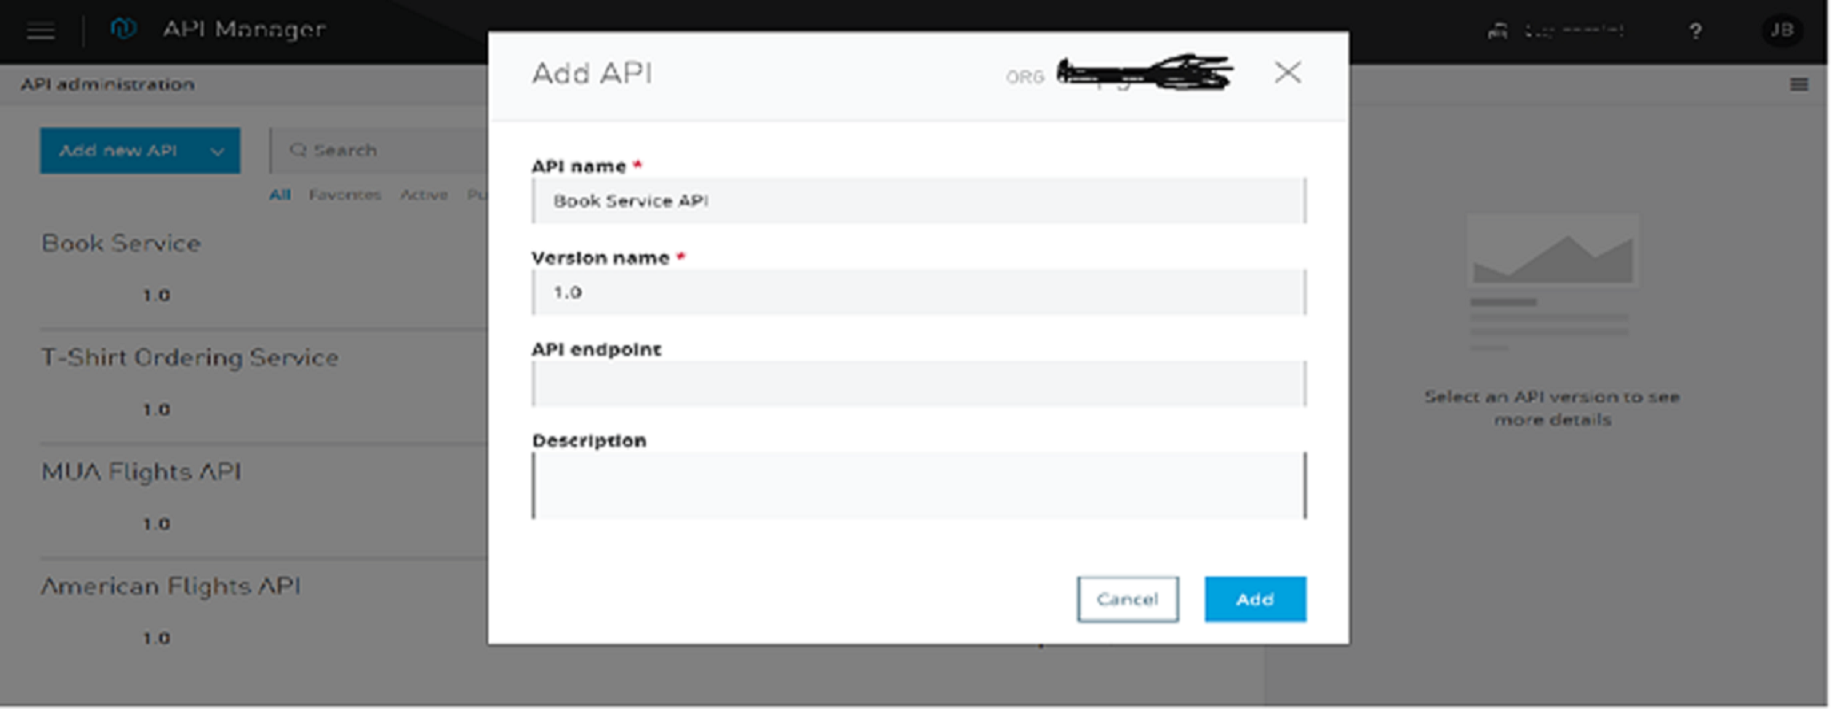
After filling in these details, click Add.
3. Define the API
Next, click Define API in the API Designer.
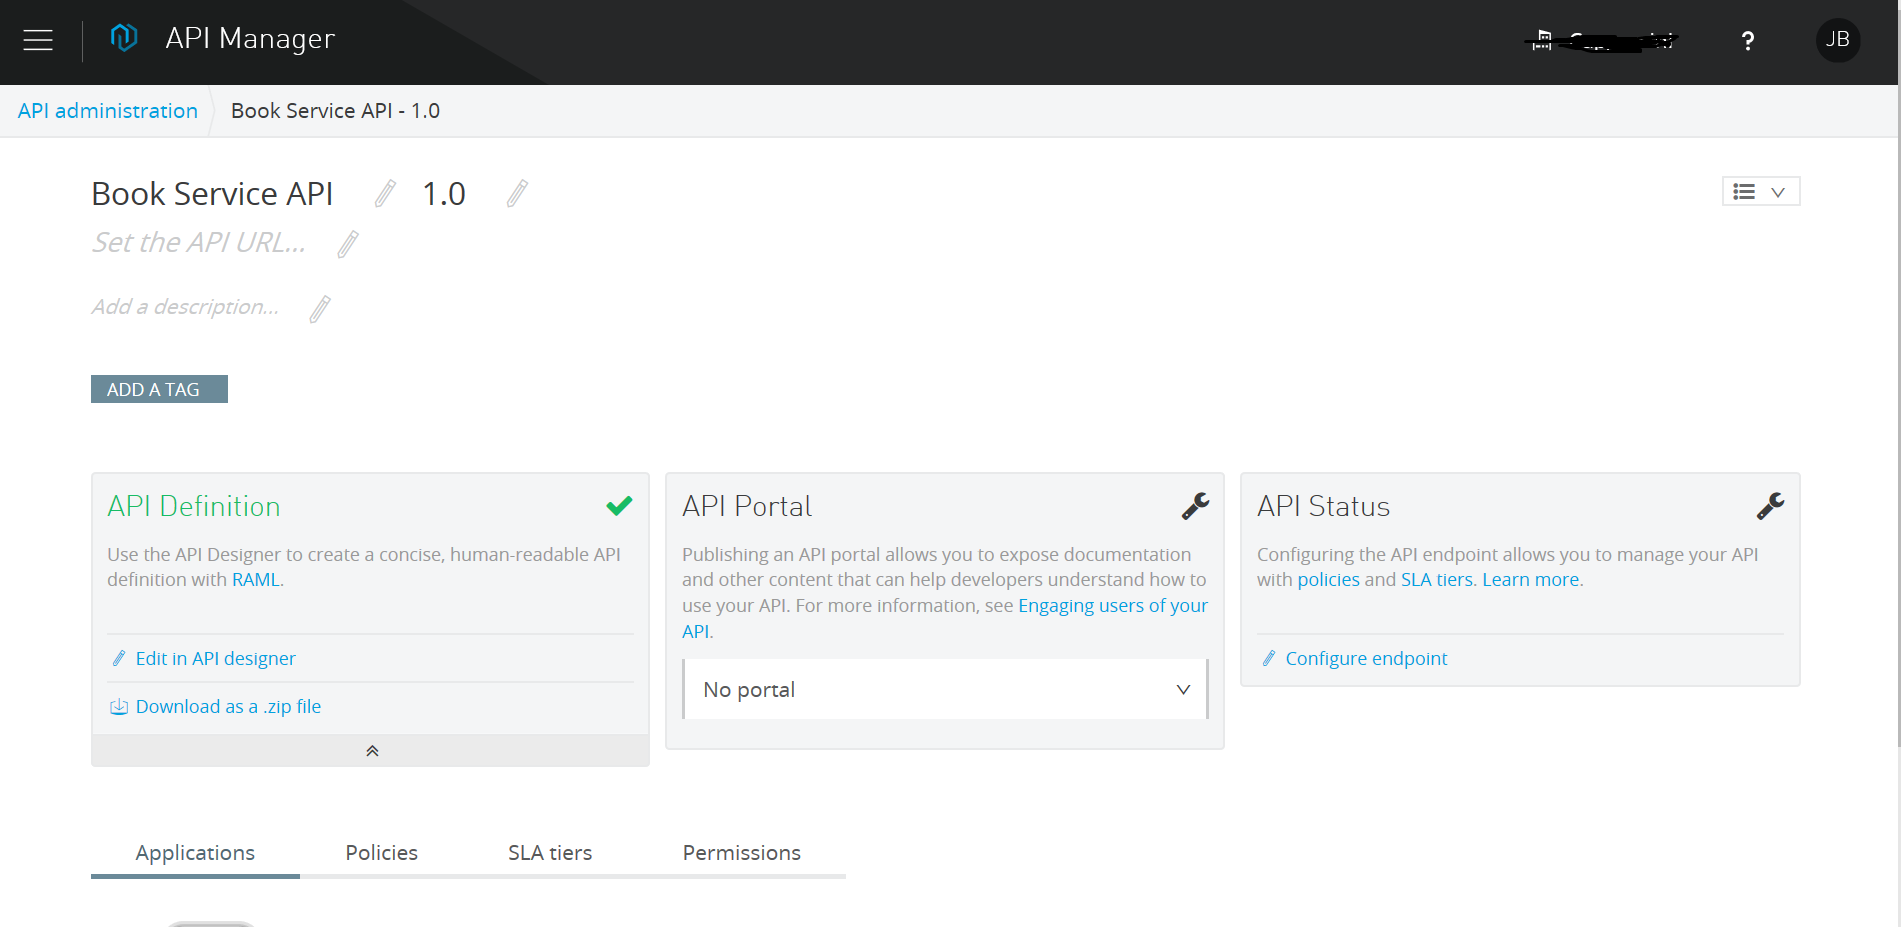
We will be navigated to API Manager Designer, where we can start writing the RAML. We can see the documentation on the right side, depending on the RAML we are writing.
On the left side, we can see the RAML file name. By default, the file name will be api.raml. We can rename the RAML filename by right clicking on api.raml. The extension of a RAML file is always .raml.
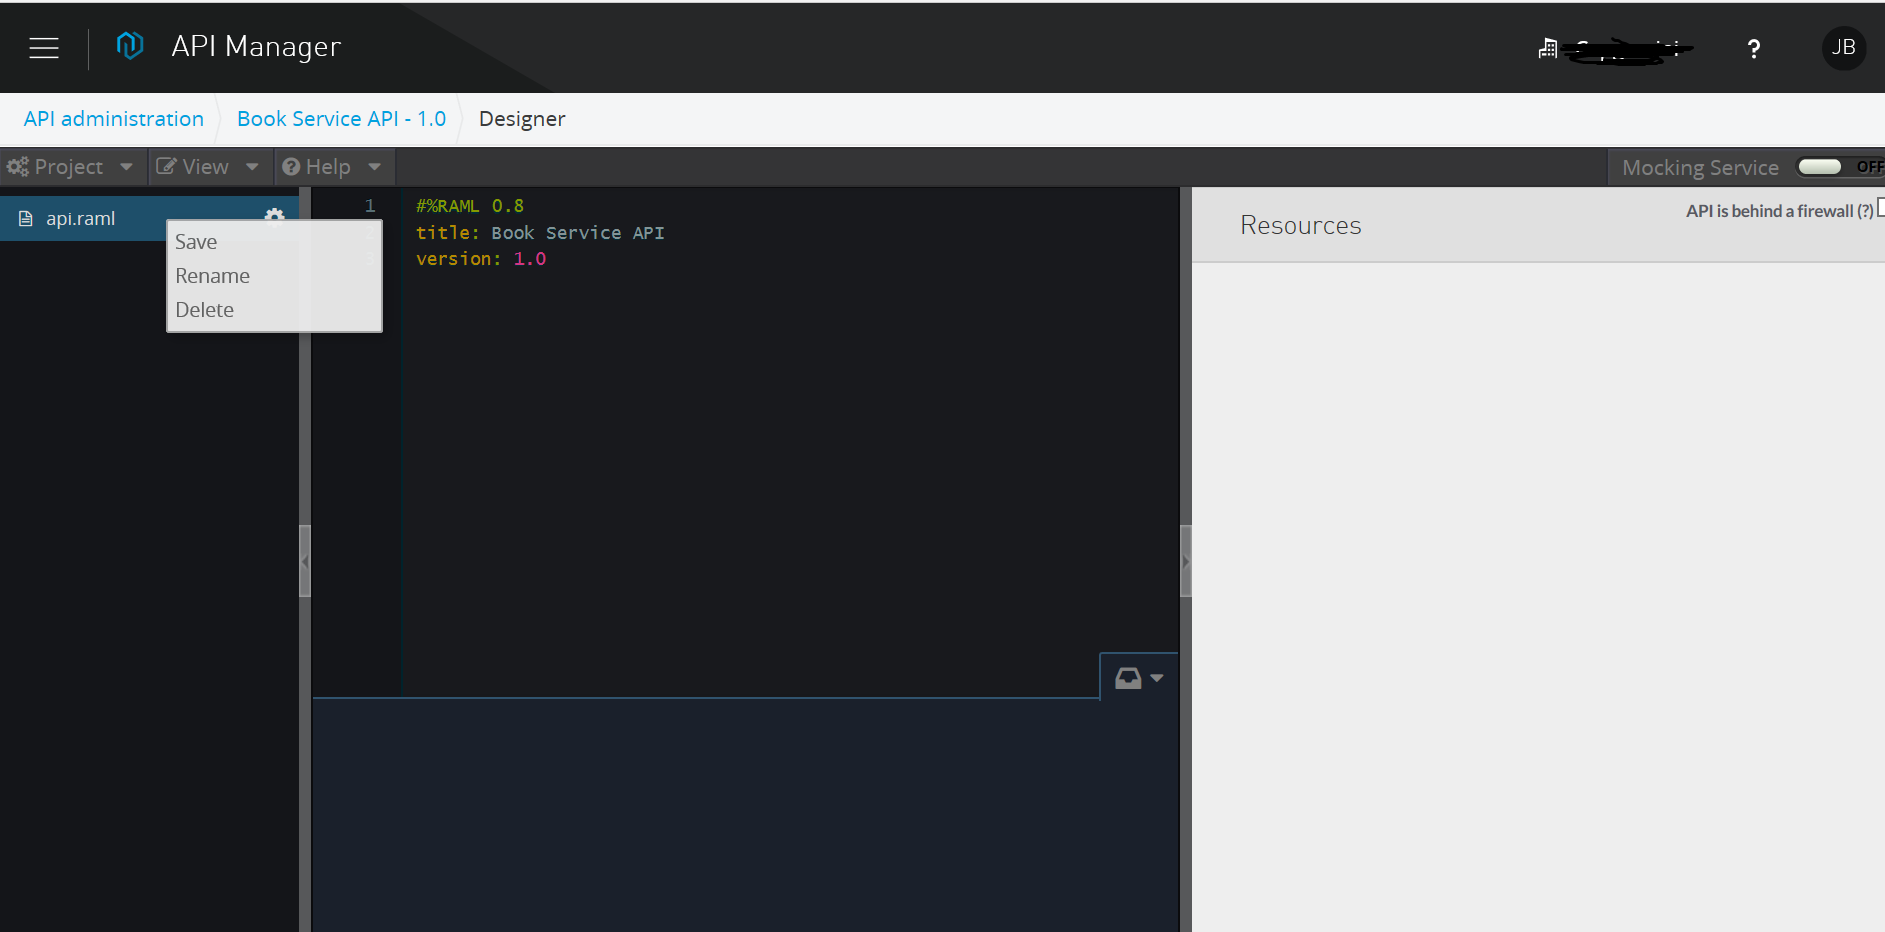
We can see title and version have already been defined by default at the root level. Title and Version will be the same, as we mentioned in Step 2. Now, we can start defining the RAML.
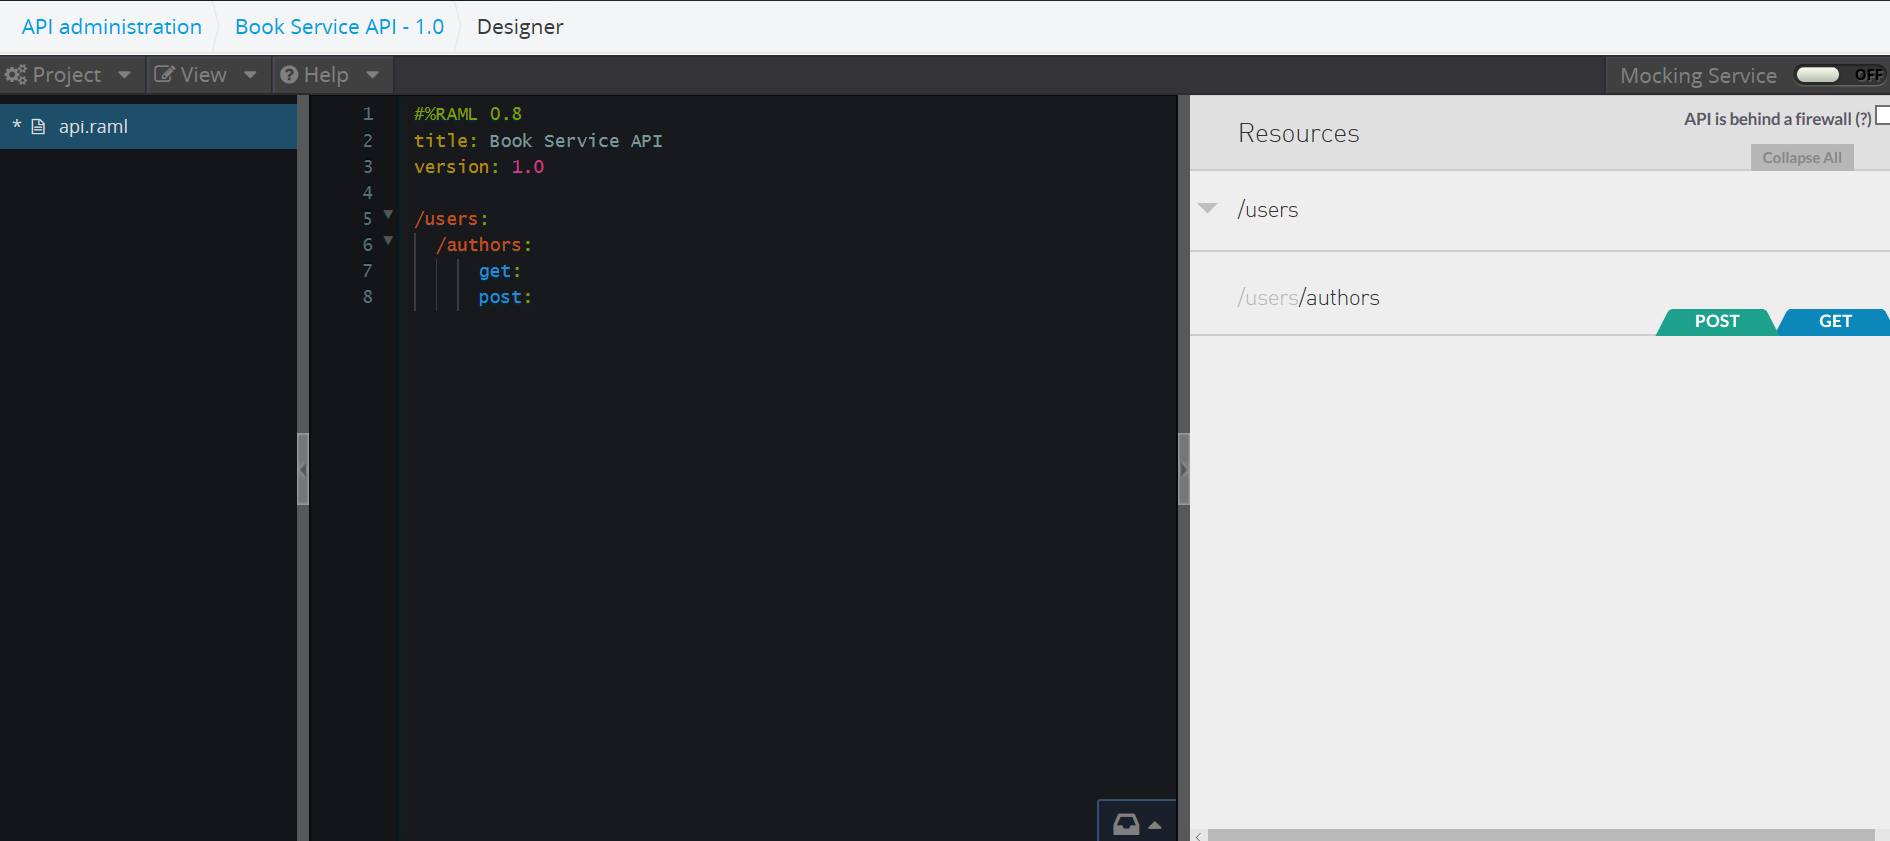
As we are writing the RAML, we can see the documentation being generated on the right side of the screen.
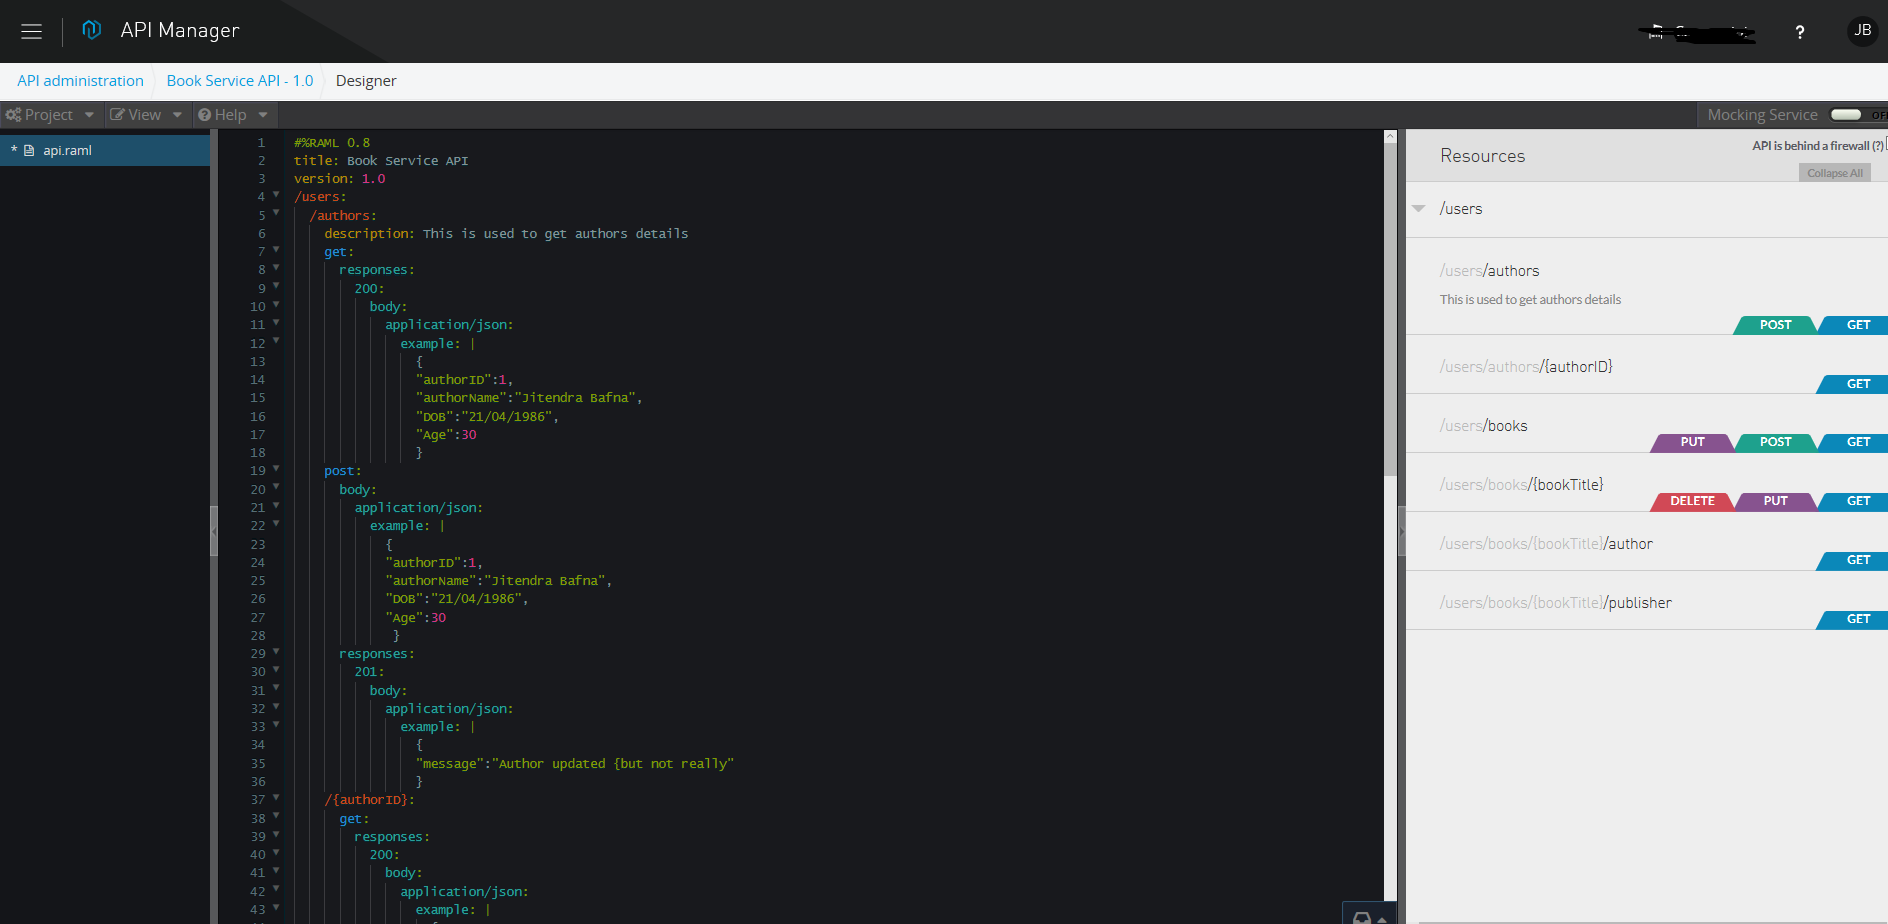
4. Test the API from API Manager
We need to enable Mocking Service for testing the API. Once we will enable the mocking service, then baseURI will be added to the RAML.
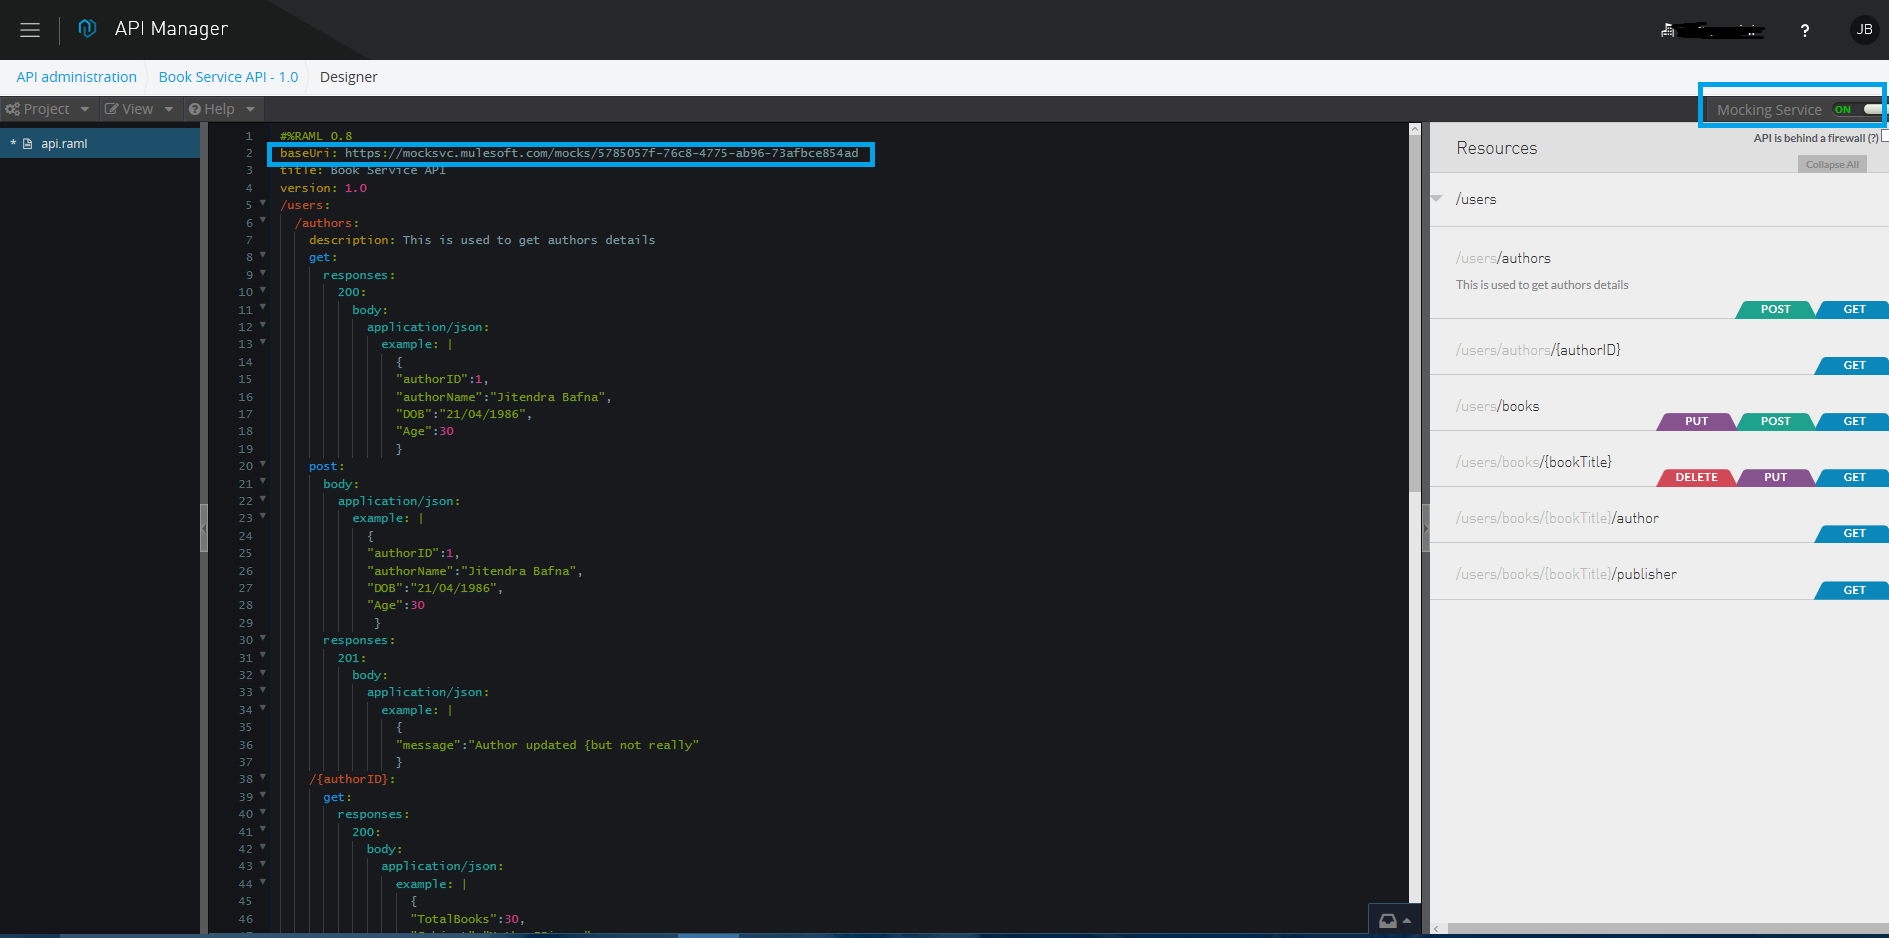
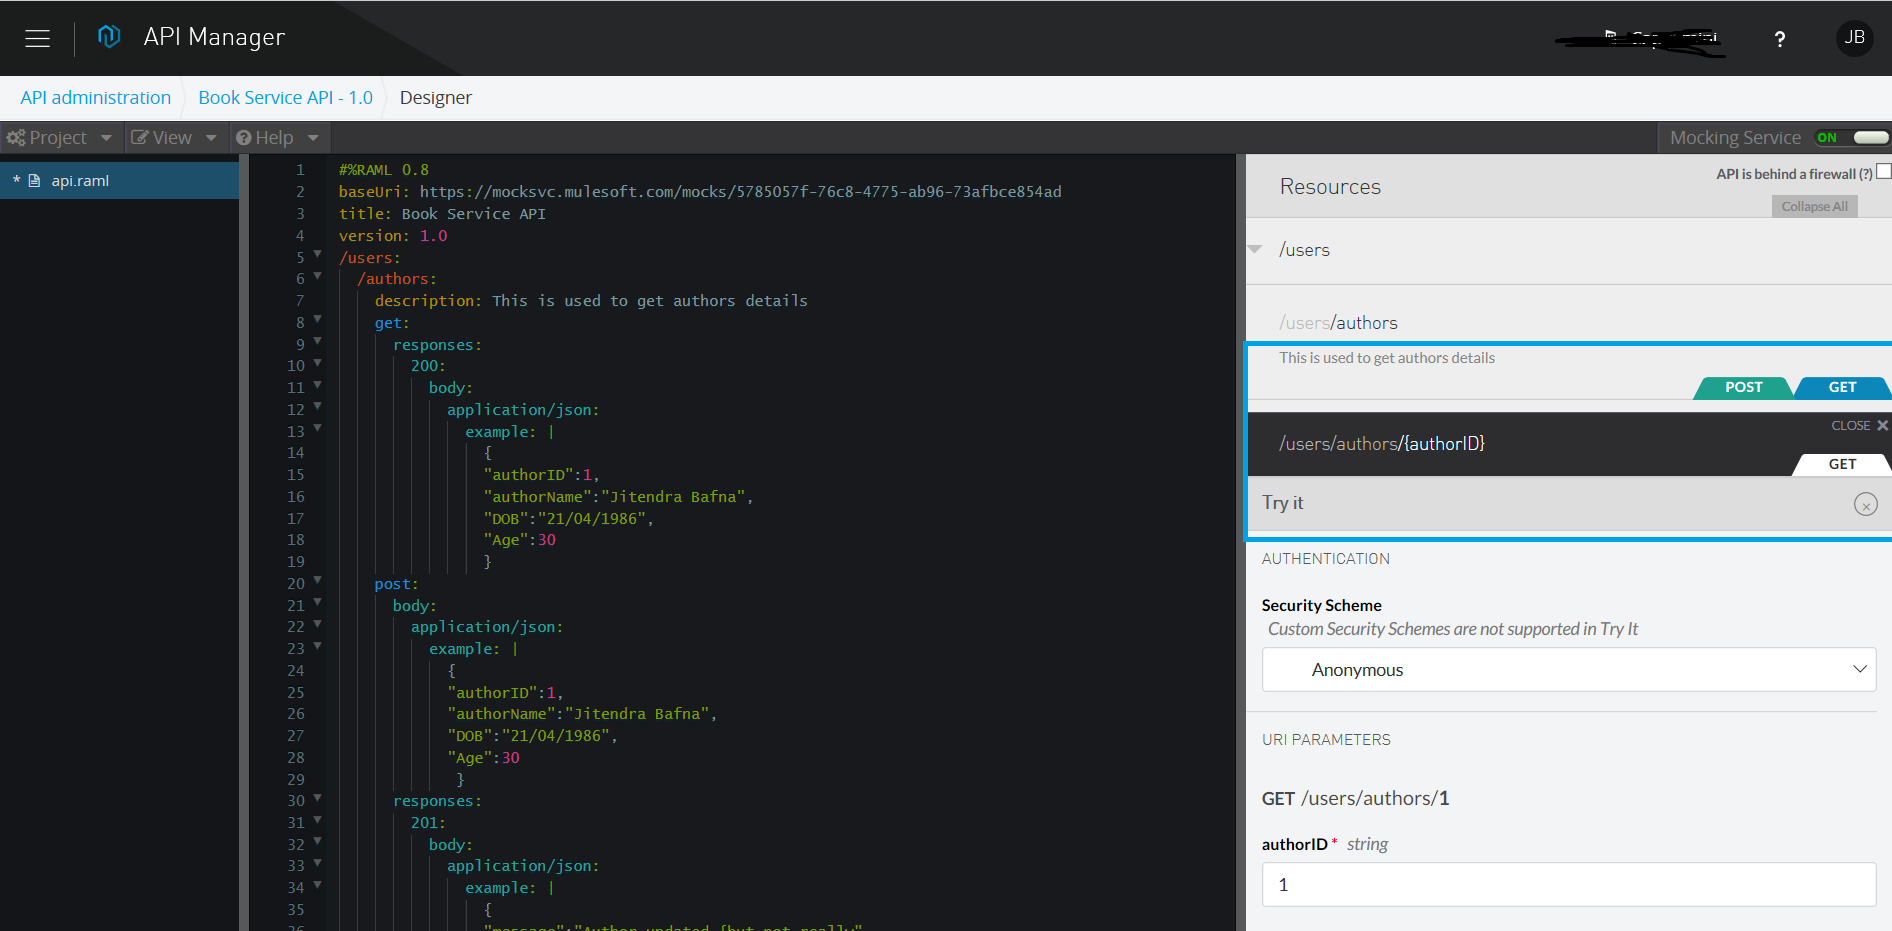
After enabling the mocking service, we can test the REST API by clicking on any of the HTTP methods on the right side of the screen. Then, click Try it!.
RAML Example
#%RAML 0.8
title: Book Service API
version: 1.0
/users:
  /authors:
    description: This is used to get authors details
    get:
      responses:
        200:
          body:
            application/json:
              example: |
                {
                "authorID":1,
                "authorName":"Robert",
                "DOB":"21/04/1986",
                "Age":30
                }
    post:
      body:
        application/json:
          example: |
            {
            "authorID":1,
            "authorName":"Stephen",
            "DOB":"21/04/1986",
            "Age":30
             }
      responses:
        201:
          body:
            application/json:
              example: |
                {
                "message":"Author updated {but not really"
                }
    /{authorID}:
      get:
        responses:
          200:
            body:
              application/json:
                example: |
                  {
                  "TotalBooks":30,
                  "Subject":"Maths,Science",
                  "Publication":"Nirvana"
                  }
  /books:
    get:
    post:
    put:
    /{bookTitle}:
      get:
        queryParameters:
          author:
            displayName: Author
            description: The Author's Full Name
            type: string
            required: false
            example: Michael Lynn
          publicationYear:
            displayName: Publication Year
            description: Year of Publication
            type: number
            required: false
            example: 2010
          rating:
            displayName: Rating
            description: Average Rating of book submitted by users (1-5)
            type: number
            required: false
            example: 3.5
          isbn:
            displayName: ISBN
            description: ISBN Number of Book
            type: string
            maxLength: 10
            example: 1234567
            required: false
        responses:
          200:
            body:
              application/json:
                example: |
                  {
                  "id": "123",
                  "title": "API Design",
                  "description": null,
                  "datetime": 1341533193,
                  "author": "Mary"
                  }
      put:
      delete:
      /author:
        get:
      /publisher:
        get:
And we're done! Now you know how to create REST APIs using API Manager. Please refer to another article for publishing your API to Anypoint API Portal. Here's a video tutorial:
Opinions expressed by DZone contributors are their own.

Comments