Deploying Red Hat JBoss Fuse Using ACS and Kubernetes
This guide will help you tab into JBoss Fuse's power for REST services and the web while running on Azure Container service with some help from Kubernetes.
Join the DZone community and get the full member experience.
Join For FreeRed Hat JBoss Fuse has been the de facto standard for building Java web/RESTful services for over a decade. But how do you run it effectively in today’s cloud-centric world? As you’ll see, an infrastructure-as-a-code and scalable/fault-tolerant approach are both critical for a successful deployment.
In this tutorial, we’ll show you how to:
Build an environment in a Kubernetes (K8s) cluster in Azure.
Package your Red Hat JBoss services into a Docker Container.
Run your services in a scalable, highly-available cluster.
Building an Environment on a Kubernetes Cluster in Azure
To start, you’ll need an operational Kubernetes cluster.
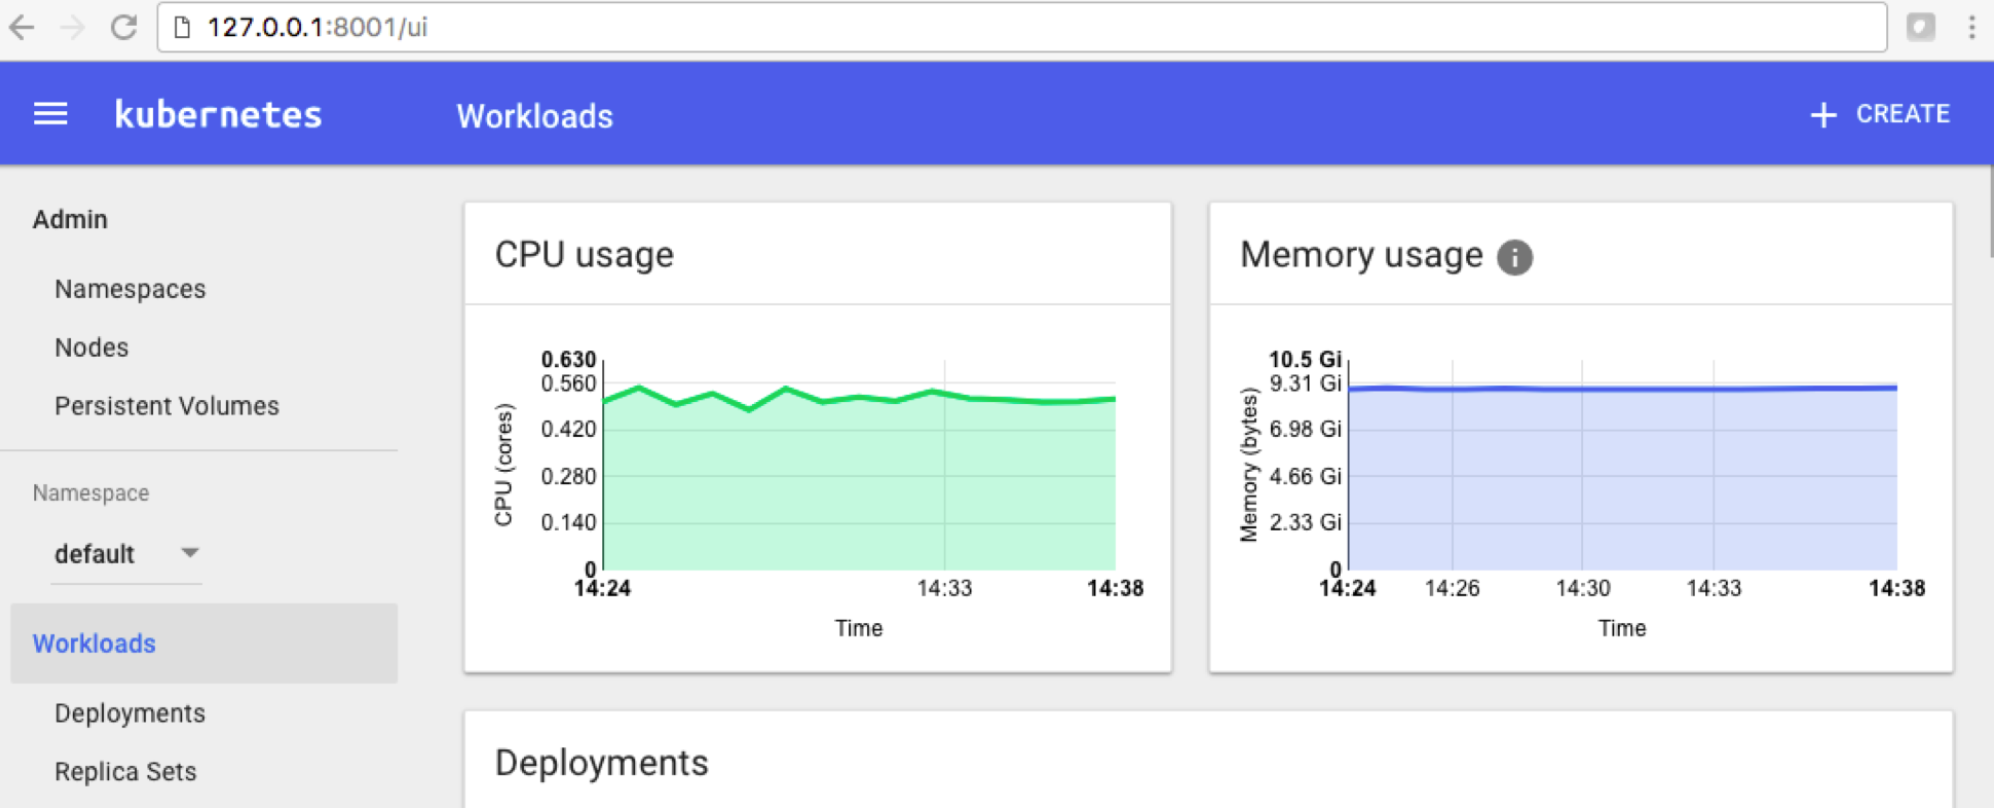
After installation, run the Kubernetes Dashboard (kubectl proxy) and ensure the Kubernetes Dashboard UI (http://127.0.0.1:8001/ui) is working:
Packaging Your Red Hat JBoss Services Into a Docker Container
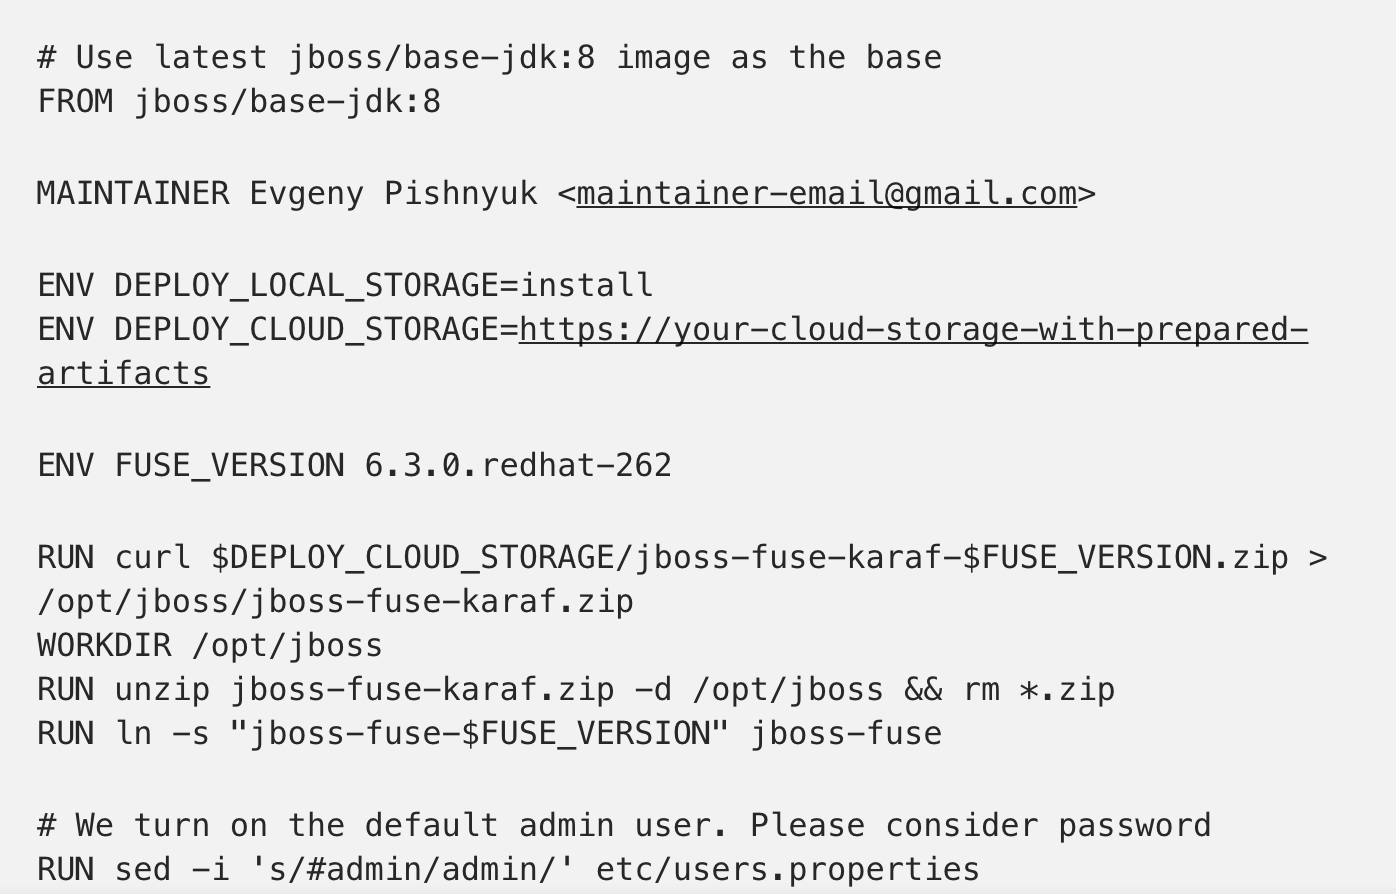
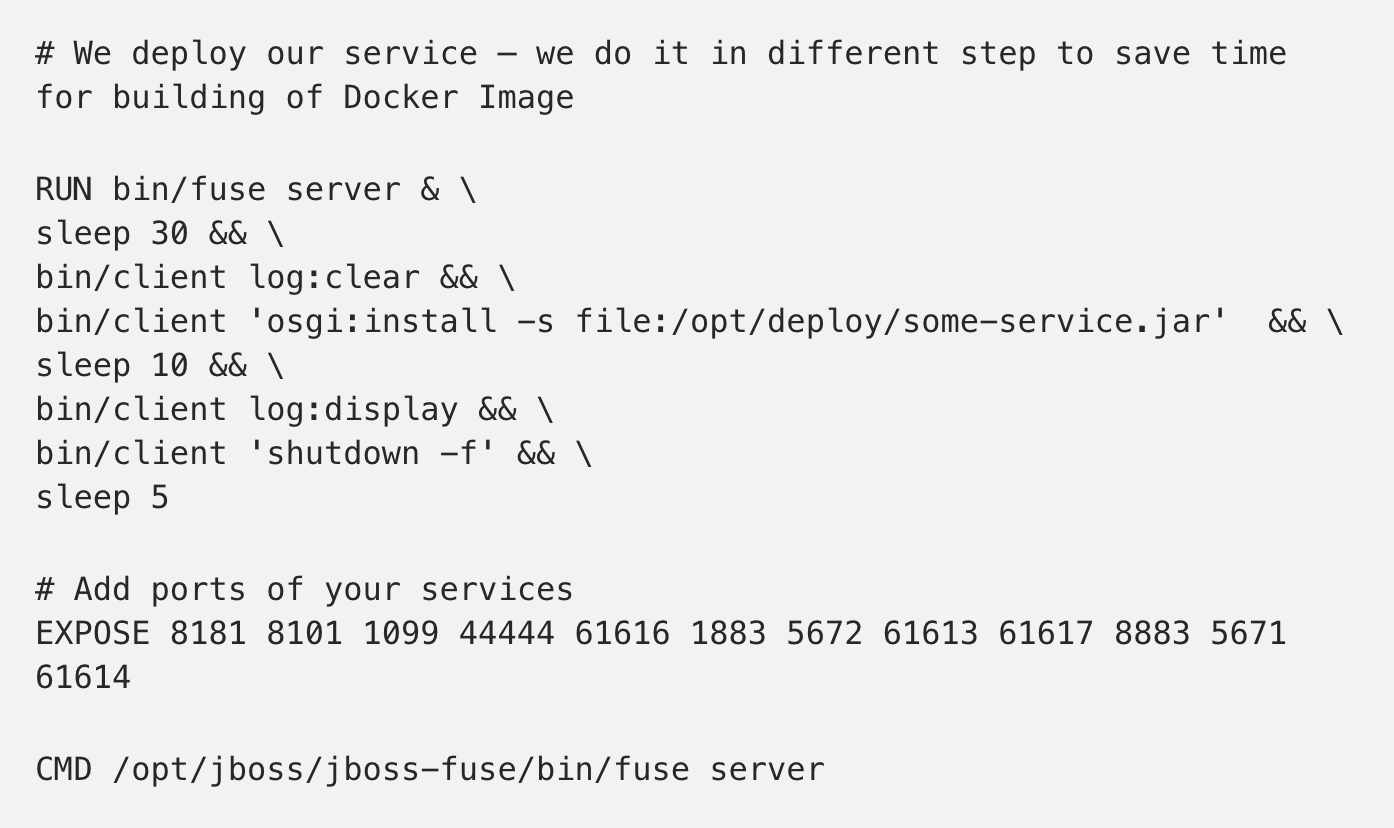
The typical Red Hat JBoss deployment process requires you to install Red Hat JBoss, configure Red Hat/Karaf features, and deploy your services (i.e., the developed *.jar files). You can automate the installation with the Docker file and get a delivery unit that is ready for testing and deployment to production.
Docker file:

Set up your Docker Image Registry (or use DockerHub), and configure your Docker to access the Registry.
We use the commands “bin/client log:display” in the Docker file to help ensure that the Red Hat reconfigurations and deployments were successful.
After this, the typical developer’s flow will be to build a Docker Container Image, tag the Image with a version, and push the Image to the Docker Registry:

Running Your Services in a Scalable, Highly Available Cluster
You have now successfully configured Kubernetes on Azure Container Service, and you have a Docker Image in a Docker Registry. Next, you’re ready to proceed with Kubernetes!
Basically, you will need to create one Deployment (for Red Hat nodes) and one Service (for a load balancer and publicly accessible IP) in Kubernetes.
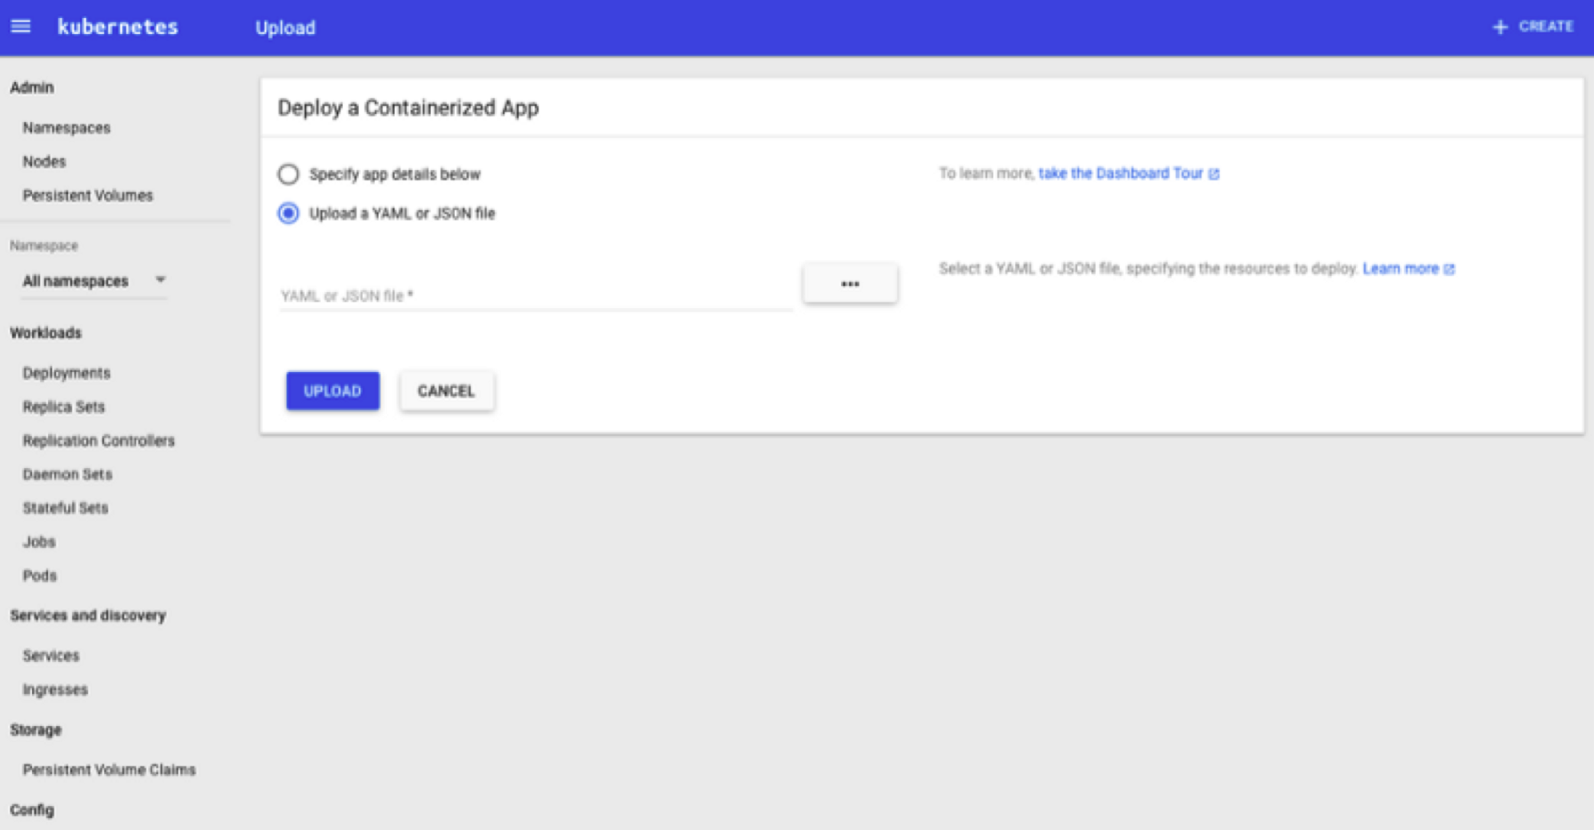
To create the Deployment, go to the dashboard, and select “Deployment” in the left menu.
Click “+Create” in the upper right, and select the “Upload a YAML or JSON file” option.
Here is the Kubernetes deployment definition:
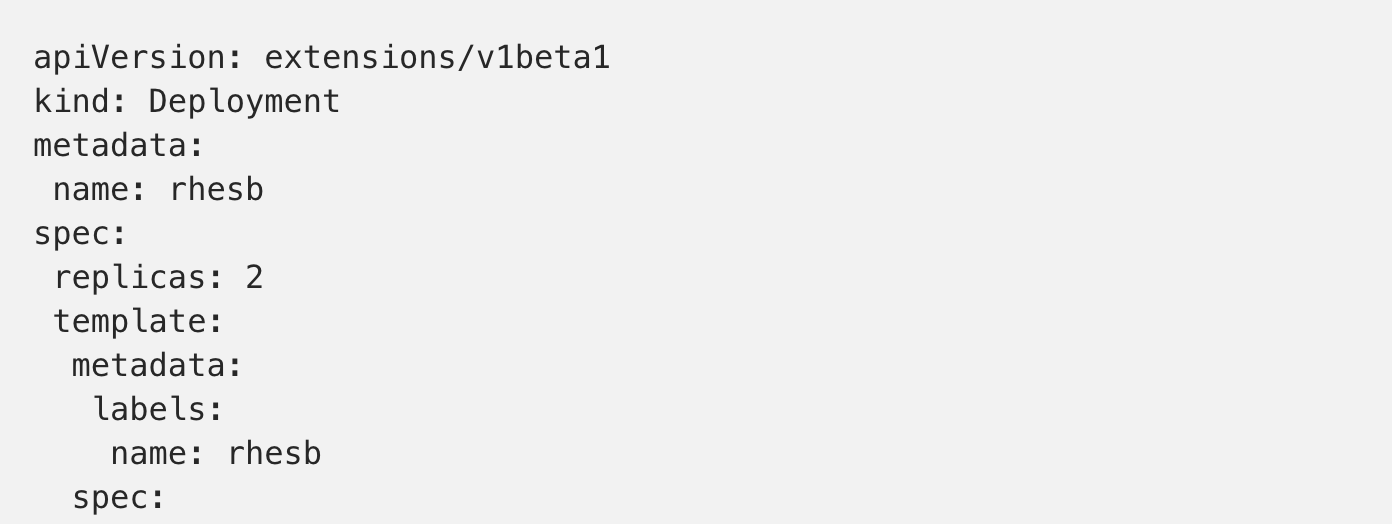

Select Rh-deployment.yaml, and click “Upload”. Next, select “Pods” in the left menu. Wait until “rhesb-….” is ready. This should take approximately 5 minutes because the image is 2GB.
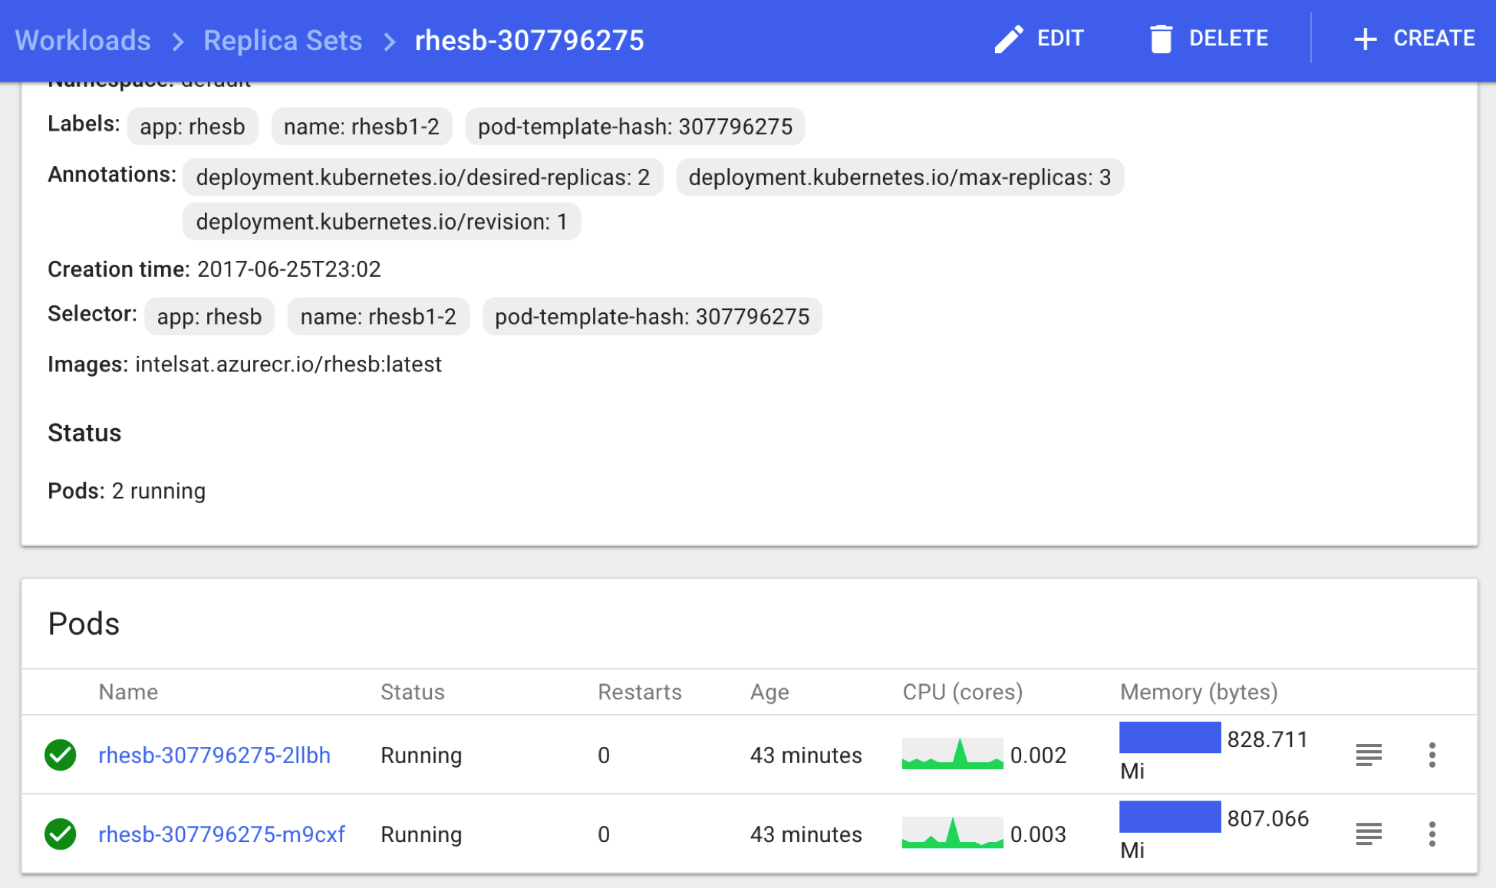
Then go to “Services”, click “+Create”, and select the Kubernetes service definition(rh-service.yaml). Ensure the “selector” attribute in the Service definition matches the “metadata” name of the Deployment definition.
Here is the Kubernetes service definition:
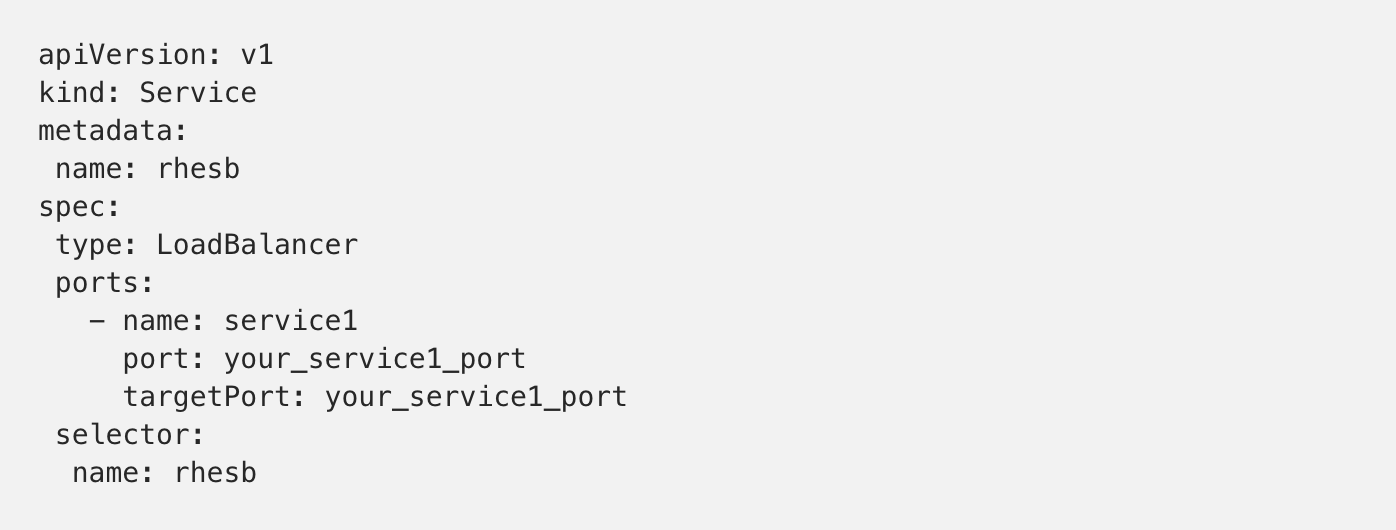
Go to “Services” and wait until the new service displays an IP address. This will take a few minutes as the load balancer and rules are created.
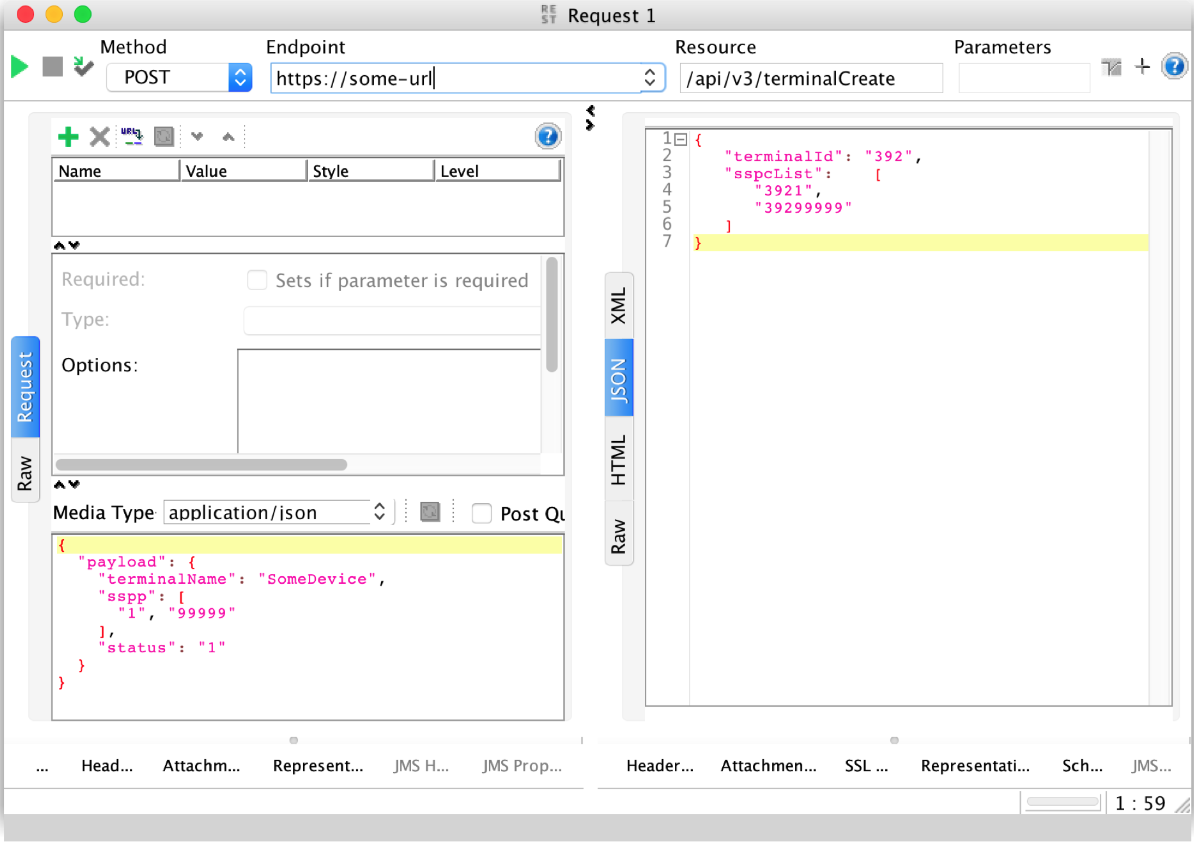
You are now ready to test your service using SoapUI, or a similar tool:
While you can go into production with this Docker Image and a couple of Kubernetes YAML files, you should also:
Choose an approach for managing environment-specific properties (for example, URLs and ports of services).
Set up log shipping using Stash or the Azure Monitoring Agent.
Add readinessProbe and livenessProbe (for each service) to Kubernetes Service definition to ensure you are not the owner of a cluster of all-dead nodes.
Share your thoughts and questions in the comments section below.
Published at DZone with permission of Oleg Chunikhin. See the original article here.
Opinions expressed by DZone contributors are their own.

Comments