Deploying Concourse CI on AliCloud Kubernetes
Learn how to deploy Concourse CI in the Alibaba Cloud-managed Kubernetes service with a Helm chart and set up a simple pipeline in Concourse CI with Fly CLI.
Join the DZone community and get the full member experience.
Join For FreeIn this article, I'm going to show you how to deploy Concourse CI in the Alibaba Cloud-managed Kubernetes service with a Helm chart. After that, we will set up a simple pipeline in Concourse CI with Fly CLI. Concourse CI is a nice automation tool that brings YAML native CI/CD pipelines to your Kubernetes cluster.
High-level overview:
- Set up environment
- Deploy Concourse
- Expose Concourse
- Install Fly CLI
- Set Pipeline
Set Up Environment
The first step is to install the Kubernetes cluster. Detailed instructions could be found in Alibaba Cloud documentation or other guidelines on the internet. For this tutorial, the Kubernetes cluster should be considered as a prerequisite.
In this guideline, we will use a web browser-based tool called Cloud Shell. Under the hood, it is a Linux virtual machine. Multiple useful management CLI tools come pre-installed, including kubectl and Helm, which we are going to use.
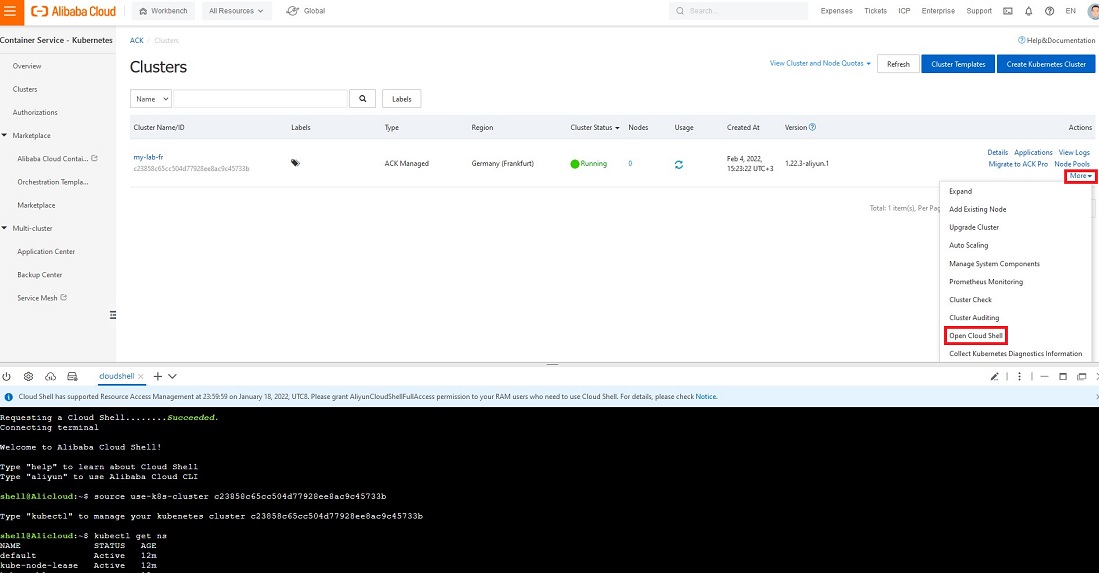
To run Cloud Shell, you need to navigate to the Container Service - Kubernetes page, then select More on the right side of the particular cluster menu and select Open Cloud Shell. This way Cloud Shell will automatically configure access to the Kubernetes cluster by sourcing kubeconfig.

which helm
The next step is to add an official concourse Helm chart repository.
helm repo add concourse https://concourse-charts.storage.googleapis.com/
Deploy Concourse
In order to customize and experiment with your Concourse CI installation, you can modify default values in the install/values.yml file. You can get this file from the Concourse chart GitHub repository.
However, to make Concourse work in Alibaba Cloud-managed Kubernetes service, we need to set Storage Class the one that exists in AliCloud.
--set persistence.worker.storageClass=alicloud-disk-ssdfor workers--set global.storageClass=alicloud-disk-ssdfor database
Under the hood, the Concourse Helm chart uses the Bitnami PostgreSQLchart to install the database. By default, the PostgreSQL Storage class requests 8GB disks. This will lead to the Pending state of the PostgreSQL PVC since it is impossible to create such a small disk due to Alibaba Cloud limitations. 20 GB is the minimum size of the disk that you can provision in AliCloud. To fix this we will set the DB disk size to 20GB:
--set postgresql.primary.persistence.size=20Gi
Now we are ready to install Concourse:
helm install my-concourse concourse/concourse --set persistence.worker.storageClass=alicloud-disk-ssd --set global.storageClass=alicloud-disk-ssd --set postgresql.primary.persistence.size=20Gi

Expose Concourse
If you want to expose Concourse web UI to the public, you need to navigate to Ingress and create an Ingress rule by clicking the Create button.
Concourse default credentials for the username and the password are both "test". You can configure credentials in the values.yml file.
Installing Fly CLI
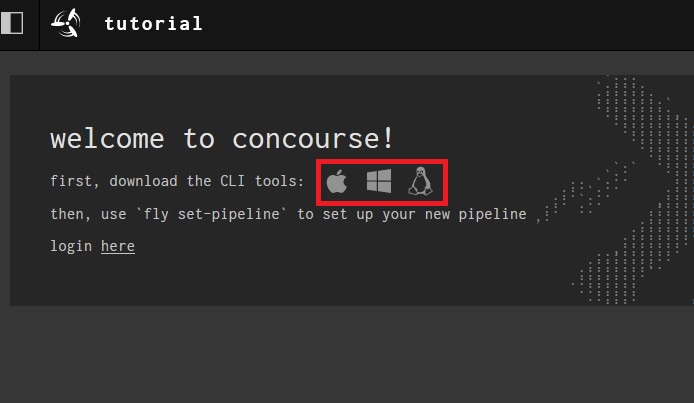
To set pipelines you need to install the Fly client application first. Fly CLI is used to interact with the Concourse CI cluster from the command line. You can install Fly CLI by downloading the binary from your Concourse CI cluster directly by clicking the link appropriate for your system, as shown here.

Then we need to make this file executable and move it to the $PATH.
chmod +x ./fly && mv ./fly /usr/local/bin/
Login to Concourse with Fly.
fly -t myconcourse login -c http://<your-concourse-url> -u test -p test
Setup Simple Pipeline
Let's save our first pipeline in the my-pipeline.yml file.
jobs:
- name: hello-world-job
 plan:
 - task: hello-world-task
   config:
     platform: linux
     image_resource:
       type: registry-image
       source:
         repository: busybox
     run:
       path: echo
       args: ["Hello world!"]
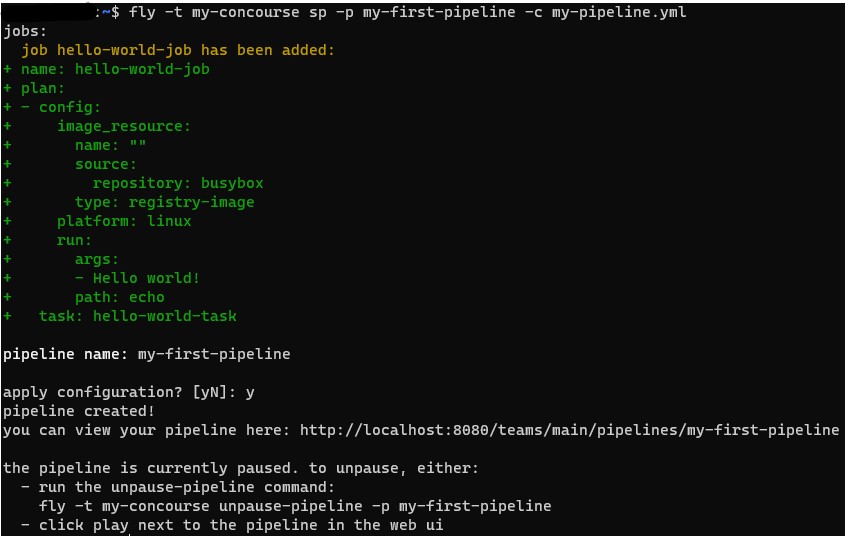
Set pipeline on the Concourse server.
fly -t my-concourse sp -p my-first-pipeline -c my-pipeline.yml


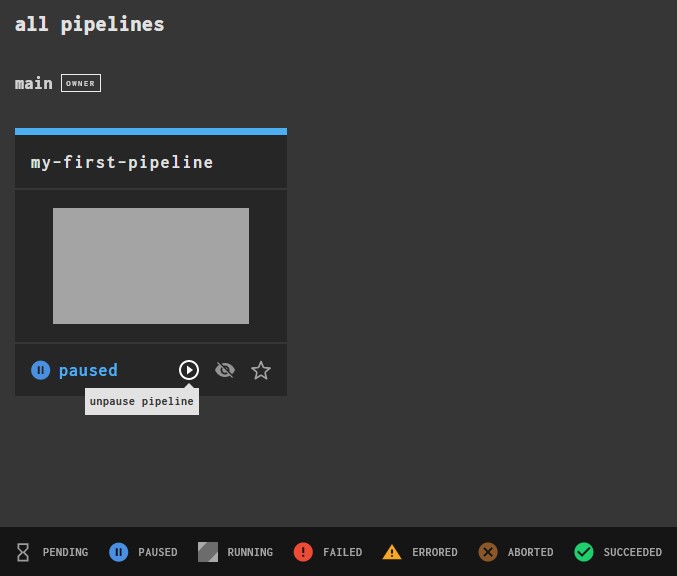
After unpausing, navigate inside the job and trigger it by clicking the "+" sign in the top right corner. If you expand the only task in this job you will see the expected output: Hello world!

Clean-Up
To delete your installation, you need to run the following command:
helm delete my-concourse
PVC has to be cleaned up separately. To clean-up Persistence Volume Claim leftovers from concourse CI installation, you can use the following command:
kubectl delete pvc -l app=${RELEASE-NAME}-workerOpinions expressed by DZone contributors are their own.

Comments