Deploy a File Server in the Cloud (WebDav on Windows Azure)
Join the DZone community and get the full member experience.
Join For Free
this month, my fellow
it pro technical evangelists
and i are authoring a new series of articles on
20 key scenarios with windows azure infrastructure services
. check out the list of articles here:
http://mythoughtsonit.com/2013/05/20-key-scenarios-with-windows-azure-infrastructure-services/
.
 web-based distributed authoring and versioning, or webdav, is a set of protocols based on http that allows end-users to map a network drive over http and edit content and files stored on the web server. when webdav was first offered on microsoft server i had evaluated it and decided it did not perform well enough for me. the webdav extension to iis was completely rewritten back in the server 2008 timeframe and is worth taking a look at again.
in this article i will guide you step by step through the process of setting up webdav on server 2012 in a windows azure iaas environment. this will give you a solid performing file share on the internet over port 80 and the http protocol.
first you need an azure account.
you can setup a free trail of azure. details can be found here:
http://mythoughtsonit.com/2013/04/step-by-step-guide-to-setting-up-a-windows-azure-free-trial/
second provision a server 2012 machine. watch a video of what to do here:
third open port 80 to this new server:
-
in the azure portal select your 2012 server and choose the “endpoints” tab on the top.

-
click “add endpoint” at the bottom of the screen

- enter the endpoint information for port 80 to port 80
- done.
next we need to install the iis webserver and webdav.
installing webdav on iis 8.0
- start server manager and go to “add roles and features”
-
under server roles – add the web server (iis) role


-
click through the wizard until you come to the role services section. then find and select “webdav publishing” and “windows authentication”

-
click next and then install

-
when the install is finished you are ready to move on to the next section.

configuring iis 8 for webdav
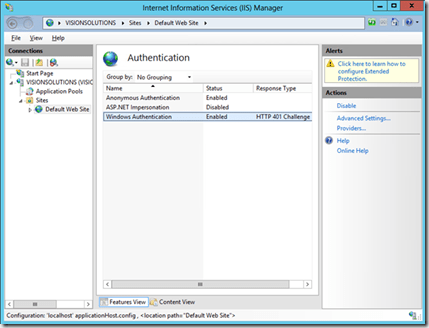
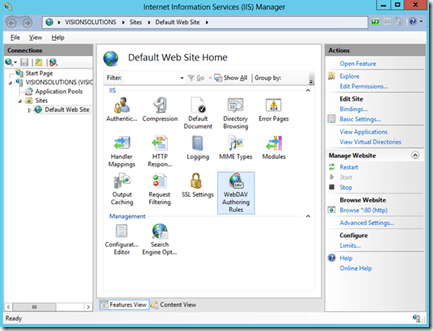
- after the installation finishes you need to configure the box for access. start the iis manager tool. choose the “default web site” on the left side. then click on “authentication”
- open the windows authentication option and enable it.
- open the “webdav authoring rules”
-
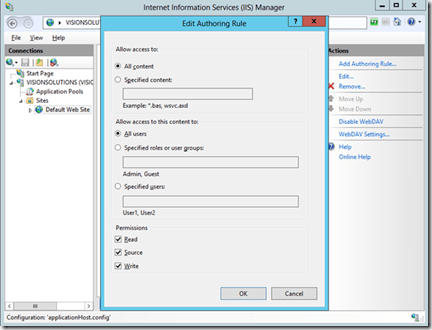
create a webdav rule. i choose to allow all users access to all content. a better security practice is to limit what users can use the service. it’s your data so you decide.

-
make sure webdav is enabled and that your access rule is set:
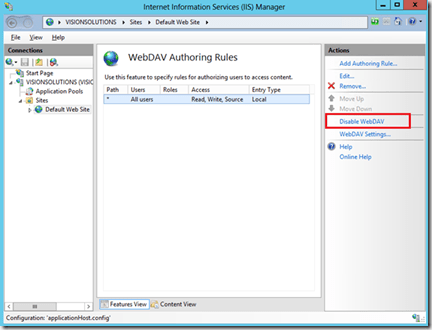
- that is it… now your ready to access your webdav file share!
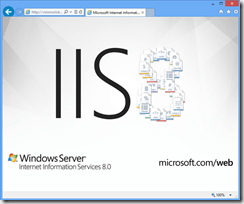
test and insure you can hit the web server by using your browser:
- because you opened port 80 and installed iis 8 you should see the default web page when you browse to your servers internet dns name. example: http://yourdomainname.cloudapp.net/
how to map a drive to your webdav server:
there are two ways i use to connect to the webdav server
how to map a drive to your webdav server from the win 8 gui:
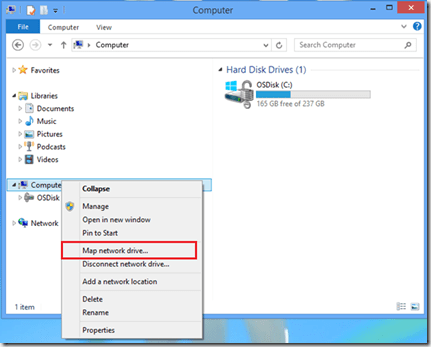
- from windows explorer, right click on “computer” and select “map a network drive”
-
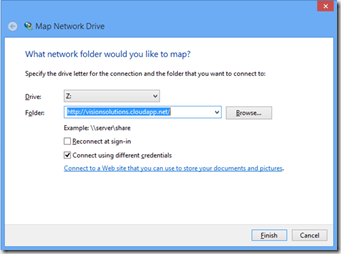
map your network drive by entering the address to your server
example: http://yourdomainname.cloudapp.net/
i selected “connect using different credentials” because my workstation was not joined to the server in anyway and i needed to use an account in the servers local sam database. -
hit “finish” and enter your credentials.
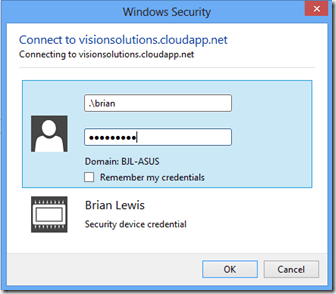
-
now you will have a connected drive that you can access from windows explorer or any tool via the drive mapping.
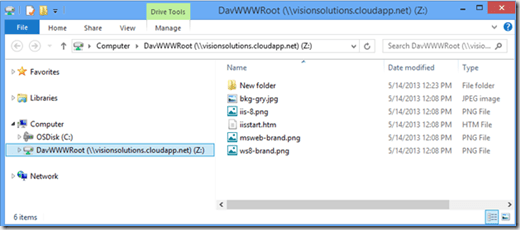
how to map a drive to your webdav server from a cmd box:
1. hit windows start and type: cmd <enter>
2. enter the command: net use [drive letter] [url] example: net use e: http://yourdomainname.cloudapp.net/
Published at DZone with permission of Brian Lewis, DZone MVB. See the original article here.
Opinions expressed by DZone contributors are their own.


Comments