Connect JMC and Other JMX Monitoring Tools to Microservices on Docker and AWS
In this tutorial, we learn how to connect your microservices in a Docker container to JMC and JMX in order to monitor their performance.
Join the DZone community and get the full member experience.
Join For FreeJMC- and JMX-based tools are really helpful to profile and monitor the performance of an application, but the problem comes when your program runs inside a container, such as Docker. Also, the problem is worse if it is hosted on a cloud platform, such as AWS.
This article will explain step-by-step, with working code, how you can get this to work.
Objective
Create a Spring microservice and create a Docker container from that. Then, deploy it on AWS (this is optional and will deploy on any remote server). Then configure and connect JMX tools to the JVM to run inside the container.
Create a Service
This part is optional and you can use any existing services you have, any Java program, or you can download the program which I used for this demo here. In order to make this article simple, I am not explaining how to create a microservice project. You can download the sample project from the link or use your own Java project.
This example uses port 8080 for the service to run and 8192 for JMX to connect. You can customize those based on your requirements and availability.
Create a Docker Container
I am not using any plugins and I am going to create a Docker container manually. Add a file called "Dockerfile" at the root of the application (same level as src).
from java:8
expose 8080
expose 8192
add target/sample-microservice-1.0-SNAPSHOT.jar /opt/sample-microservice-1.0-SNAPSHOT.jar
workdir /opt
ENTRYPOINT exec java $JAVA_OPTS -jar sample-microservice-1.0-SNAPSHOT.jar
This file is a little bit different than usual Docker files. To connect to JMX remotely, we need to pass some JVM options. There are multiple ways to do that, but I used this way so I can pass options when Docker runs rather than hard code here. Take note that I have disabled various security to make this simple. If you use this in production, do it at your own risk.
from java:8
This means the base image is Java version 8.
expose 8080
This is for the service to run.
expose 8192
This is for the remote JMX connection.
ENTRYPOINT exec java $JAVA_OPTS -jar sample-microservice-1.0-SNAPSHOT.jar
This means to execute the copied jar file with JAVA_OPTS pass when Docker runs. This variable can be anything, but make sure use the same name when Docker runs.
Now move this project to AWS (or any other remote) OR build the container on your machine and push it to the Docker registry. I assume you copy this file to the AWS EC2 instance.

Build the project:
mvn clean install
It will create the jar file. Now build the Docker container.
[ec2-user@ip-172-31-xx-xx sample-microservice]$ docker build -t sample .
Sending build context to Docker daemon 13.31 kB
Step 1/6 : FROM java:8
 ---> d23bdf5b1b1b
Step 2/6 : EXPOSE 8080
 ---> Using cache
 ---> 3260775daefc
Step 3/6 : EXPOSE 8192
 ---> Using cache
 ---> 33f5911f19c3
Step 4/6 : ADD target/sample-microservice-1.0-SNAPSHOT.jar /opt/sample-microservice-1.0-SNAPSHOT.jar
lstat target/sample-microservice-1.0-SNAPSHOT.jar: no such file or directory
Now everything is ready. We need to run the container now. Before that, we need to make sure we pass all the parameters we need:
docker run -p 98:8080 -p 8192:8192 -e JAVA_OPTS="-Dcom.sun.management.jmxremote.rmi.port=8192 -Dcom.sun.management.jmxremote=true -Dcom.sun.management.jmxremote.port=8192 -Dcom.sun.management.jmxremote.ssl=false -Dcom.sun.management.jmxremote.authenticate=false -Dcom.sun.management.jmxremote.local.only=false -Djava.rmi.server.hostname=YOUR_REMOTE_SERVER_IP" -d --name sample sampleHere YOUR_REMOTE_SERVER_IP should be replaced with your remote server IP.
--name sample means the name we provide for the container, and the next sample means the image name (the name we gave for -t in the build).
This is the output:
[ec2-user@ip-172-31-xx sample-microservice]$ docker run -p 98:8080 -p 8192:8192  -e JAVA_OPTS="-Dcom.sun.management.jmxremote.rmi.port=8192 -Dcom.sun.management.jmxremote=true -Dcom.sun.management.jmxremote.port=8192 -Dcom.sun.management.jmxremote.ssl=false -Dcom.sun.management.jmxremote.authenticate=false -Dcom.sun.management.jmxremote.local.only=false -Djava.rmi.server.hostname=16.231.85.102" -d --name sample sample
ad4891da2aaf02475a111d81e9f0c448cff5b0c731b8a305846f9e268405a634
[ec2-user@ip-172-31-xx sample-microservice]$
Now test on the browser.

(ignore the spelling)
Enable a Firewall
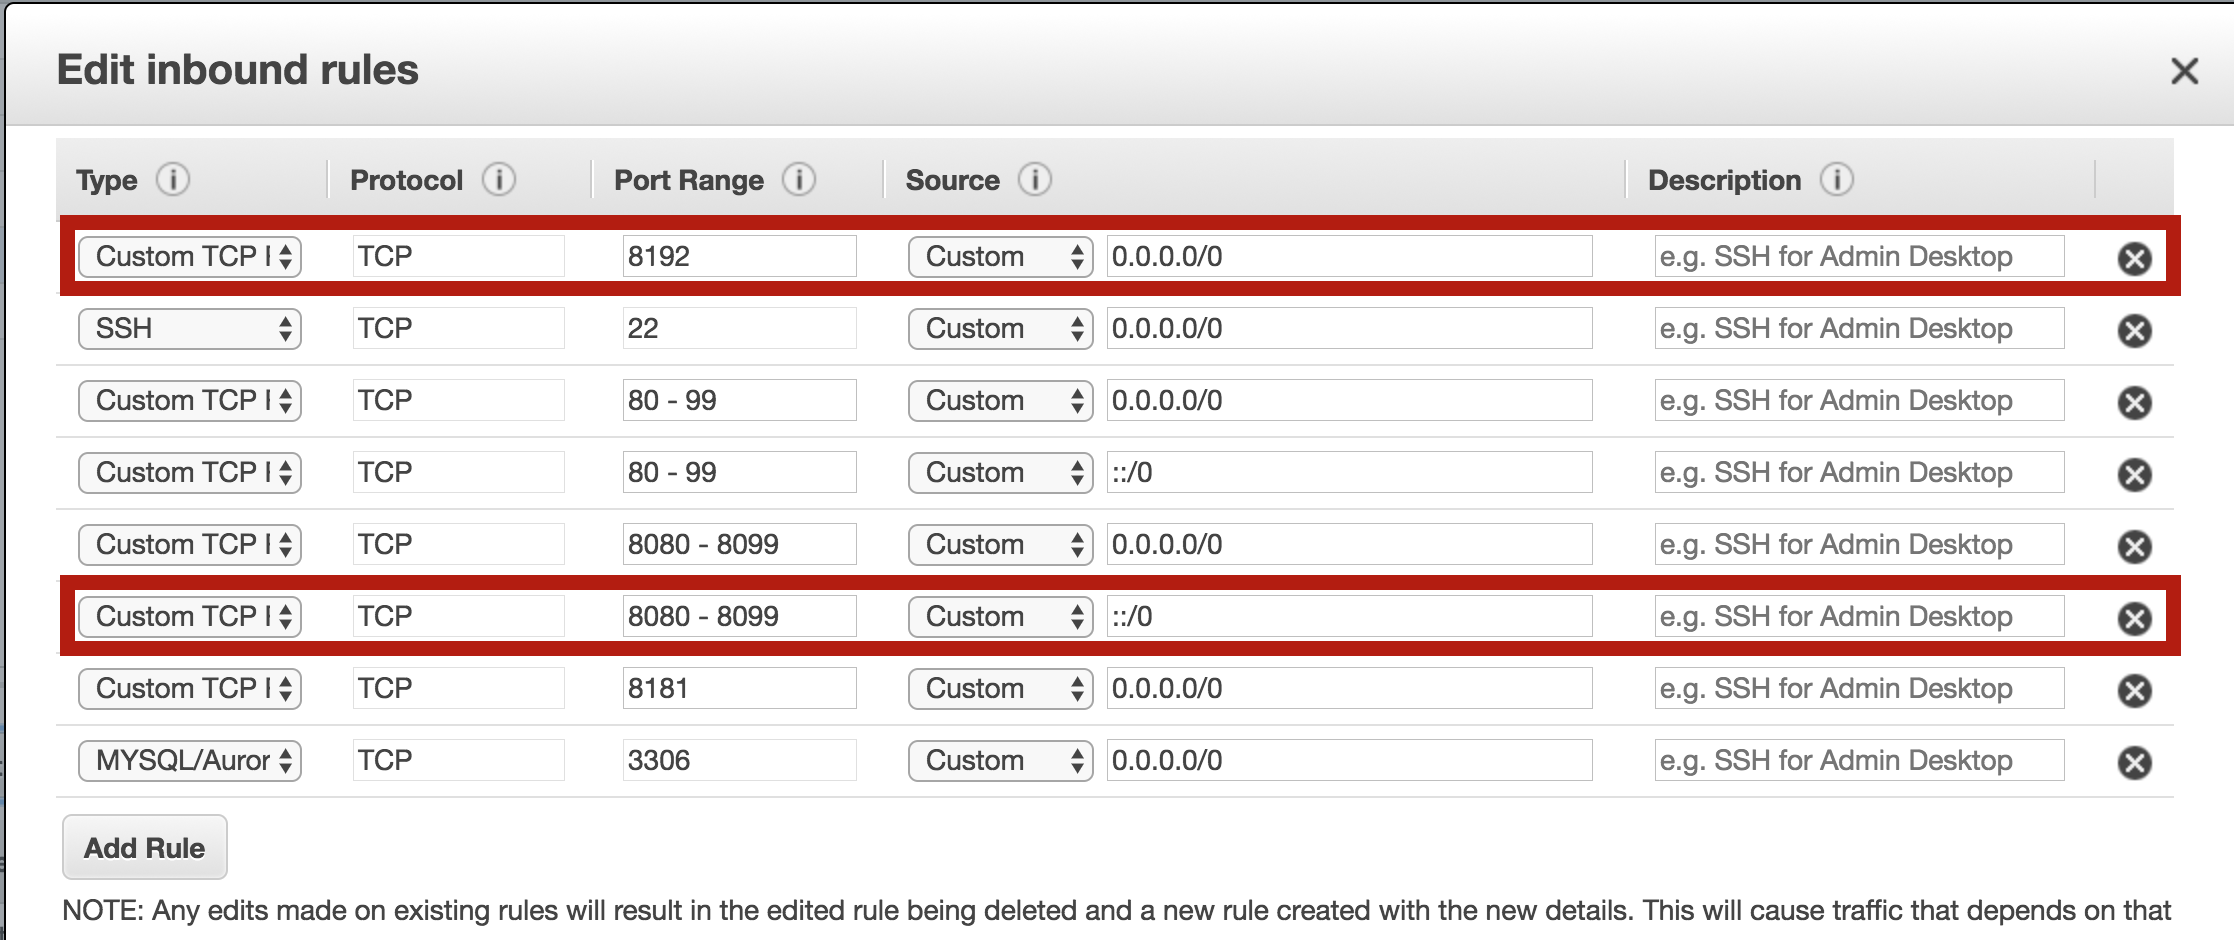
This is optional. If your remote server is behind a firewall, you can do this. I will explain how you can do this on AWS.
Allow above two ports from your security group of the EC2 instance.

Now everything is ready.
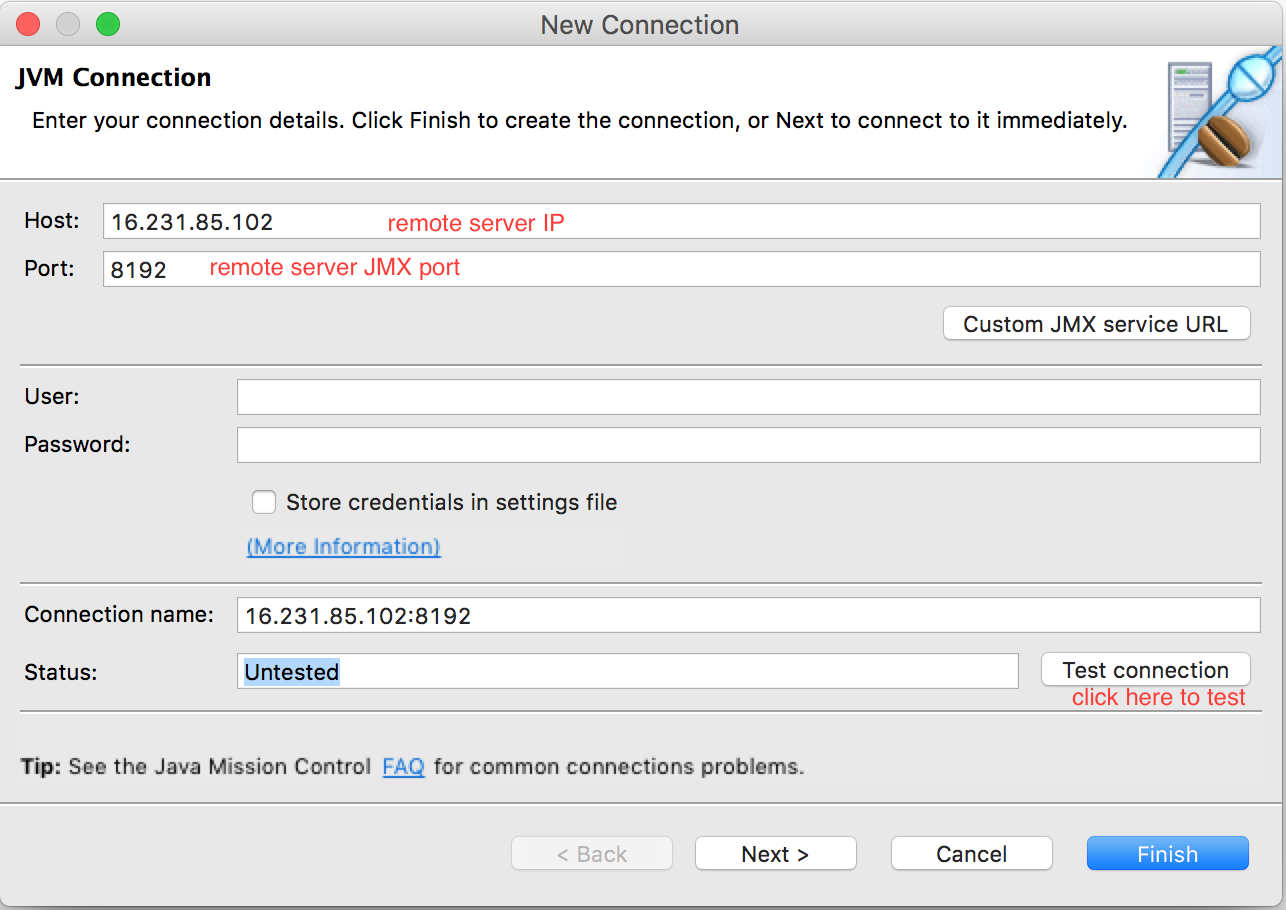
Connect JMC to the remote server.
Run jmc from the shell of your local computer:
192:sample-microservice kdinesh$ jmc

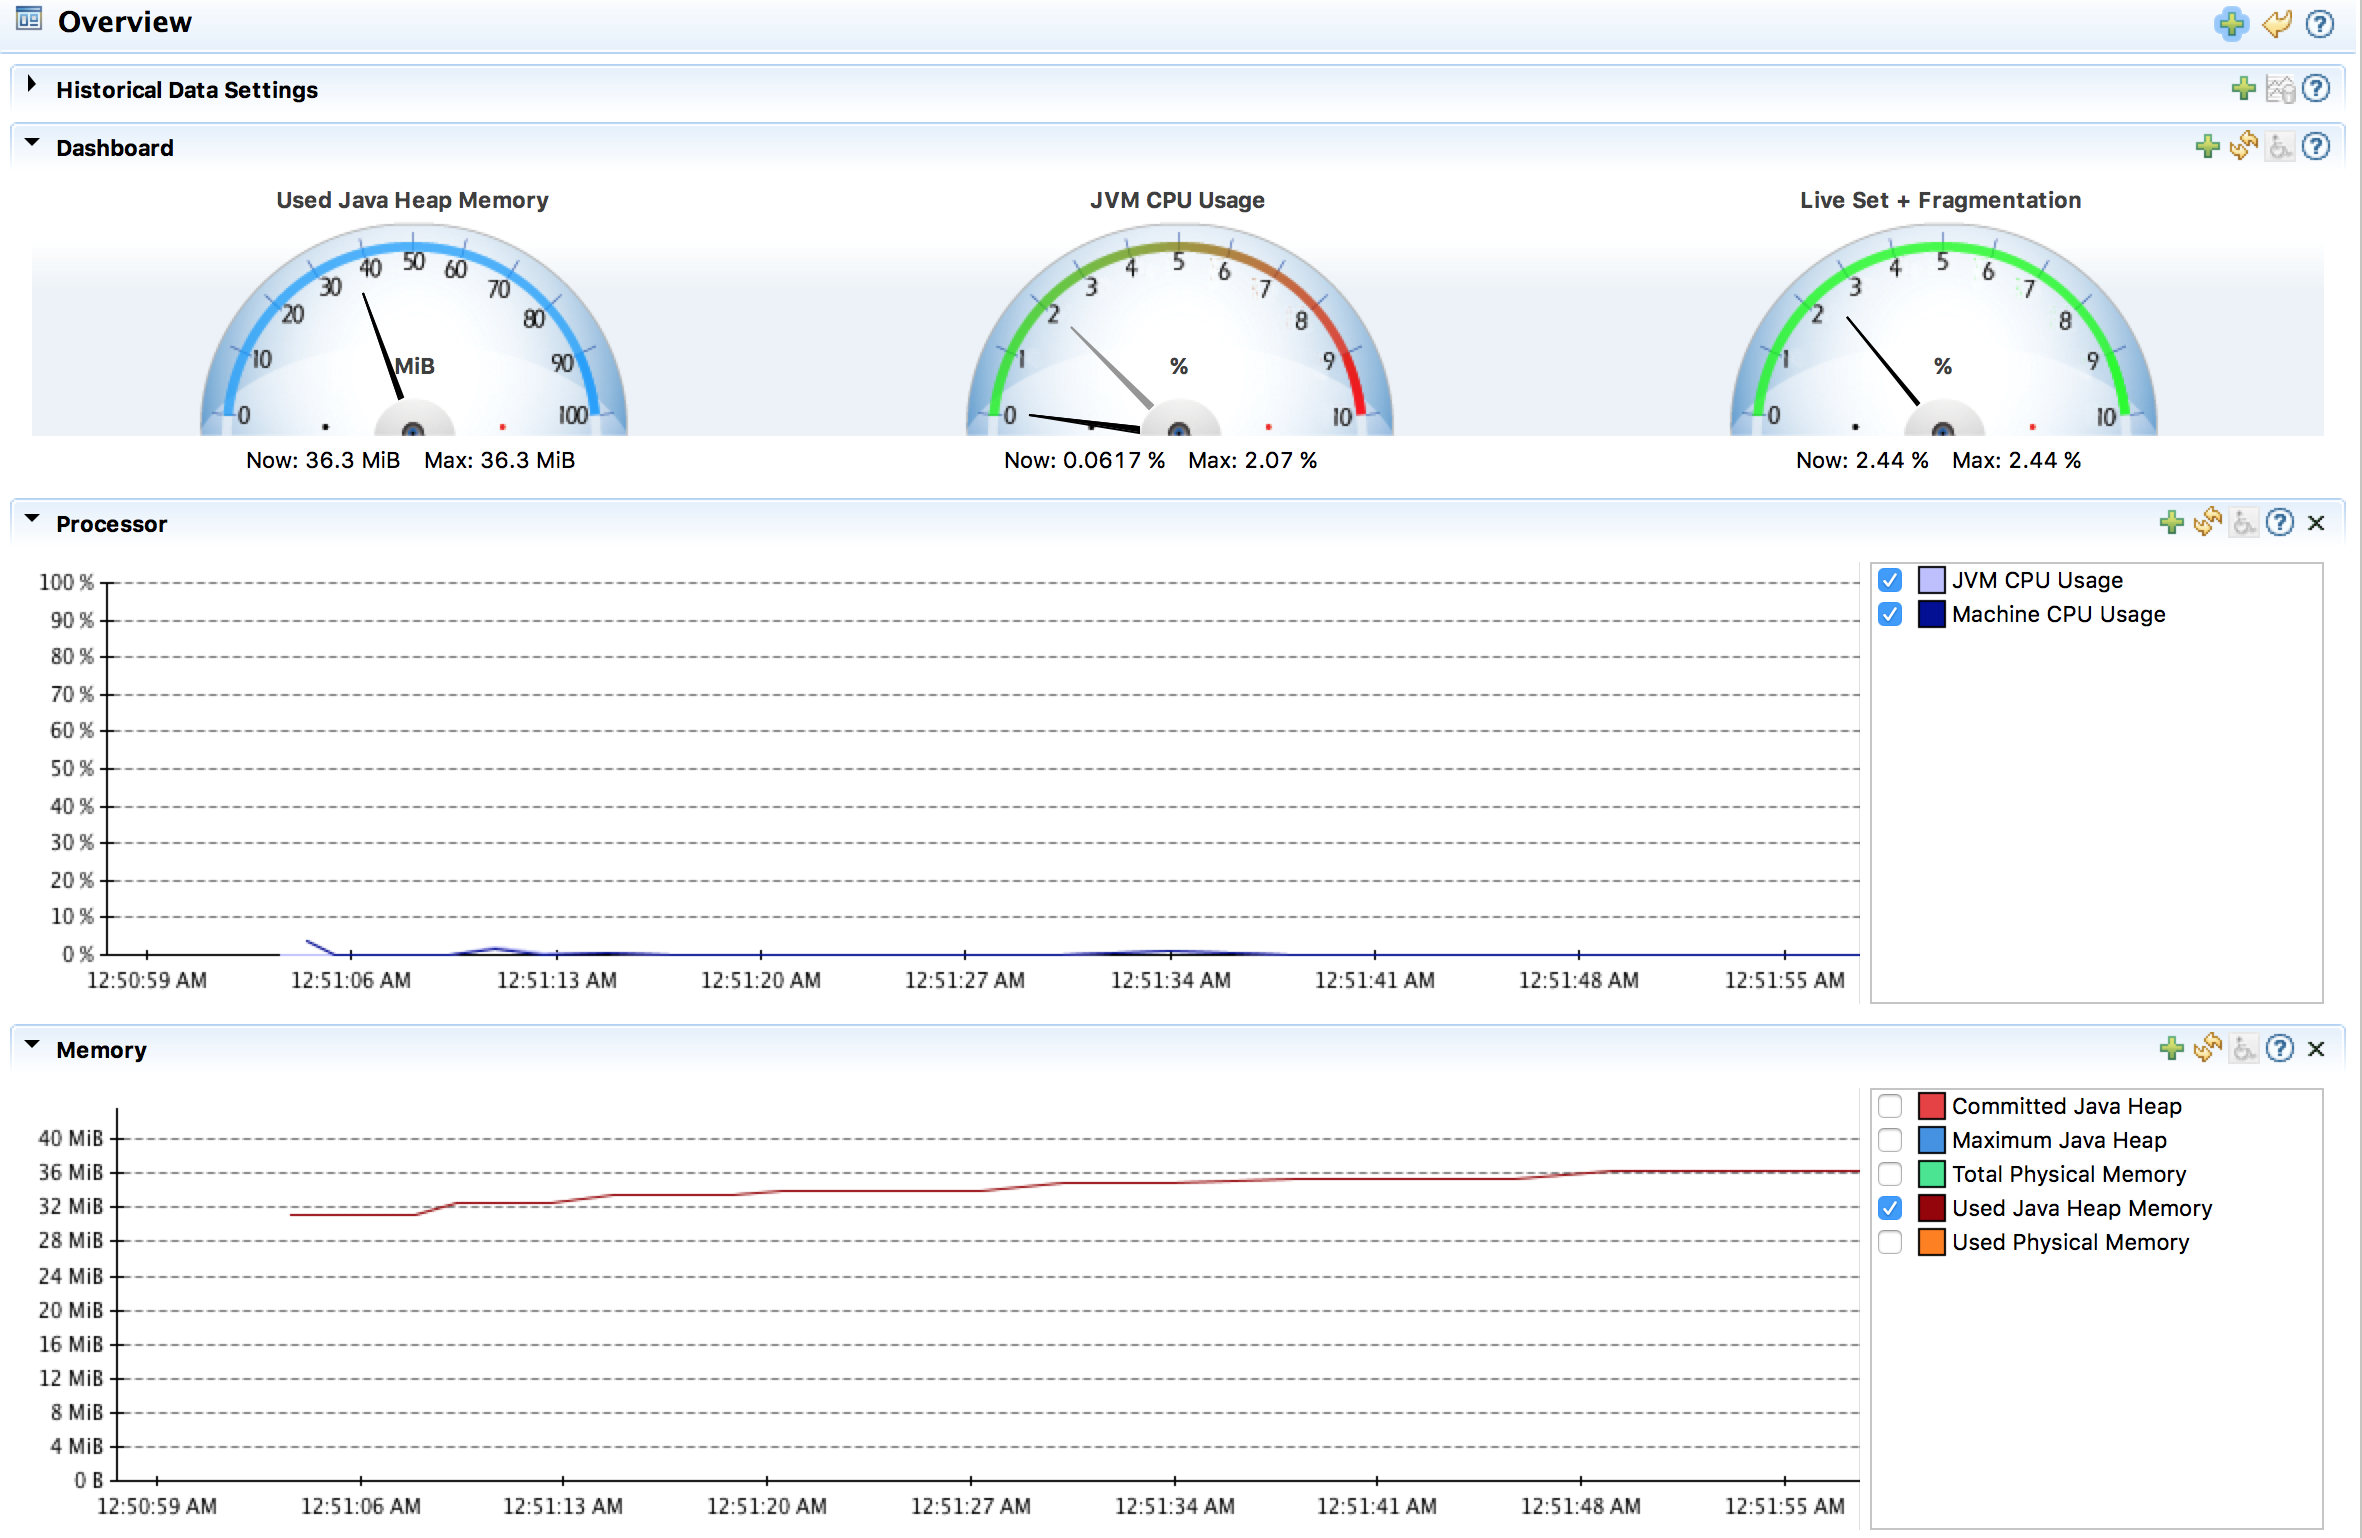
Once you click finish, it will go to the saved connection, and then you can connect.

Opinions expressed by DZone contributors are their own.

Comments