Capture IoT Devices Data Via RabbitMQ
The purpose of this article is to give you an overview of how to capture events from MQTT enabled IoT sensors/devices and monitors it via ELK stack.
Join the DZone community and get the full member experience.
Join For FreeIntroduction
The purpose of this article is to give you an overview of how to capture events from MQTT enabled IoT sensors/devices and monitors it via ELK stack.
After capturing events, you could either store it in event-stores or in time-series database for further processing.
Here I am taking a very basic example of capturing an event i.e temperature change city wise.
Below are the popular Internet of Things protocols and standard communication technologies :
- MQTT
- DDS
- AMQP
- Bluetooth
- Zigbee
For this tutorial I am using MQTT protocol.
MQTT — MQ Telemetry Transport
MQTT Broker — RabbitMQ
MQTT Broker is a pre-requisite to capture MQTT events from IoT devices. Here I am using RabbitMQ as MQTT Broker
Check this before selecting MQTT Broker and for a basic understanding of RabbitMQ watch this.
MQTT Client — Mosquitto MQTT Publisher
To simulate the actual behavior of the IoT device’s event generation I am using Mosquitto MQTT publisher.
Installation
- Install RabbitMQ Server.
- Install mosquitto package.
- Set up ELK on your machine.
Make sure to enable mqtt plugin in rabbitmq using below command:
rabbitmq-plugins enable rabbitmq_mqtt
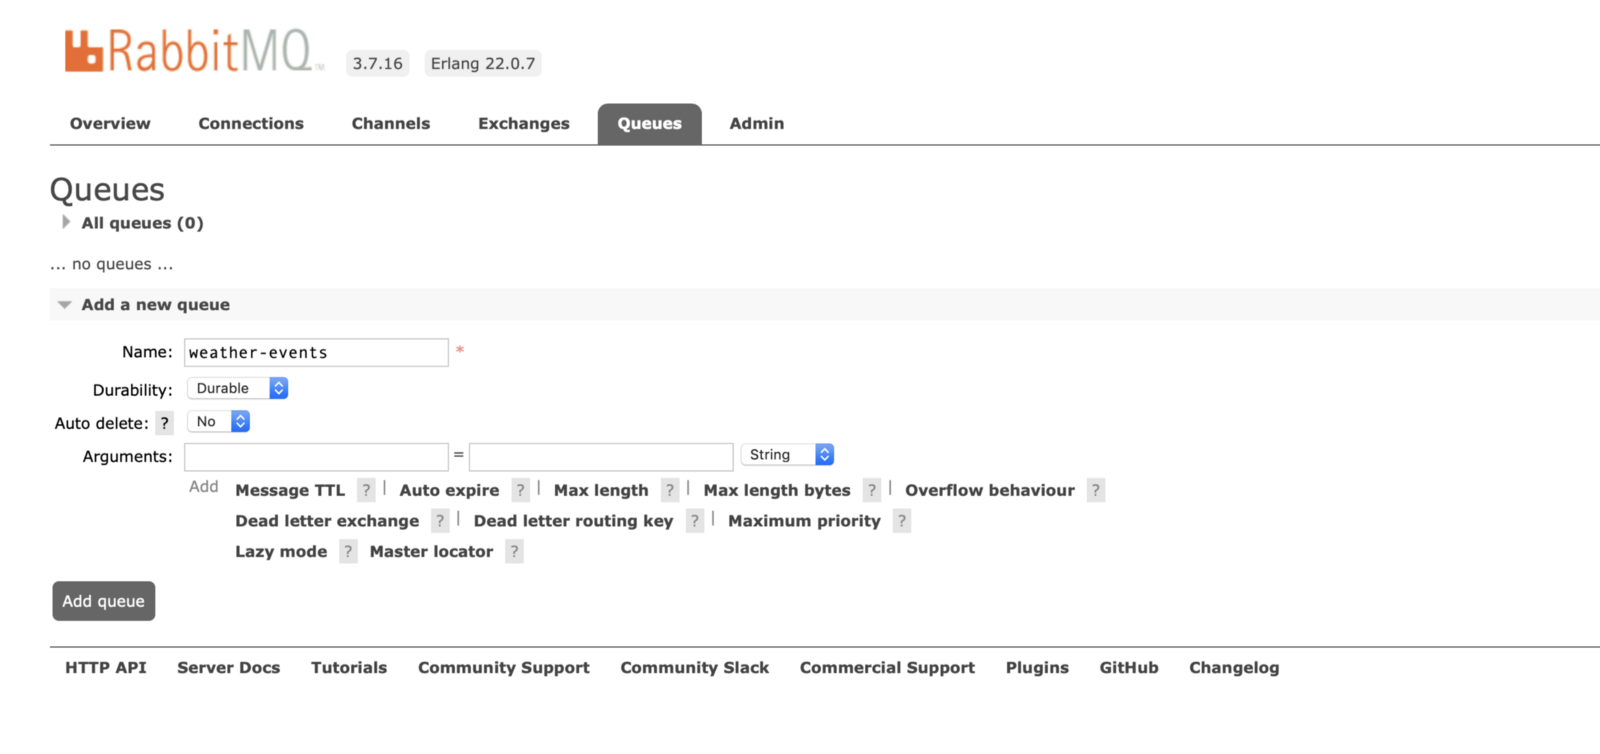
Create a Queue
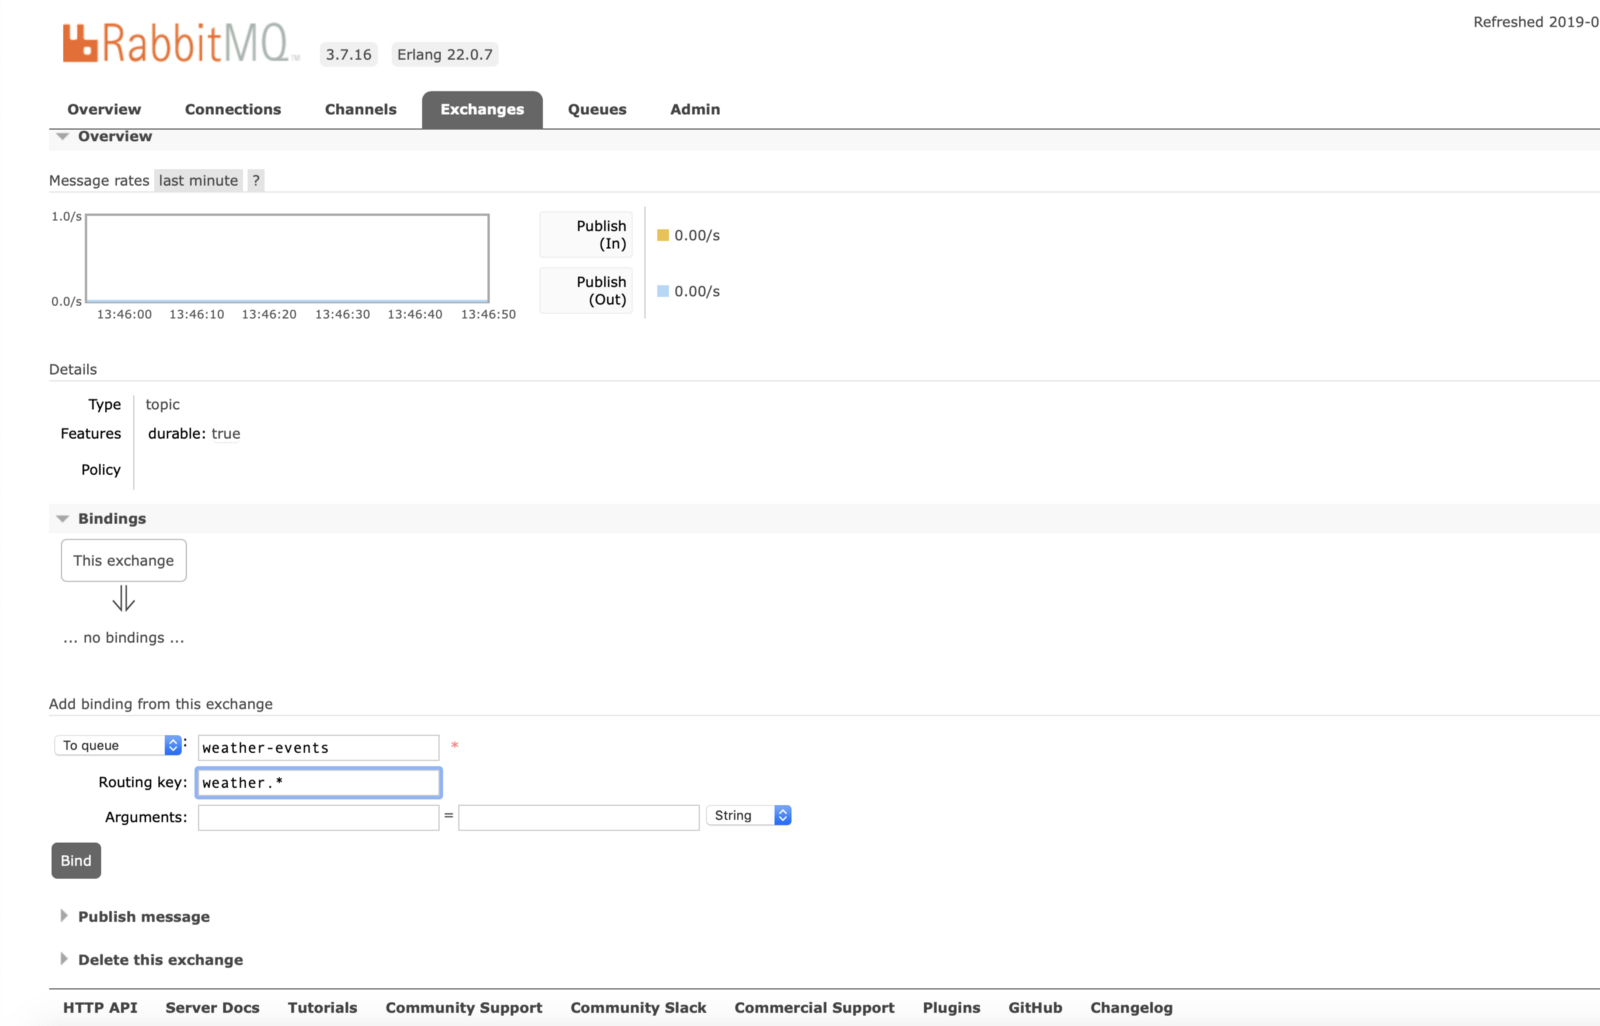
Bind Exchange to Queue
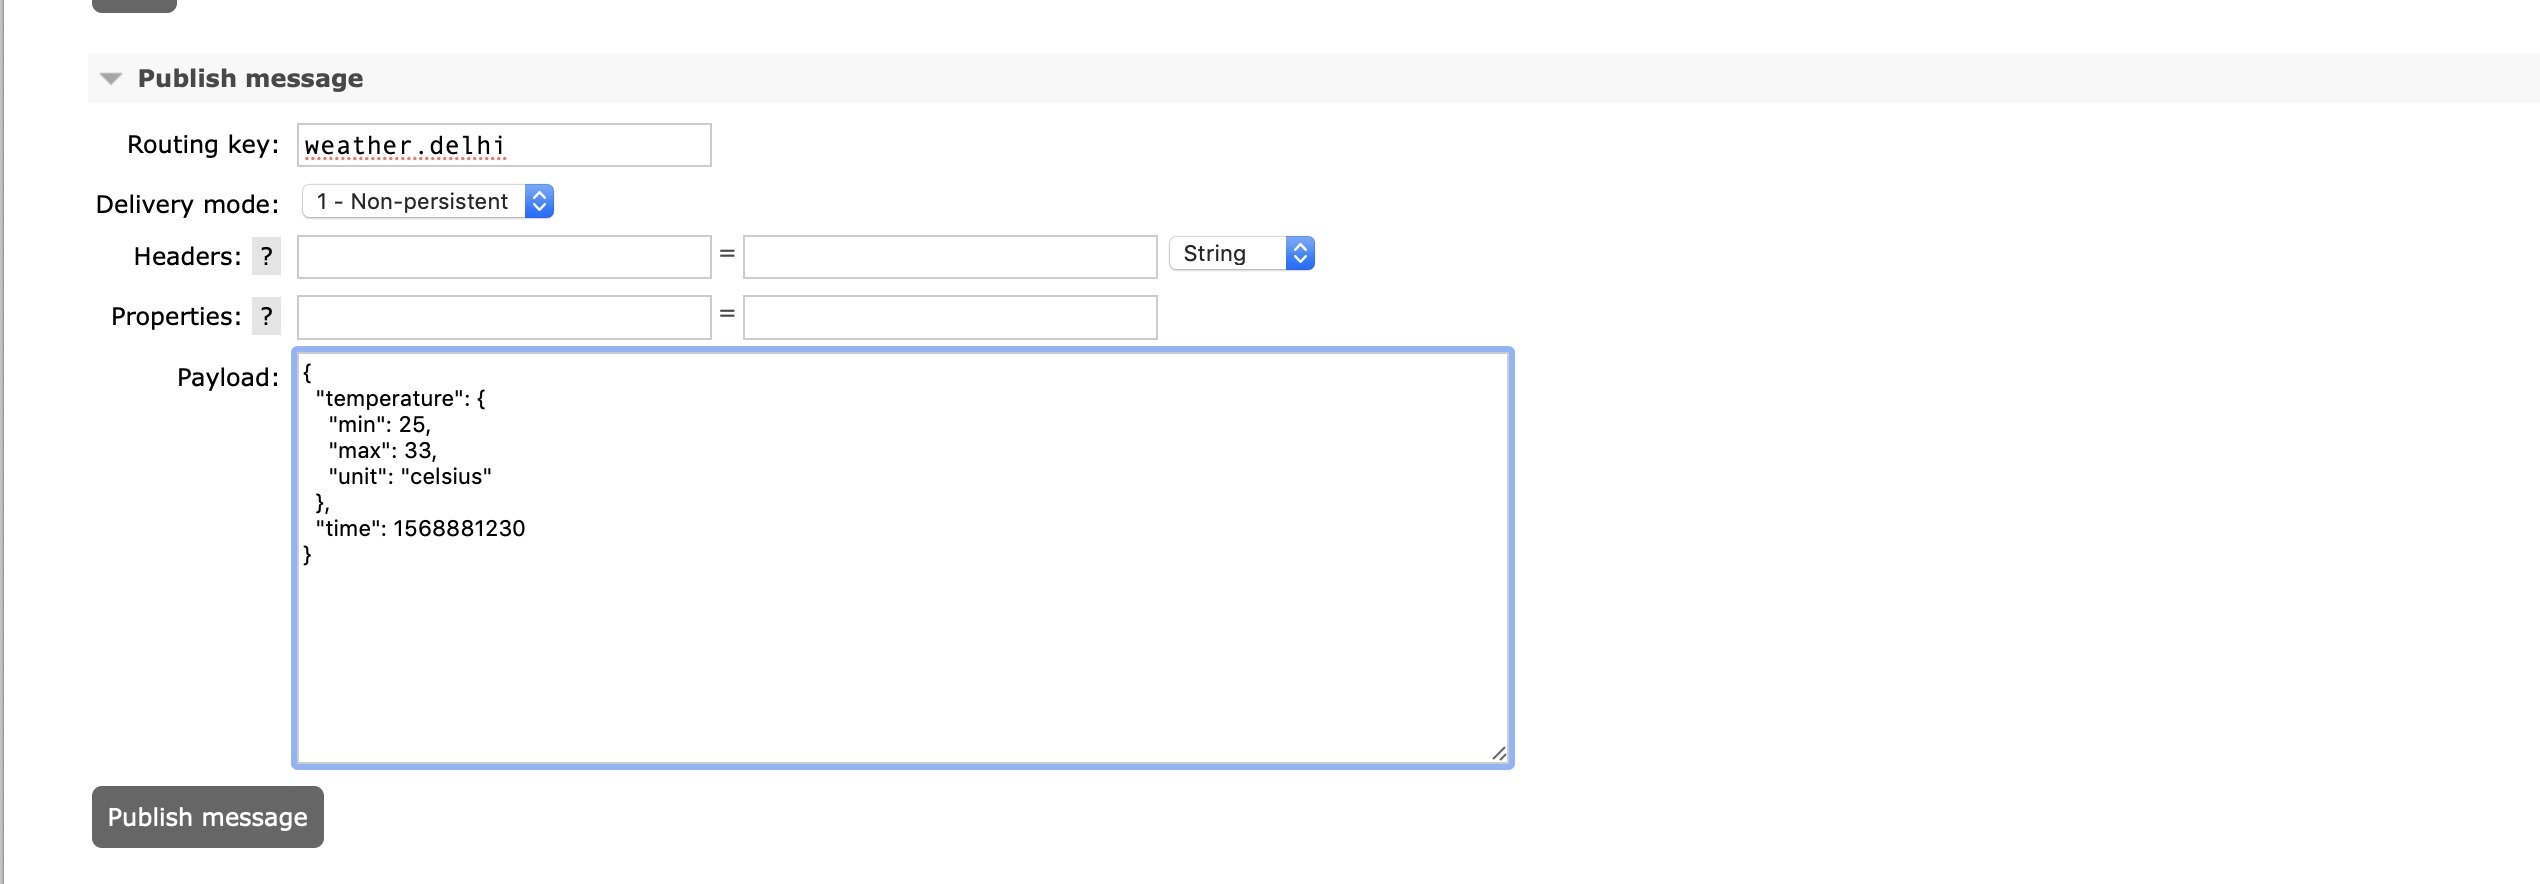
Publish a Sample Message
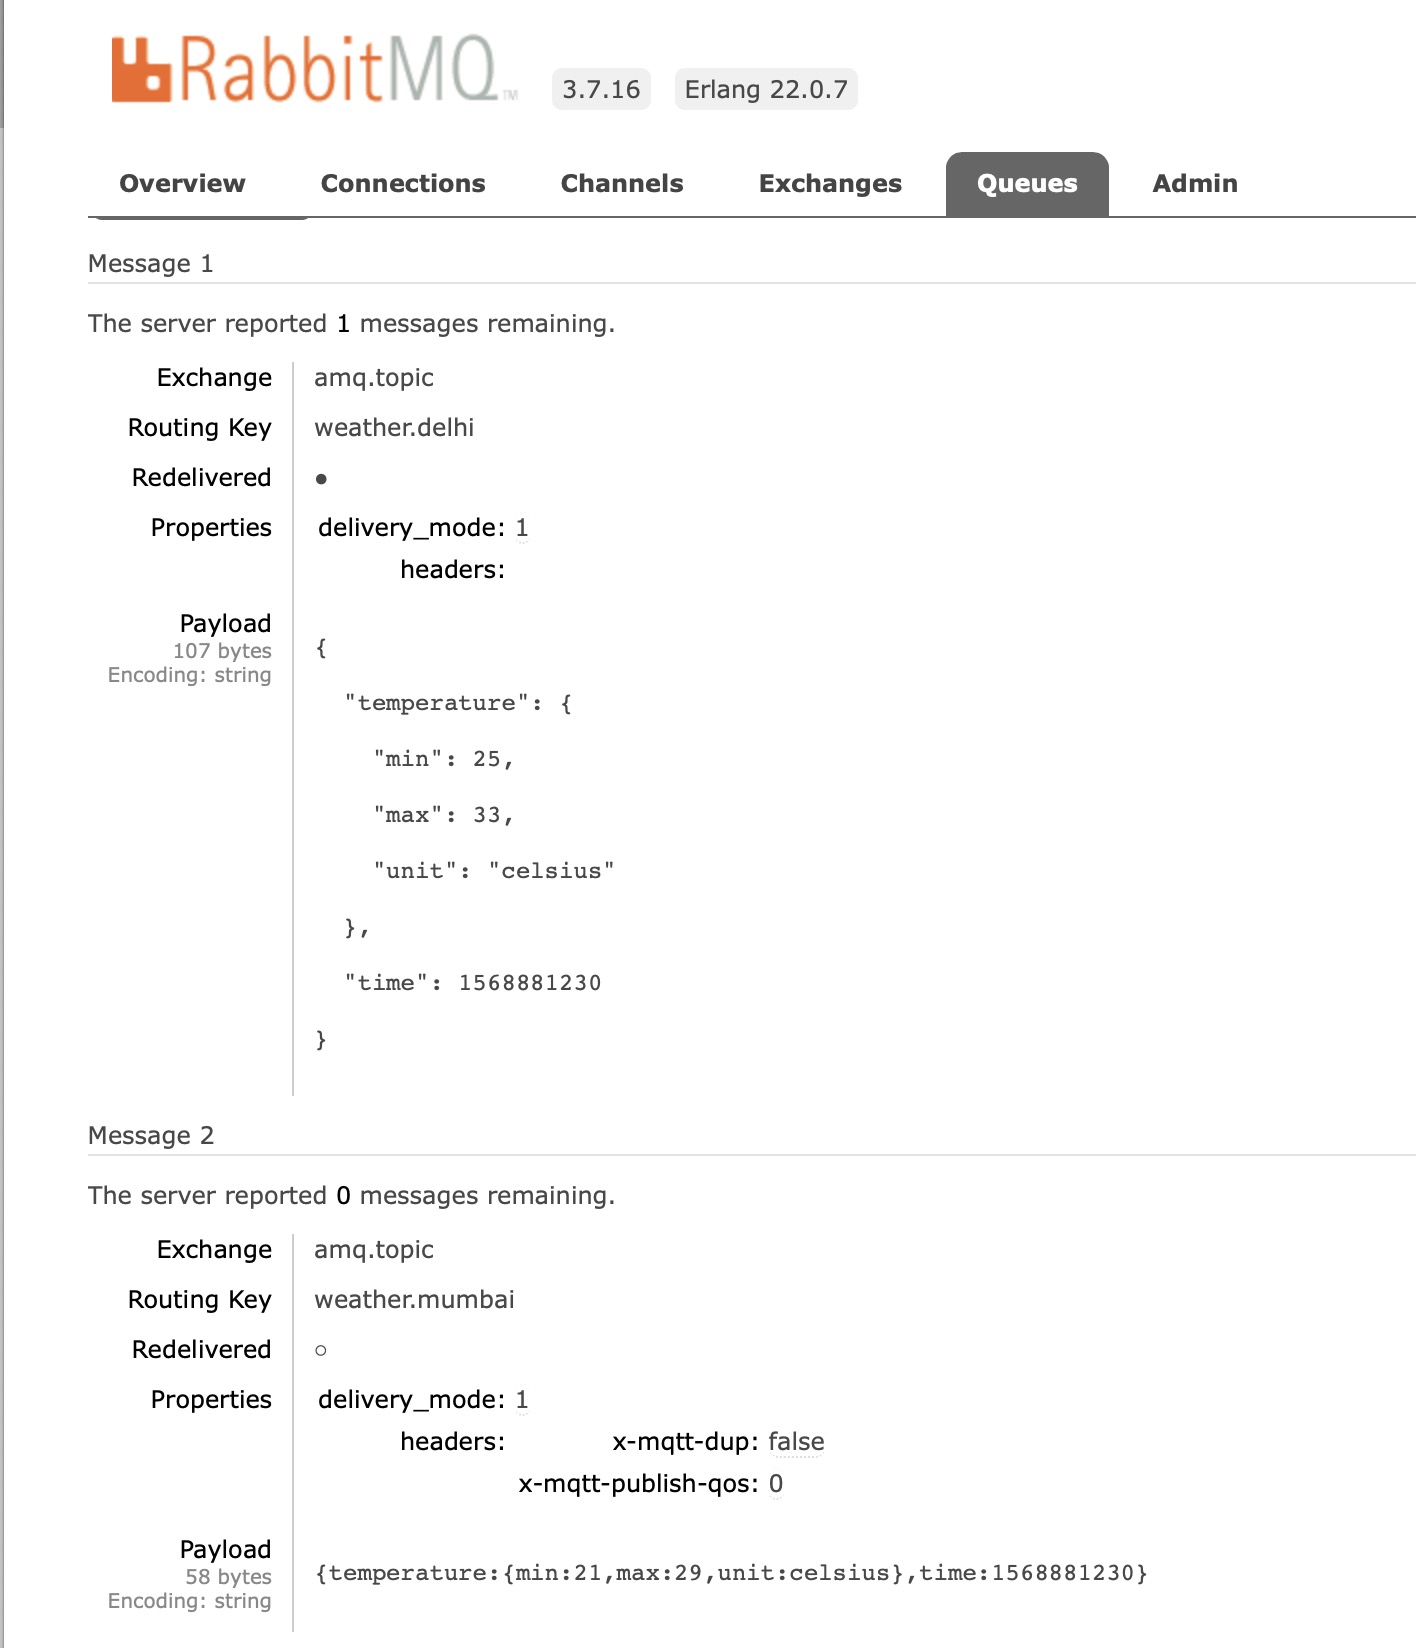
Check Whether the Message Is Received or Not
Publish Message From Mosquitto MQTT Publisher
Let’s try to send some messages from Mosquitto publisher using the below command :
xxxxxxxxxx
mosquitto_pub -h 127.0.0.1 -t weather.mumbai -m “{“temperature”:{“min”:21,”max”:29,”unit”:”celsius”},”time”:1568881230}” -u guest -P guest -p 1883 -d
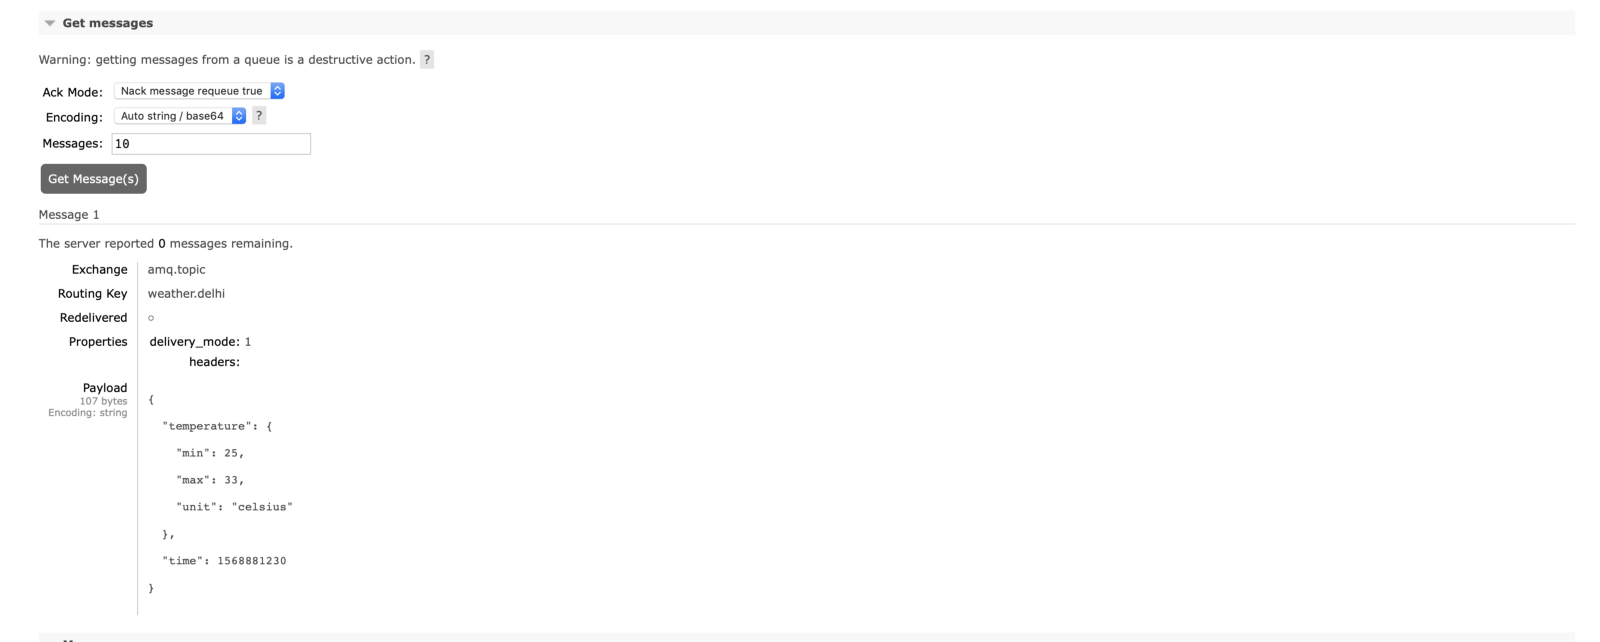
Check Whether the Message Is Received or Not in RabbitMQ Queue
How To Install Elasticsearch, Logstash, and Kibana (ELK Stack)
Start Logstash Server
Use the below configuration which will read weather.* events from RabbitMQ queue and will dump the same into weather index in Elastic Search.
xxxxxxxxxx
input {
rabbitmq {
host => “localhost”
port => 15672
heartbeat => 30
durable => true
exchange => “amq.topic”
exchange_type => “topic”
key => “weather.*”
}
}
output {
elasticsearch {
hosts => “localhost:9200”
index => “weather”
}
stdout {}
}
Paste the above configuration in logstash-rabbitmq.conf file
Run Logstash Server
xxxxxxxxxx
logstash -f <path>/logstash-rabbitmq.conf
Once logstash started successfully, you will be able to see logstash queue created and binded with weather* events in RabbitMQ
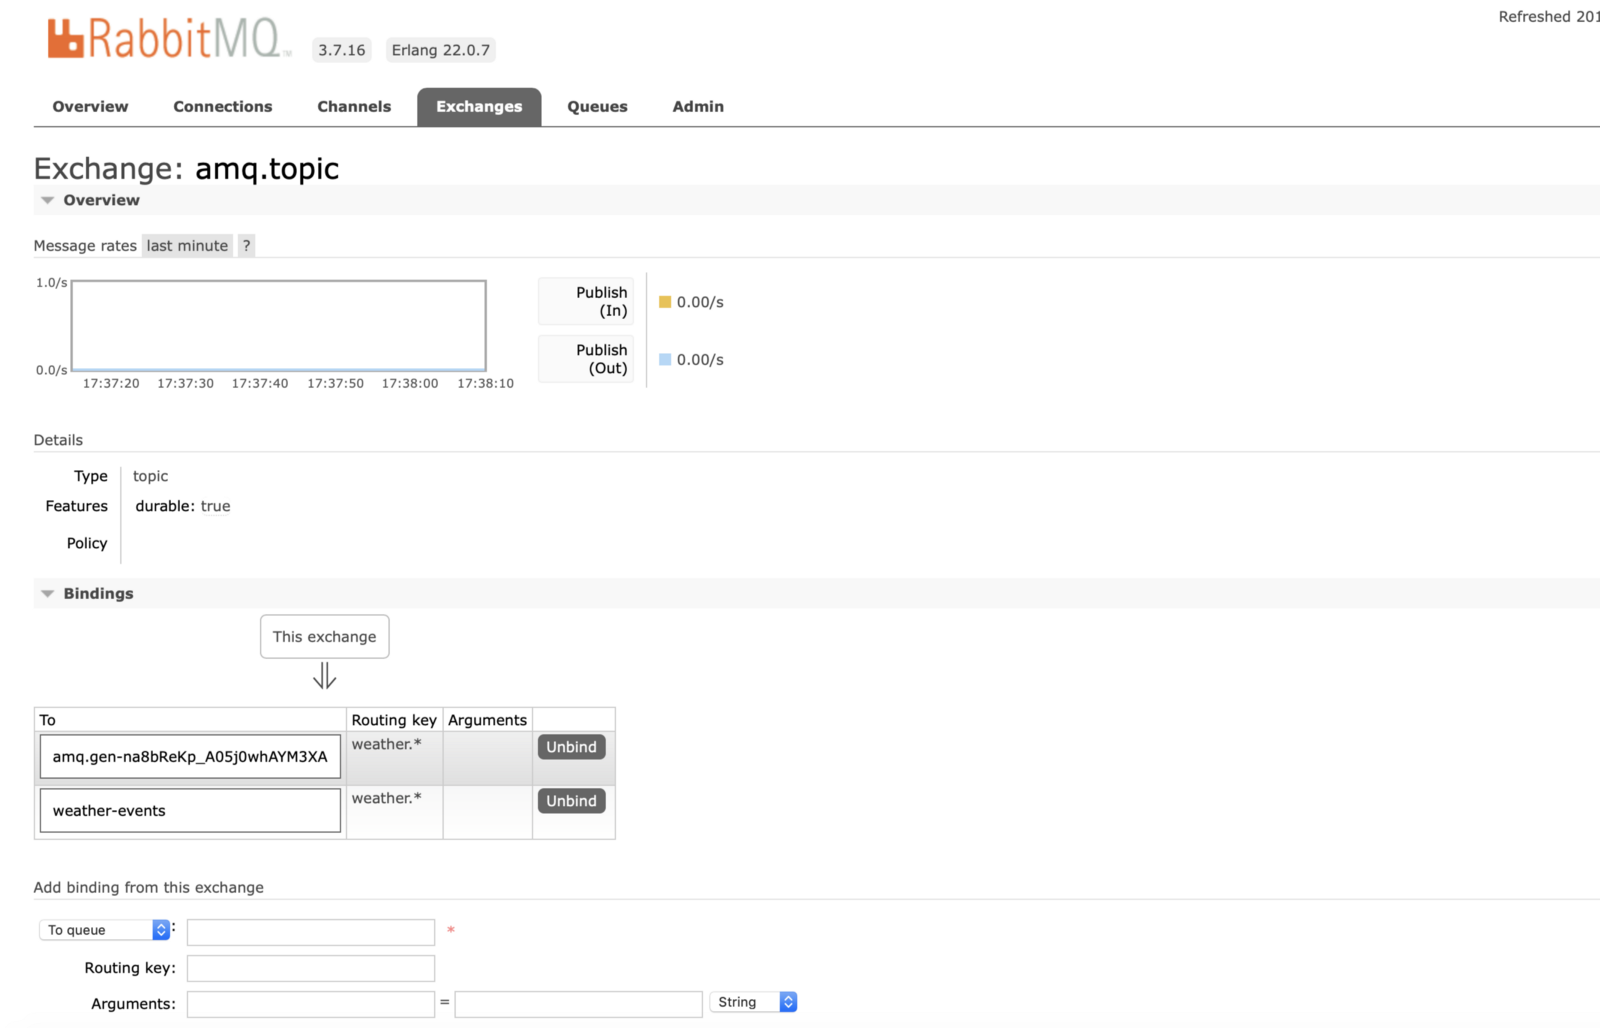
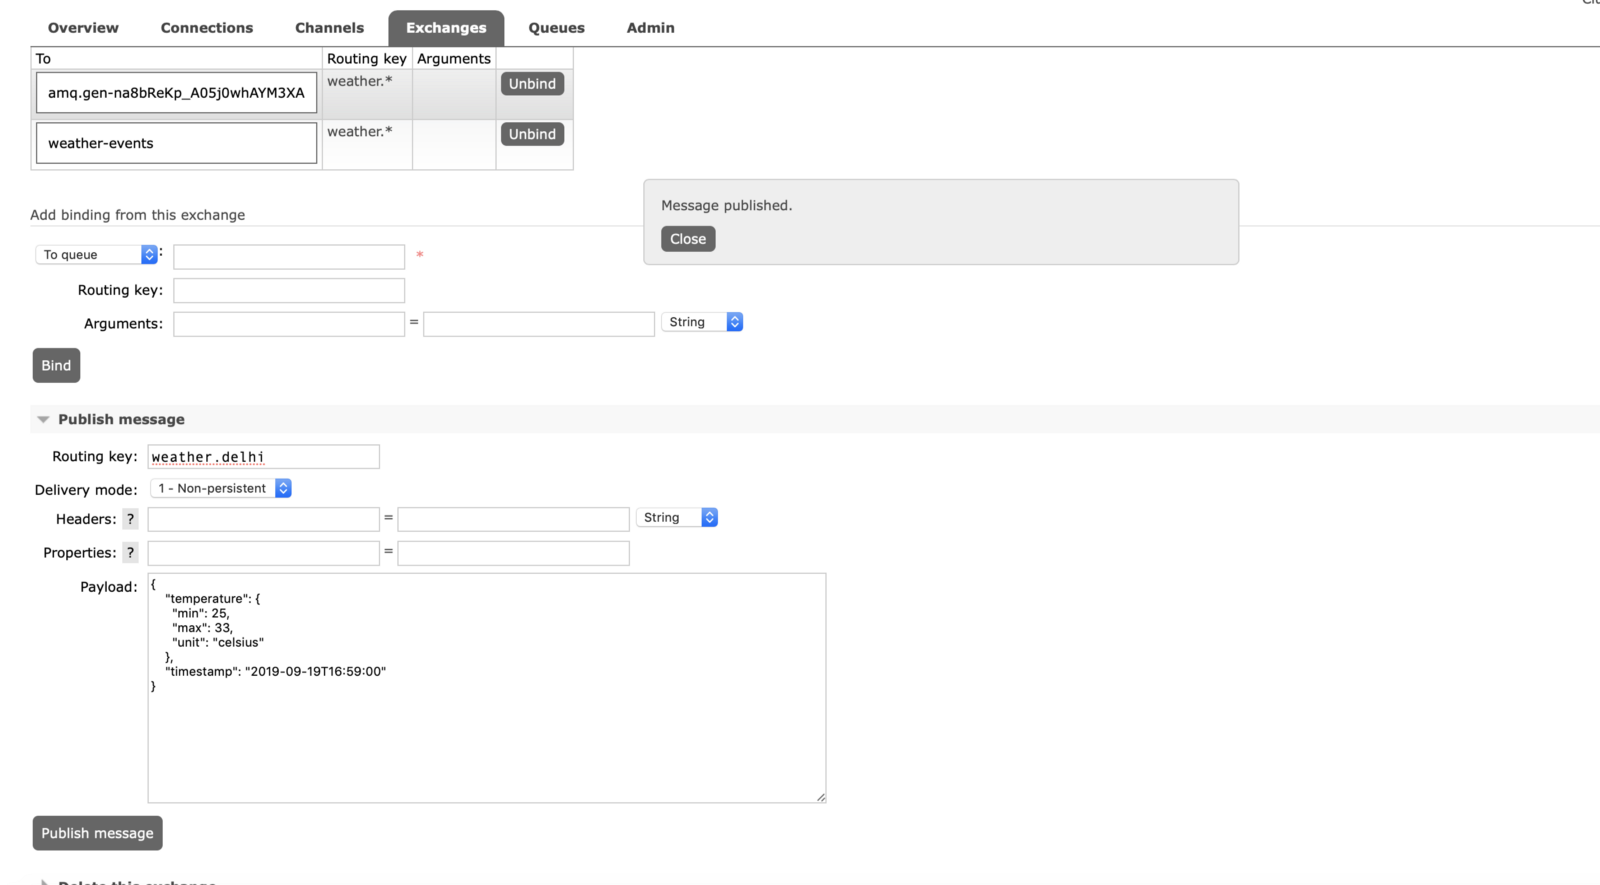
Let’s Publish Some Test Messages via RabbitMQ GUI
 K ibana Dashboard
Let’s check Kibana whether it is receiving any events under weather-index or not.
As you could see in below Kibana search that Elastic-Search received some events in weather-mumbai index via logstash.
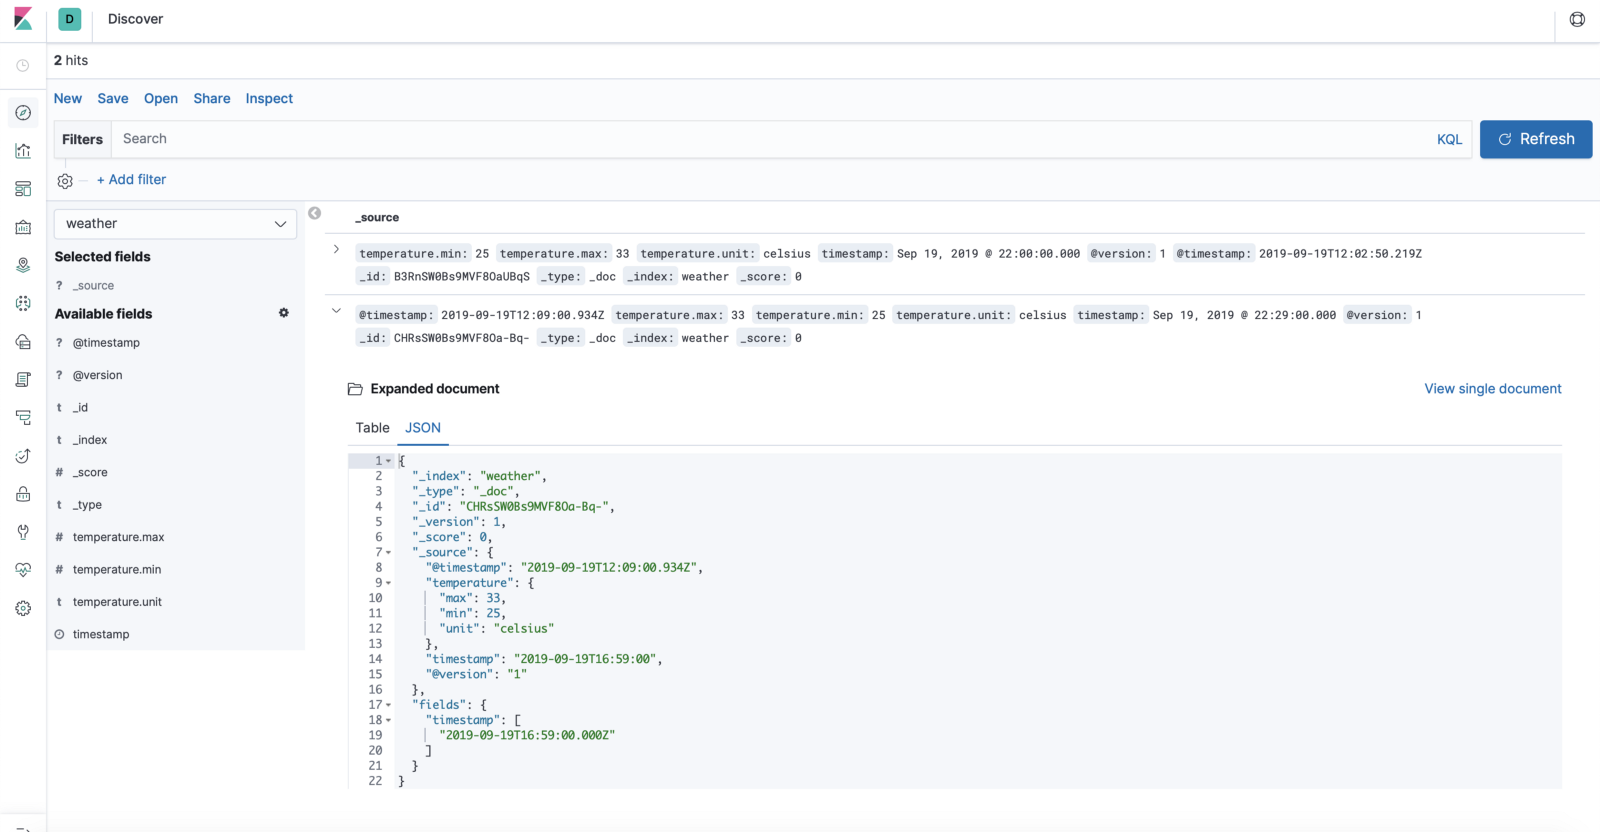
Publish Some Message From Mosquitto MQTT Publisher
xxxxxxxxxx
$ mosquitto_pub -h 127.0.0.1 -t weather.mumbai -m ‘{“temperature”:{“min”:21,”max”:32,”unit”:”celsius”},”timestamp”:”2019–09–19T18:59:00"}’ -u guest -P guest -p 1883 -d
Finally, you can see your messages in kibana, now you can configure Kibana Dashboards and create charts for ex: compare last 3 month temperature change etc.
Hope you have enjoyed reading the article.
Published at DZone with permission of Ritresh Girdhar. See the original article here.
Opinions expressed by DZone contributors are their own.

Comments