Building an ActiveMQ Docker Image on Kubernetes
This article will give you a primer on installing Apache ActiveMQ and building it on a Docker image to deploy to Kubernetes.
Join the DZone community and get the full member experience.
Join For FreeIn our project, we require a message broker to pave a way for asynchronous communication between different microservices. So, one of the microservices required is a messaging service. In this example, we are going to use Apache ActiveMQ as a message broker.
In order to deploy messaging microservice, we must containerize ActiveMQ. It’s a very straightforward process as we are only going to set up 1 node cluster.
Technically we require taking the base image of Linux and getting and installing ActiveMQ 5.16.5. The final step is to start ActiveMQ. So, let’s get started.
Create a Docker file, a script file with following instructions.
FROM openjdk:8-jre-alpine
RUN wget -O activemq.tar.gz http://archive.apache.org/dist/activemq/5.15.6/apache-activemq-5.15.6-bin.tar.gz
RUN tar -xzf activemq.tar.gz
CMD ["apache-activemq-5.15.6/bin/activemq", "console"]
Navigate to the folder in which the Docker file is saved and create a Docker image by running command
docker build:

Check whether the image is registered in local Docker repo with Docker images.
Note that initially you will notice <none> under repository. In order to tag the image, run command docker tag <IMAGE_ID> <yourdockerhubname>/image-name.
For example: docker tag c35d0594bffc nikbhi15docker/k8s-make-my-vacation-queue .
docker run nikbhi15docker/k8s-make-my-vacation-queue 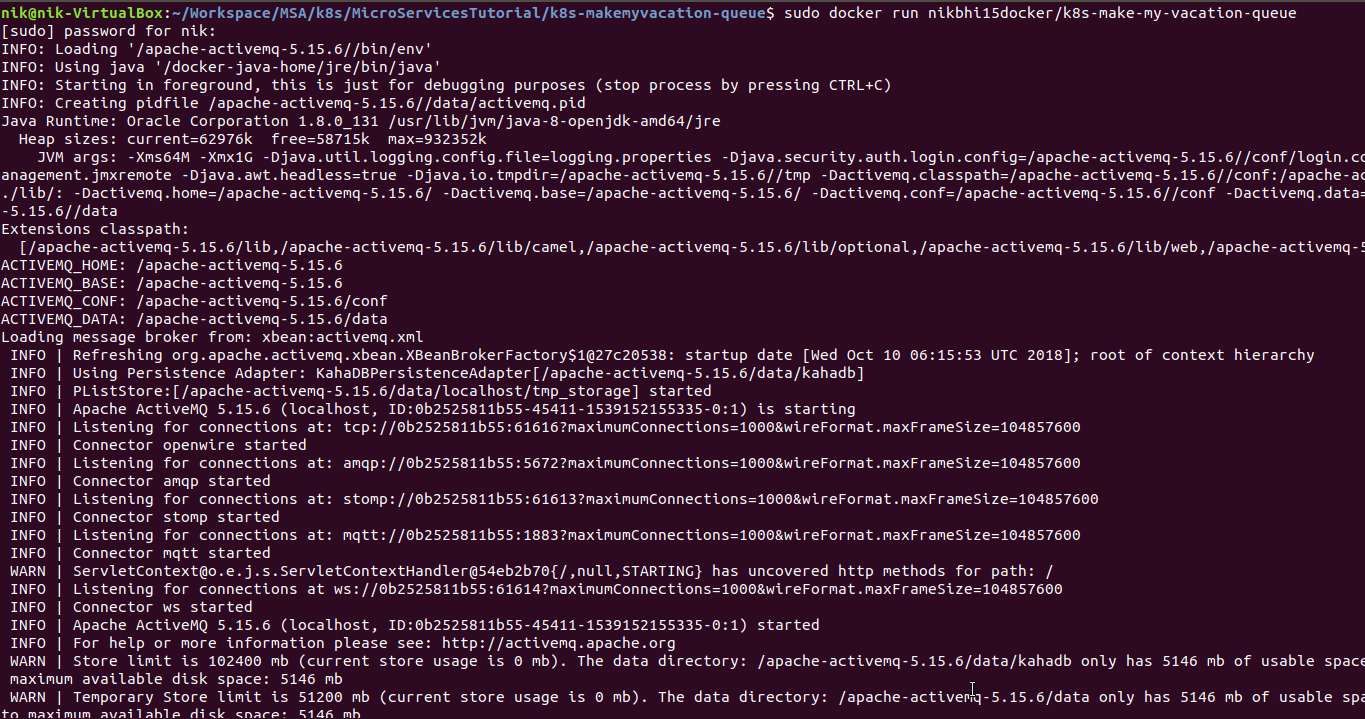
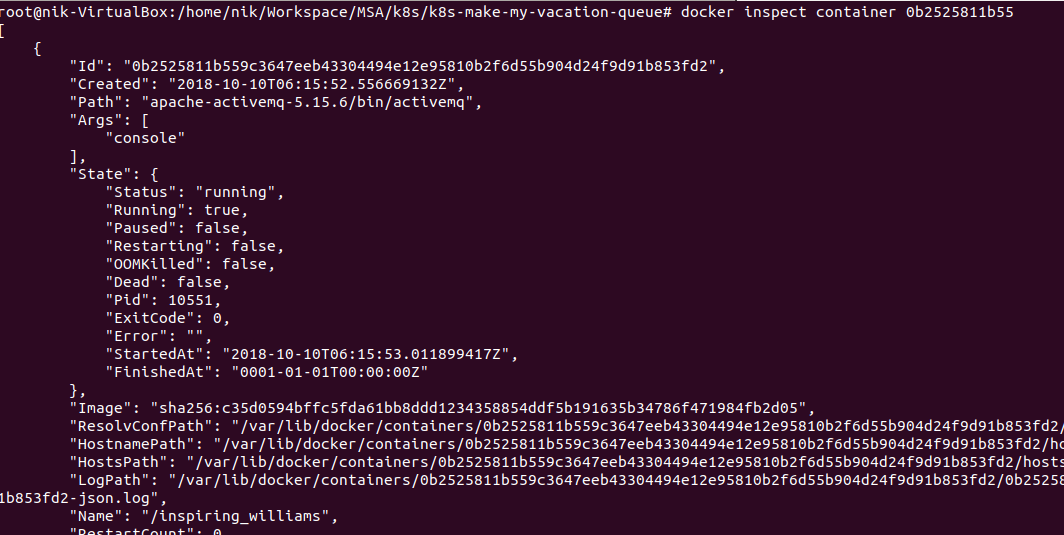
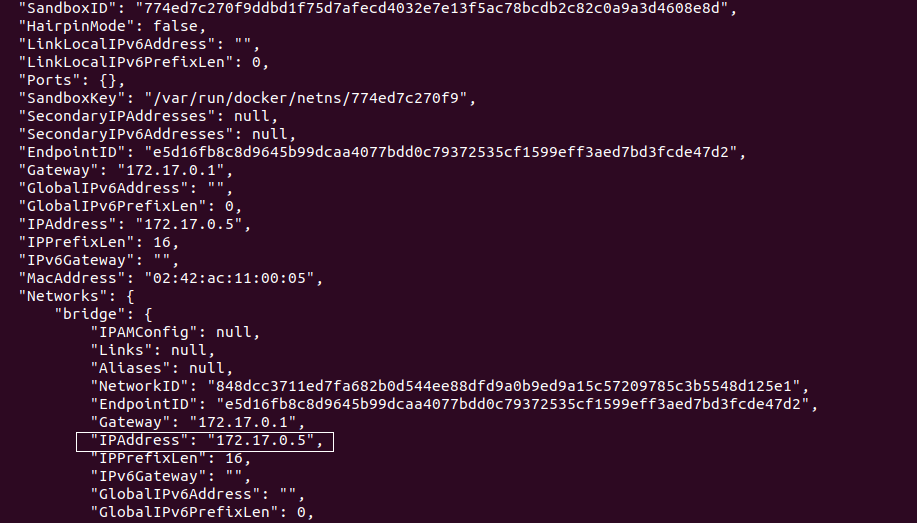
- Find out IP address of our container and connect to admin console on <container_ip>:8161.

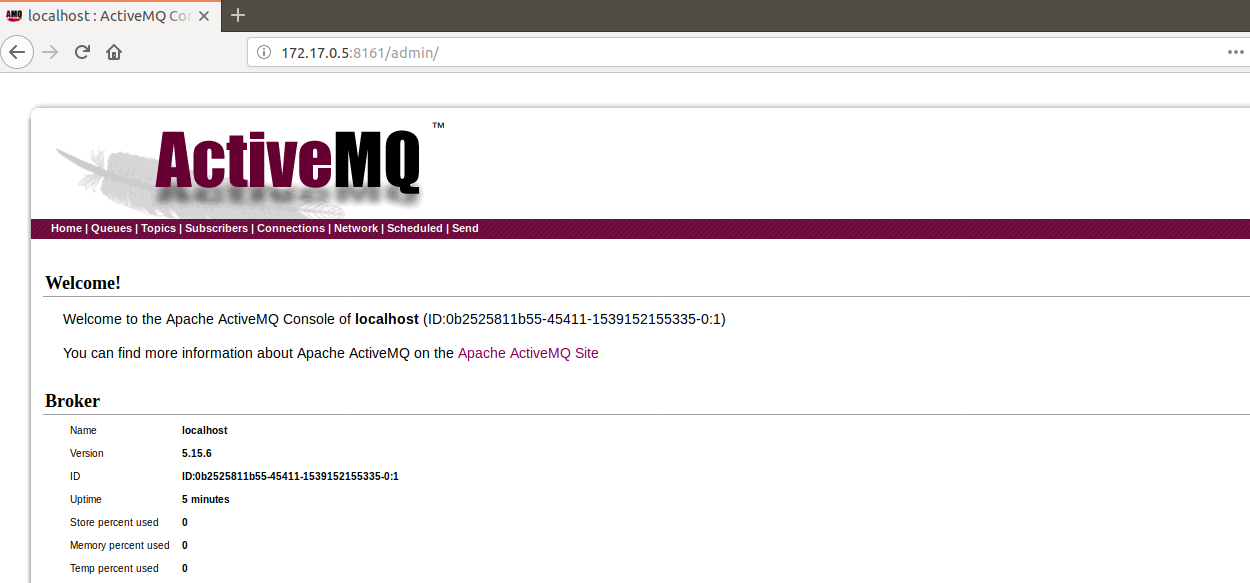
Okay, so ActiveMQ started. But seriously, what the heck is happening? Let's understand!
Those who are familiar with Docker can simply stop reading this article and go for a coffee break. Others hold on!
The entire magic is in the Docker file – YES only 4 instructions.
FROM openjdk:8-jre-alpineIt implies that we want to use the base image of openJDK:8-jre-alpine. Its one of the smallest Linux Java images with Alpine. If you are observing carefully, then you will have noticed the usage of openjdk and not Oracle JDK. Yes, it’s now official that OpenJDK has better official images than Oracle JDK. Even the regular images are smaller, including the alpine alternatives.
RUN wget -O activemq.tar.gz http://archive.apache.org/dist/activemq/5.15.6/apache-activemq-5.15.6-bin.tar.gzIt’a no-brainer. This instruction is downloading the MQ setup artifact from thr official Apache ActiveMQ site and this command is getting executed on the top of our Linux base image. So after this, you have Linux, Java and ActiveMQ.
I am sure by now you must have understood the gist of this article and you can definitely anticipate what is to be followed in this article. However, I will still explain the remaining steps from the perspective of completeness of this article.
RUN tar -xzf activemq.tar.gz tar is Short for Tape Archive, and sometimes referred to as tarball, a file that has the TAR file extension is a file. Above command unpacks the tar.gz file.
-xzf are nothing but different flags/arguments passed to tar command.
-x --extract = extract files from an archive
-z, --gzip = gzipped files eg. for tar.gz packages
-f, --file ARCHIVE = use archive file or device ARCHIVE
CMD ["apache-activemq-5.15.6/bin/activemq", "console"]Here we are using default entry point which is /bin/sh –c . The CMD specifies arguments that will be fed to the ENTRYPOINT. The format of command CMD is
CMD ["executable","param1","param2"]
Therefore what we are doing is forking out a process
/bin/sh -c command param1 param2 . This is how the ActiveMQ process gets started.
That’s it in this article. In the next article, we will see how to use a Spring Boot JMS application to connect with this messaging service in microservices architecture using K8s.
Just wait a moment!
We have not yet accomplished the mission. Our mission is to run this image on K8s. Let’s cross the finish line in the last section of this article.
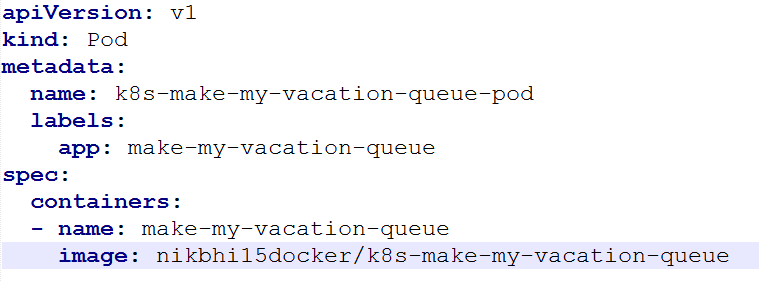
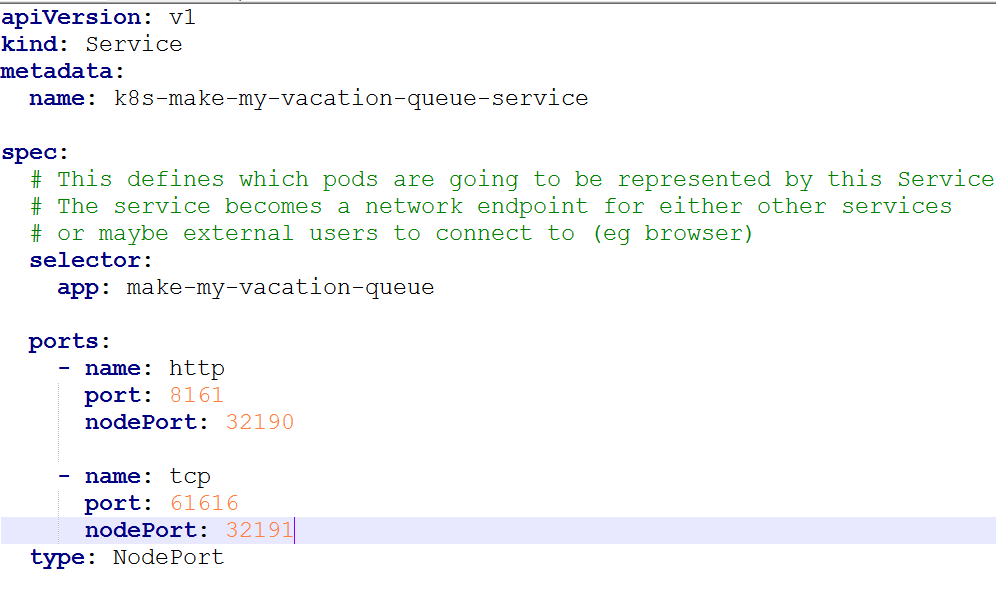
In order to run this Docker image on K8S, we require the pod and service definition. Here are those definitions.
Pod definition – Notice carefully that in this example, I am using image pushed to my Dockerhub that is nikbhi15docker/k8s-make-my-vacation-queue.
Service definition – Notice that we are using nodePort and thrport to be exposed is 32090 and from the container the port is 8161. NodePort exposes the service on each Node’s IP at a static port.
Start minikube using command minikube start .
Then navigate to the directory in which queue-pod and queue-service definitions are saved. Apply pod and service definitions as follows. In short, applying definition implies that you are starting a pod and a service.
kubectl apply –f queue-pod.yamlkubectl queue-service.yamlFind the IP address of minikube cluster (minikube ip) and navigate to :32190 and you should admin console of ActiveMQ (username – admin & password – admin).
You can refer to GitHub.
Opinions expressed by DZone contributors are their own.

Comments