Building a 24-Core Docker Swarm Cluster on Banana Pi Zero
One alternative to the Raspberry Pi is the Banana Pi M2 Zero. In this tutorial, take on the challenge of creating a cheap cluster using Banana Pi devices.
Join the DZone community and get the full member experience.
Join For FreeIf you are a software developer, DevOps engineer, or system administrator, you have a use case for single-board computers like the Raspberry Pi. I spent 6 months actively tracking the availability of Raspberry Pi 4 until I got the chance to buy some and build a beautiful 8-node cluster to run MariaDB products on it. Unfortunately, Raspberry Pi devices are out of stock these days. Although they become available from time to time and you can use rpilocator.com to track availability, if you are lucky to find one, don’t expect it to be cheap (although this could change in 2023). Fortunately, there are alternatives, one of the cheapest ones being the Banana Pi M2 Zero.
I knew that MariaDB runs on Raspberry Pi Zero 2 W since I had previously created a portable database server on it. But would the Banana Pi M2 Zero be able to run a MariaDB database? Well, yes! Of course. No surprise here since the Banana Pi M2 Zero has almost the same technical specs as the Raspberry Pi Zero 2 W:
- Quad-core processor
- 512M DDR3 RAM
- Onboard Wi-Fi
Since I suspect that you might want to build your own physical cluster with single-board computers and might be frustrated by the unavailability and high prices of Raspberry Pi, I decided to take on the challenge of creating a cheap cluster (at least as cheap as it can get) using Banana Pi devices and documenting the process so it’s easier for you to replicate. Enjoy!
What You Need
Here’s what you need to buy:
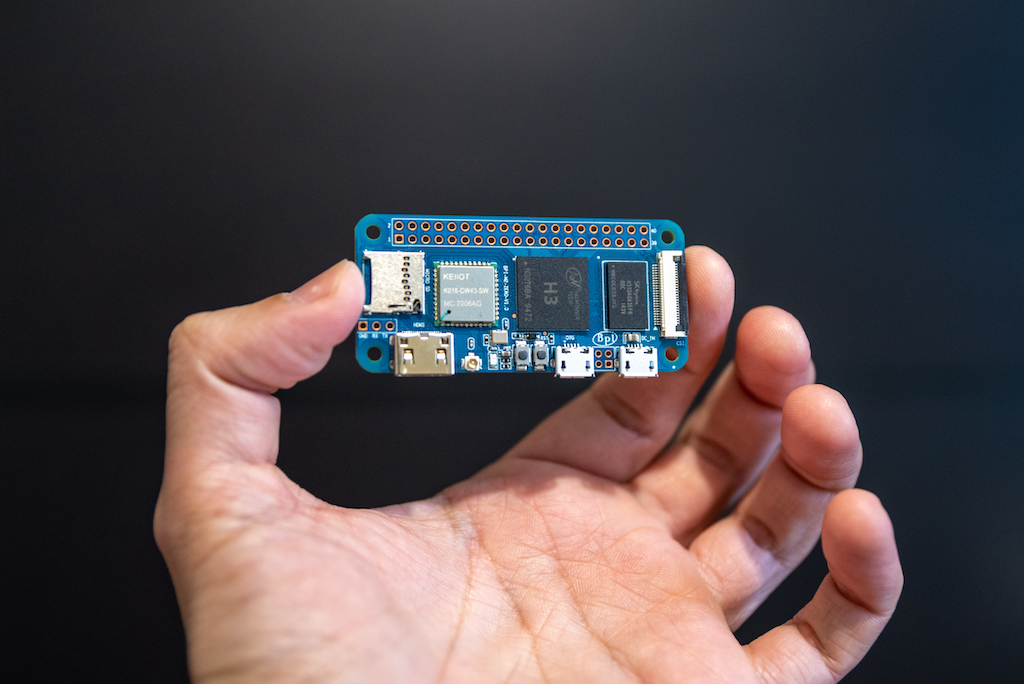
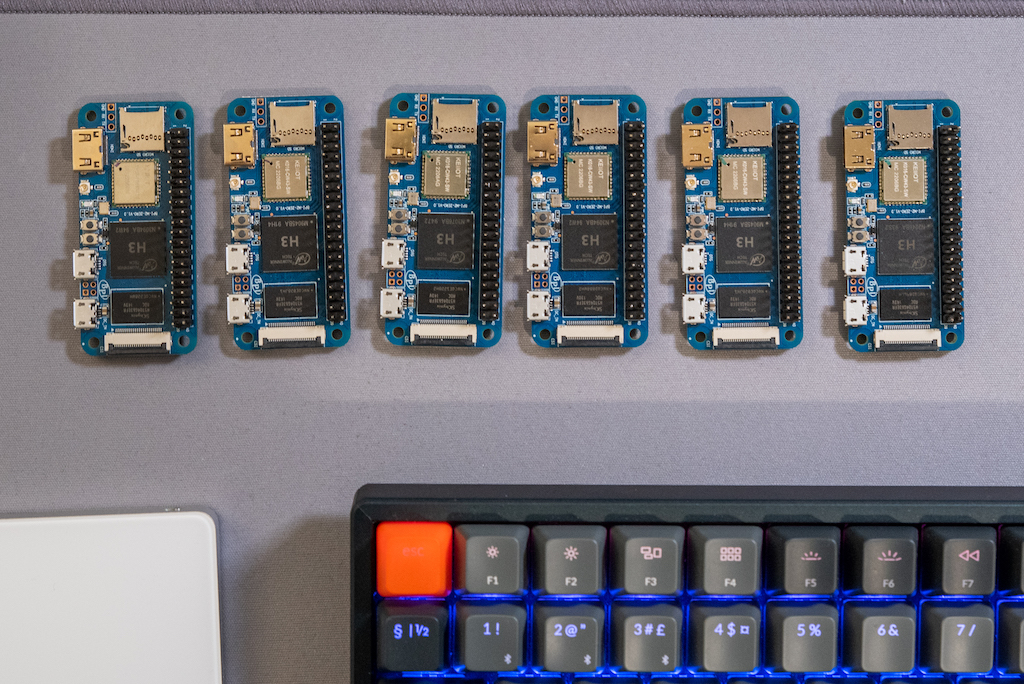
Banana Pi M2 Zero: Technically, you need only 2 devices to make a cluster but to really be able to have a good lab for experimentation on distributed systems, you need at least 3 and ideally 4 or more. I went crazy and got 6 of them. Where can you buy them? You’ll have to Google it. Remember to check the availability. Even though they are much more available than Raspberry Pi, it’s a good idea to double-check that the store you pick has them in stock and ready for delivery.
![Banana Pi M2 Zero]()
- USB cables: Each Banana Pi needs to be powered via a micro USB port. You need a cable with one end of type micro USB and the other of the type your power supply accepts (see next point).
- USB power supply: To power the devices, I recommend a dedicated USB power supply. You could also just use individual chargers, but the setup will be messier and require a power strip with as many outlets as devices as you have. It’s better to use a USB multi-port power supply. I used an Anker PowerPort 6, but there are also good and cheaper alternatives. You’ll have to Google this too. Check that each port can supply 5V and at least 2.4A.
- MicroSD cards: Even though the Banana Pi M2 Zero has 8G of onboard eMMC flash memory, it’s easier to set it up using a micro SD card. Get one per device. Try to use fast ones—it will make quite a difference in performance! I recommend at least 16GB. For reference, I used SanDisk Extreme Pro Micro/SDXC with 32GB which offers a write speed of 90 MB/s and reads at 170 MB/s.
Optional:
- MicroSD card reader: If your computer doesn’t have an SD card port, you’ll need a USB SD card reader to be able to connect your card to your computer and install the operating system.
- Cluster case: You can let your Banana Pi devices spread over your desk if you want to, but chances are that you would be more up to playing with your cluster if it is easy to move around. Since the Banana Pi M2 Zero shares the form factor of the Raspberry Pi Zero, any cluster case for the Raspberry Pi Zero also works for the Banana Pi M2 Zero. The simplest and cheapest option is to use bolts and nuts to stack up the boards (check this example by Jeff Geerling). I recommend one of the cases from The Pi Hut. Check out the Mini Cluster Case for Raspberry Pi Zero or this Mini Cluster Case for Raspberry Pi Zero 2 (with Fans).
- GPIO headers: If you want to connect your Banana Pi to the external world through things such as sensors, you’ll have to put your soldering skills into practice because you’ll need to solder a GPIO header on each device.
![Solder a GPIO header on each device]()
- Fans: Not the ones you’ll get online once you publish a pic of your new shiny cluster; no, the ones that cool down your little computers. This will improve performance at the cost of noise (not too loud) and price (not too expensive). You don’t really need them but if you decide to go for it, make sure that your cluster case can hold the fans and that you have installed the GPIO headers (see the previous point).
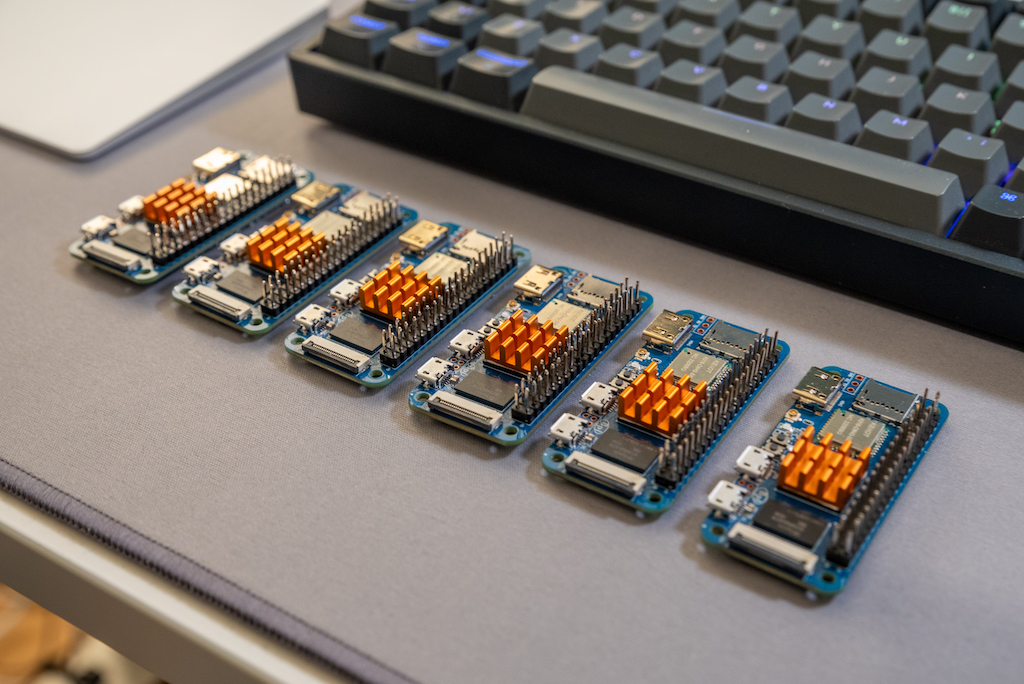
- Heat sinks: Heat sinks can be used as an alternative to fans or in conjunction with them. Any heat sink for the Raspberry Pi Zero works with the Banana Pi M2 Zero.
![Heat sinks]()
- Antennas: I have to say that a negative point of the Banana Pi M2 Zero is the poor Wi-Fi connection it has. This can be improved using external antennas, though. Check this review by Bret Weber for a comparison of different kinds of antennas compatible with the Banana Pi M2 Zero.
- Wi-Fi repeater: If you don’t want to install individual antennas or want to be able to connect your cluster to different networks, for example when traveling, a Wi-Fi repeater is an excellent option. With this, you can connect your little computers to the repeater and only change the connection configuration in the repeater when you move from one network to another. If you put the repeater close to the cluster, you don’t need to install individual antennas on each device. This works great for me since as a Developer Advocate, I can take the cluster with me and use it during live demos without having to reconfigure the connection on each node.
Assembling the Cluster
One of the fun parts of building this cluster is the physical assembly of the boards on a case. If you want to use a case and fans, start by soldering the GPIO headers on the Banana Pi boards. It had been years since I used a soldering iron for the last time, so I struggle with the first boards. I recommend watching videos on YouTube and practicing if you don’t have previous experience or your soldering skills feel a bit rusty. The main key to soldering the pins properly is to realize that you need to make the pin and the pad on the board hot, not the solder. Keep it in mind.
Depending on the case that you select, the process of assembling varies. I’m sure you’ll figure it out. I first mounted the boards and the fans on each layer and then stack them one by one.
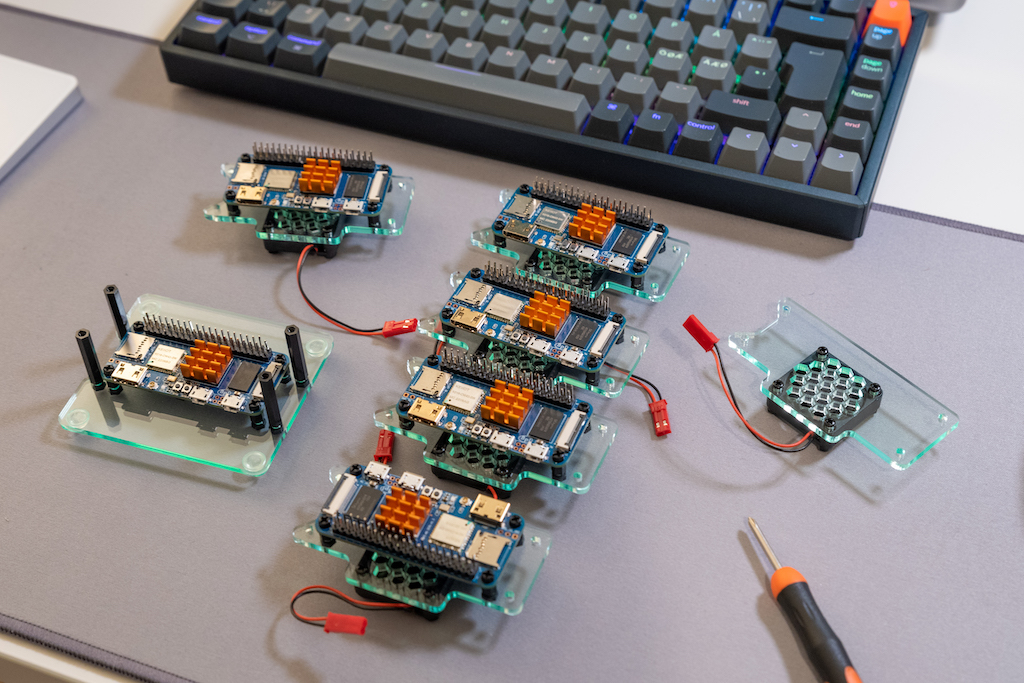
Something I also did, was testing that each fan was working correctly before mounting it on the layer. In fact, one of the fans was broken and produces a much louder noise than the others. Fortunately, I had a spare fan and was able to replace it immediately. As you start to stack layers, the rack starts to get in shape and when you mount the last layer, you get a rewarding feeling.
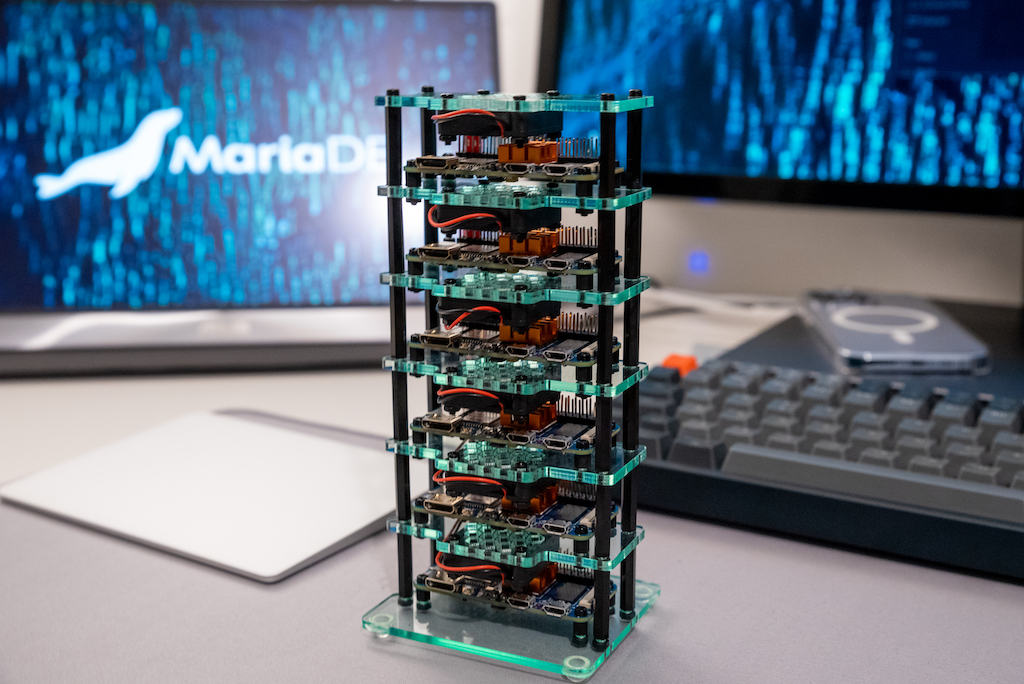
The last step is to connect all the boards to the USB power supply and turn them on. However, before that, we need to install the operating system on the micro SD cards.
Installing Armbian
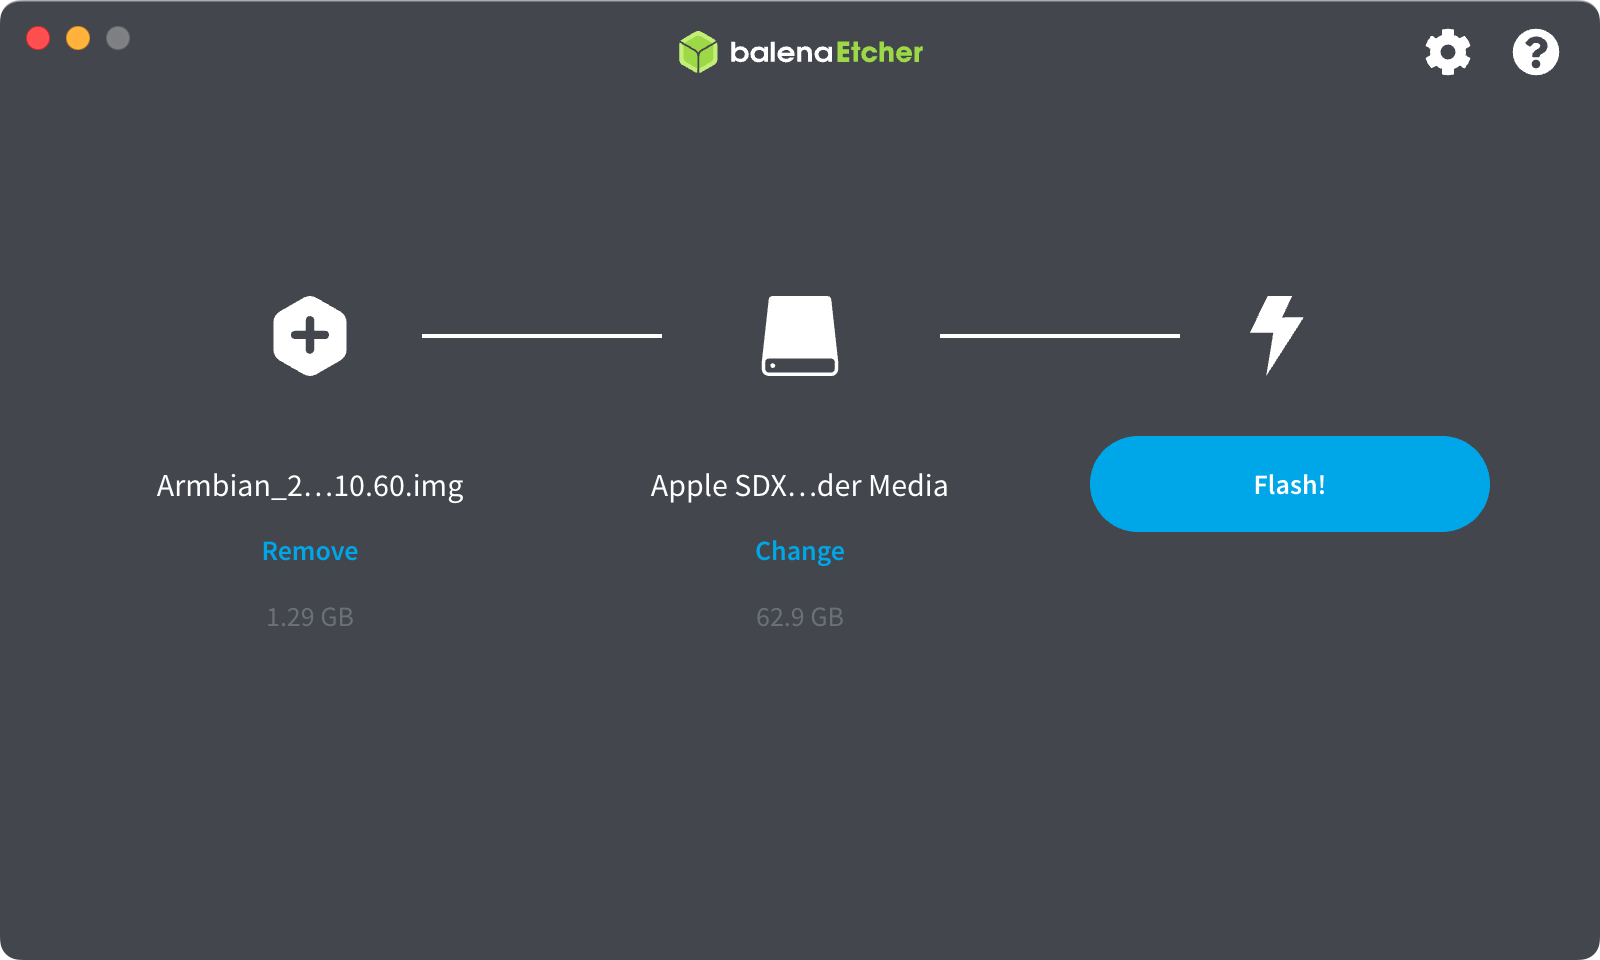
There are Linux and Android operating system images for the Banana Pi M2 Zero. We are going to use Linux here. Specifically, Armbian 21.08.1. You can download the image from this page (Armbian_21.08.1_Bananapim2zero_focal_current_5.10.60.img.xz). To install Armbian on the micro SD cards, you need a program like balenaEtcher. Download and install this tool on your computer. Select the Armbian image file and the drive that corresponds to the micro SD card. Flash the image and repeat the process for each micro SD card.
Configuring Banana Pi M2 Zero Headless (For Real)
I tried different things to configure the Banana Pi M2 Zero to automatically connect to my Wi-Fi network during the first boot, but I didn’t succeed. I defaulted to preconfigure the network connection using a static IP so that I could later continue further configurations through SSH without having to scan ports (when using DHCP) or using external monitors.
Configuring the Wi-Fi Connection
To configure the Wi-Fi connection, Armbian includes the /boot/armbian_first_run.txt.template file which allows you to configure the operating system when it runs for the first time. The template includes instructions, so it’s worth checking. You have to rename this file to armbian_first_run.txt. Here’s what I used:
FR_general_delete_this_file_after_completion=1
FR_net_change_defaults=1
FR_net_ethernet_enabled=0
FR_net_wifi_enabled=1
FR_net_wifi_ssid='my_2.4G_connection_id>'
FR_net_wifi_key='my_password'
FR_net_wifi_countrycode='FI'
FR_net_use_static=1
FR_net_static_gateway='192.168.1.1'
FR_net_static_mask='255.255.255.0'
FR_net_static_dns='192.168.1.1 8.8.8.8'
FR_net_static_ip='192.168.1.171'
Use your own Wi-Fi details including connection name (you have to use a 2.4G connection), password, country code, gateway, mask, and DNS. Remember to use the connection to the Wi-Fi repeater if you are using one.
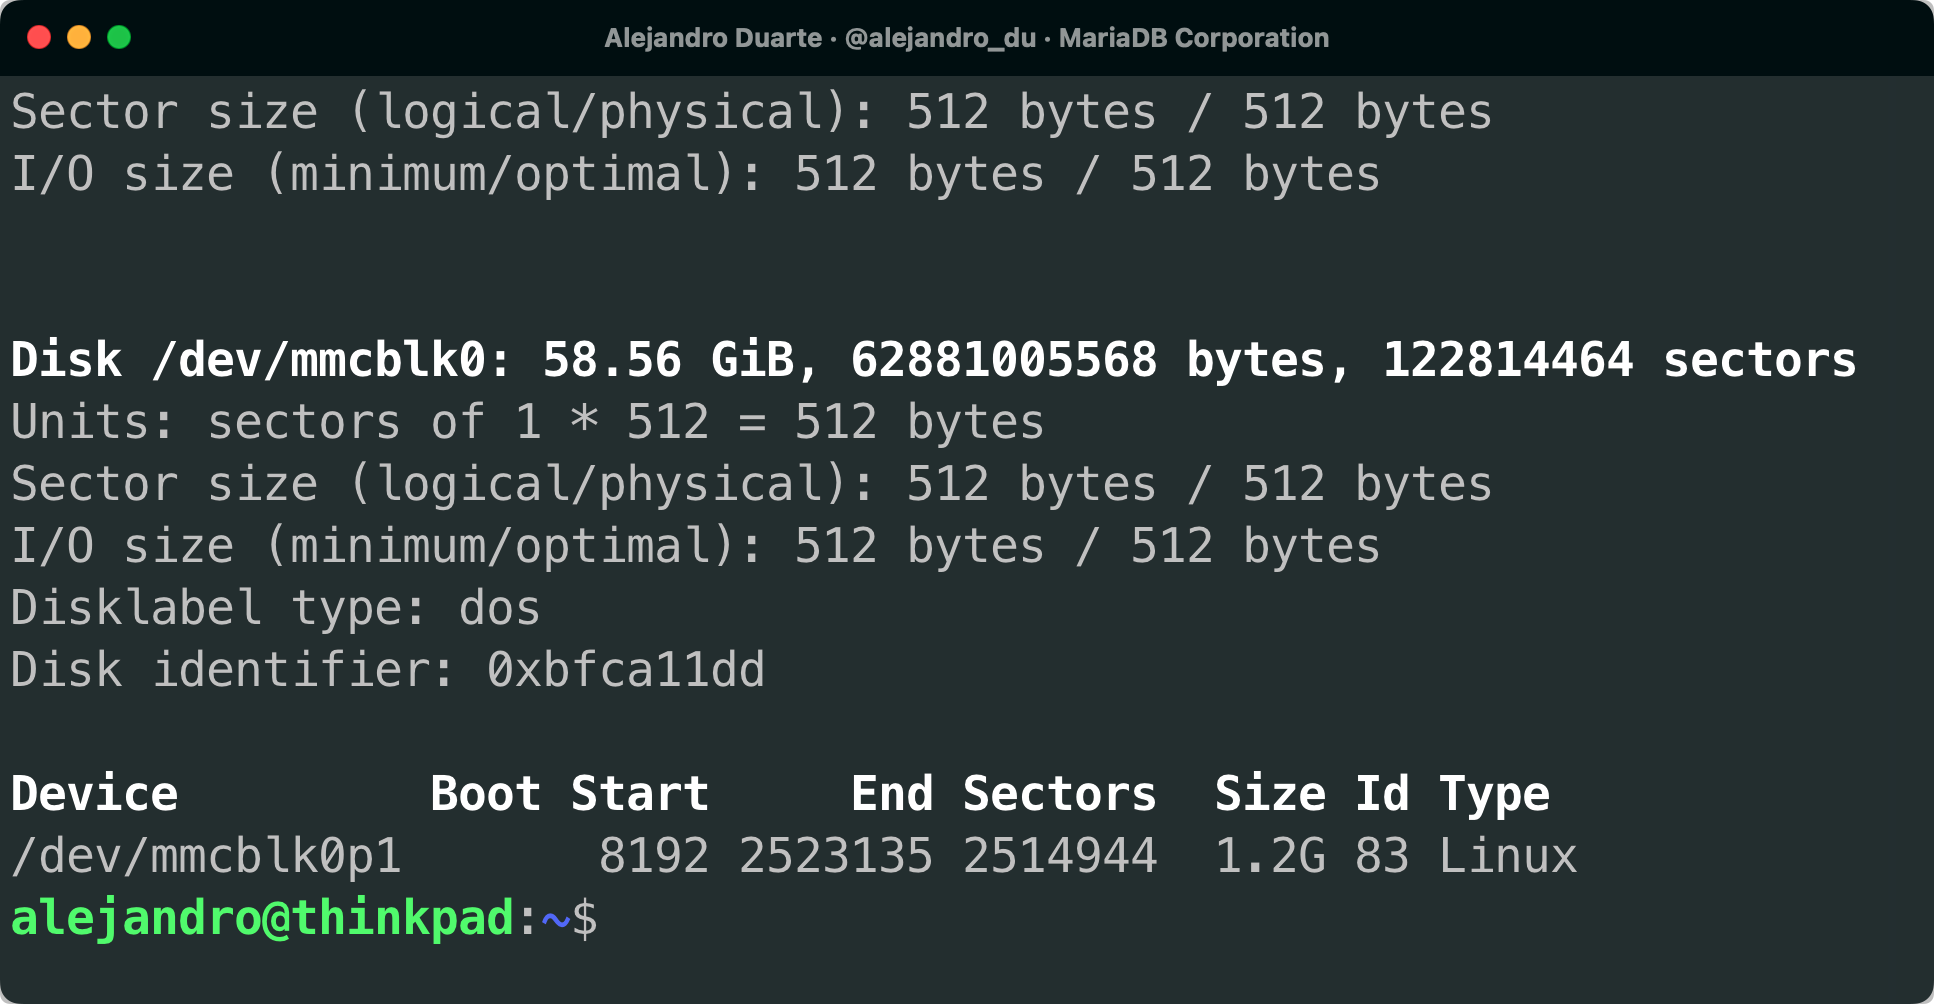
Another caveat is that I wasn’t able to read the SD card from macOS. I had to use another laptop with Linux on it to make the changes to the configuration file on each SD card. To mount the SD card on Linux, run the following command before and after inserting the SD card and see what changes:
sudo fdisk -lIn my case, the SD card is at /dev/mmcblk0p1:
Now I can mount the SD card:
sudo mount /dev/mmcblk0p1 /media/sdcard/Since I had 6 nodes I created a Bash script to automate the process. The script accepts as a parameter the IP to set. For example:
sudo ./armbian-setup.sh 192.168.1.171I run this command on each of the six SD cards changing the IP address from 192.168.1.171 to 192.168.1.176.
Connecting Through SSH
Now it’s time for the fun part. Insert the flashed and configured micro SD cards on each Banana Pi M2 Zero and turn the power supply on. Be patient! Give the small devices time to boot. The first time it can take several minutes. Use the ping command to check whether the device is ready and connected to the network:
ping 192.168.1.171Once it responds, connect to the mini-computer through SSH using the root user and the IP address that you configured:
ssh root@192.168.1.171The default password is:
1234Follow the steps to finish the configuration and repeat the process for each Banana Pi.
Setting up the Cluster Using Ansible
Armbian has the armbian-config CLI tool that allows you to configure the system and install additional software using an interactive text-based user interface.
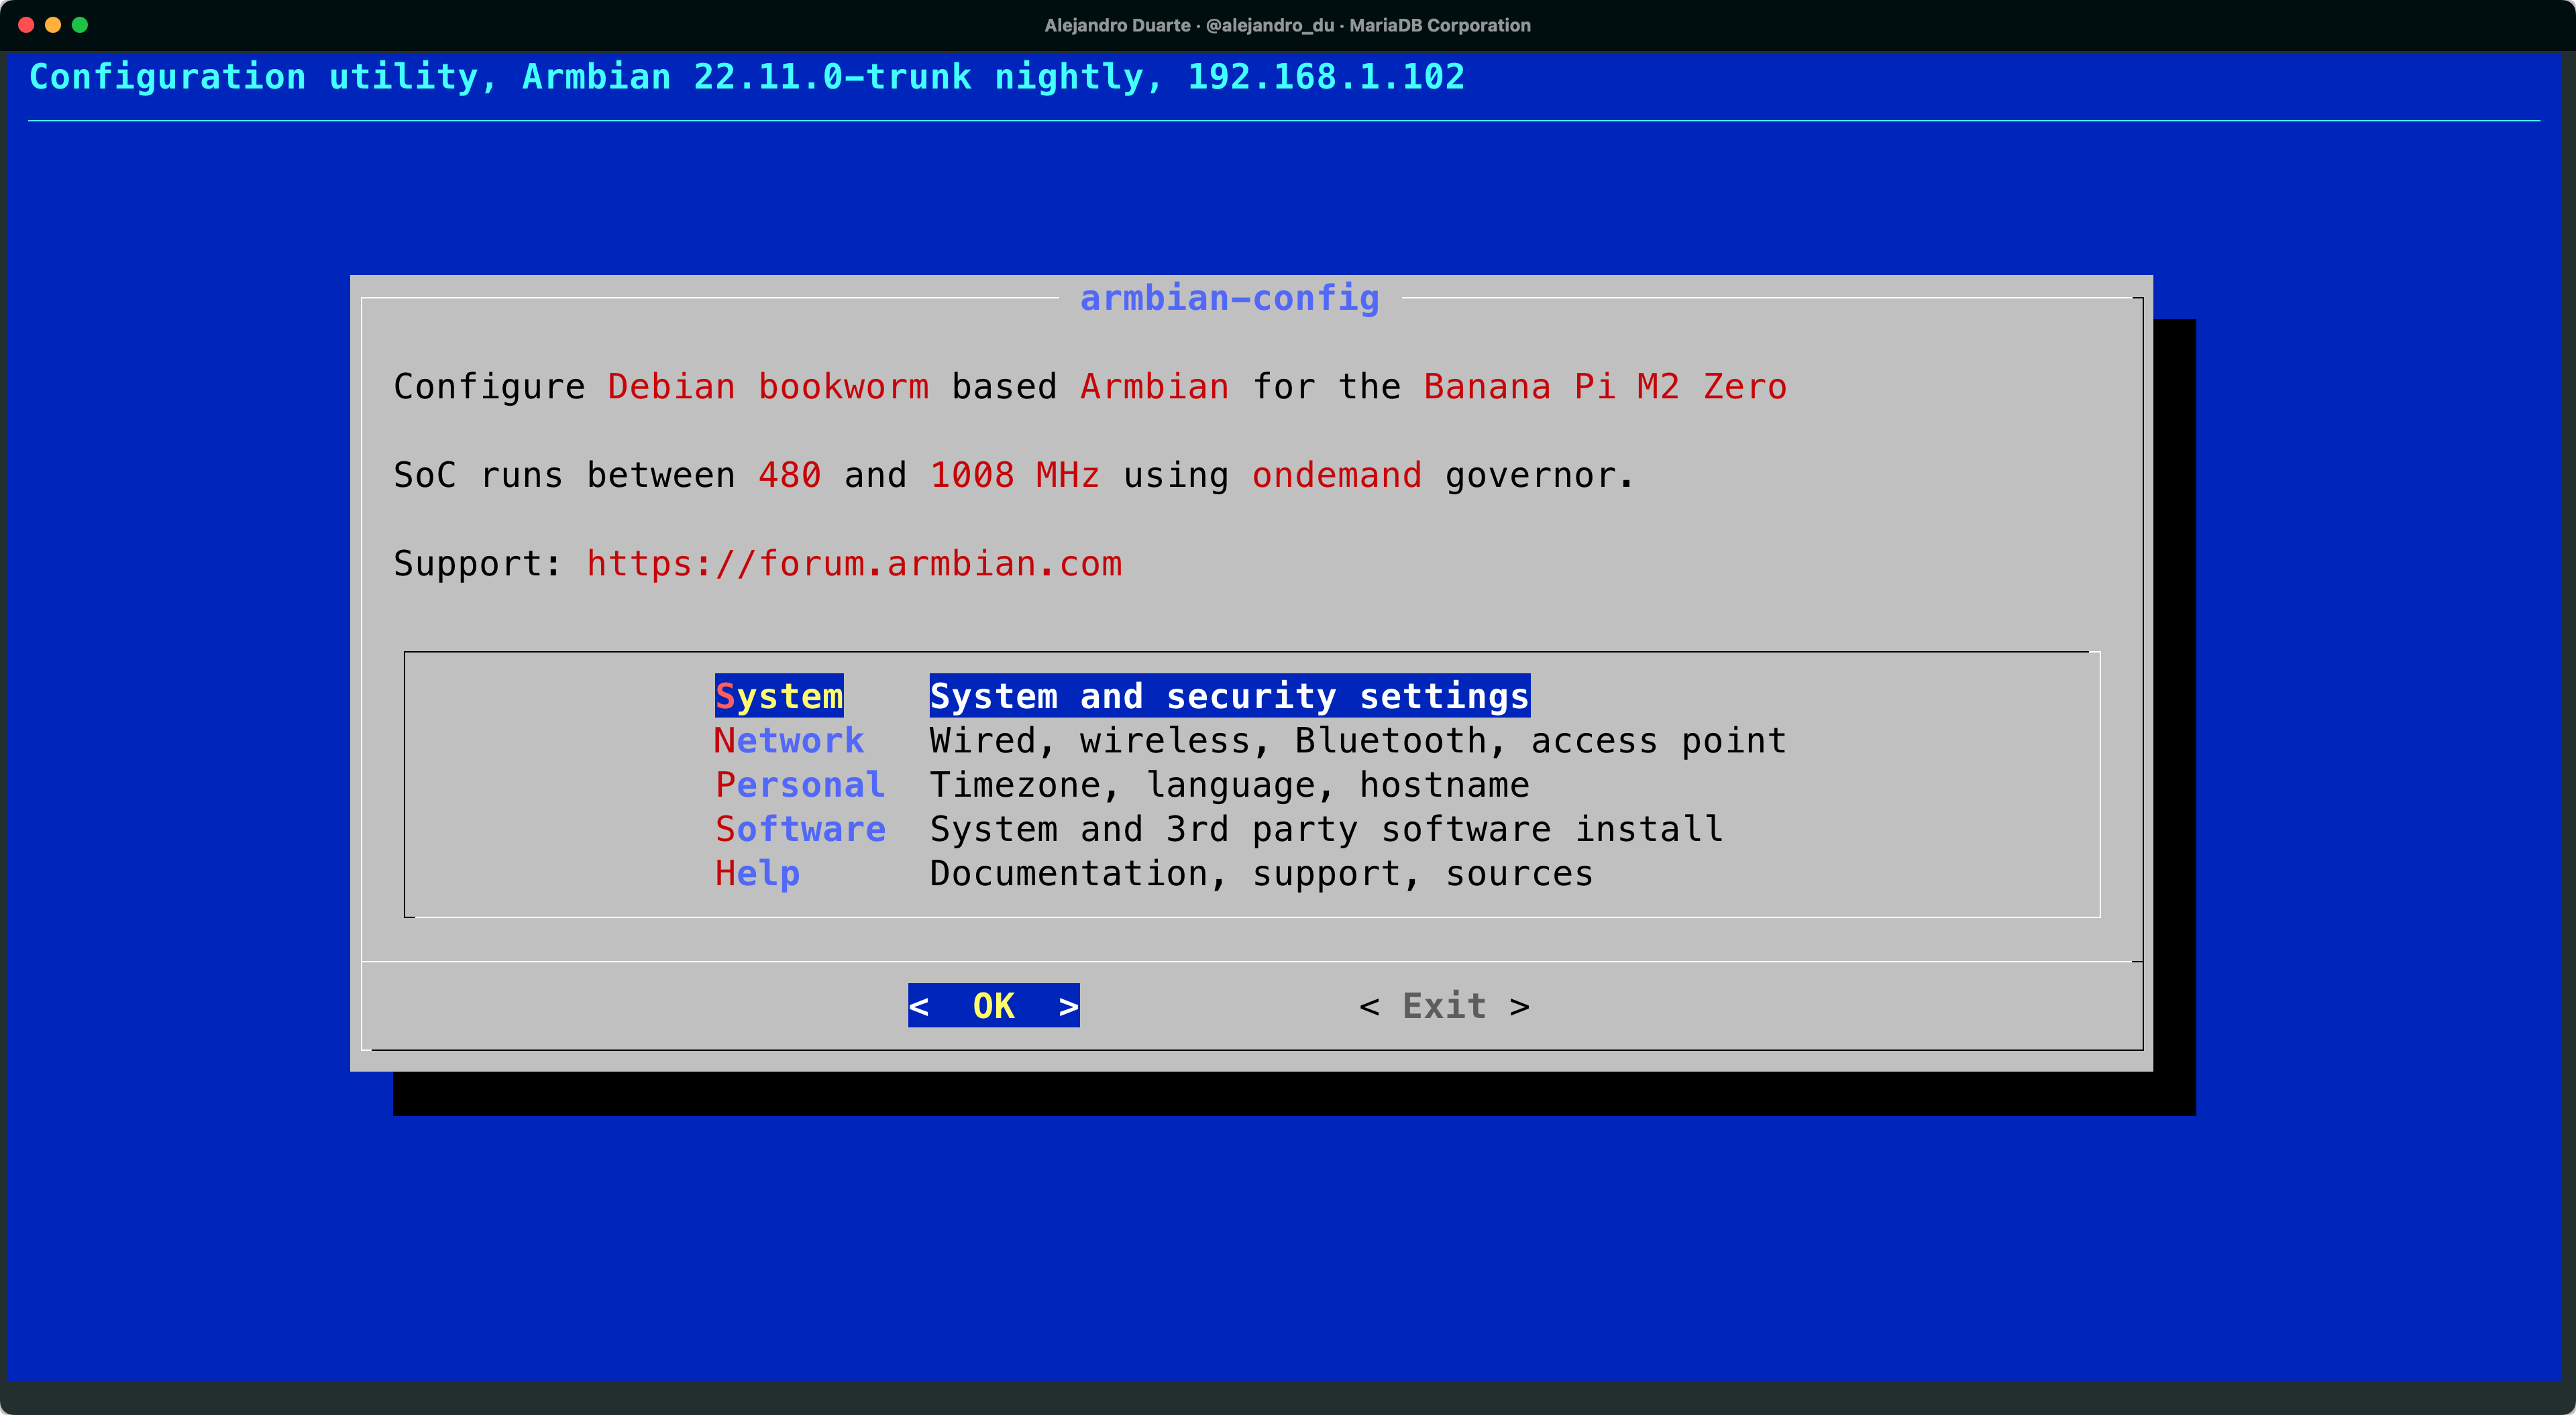
However, since we are building a cluster with potentially hundreds or thousands of nodes (not really, only six in my case, but if you have tons of them, please let me know), it’s better to automate this process. Ansible is a great tool for this.
Installing and Configuring Ansible
You have to install Ansible on your computer and generate a configuration file:
sudo su
ansible-config init --disabled -t all > /etc/ansible/ansible.cfg
exit
In the /etc/ansible/ansible.cfg file, set the following properties (enable them by removing the semicolon):
host_key_checking=False
become_allow_same_user=True
This just makes the whole process easier. Never do this in a production environment!
Create an Ansible Inventory
An Ansible inventory is a file that lists the machines on which it will operate. You can define the inventory in the /etc/ansible/hosts file. Since I have six nodes I defined the following inventory:
##############################################################################

# 6-node Banana Pi cluster

##############################################################################

[bpies]
192.168.1.171        ansible_user=pi        hostname=bpi01
192.168.1.172        ansible_user=pi        hostname=bpi02
192.168.1.173        ansible_user=pi        hostname=bpi03
192.168.1.174        ansible_user=pi        hostname=bpi04
192.168.1.175        ansible_user=pi        hostname=bpi05
192.168.1.176        ansible_user=pi        hostname=bpi06

[bpies_manager]
bpi01.local        ansible_user=pi

[bpies_workers]
bpi[02:06].local    ansible_user=pi
Adjust the values to your own setup. Add one manager node to the bpies_manager group and one or more nodes to the bpies_workers group. These will be the Docker Swarm manager and worker nodes respectively.
Now we are ready to automate the configuration process!
Configuring Nodes and Setting up Docker Swarm With Ansible
Ansible includes the concept of playbooks. A playbook is a list of tasks that can be executed on the hosts defined in an inventory. Since I promised it’d be easier for you, I created Ansible playbooks for setting up a Docker Swarm cluster on your Banana Pi devices.
Clone the following GitHub repository:
git clone https://github.com/alejandro-du/banana-pi-cluster-ansible-playbooks.gitThe repository includes several .yml files. Each file is an Ansible playbook. Let’s start by configuring the LEDs (so that they blink when there’s activity), setting a hostname, and installing Avahi (so that you can forget about IPs). Run the following:
ansible-playbook configure-hosts.yml --ask-become-passIntroduce the password that you configured for the root user and press <Enter> twice. Pay attention to the LEDs in your Banana Pi boards. They should start blinking on processor activity.
Now run the following to set up a Docker Swarm cluster on your Banana Pi devices:
ansible-playbook docker-swarm.yml --ask-become-passSSH into the manager node and run the following:
docker node ls
You should see your Docker Swarm cluster ready:
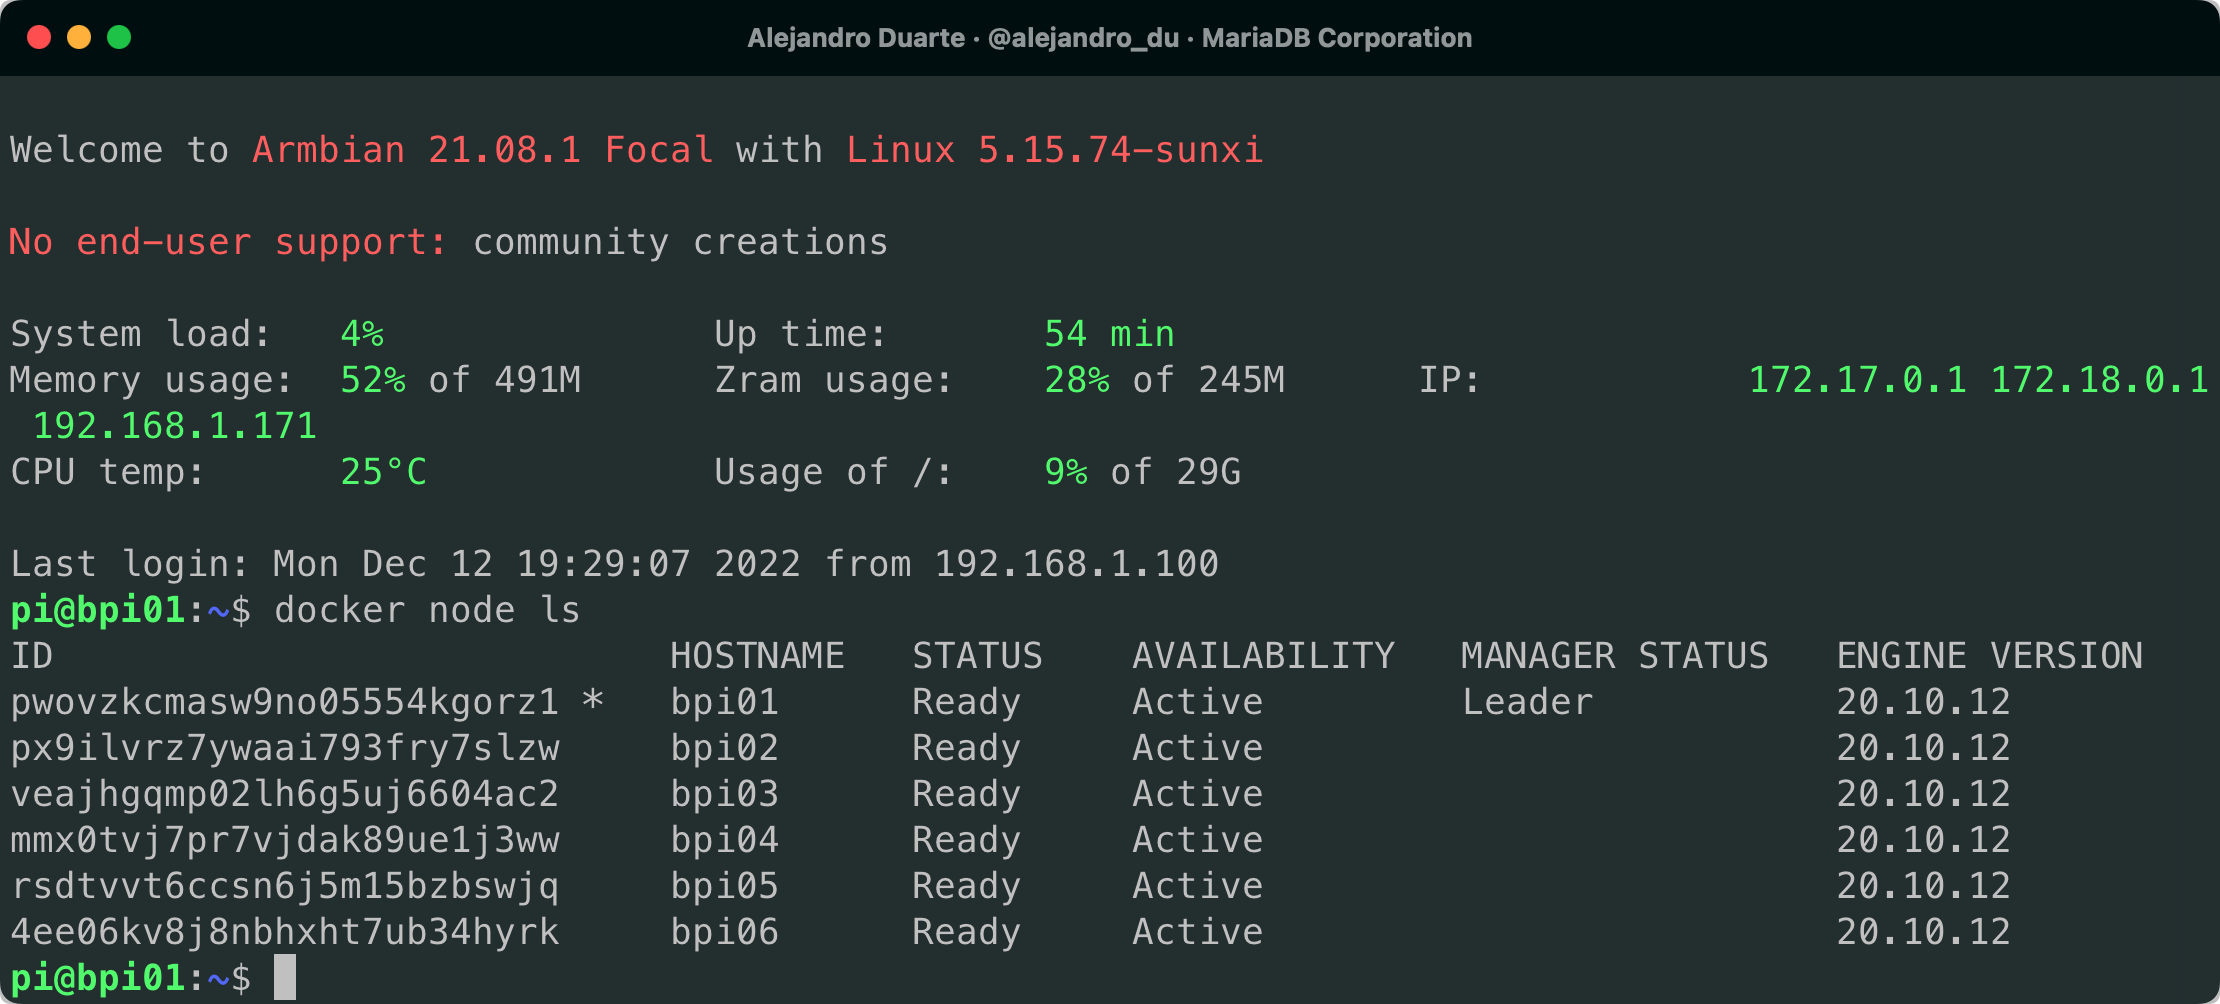
Congrats! You have a running Docker Swarm cluster running on Banana Pi M2 Zero!
Deploying a Replicated MariaDB Database on Docker Swarm
MariaDB is one of the most popular open-source relational databases. It supports any workload through its purpose-built pluggable storage engines. It has analytical capabilities (with ColumnStore) and unlimited write scalability with high availability (with Xpand). It also supports basic replication with a primary node and multiple replicas, a perfect use case for a Banana Pi cluster.
One of the cool things about open-source products is that their ecosystems are usually huge. At least for popular projects. This is the case with MariaDB. The Banana Pi M2 Zero features a 32-bit ARM processor, so it was easy for me to find a MariaDB Docker image on Docker Hub built for this architecture. I extended the image to simplify the deployment of a replicated MariaDB topology on Docker Swarm suitable for demos and experimentation. Be warned that these images are not for production environments! They are only meant to be used in demos where there’s no sensitive information or need for support. You can see the source code of the images on this GitHub repository.
With Docker Swarm, you can easily deploy (and remove) a stack defined in a Docker compose file. SSH into your manager node and create a new file with the name replication.stack.yml and the following content:
version: "3.9"
services:
  primary:
    image: alejandrodu/mariadb-arm-primary
    ports:
    - "3306:3306"

  replica:
    image: alejandrodu/mariadb-arm-replica
    environment:
      PRIMARY_SERVER_IP_ADDRESS: primary
    ports:
    - "3307:3306"
    deploy:
      replicas: 5
Pretty simple, right? You just have to set the number of replicas for the replica service (in the last line of the file) to the number of Banana Pi boards minus 1 (the other one is for the primary service). I have 6 boards, so I specified 5 replicas. The goal is to have one container per Banana Pi board.
Deploy the stack as follows:
docker stack deploy -c replication.stack.yml mariadbDocker downloads and creates the services (primary and replica) with the number of replicas that you specified. You can check the status by running:
docker stack mariadb ps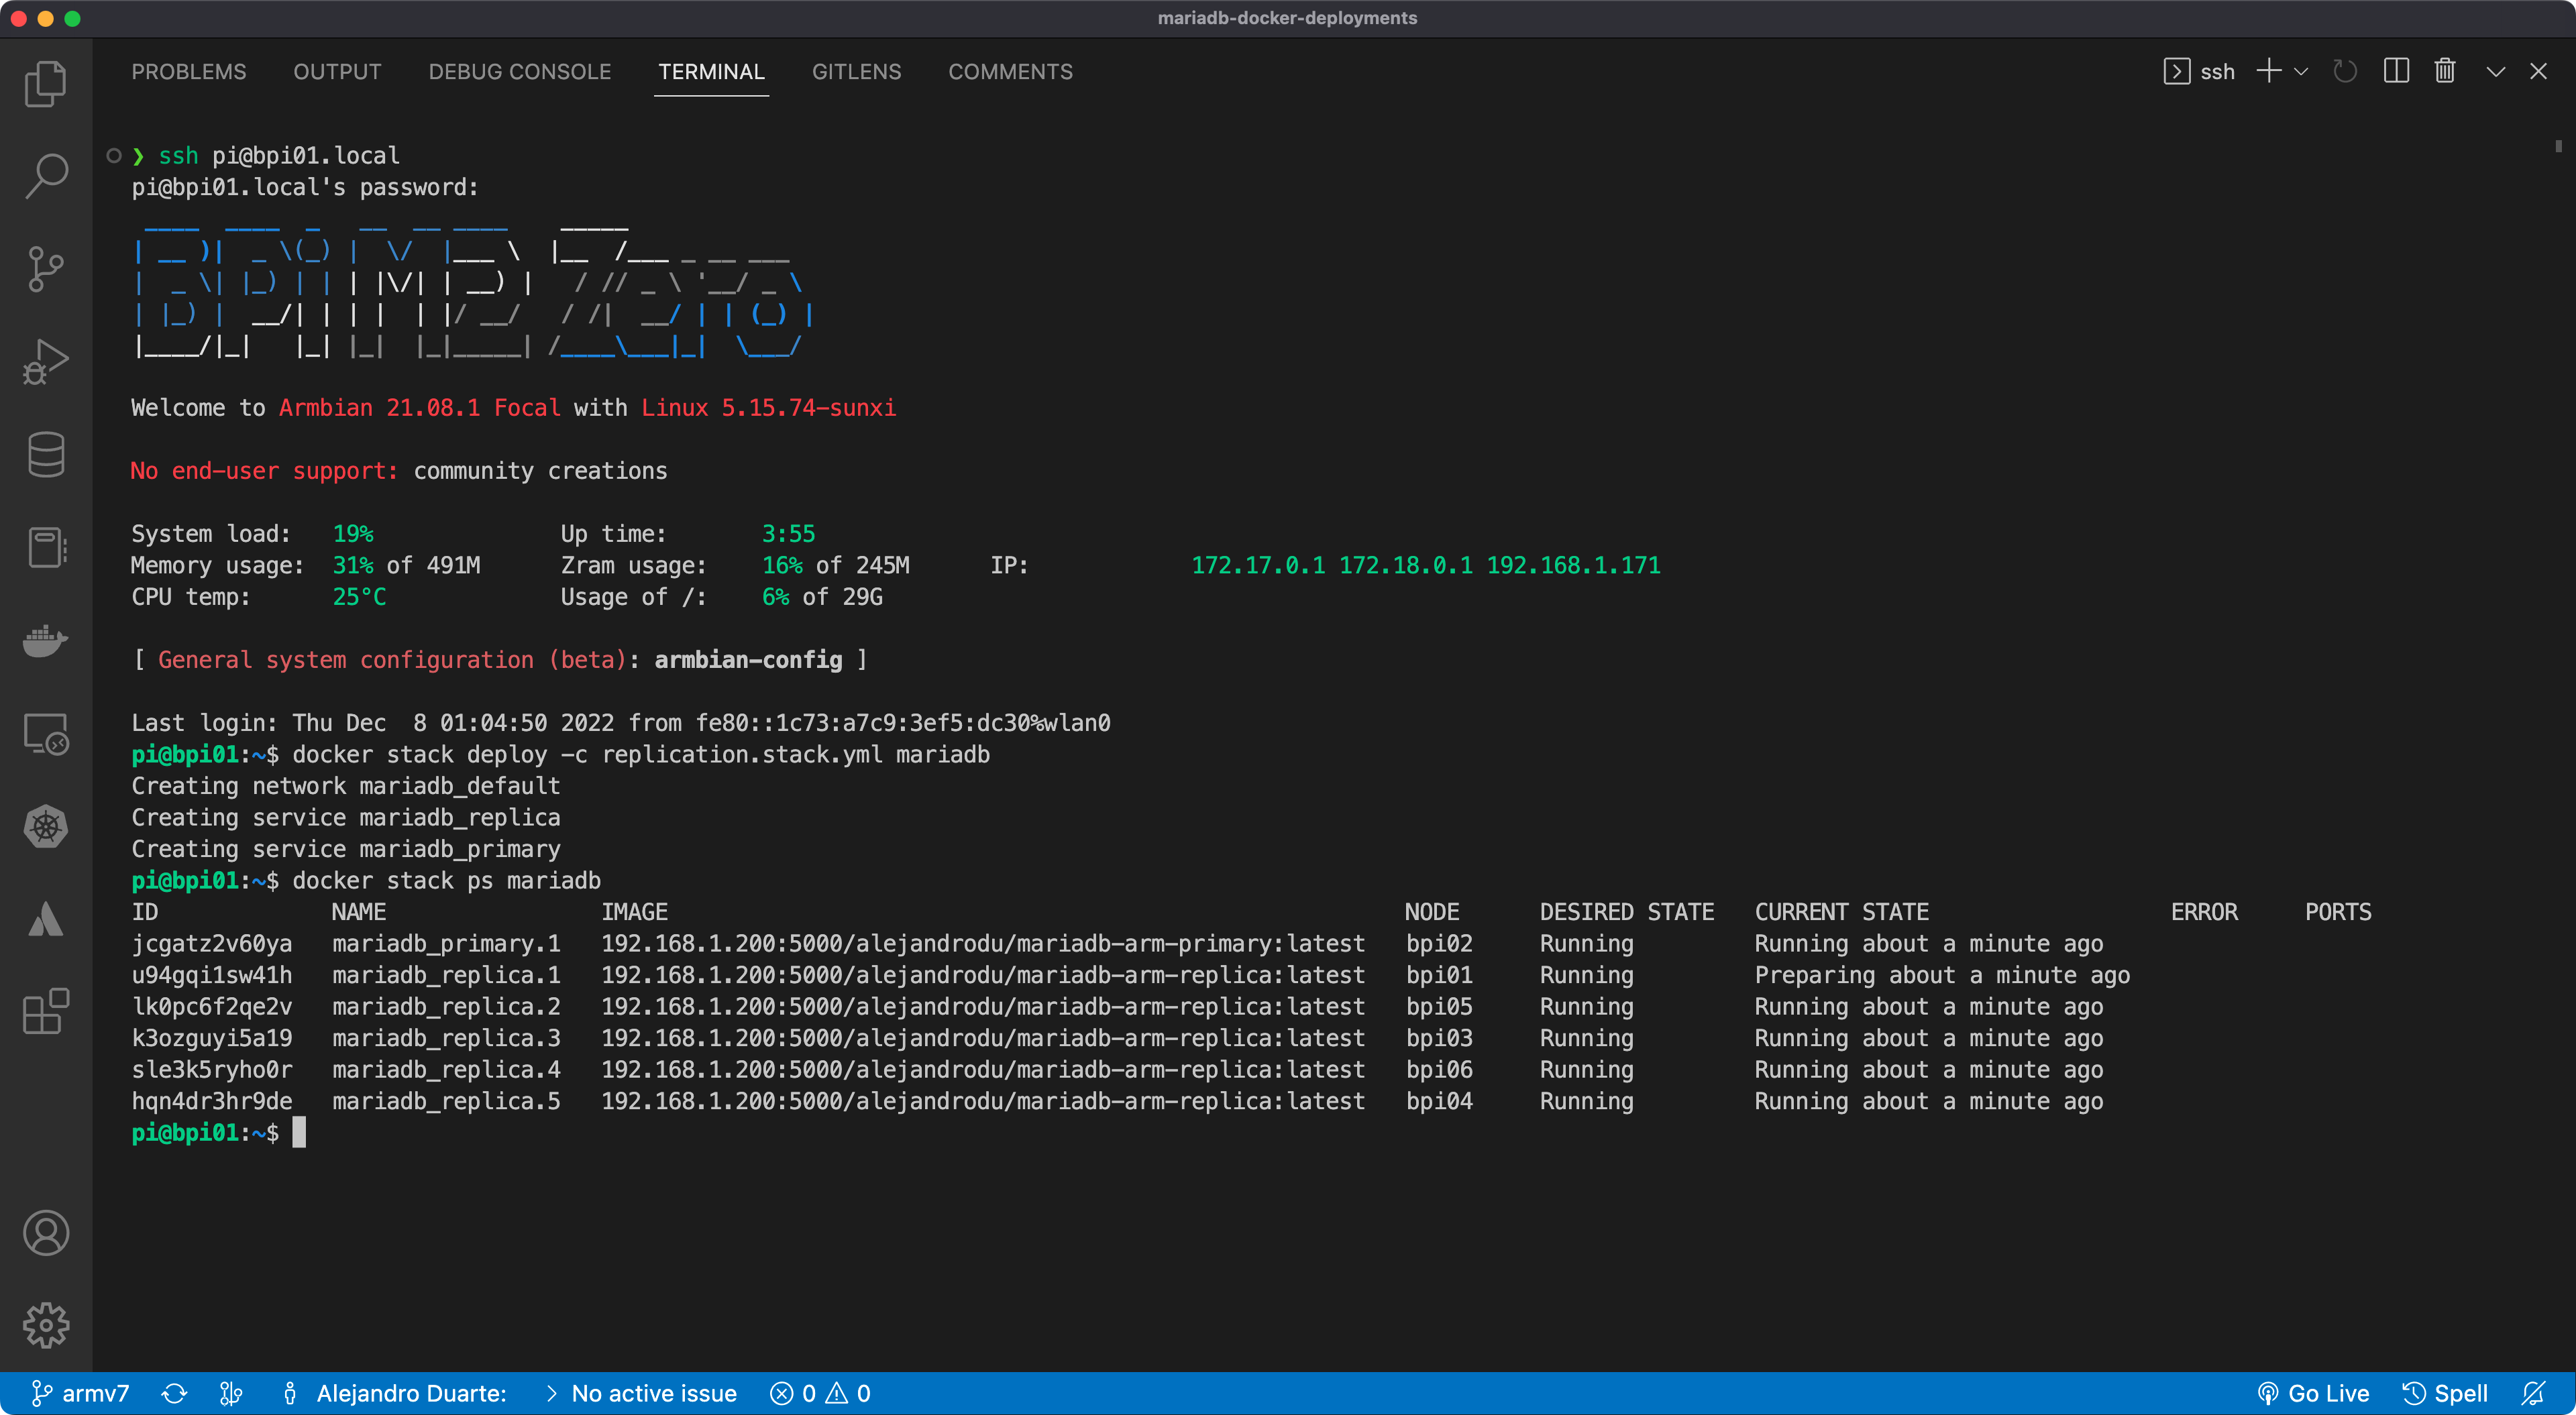
To test the database and replication features, you can use your computer to connect to the MariaDB database using the MariaDB CLI client (mariadb), or a GUI tool such as DBeaver, HeidiSQL, or even VS Code through a SQL client extension. You can connect to the database through any node even if no containers for the service are running on that node. Docker forwards the request to a node running the service. The Docker images automatically create the following credentials to access a database named demo:
- Database user:
user - Password:
password
Here’s a screenshot of the connection details I used to connect to the primary service (the primary database) using the Database Client extension for VS Code:
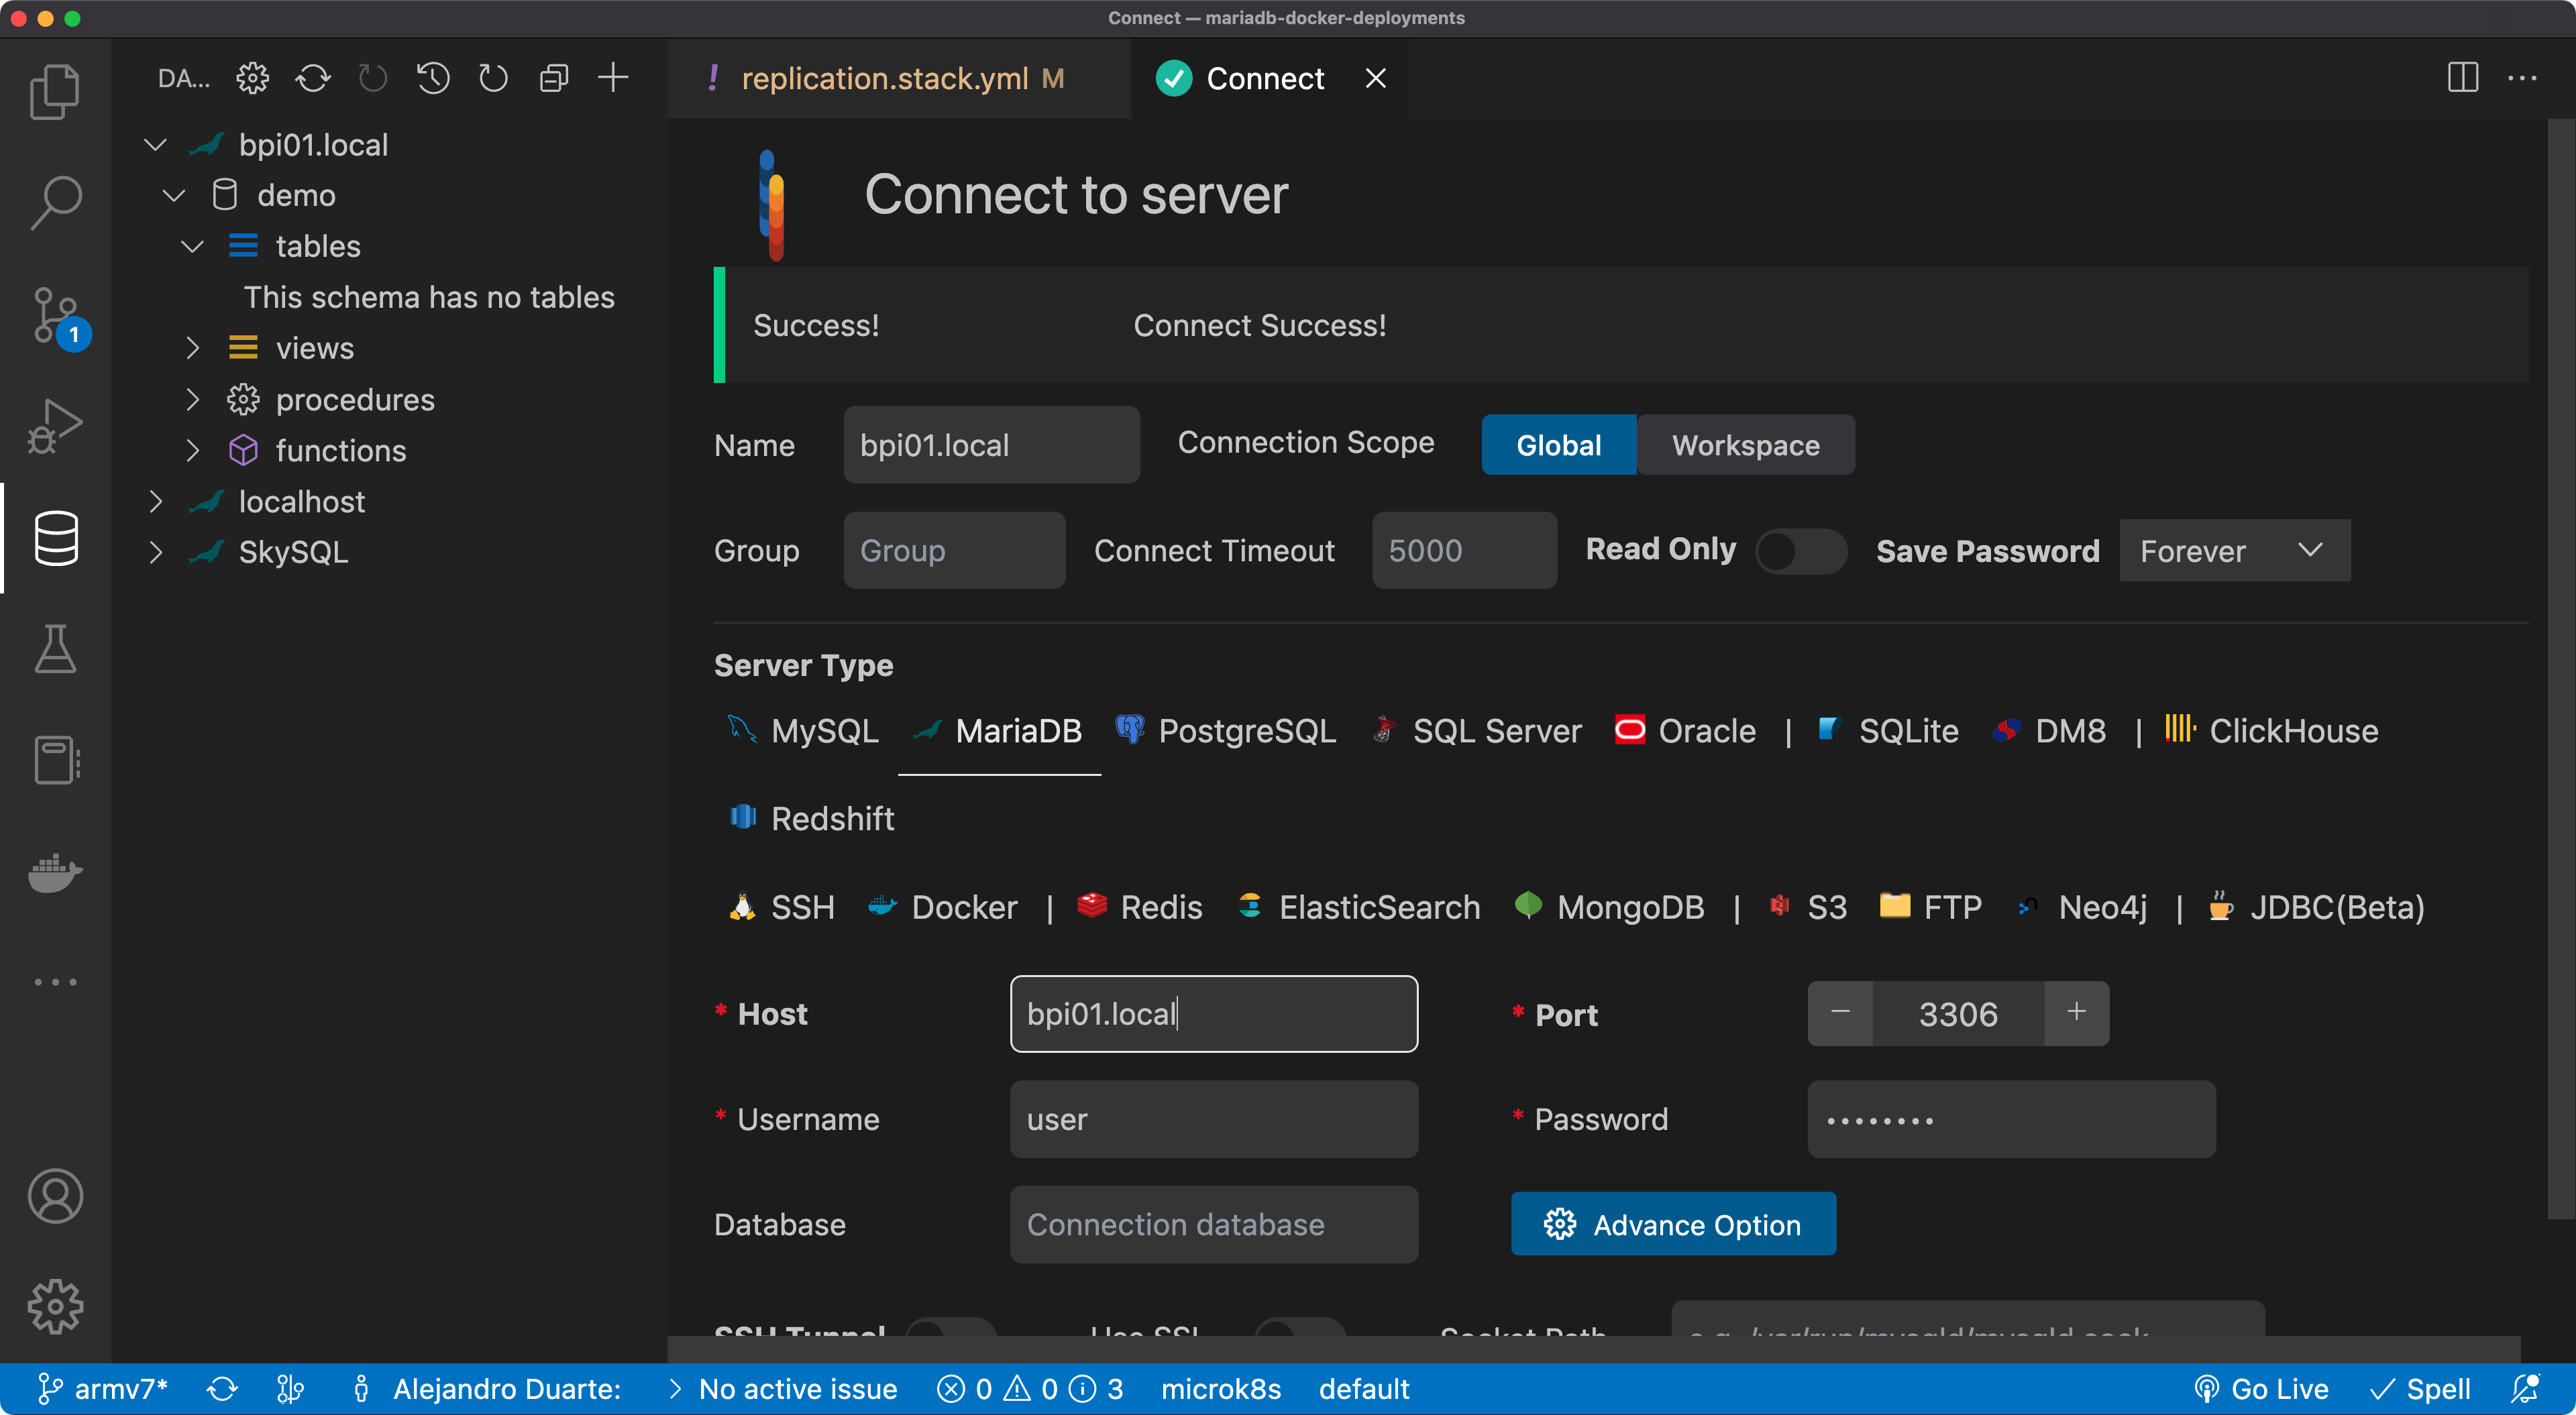
The reason this connects to the primary database is that the stack we defined in the replication.stack.yml file forwards requests on port 3306 to a container running the primary service. On the other hand, requests to port 3307 are forwarded to one of the containers running the replica service.
Once connected to the primary service using port 3306 through any node, check to which host are you connected:
SELECT @@hostname;This is the hostname assigned by Docker to the container running the primary database. Take note of this value (mine was 3ac9e65c3601).
Now create a new table and insert some data:
CREATE OR REPLACE TABLE demo.message(
    id INT AUTO_INCREMENT PRIMARY KEY,
    content TINYTEXT NOT NULL
) engine=Aria;

INSERT INTO demo.message(content) VALUES ("It works!");
Notice that for fun, and to show you something new (maybe), I used the TINYTEXT data type which allows for max 255 characters. Our cluster is tiny so I figured our table column should be tiny as well. Silly jokes aside, also notice that I used the Aria storage engine just to illustrate the concept of pluggable storage engines in MariaDB. Most of the time, what you need is the default InnoDB engine and you can run cross-join queries on tables that use different storage engines in the same SQL query. There are many storage engines available: check them out! Aria is suitable for ready-heavy workloads but it doesn’t support foreign keys and other features available in InnoDB. For this demo, Aria works just great.
Before moving on, check that the data is stored in the primary database:
SELECT * FROM demo.message;Create another database connection similar to the previous one, but this time, use port 3307 to connect to one of the replica nodes. Docker will pick one for you. Again, you can do this using any SQL client. To show you a different example, here’s how to connect to a replica database using the MariaDB CLI client:
mariadb --host 192.168.1.171 --port 3307 -u user -p
This time you have to use the IP address instead. You can use the IP address of any of the Banana Pi computers.
Check to which node you are connected this time:
SELECT @@hostname;You’ll get the hostname of the container that Docker selected to serve the replica service. I got f236189e5f4c, which is different from 3ac9e65c3601 (the host running the primary database). This means you are connected to a different container and very likely to a different Banana Pi board.
We inserted the data in a different node (the primary database), let’s see whether the data is being automatically replicated to the replica node to which we are connected:
SELECT * FROM demo.message;You should see the data replicated:

Success! Data replication is working. Your applications can load-balance reads through all the replica nodes if they connect to the database using port 3307 and perform writes if they connect to the database using port 3306. This could be further improved by using a database proxy configured to perform transparent read-write splitting, but this is out of the scope of this article.
What’s Next?
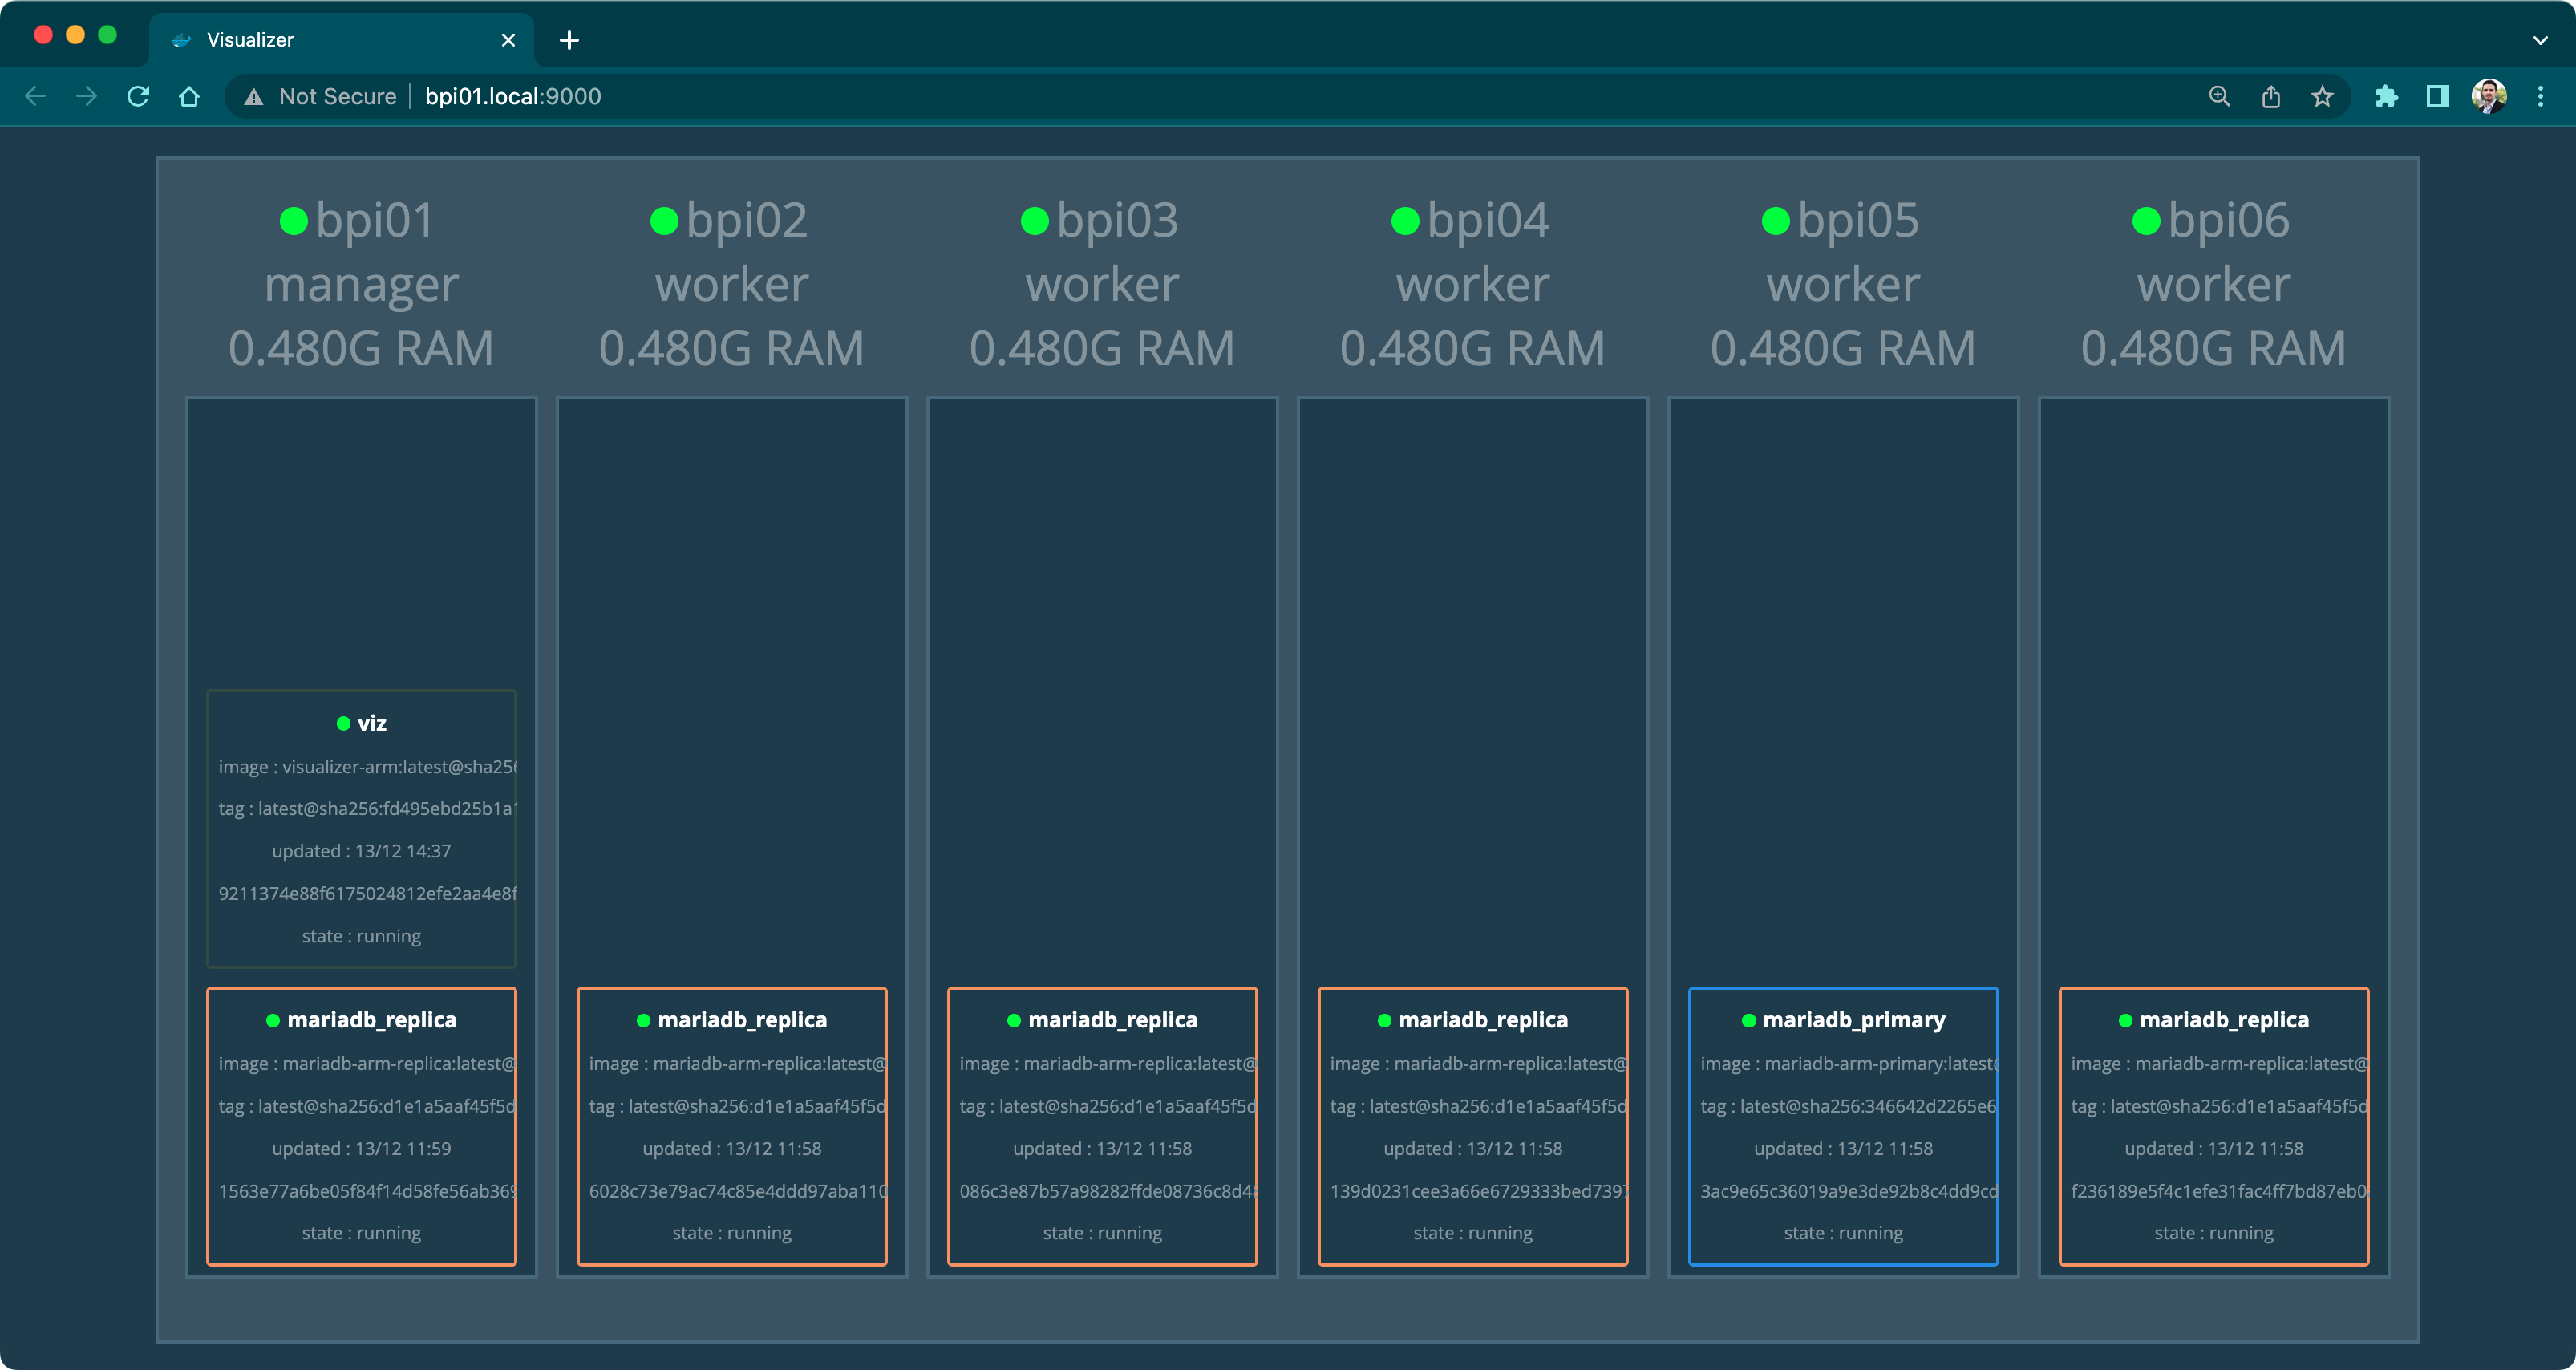
You now have a great lab to learn distributed computing concepts, tools, and technologies. You saw only one example (a distributed database) but there’s much more that you can do with your new shiny cluster. Try for example Dockerizing a stateless application (for instance a web service) and make it connect to the database you just deployed. You might want to explore visualization tools as well. For example, you can deploy the Docker Swarm Visualizer as follows (or equivalent in a Docker compose file):
docker service create \
  --name=viz \
  --publish=9000:8080 \
  --constraint=node.role==manager\
  --mount=type=bind,src=/var/run/docker.sock,dst=/var/run/docker.sock \
  alexellis2/visualizer-arm:latest
Point your browser to http://bpi01.local:9000 and see how the containers are distributed in the cluster:
Deploy your own applications and enjoy your new Banana Pi M2 Zero cluster!
Opinions expressed by DZone contributors are their own.

Comments