Azure Logic Apps Lifecycle – The Big Picture
Get a high-level view of Logic Apps with this article that takes a look at the design, development, and deployment of a Logic App.
Join the DZone community and get the full member experience.
Join For Free
In this blog post, I would like to discuss the big picture of Azure Logic Apps lifecycle.
Logic Apps supports various scenarios such as:
- Messaging
- Data wrangling
- B2B and EDI
- EAI (Cloud Native and Hybrid)
- Process Automation
- Smart Solutions
We showcased some of these scenarios on Middleware Friday and Serverless360 blog posts.
A Holistic View
With Logic Apps you have a whole range of connectors to connect to anything and everything. This allows you to build any integration and business flow on the Azure Platform.
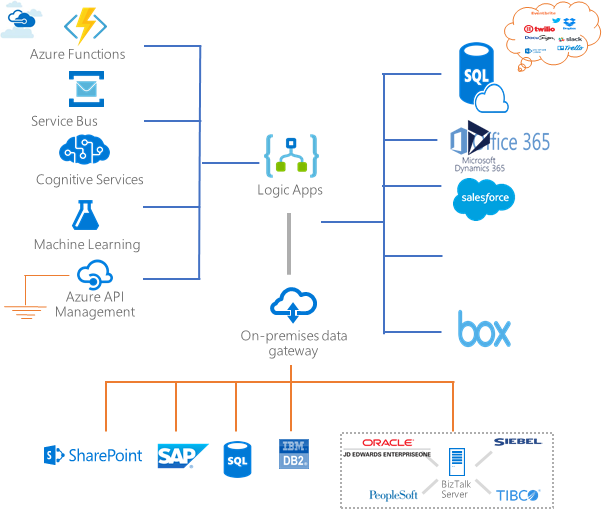
Furthermore, you control the behavior, invoke other services, handle messages, and manage the flow with scopes, conditions, switch cases, and loopings.
Logic Apps can be a critical or useful service in your solution’s architecture. You can also use Logic Apps to schedule a task for ingesting data, execute a runbook, or deletion of data in a storage account. There are countless scenarios in which Logic Apps can play a role.
Design, Develop, Deploy
When looking at the lifecycle of Logic Apps, you can divide it into various stages. You can decide to have one or more Logic Apps in your solution architecture based on the requirements provided by the business. Moreover, you can sit down with your business and walk through one or more flows that they require. Hence, with Logic Apps you are in a design phase.
Once you finalize the design or first try a concept, you can start developing it by configuring the connections (connectors), adding actions to the control flow, and making it more robust by applying error handling (scopes, run afters, and retries). Furthermore, you can test the workflow definition and verify if it runs correctly. Note that when authoring the workflow in Visual Studio first, you need to deploy it to be able to run it. We will discuss the authoring in more detail in the "Developing a Logic App" paragraph of this blog post.
Finally, you store your workflow definition from the Logic App in a repository in an Azure DevOps project. You will save the definition as an ARM template in the repo, which you leverage in a release pipeline. We will discuss this process in the "Deployment of a Logic App" paragraph of this blog post.
Above we described a design, develop, and deploy phase for a Logic App – basically, the lifecycle. However, we did miss the operational and governance side – we will discuss these topics later in this blog post.
Design a Logic App
Designing a workflow in a Logic App is easy. You drag a trigger action to the canvas and add one or more action underneath it. Then, you sit down with someone from the business and discuss the flow while adding actions – no need to configure the actions directly.
Next, when you have configured the actions, show the flow to the business. Logic Apps allows you to build fast and fail fast, encouraging experimentation and demonstrate the agility of Logic Apps.
Develop a Logic App
When the business side is convinced and sees the value of the Logic App workflow definition, and you need to validate a specific solution architecture with Logic Apps, or when the implementation of a solution requires one or more Logic Apps, it's time to start development.
Developers can design the workflow using the designer in the browser or Visual Studio. You can view a Logic App itself as a logical container or host of a workflow definition – when running the flow it will consume resources on the Azure Platform (resources that are abstracted away from you).
With the designer, you can define a business process workflow or integration workflow by choosing one of the many predefined templates or an empty one. The predefined templates offer something like "Peek-lock receive a Service Bus message and complete it" or "Peek-lock receives a Service Bus message with exception handling." Besides the pre-built template, you can start with an empty template and begin dragging a trigger and actions yourself to the canvas – each trigger, action, condition, and so on that you place in the Visual Designer is part of a JSON template (a domain-specific language for your workflow that you can inspect in the code behind file). When executing a Logic App, the runtime engine of the service will interpret the JSON and execute the flow accordingly.
You can author a Logic App inside a browser or use Visual Studio 2017 or 2019. The browser approach is more effective as you can interact directly with the Azure Platform, while with Visual Studio you need to setup connectivity with Azure, potentially deal with network lags (the designer continuously needs to interact with the Azure Platform), and you first need to deploy your Logic App before you can test.
Azure Portal
In the Azure Portal, you provision a Logic App, and then select the template you need. It’s a straightforward process, and you quickly start authoring your Logic App. However, once you feel confident with your Logic App, you do need to download the Logic App definition and deployment part to a Visual Studio project.
Visual Studio
With Visual Studio 2017 or 2019, you will need the Logic App Tools for 2017 or 2019 – a plug-in providing you with the designer to author a Logic App through the Azure Resource Group template. Once you have installed the plug-in, you can open Visual Studio, create a new project, and select the Azure Resource Group template. Next, you can pick the Logic App template.
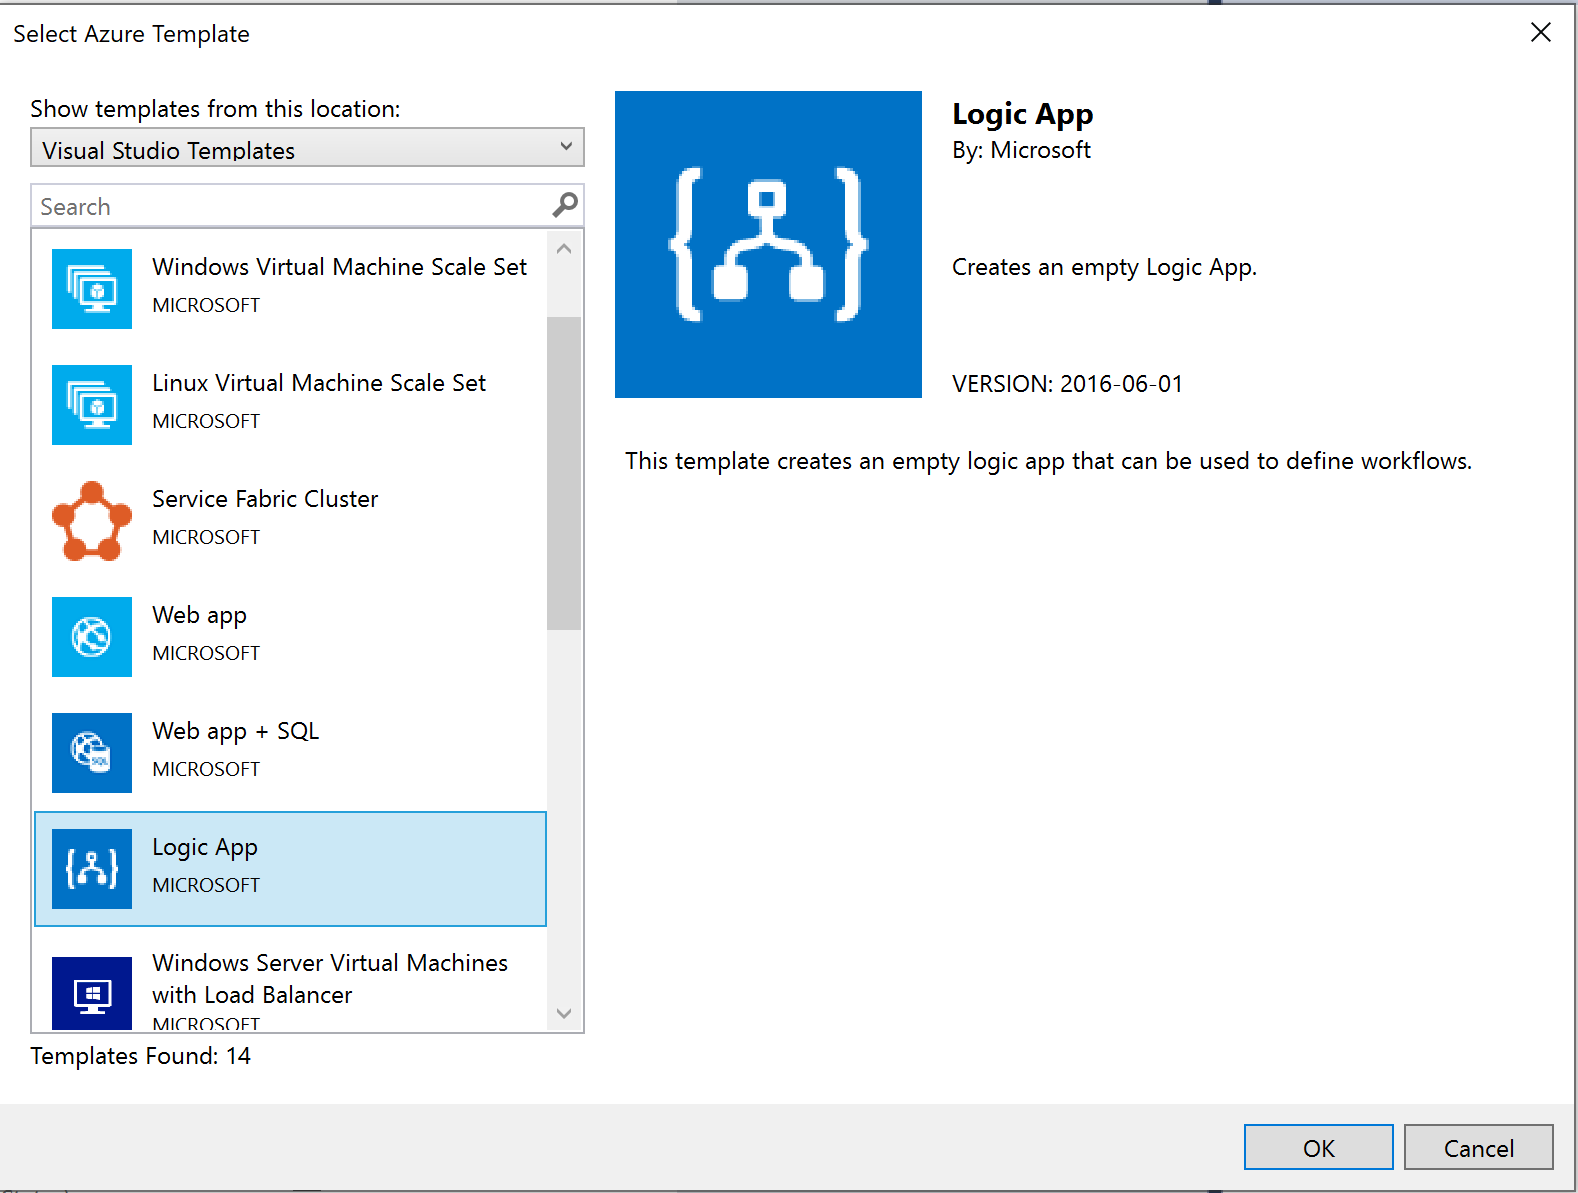
When you click Ok, Visual Studio will create a few files: LogicApp.json, the LogicApp.Parameters.json, and a PowerShell script. To author a Logic App, you can right-click on the LogicApp.json and choose "Open with Logic App Designer." You will then be presented with a pop-up window asking you to connect to Azure with your credentials (your Azure subscription), and asking what resource group, and location you want for the Logic App. Once there is connectivity established with your Azure subscription, you can select a template for Logic App.
Deploy a Logic App
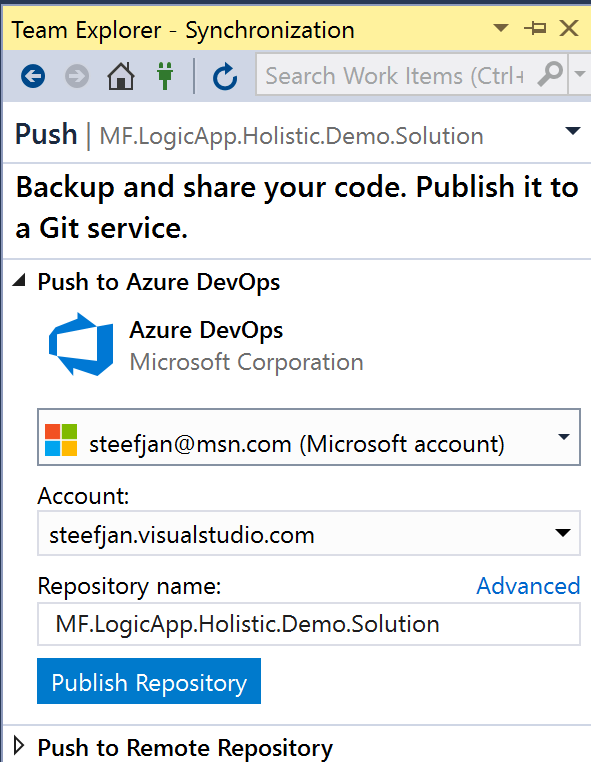
With development and testing done, you are ready to push your workflow definition to source control and deploy it to another resource group. Therefore, your next steps will be to set up or connect to a repo in Azure DevOps. After pushing your project to a repo, you can start creating a release pipeline to deploy your Logic App to another resource group in your or other subscription.
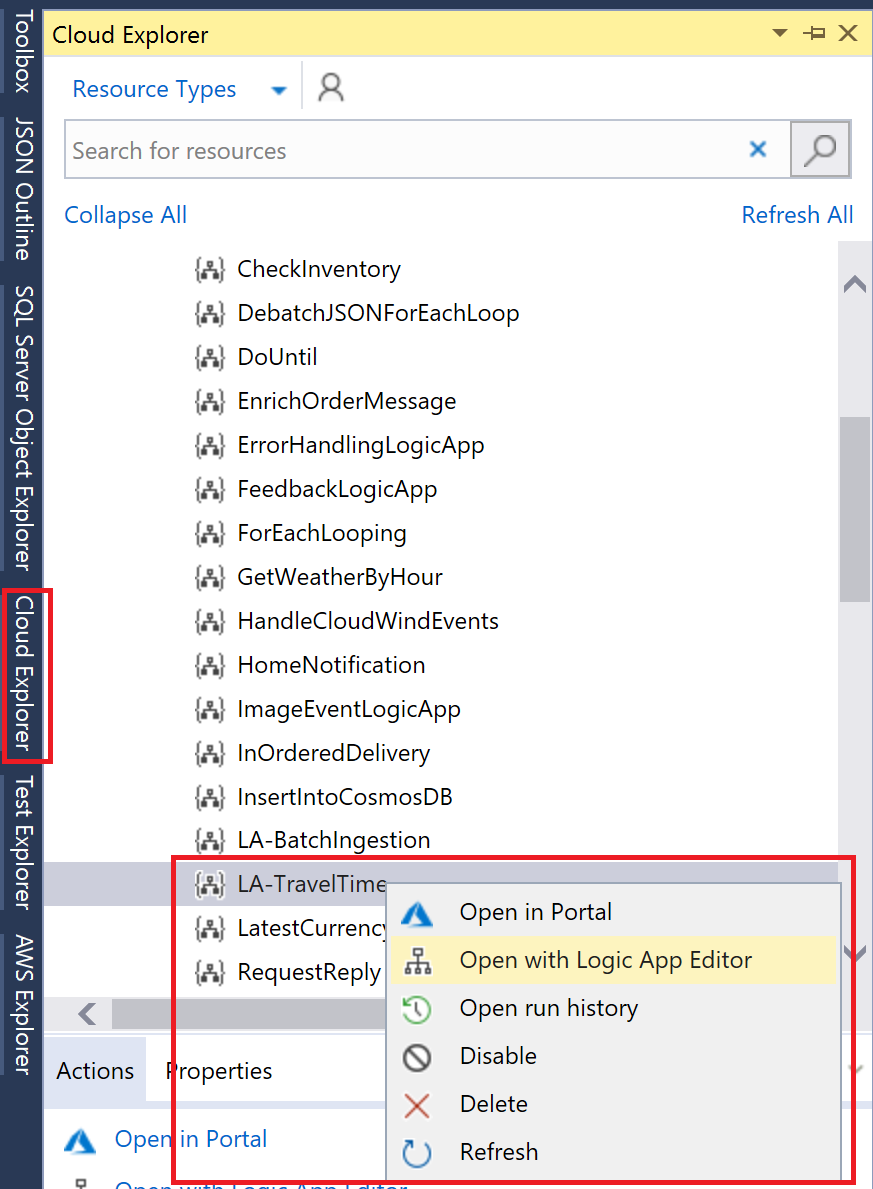
If you are building your Logic App in the portal, you can create a project in Visual Studio as described earlier. Next, you use the cloud explorer in Visual Studio to navigate to your Logic App by right-clicking the Logic App and choosing “Open with Logic App Editor.”
Your Logic App graphical representation will appear, including buttons on the top allowing you to run a trigger and download the Logic App. You can do so and choose to overwrite the existing Logic App.json.
Before you push your Logic App to a repo, you can configure a few parameters to facilitate deployment to other environments. You can have your Logic App name changed depending on your environment, for instance, company-dev-we-feedback. In this particular case, you will add a logicAppName parameter in your LogicApp.Parameters.json:
{
  "$schema": "https://schema.management.azure.com/schemas/2015-01-01/deploymentParameters.json#",
  "contentVersion": "1.0.0.0",
  "parameters": {
    "logicAppName": {
      "value": {
        "service": {
          "name": "#{LogicApp.Name}#"
        }
      }
    }
  }
}
You create more parameters you need for deployment to other environments depending on different services in those environments or endpoints.
When your project with your Logic App is in a repo, you can start with creating a release pipeline. In your DevOps project, you can navigate to the pipeline, choose release, and click "Create New Pipeline." Next, select your source, click continue, and select an empty job at the top. With this template, choose a new task below the agent job.
Add the Azure Resource Group deployment task, and configure it by:
- Renaming task
- Choosing a correct subscription and clicking authorize (you need to login to your Azure subscription with the right credentials)
- Resource Group
- Location
- Template location (navigate to your template in the repro)
- Parameters template (again you need to navigate to your parameters file in the repro)
- Override the parameters (depending on how many you have and use variables or not)
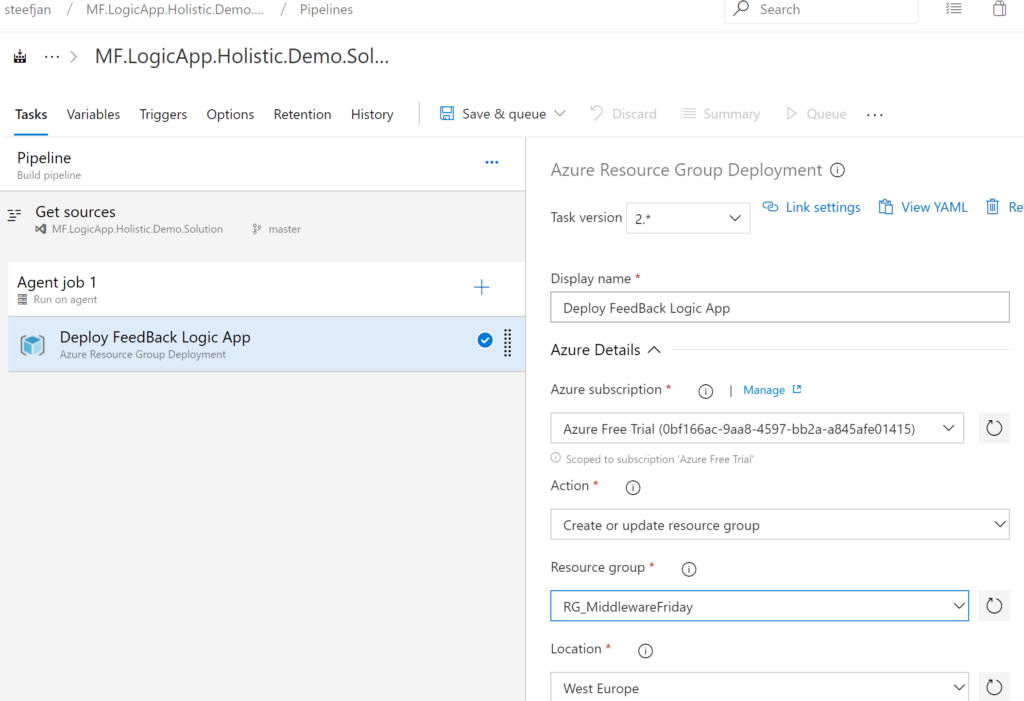
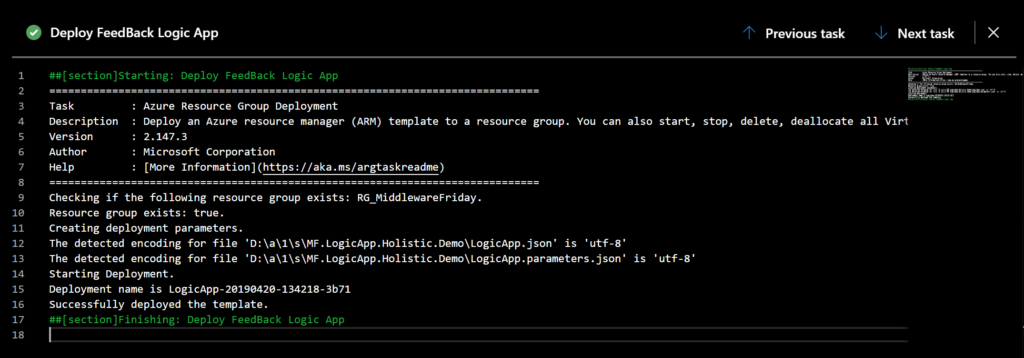
Lastly, you save and queue your release to the environment specified. Furthermore, in case you need to deploy the Logic App to multiple environments you can add various stages to the pipeline and configure the task and parameters accordingly.
The following diagram summarizes the process of deploying to Azure.
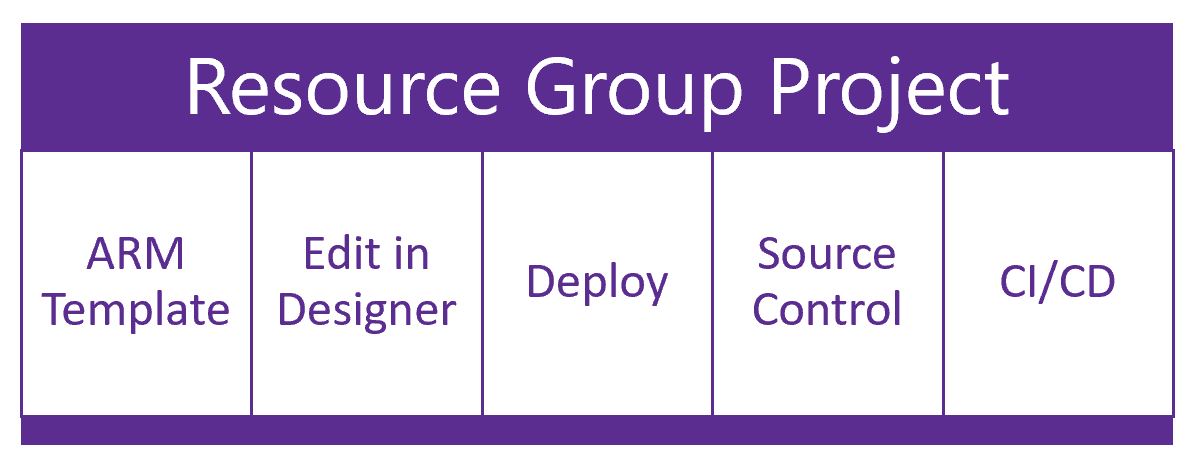
You author the ARM template in Visual Studio, implicitly by either downloading the Logic App you create in the Portal or when working in Visual Studio. Either way, within the template you can work with the parameters (see several blog posts by Justin Yoo). Next, as explained in the paragraphs above, you use Azure DevOps for source control, deployment, and CI/CD.
What About Ops?
You have finished the design, development, and deployment, and the final step is operations. Your Logic App might support a critical business process. You need to act when a run failed or anticipate other issues that can occur. Hence, you will need to monitor your Logic App.
Azure Platform
In previous blog posts on Serverless360 blog, we discussed several options for monitoring integration solutions including Logic Apps. Through the Logic App blade, you can configure alerts, when a Logic App run fails to notify someone by email. Furthermore, through diagnostic settings, you can set save logs to a storage account. Then stream to Event Hubs, and send to Log Analytics.
And Governance?
Another aspect of the Logic App lifecycle is governance. How do you handle versioning if necessary and control costs?
Versioning of Logic App can be necessary if you need to support various versions of a workflow or when you update an existing one. If you update an existing one, test in one environment and would like to deploy it to the production environment, it can be handy to apply to versioning. For example, you can add the version to the Logic App name or in the blade, examine the previous versions and promote an earlier version to the latest.
Cost control is critical when deploying Logic Apps in production. For instance, when you use a few Logic Apps with many actions, enterprise connectors, and a considerable workload to process every day, you can run into some high costs (see Logic App pricing). As an alternative, you can look at other Azure Services like Functions or set up an integration service environment (ISE) for more predictable costs – see the Introducing Azure Logic Apps Integration Service Environment (ISE) post.
Recap
In this blog post, we discussed Logic Apps from a holistic viewpoint – design, development, and deployment of a Logic App. Furthermore, we looked at the operational side of Logic Apps. You design your workflows with the critical stakeholders in the business or the solution architect. You author them in the Portal or Visual Studio and use Visual Studio to set up the deployment through the repo in an Azure DevOps project and Continuous Integration/Continous Deployment (CI/CD). The next phase you set up the monitoring using the services available on the Azure Platform or leverage the Serverless360 capabilities. Lastly, governance over your Logic Apps is not something to overlook to prevent an uncontrollable proliferation of Logic Apps.
Published at DZone with permission of Steef-Jan Wiggers. See the original article here.
Opinions expressed by DZone contributors are their own.

Comments