Automate CodeCommit and CodePipeline in AWS CloudFormation
A thorough look at the integration of CodeCommit and CodePipeline, and how to reach Continuous Delivery
Join the DZone community and get the full member experience.
Join For Free
amazon web services (aws) recently
announced
the integration of
aws codecommit
with
aws codepipeline
. this means you can now use codecommit as a version-control repository as part of your pipelines! aws describes how to manually configure this integration at
simple pipeline walkthrough (aws codecommit repository)
.
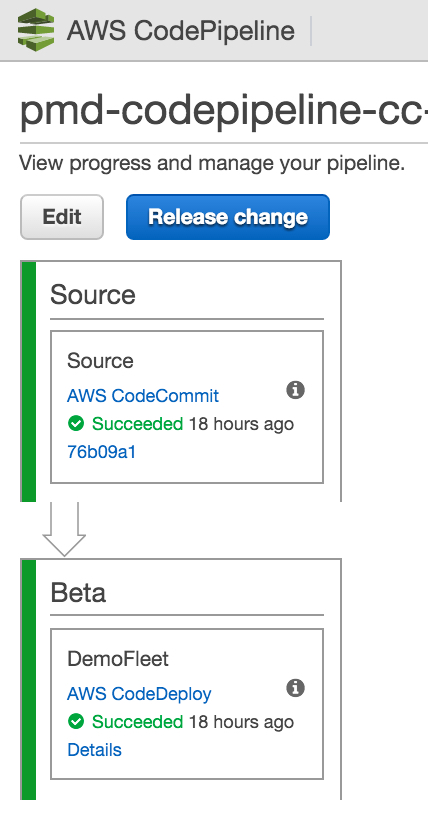
one of the biggest benefits of using codecommit is its seamless integration with other aws services including iam.
after describing how to create and connect to a new codecommit repository, in this blog post, i’ll explain how to fully automate the provisioning of all of the aws resources in cloudformation to achieve continuous delivery . this includes codecommit, codepipeline, codedeploy , and iam using a sample application provided by aws.
create a codecommit repository
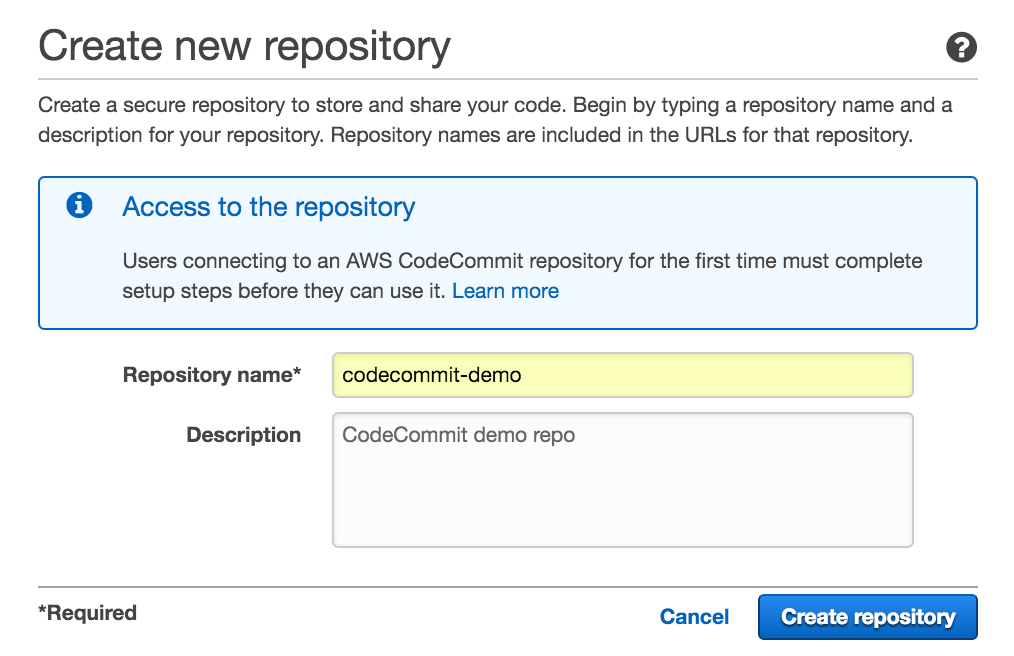
to create a new codecommit version-control repository, go to your aws console and select codecommit under developer tools. click the create new repository button, enter a unique repository name and a description and click create repository . next, you will connect to the repository.
connect to the codecommit repository
there are a couple of ways to connect to an existing codecommit repository. one is via https and the other ssh. we’re going to focus on the connecting via ssh in this post. for additional information, see connect to an aws codecommit repository . the instructions in this section are based on codecommit setup from andrew puch.
the first thing you’ll do is create an iam user. you do not need to create a password or access keys at this time. to do this, go to the aws iam console , then the users section and create a new user. once you’ve created the new user, open a terminal and type the following. note: these instructions are designed for mac/linux environments.
cd $home/.ssh
ssh-keygen
when prompted after typing
ssh-keygen
, use a name like
codecommit_rsa
and leave all fields blank and just hit enter.
cat codecommit_rsa.pub
go to iam, select the user you previously created, click on the
security credentials
tab and click the
upload ssh public key
button. copy the
contents
of the
codecommit_rsa.pub
to the text box in the
upload ssh public key
section and save.
go back to your terminal and type:
touch config
chmod 600 config
sudo vim configthe your_ssh_key_id_from_iam variable below is the row value for the ssh key id that you created when uploading the public key. you will replace this placeholder and brackets with the value for the ssh key id from the security credentials tab for the iam user you’d previously created.
host git-codecommit.*.amazonaws.com
  user [your_ssh_key_id_from_iam]
  identityfile ~/.ssh/codecommit_rsa
to verify your ssh connection works, type:
ssh git-codecommit.us-east-1.amazonaws.comto clone a local copy of the codecommit repo you just created, type something like (your region and/or repo name may be different):
git clone ssh://git-codecommit.us-east-1.amazonaws.com/v1/repos/codecommit-demoyou’ll be using this local copy of your codecommit repo later.
manually integrate codecommit with codepipeline
follow the instructions for manually integrating codecommit with codepipeline as described in simple pipeline walkthrough (aws codecommit repository) . name the pipeline codecommitpipeline .
create a cloudformation template
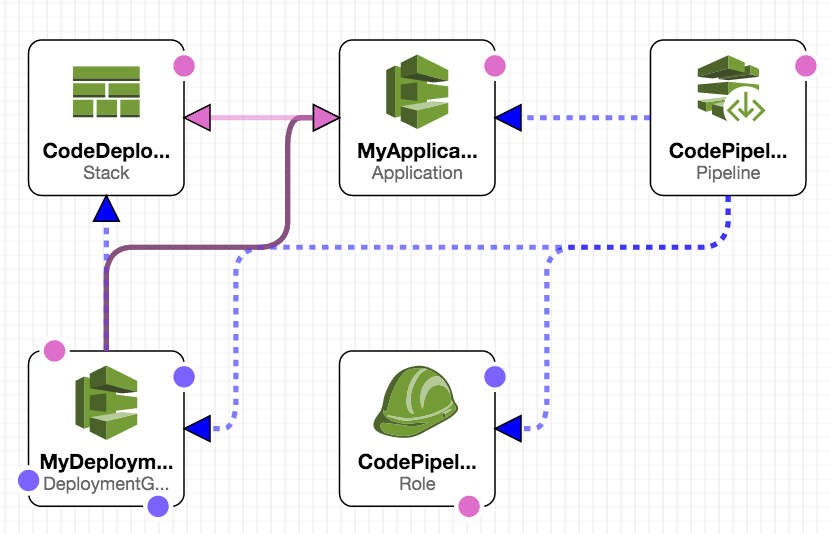
in this solution, the cloudformation template is composed of several components. it includes launching ec2 instances and installing the codedeploy agent on the instances, provisioning a codedeploy application and deploymentgroup, creating an iam role that defines a policy for all resources used in the solution including codecommit, and provisioning the codepipeline pipeline stages and action – including the inclusion of codecommit.
launch ec2 instances and install codedeploy agent
to launch the ec2 instances that are used by codedeploy to deploy the sample application, i’m using a cloudformation template provided by aws as part of a nested stack. i’m passing in the name of my ec2 key pair along with the tag that codedeploy will use to run a deployment against ec2 instances labeled with this tag.
"codedeployec2instancesstack":{
      "type":"aws::cloudformation::stack",
      "properties":{
        "templateurl":"http://s3.amazonaws.com/aws-codedeploy-us-east-1/templates/latest/codedeploy_samplecf_template.json",
        "timeoutinminutes":"60",
        "parameters":{
          "tagvalue":{
            "ref":"tagvalue"
          },
          "keypairname":{
            "ref":"ec2keypairname"
          }
        }
      }
    },
create codedeploy application and deployment group
in the snippet below, i’m creating a simple codedeploy application along with a deploymentgroup. i’m passing in the location of the s3 bucket and key that hosts the sample application provided by aws. you can find the sample application at
aws codedeploy resource kit
. in my template, i’m entering
aws-codedeploy-us-east-1
for the
s3bucket
parameter and
samples/latest/sampleapp_linux.zip
for the
s3key
parameter. this translates to this location in s3:
s3://aws-codedeploy-us-east-1/samples/latest/sampleapp_linux.zip
. finally, the stack from the cloudformation template that provisions the ec2 instances for codedeploy provides
codedeploytrustrolearn
as an output that i use in defining the permissions for my codedeploy deploymentgroup.
    "myapplication":{
      "type":"aws::codedeploy::application",
      "dependson":"codedeployec2instancesstack"
    },
    "mydeploymentgroup":{
      "type":"aws::codedeploy::deploymentgroup",
      "dependson":"myapplication",
      "properties":{
        "applicationname":{
          "ref":"myapplication"
        },
        "deployment":{
          "description":"first time",
          "ignoreapplicationstopfailures":"true",
          "revision":{
            "revisiontype":"s3",
            "s3location":{
              "bucket":{
                "ref":"s3bucket"
              },
              "bundletype":"zip",
              "key":{
                "ref":"s3key"
              }
            }
          }
        },
        "ec2tagfilters":[
          {
            "key":{
              "ref":"tagkey"
            },
            "value":{
              "ref":"tagvalue"
            },
            "type":"key_and_value"
          }
        ],
        "servicerolearn":{
          "fn::getatt":[
            "codedeployec2instancesstack",
            "outputs.codedeploytrustrolearn"
          ]
        }
      }
    },
create an iam role and policy to include codecommit
in previous posts on codepipeline , i’d relied on the fact that, by default, aws has created an a ws-codepipeline-service role in iam. this is, frankly, a lazy and error-prone way of getting the proper permissions assigned to my aws resources. the reason it’s error prone is because anyone else using the template might have modified the permissions of this built-in iam role. because the codecommit integration is new, i needed to add the codecommit permissions to my iam policy so i decided to create a new iam role on the fly as part of my cloudformation template. this provides the added benefit of assuming nothing else had been previously created in the user’s aws account.
below, i’ve included the relevant iam policy snippet that provides codepipeline access to certain codecommit actions.
"policyname":"codepipeline-service",
  "policydocument":{
    "statement":[
      {
        "action":[
          "codecommit:getbranch",
          "codecommit:getcommit",
          "codecommit:uploadarchive",
          "codecommit:getuploadarchivestatus",
          "codecommit:canceluploadarchive"
        ],
          "resource":"*",
          "effect":"allow"
      },
create a pipeline in codepipeline using cloudformation
to get the configuration from the pipeline you manually created in the “manually integrate codecommit with codepipeline” step from above, go to your aws cli and type:
aws codepipeline get-pipeline --name codecommitpipeline > pipeline.jsonyou will use the contents of the pipeline.json in a latter step.
below, you can see that i’m creating the initial part of the pipeline in cloudformation. i’m referring to the iam role that i created previously in the template. this uses the aws::codepipeline::pipeline cloudformation resource.
"codepipelinestack":{
      "type":"aws::codepipeline::pipeline",
      "properties":{
        "rolearn":{
          "fn::join":[
            "",
            [
              "arn:aws:iam::",
              {
                "ref":"aws::accountid"
              },
              ":role/",
              {
                "ref":"codepipelinerole"
              }
            ]
          ]
        },
source stage for codecommit
i got the contents for the stages and actions by copying the contents from the pipeline.json that i’d created above and pasted them into my cloudformation template in the codepipeline resource section. after copying the contents, i update to use title case vs. camel case for some of the attribute names in order to conform to the cloudformation dsl.
for the codepipeline source stage and action of this cloudformation template, i’m referring to the codecommit provider as my source category. there are no input artifacts and the
outputartifacts
is defined as
myapp
. this is used in all downstream stages as part of each action’s
inputartifacts
.
        "stages":[
          {
            "name":"source",
            "actions":[
              {
                "inputartifacts":[

                ],
                "name":"source",
                "actiontypeid":{
                  "category":"source",
                  "owner":"aws",
                  "version":"1",
                  "provider":"codecommit"
                },
                "outputartifacts":[
                  {
                    "name":"myapp"
                  }
                ],
                "configuration":{
                  "branchname":{
                    "ref":"repositorybranch"
                  },
                  "repositoryname":{
                    "ref":"repositoryname"
                  }
                },
                "runorder":1
              }
            ]
          },
beta stage for codedeploy
the beta stage refers to the codedeploy deploymentgroup and application that were created in previously-defined resources in this cloudformation template. in the configuration for this action, i’m referring to these previously-defined references using the ref intrinsic function in cloudformation.
          {
            "name":"beta",
            "actions":[
              {
                "inputartifacts":[
                  {
                    "name":"myapp"
                  }
                ],
                "name":"demofleet",
                "actiontypeid":{
                  "category":"deploy",
                  "owner":"aws",
                  "version":"1",
                  "provider":"codedeploy"
                },
                "outputartifacts":[

                ],
                "configuration":{
                  "applicationname":{
                    "ref":"myapplication"
                  },
                  "deploymentgroupname":{
                    "ref":"mydeploymentgroup"
                  }
                },
                "runorder":1
              }
            ]
          }
store the pipeline artifact
you can store the artifact that’s transitioned through the actions in codepipeline using any s3 bucket for which you have permissions. the template i provide as part of this sample solution dynamically generates a bucket name that should work for anyone’s aws account as it uses the bucket that aws codepipeline defines which refers to the user’s current region and account id.
     ],
        "artifactstore":{
          "type":"s3",
          "location":{
            "fn::join":[
              "",
              [
                "codepipeline-",
                {
                  "ref":"aws::region"
                },
                "-",
                {
                  "ref":"aws::accountid"
                }
              ]
            ]
          }
        }
      }
    }
launch the stack
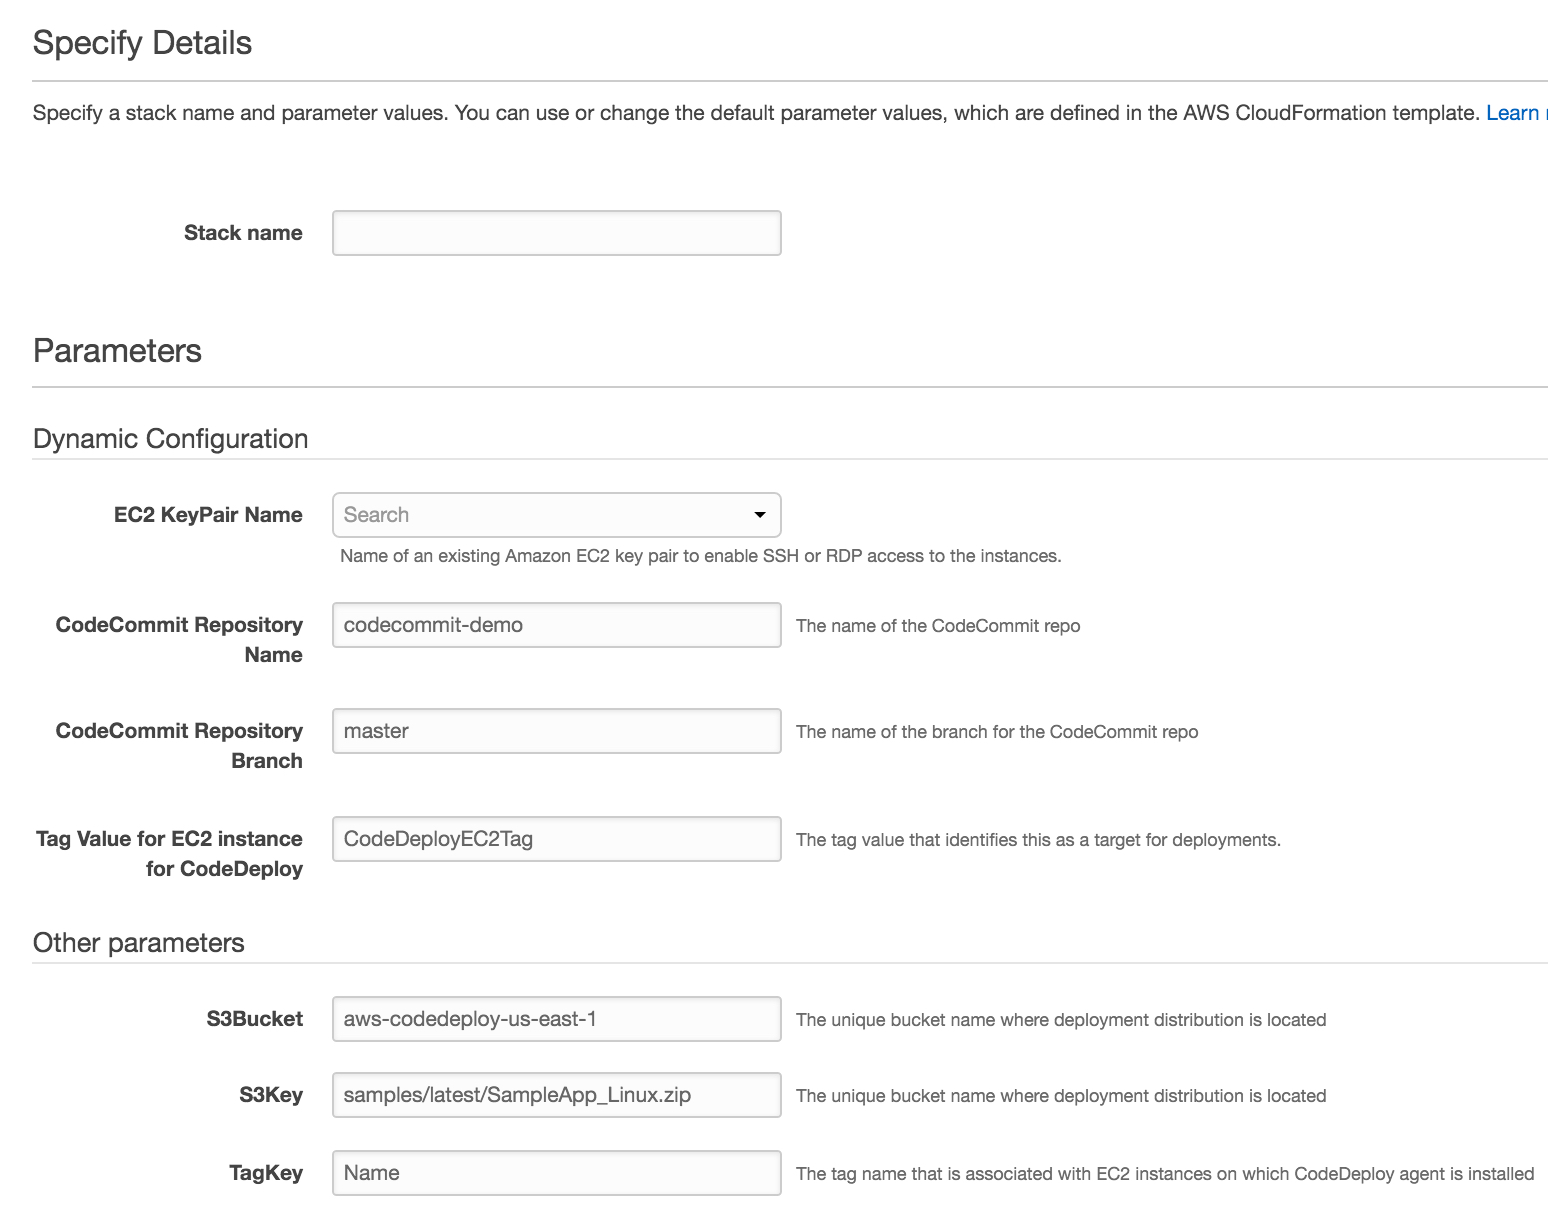
to launch the cloudformation stack, simply click the button below to launch the template from the cloudformation console in your aws account. you’ll need to enter values for the following parameters:
stack name
,
ec2 keypair name
,
codecommit repository name
,
codecommit repository branch
and, optionally,
tag value for codedeploy ec2 instances
. you can keep the default values for the other parameters.

to launch the same stack from your aws cli, type the following (while modifying the same values described above):
aws cloudformation create-stack --stack-name codepipelinecodecommitstack \
--template-url https://s3.amazonaws.com/stelligent-training-public/public/codepipeline/codepipeline-codecommit.json \
--region us-east-1 --disable-rollback --capabilities="capability_iam" \
--parameters parameterkey=ec2keypairname,parametervalue=yourec2keypair \
parameterkey=tagvalue,parametervalue=ec2tag4codedeploy \
parameterkey=repositoryname,parametervalue=codecommit-demo \
parameterkey=repositorybranch,parametervalue=master
access the application
once the cloudformation stacks have successfully completed, go to codedeploy and select deployments. for example, if you’re in the us-east-1 region: the url might look like: https://console.aws.amazon.com/codedeploy/home?region=us-east-1#/deployments . click on the link for the deployment id of the deployment you just launched from cloudformation. then, click on the link for the instance id . from the ec2 instance, copy the public dns value and paste into your browser and hit enter. you should see a page like the one below.

commit changes to codecommit
make some visual changes to the code and commit these changes to your codecommit repository to see these changes get deployed through your pipeline. you perform these actions from the directory where you cloned a local version of your codecommit repo (in the directory created by your git clone command). some example command-line operations are shown below.
git commit -am "change color to dark orange"
git push
once these changes have been committed, codepipeline will discover the changes made to your codecommit repo and initiate a new pipeline. after the pipeline is successfully completed, follow the same instructions for launching the application from your browser.

troubleshooting
in this section, i describe how to fix some of the common errors that you might experience.
after you’ve included codecommit as a source provider in the source action of a source stage and run the pipeline, you might get an “insufficient permissions” error in codepipeline – like the one you see below.
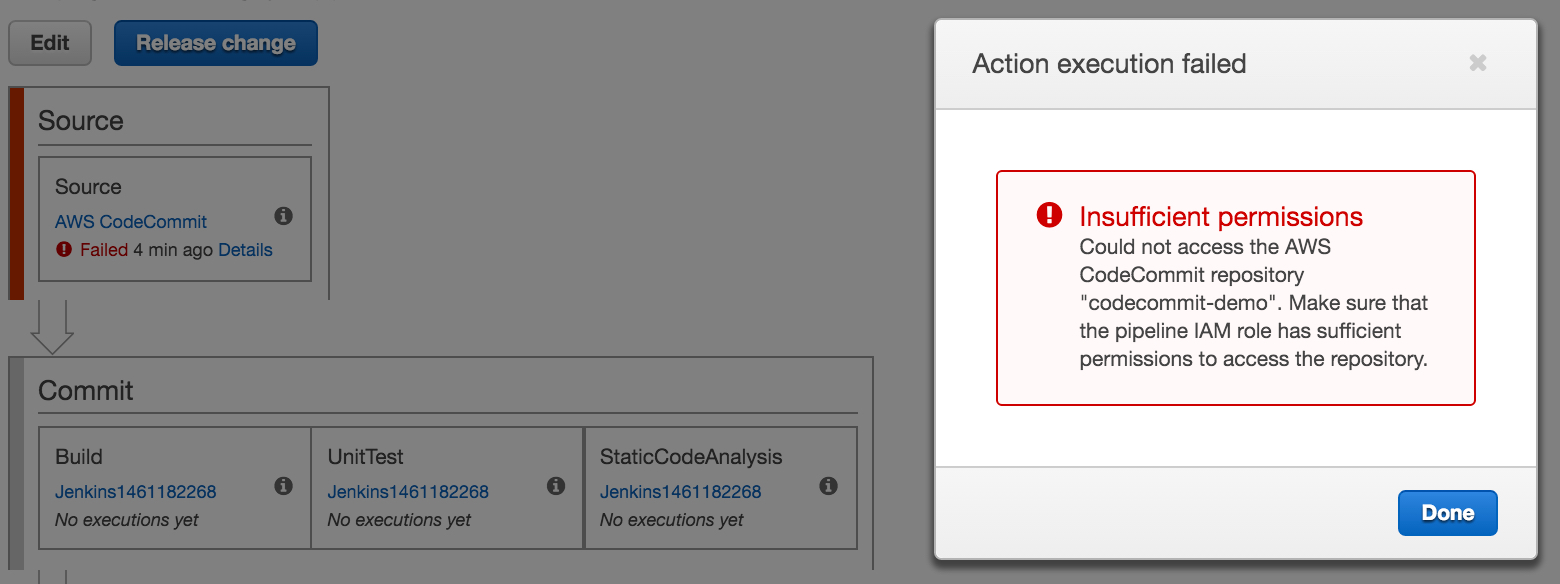
to fix this, make sure that the iam role you’re using has the proper permissions to the appropriate codecommit.* actions in the iam policy for the role. in the example, i’ve done this by defining the iam role in cloudformation and then assigning this role to the pipeline in codepipeline.
another error you might see when launching the example stack is when the s3 bucket does not exist or your user does not have the proper permissions to the bucket. unfortunately, if this happens, all you’ll see is an “internal error” in the source action/stage like the one below.
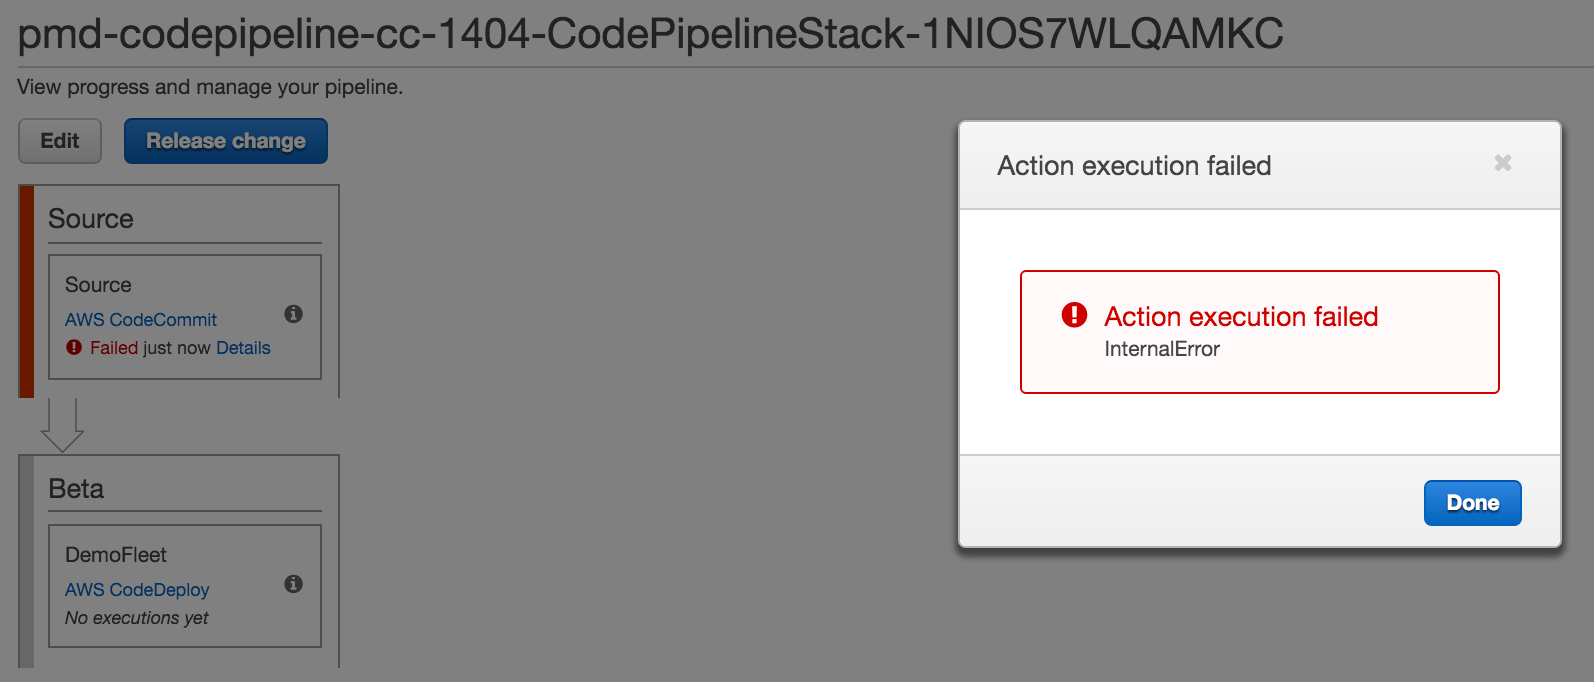
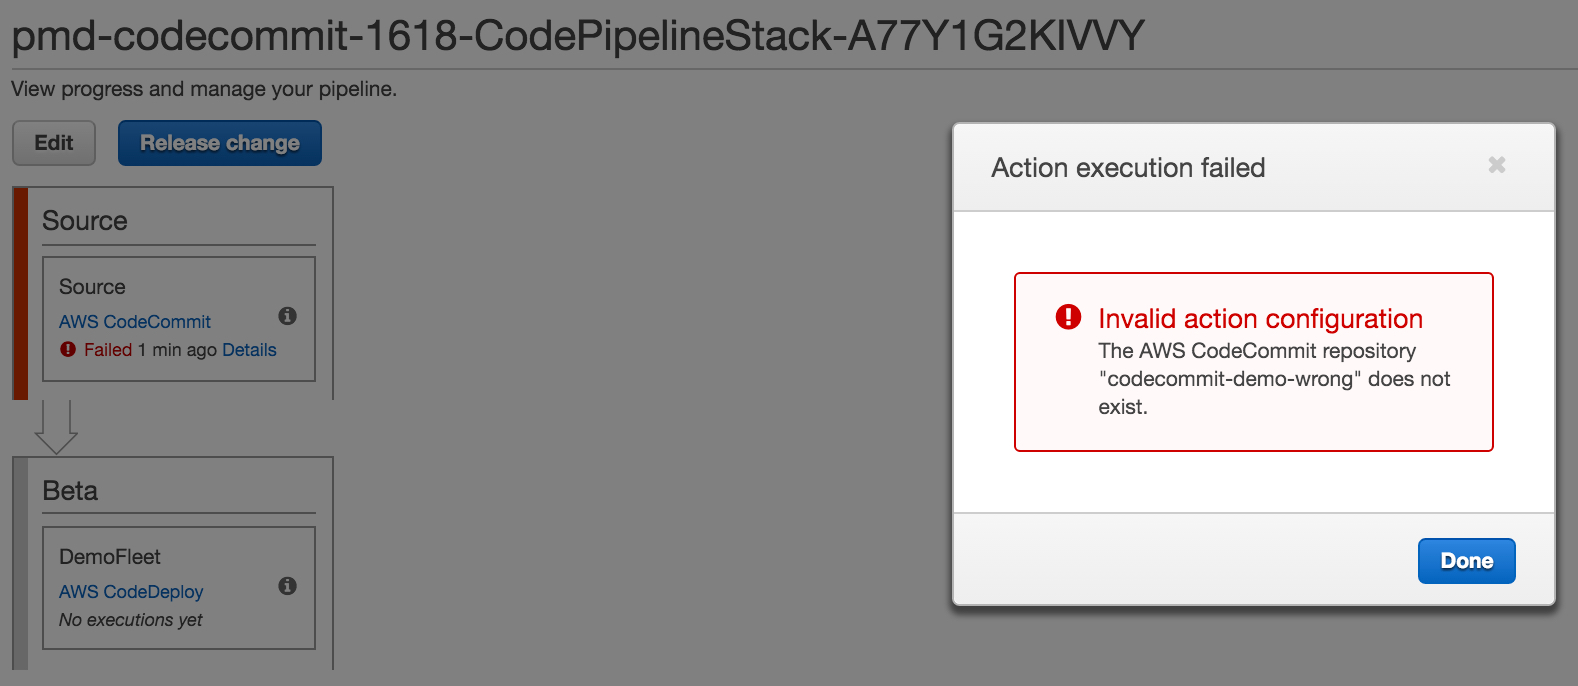
lastly, if you use the default codecommit repository name and you’ve not created a repo with the same name or have not matched the cloudformation parameter value with your codecommit repository name, you’ll see an error like this:
sample code
the code for the examples demonstrated in this post are located at https://github.com/stelligent/stelligent_commons/blob/master/cloudformation/codecommit/codepipeline-codecommit.json .
Published at DZone with permission of Paul Duvall, DZone MVB. See the original article here.
Opinions expressed by DZone contributors are their own.

Comments