ArtiBot - Free Chat Bot for Lead Generation
This article covers information on ArtiBot a free Chat Bot that can be configured as a widget on your website.
Join the DZone community and get the full member experience.
Join For FreeArtiBot is a simple and quick bot creation for capturing leads, scheduling appointments, and collecting payments in a few seconds. It can be added to your website as a widget and it is free for small businesses. ArtiBot is made using Ruby. It comes with the predefined templates.
Key Features
Lead Generation: ArtiBot helps capture visitor information, such as names and email addresses, turning website traffic into potential leads for businesses.
Customization: Users can tailor ArtiBot's appearance, behavior, and message content to match their branding and the specific needs of their website.
Integration: ArtiBot seamlessly integrates with various platforms and tools, allowing for smooth data flow and enhanced functionality.
Multilingual Support: The chatbot can communicate with users in multiple languages, broadening its reach to a global audience.
Analytics and Reporting: ArtiBot provides insights into user interactions, helping businesses make data-driven decisions to improve their chatbot's performance.
Responsive Design: It ensures a seamless experience across devices, whether users are accessing the website on a desktop computer, tablet, or mobile device.
Real-time Engagement: ArtiBot engages with users in real-time, offering immediate assistance and information, improving user satisfaction and retention.
Enrolling in courses has never been easier! In this post, we'll explore how a conversational bot can streamline the course enrollment process, offering users a convenient and interactive way to choose between self-paced and instructor-led courses along with payment.
How To Set ArtiBot
1. Sign Up or Log In:
If you haven't already, go to the ArtiBot website https://www.artibot.ai/ and sign up for an account. If you have an account, log in using your credentials.
2. Create a New Bot:
After logging in, you will typically see an option to create a new bot. Click on it to start the setup process.
3. Choose a Template (Optional):
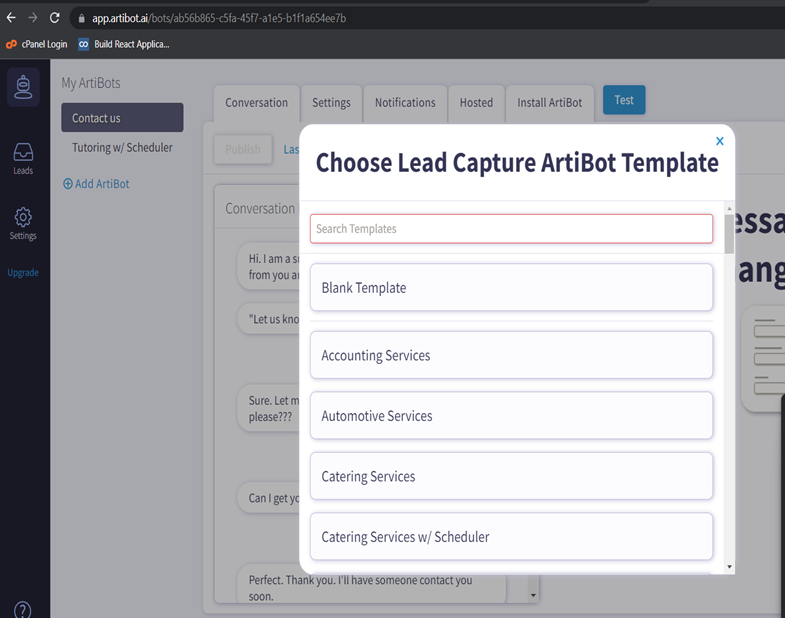
ArtiBot often provides templates for different use cases. You can choose a template that best suits your needs, such as a contact form or appointment scheduler. This can save you time in configuring your bot.
4. Customize Your Bot:
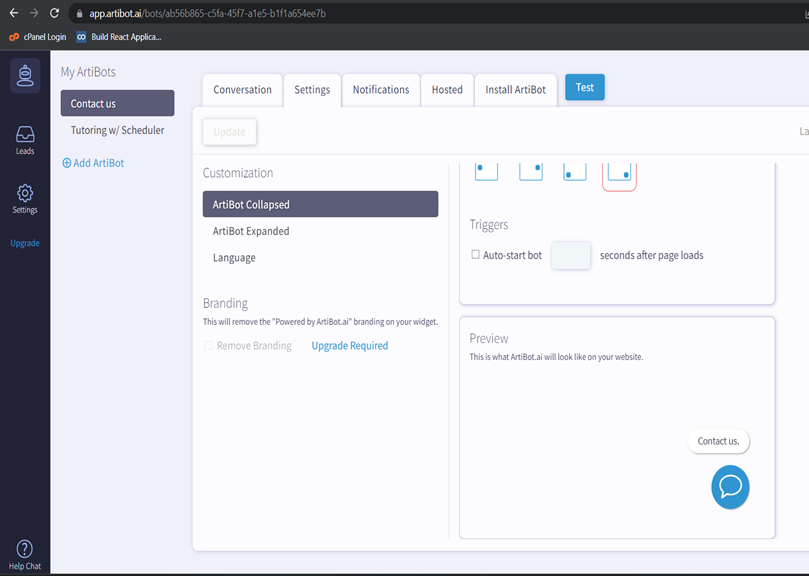
You can choose a Blank template or a pre-configured template, then you'll need to customize your bot. This includes setting up the bot's name, appearance, and behavior.
You can customize the bot's avatar, colors, and the welcome message that visitors will see.
Even one can set validation for mailId too…and can customize validation error messages.
5. Configure Behavior:
Define how the bot should behave. You can set up triggers(in this below example, the checkbox of include on lead is clicked), actions, and responses based on visitor interactions. Common behaviors include greeting visitors, answering frequently asked questions, providing contact information, and offering to schedule appointments or demos.
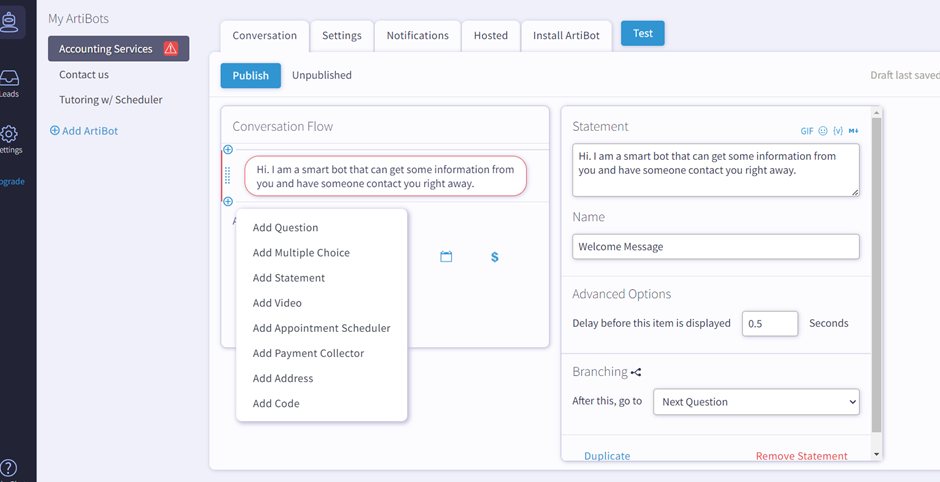
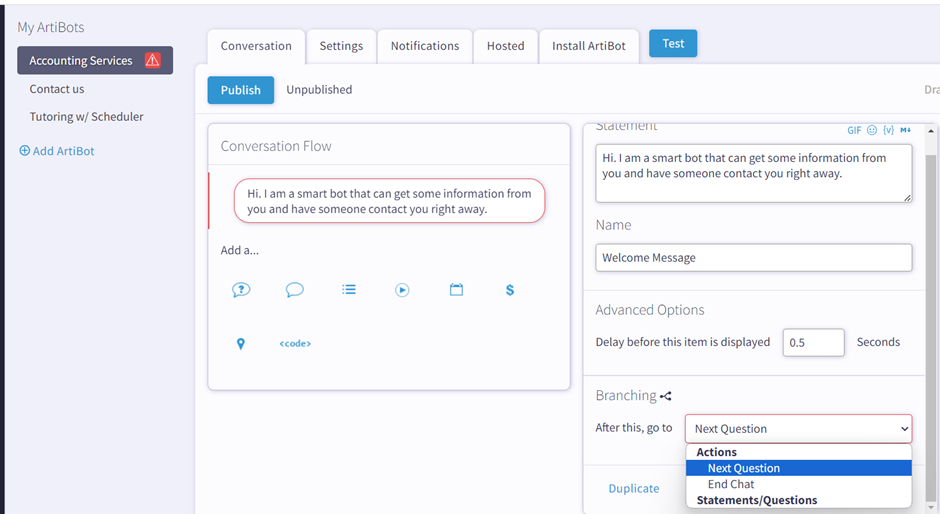
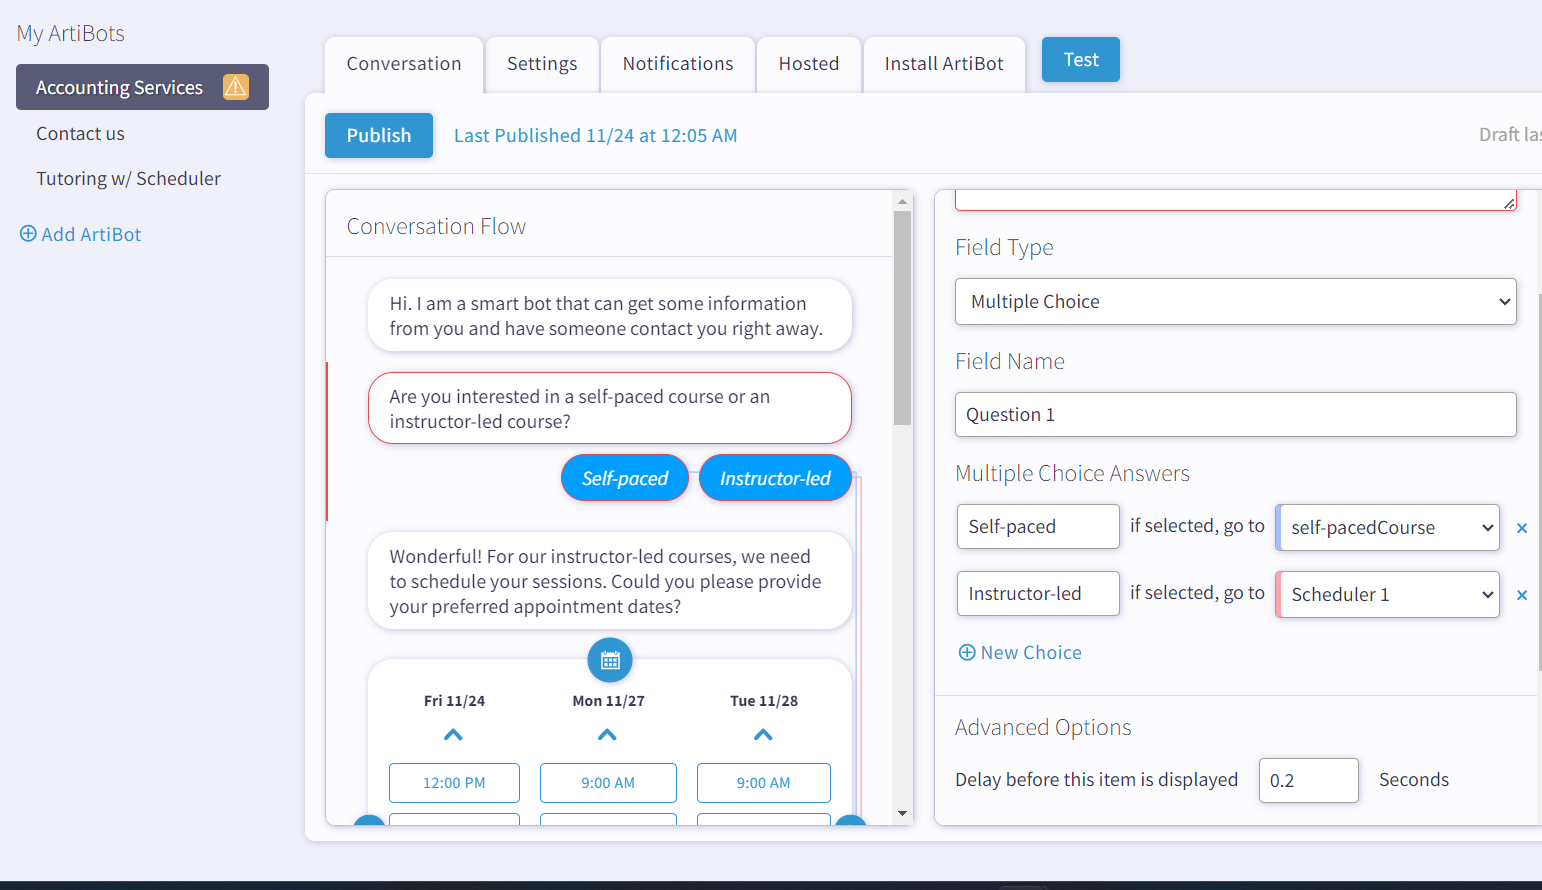
As per our requirement, the next field we are creating here is multiple-choice
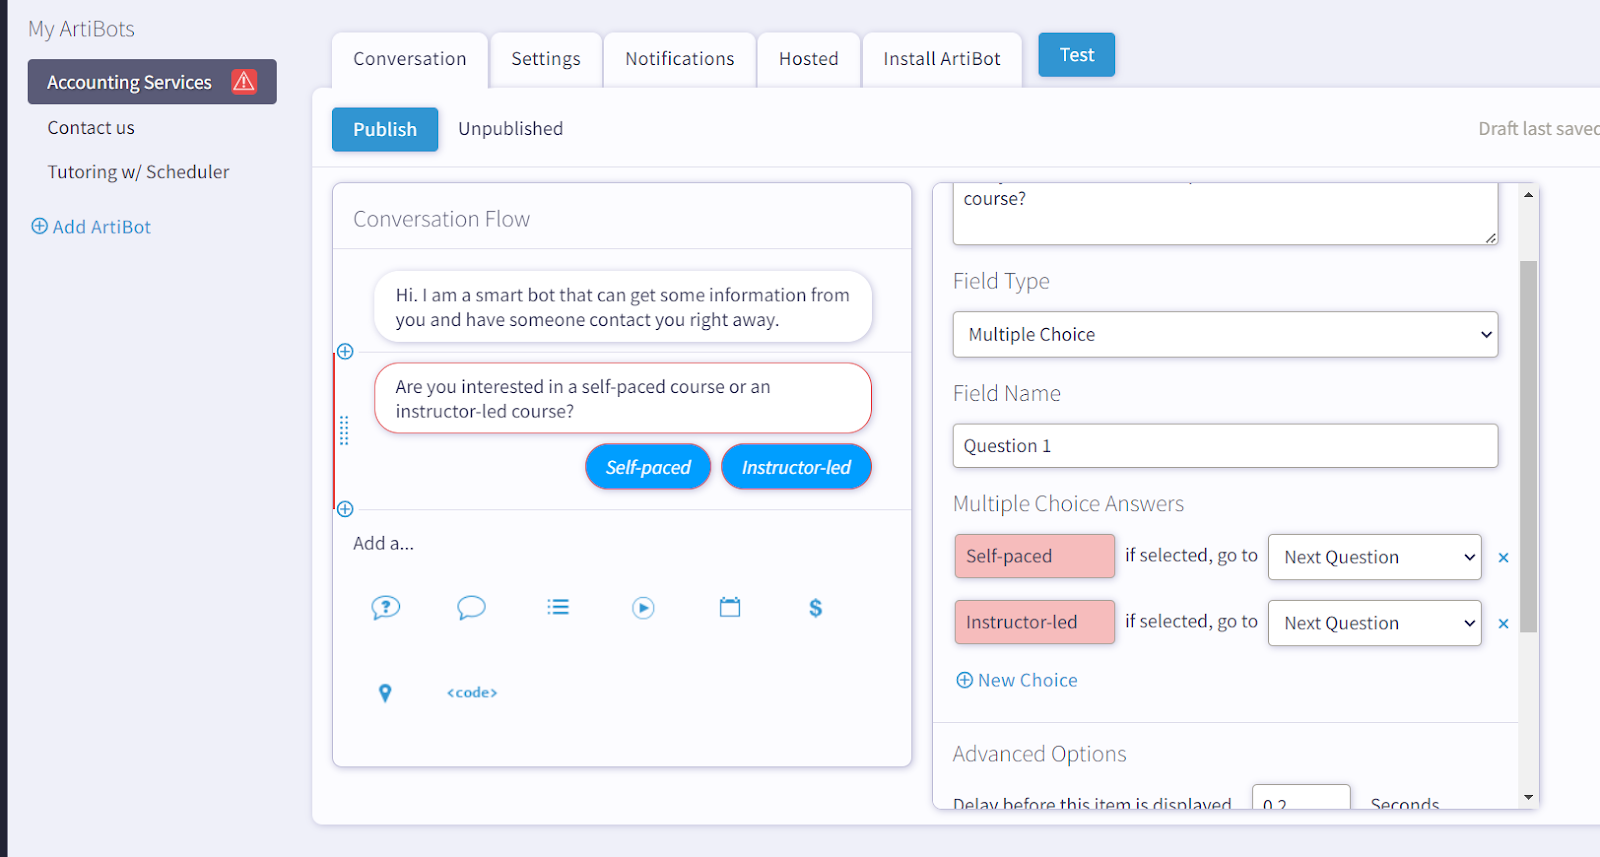
From this multiple choice, I am going to create two scenarios
(1)conversation between chatbot and user when he selects “Instructor-led”
(2)conversation between chatbot and user when he selects “Self-paced”
Let's create further conversation fields.
(1) Conversation Between Chatbot and User When He Selects “Instructor-Led”
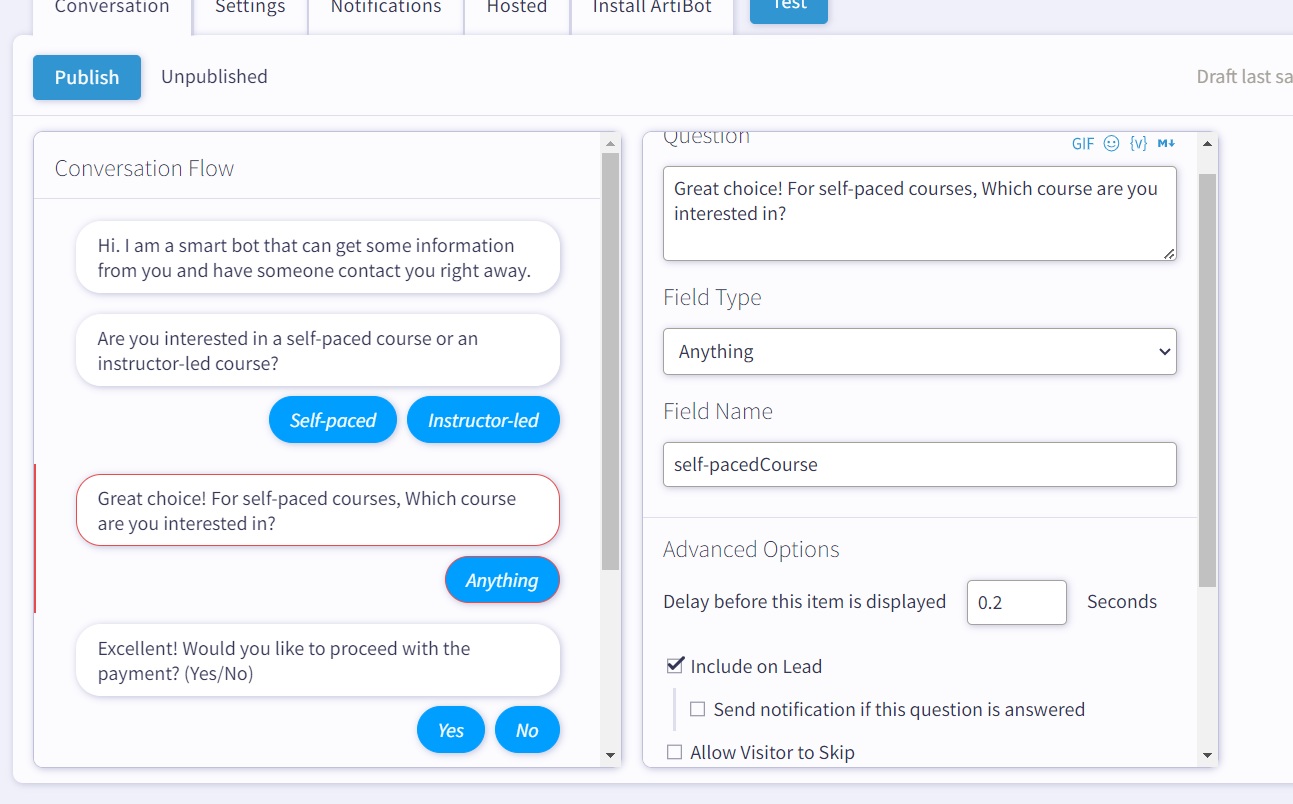
Here I created two fields ..one is question, a note that has a field type “anything” that accepts a user-entered value, and the next one is the scheduler user can choose appointment dates..we can even customise schedules in days and number of slots per day.
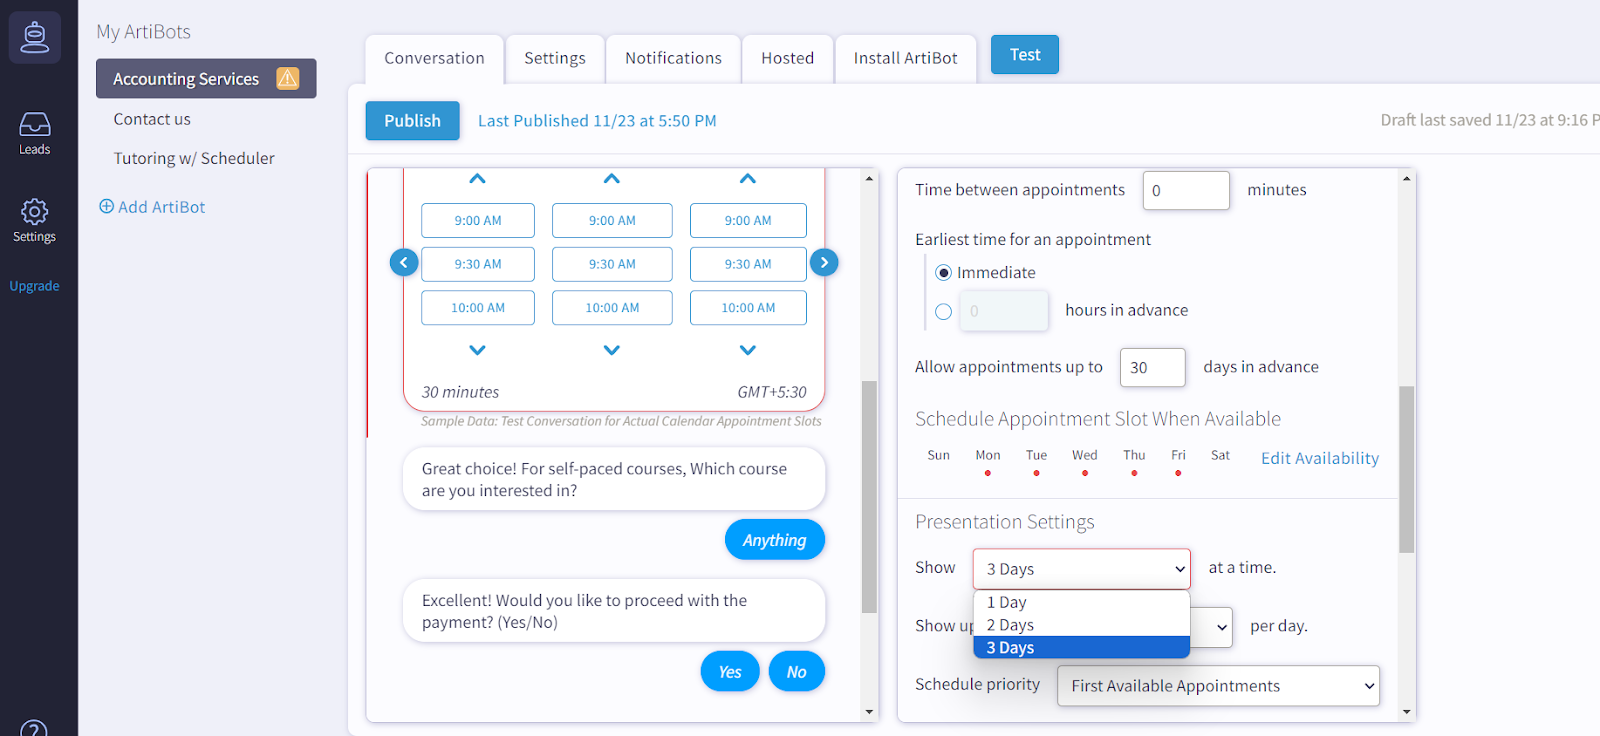
Now again go back to the multiple choice (select Instructor-led or self-paced).
Then select the options in the dropdown if “self-paced “go to self-pacedCourse and if instructor-led then Instructor-led course that we have already created.
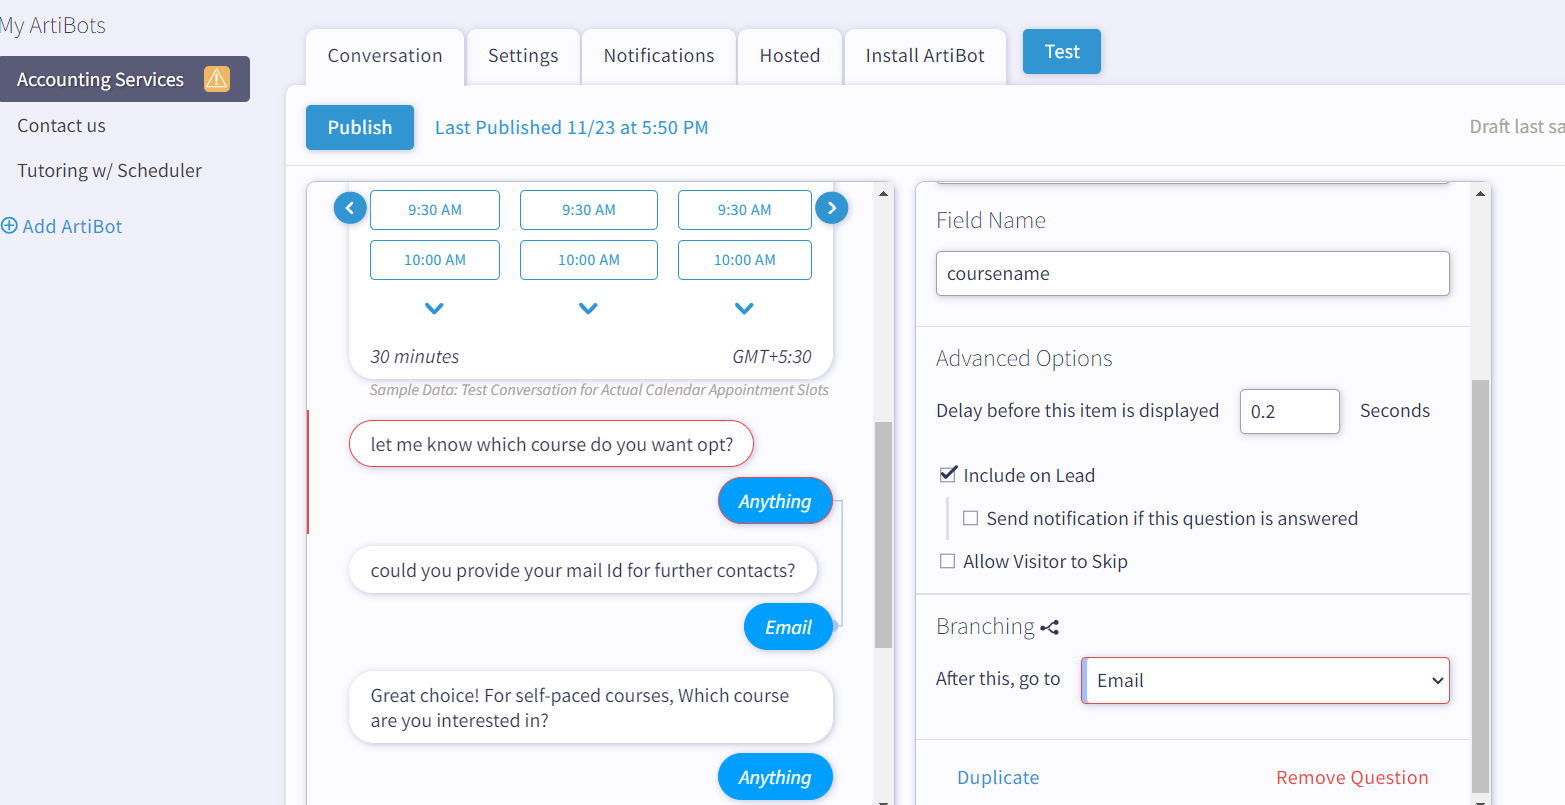
After selecting an appointment I have to get the course name or details regarding the course and if these questions are answered then the bot asks for mailId for further contacts and information.
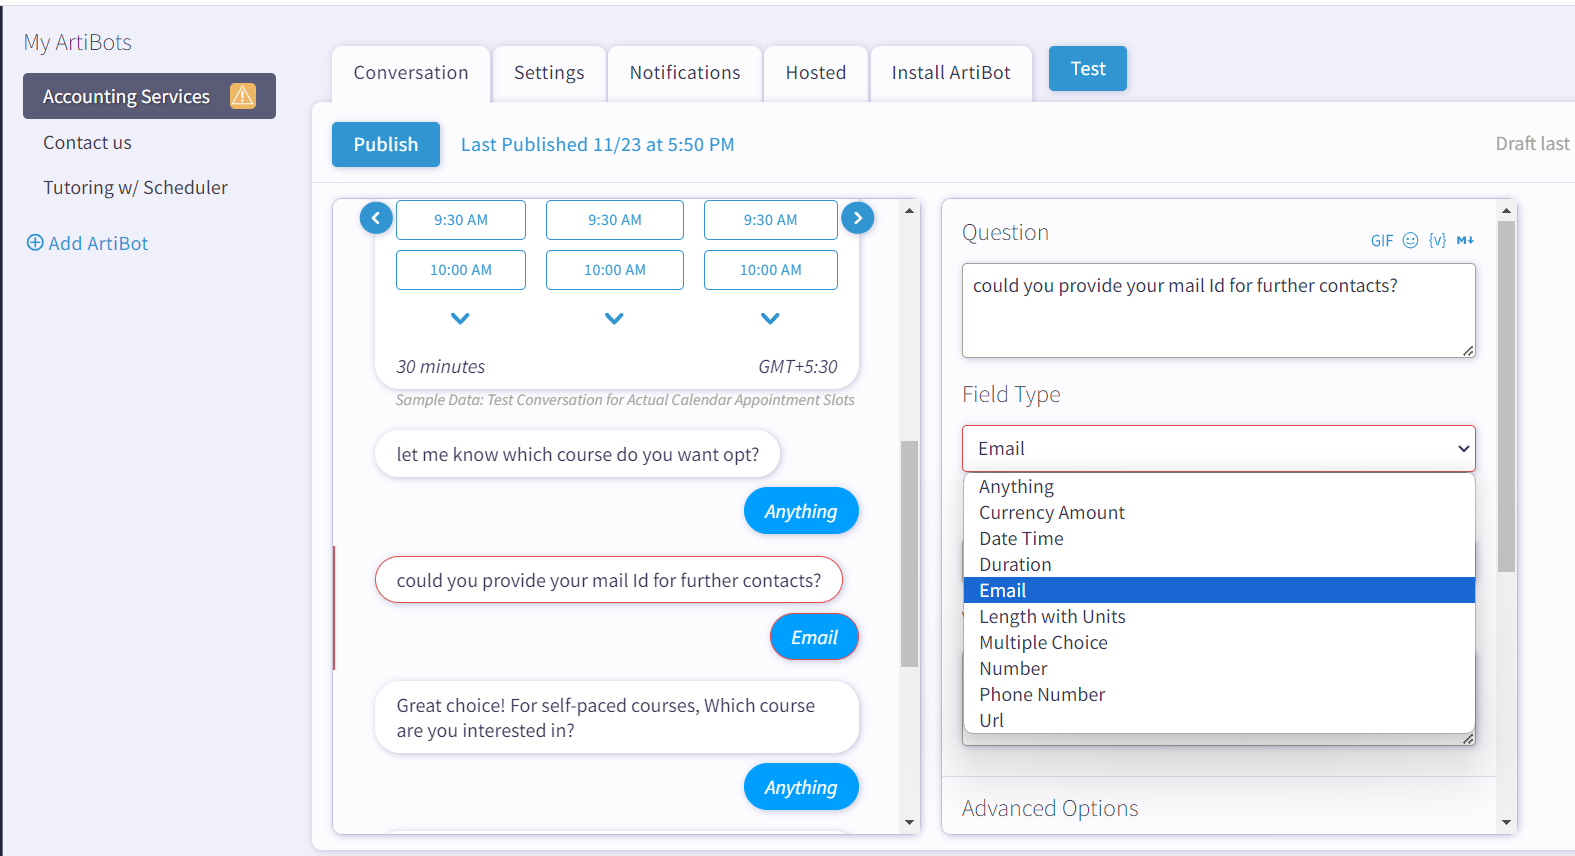
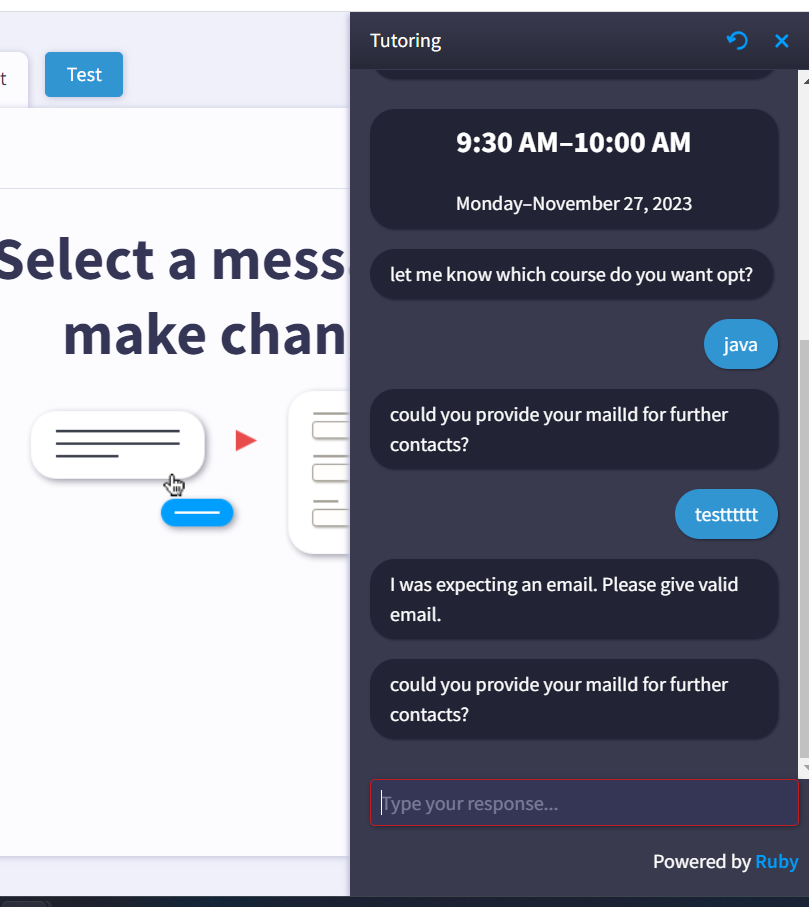
We can validate Email here…if we select Field Type as Email it will validate Email and throw an error message when an entered Email is not valid. Please find attached a screenshot of the email validation…
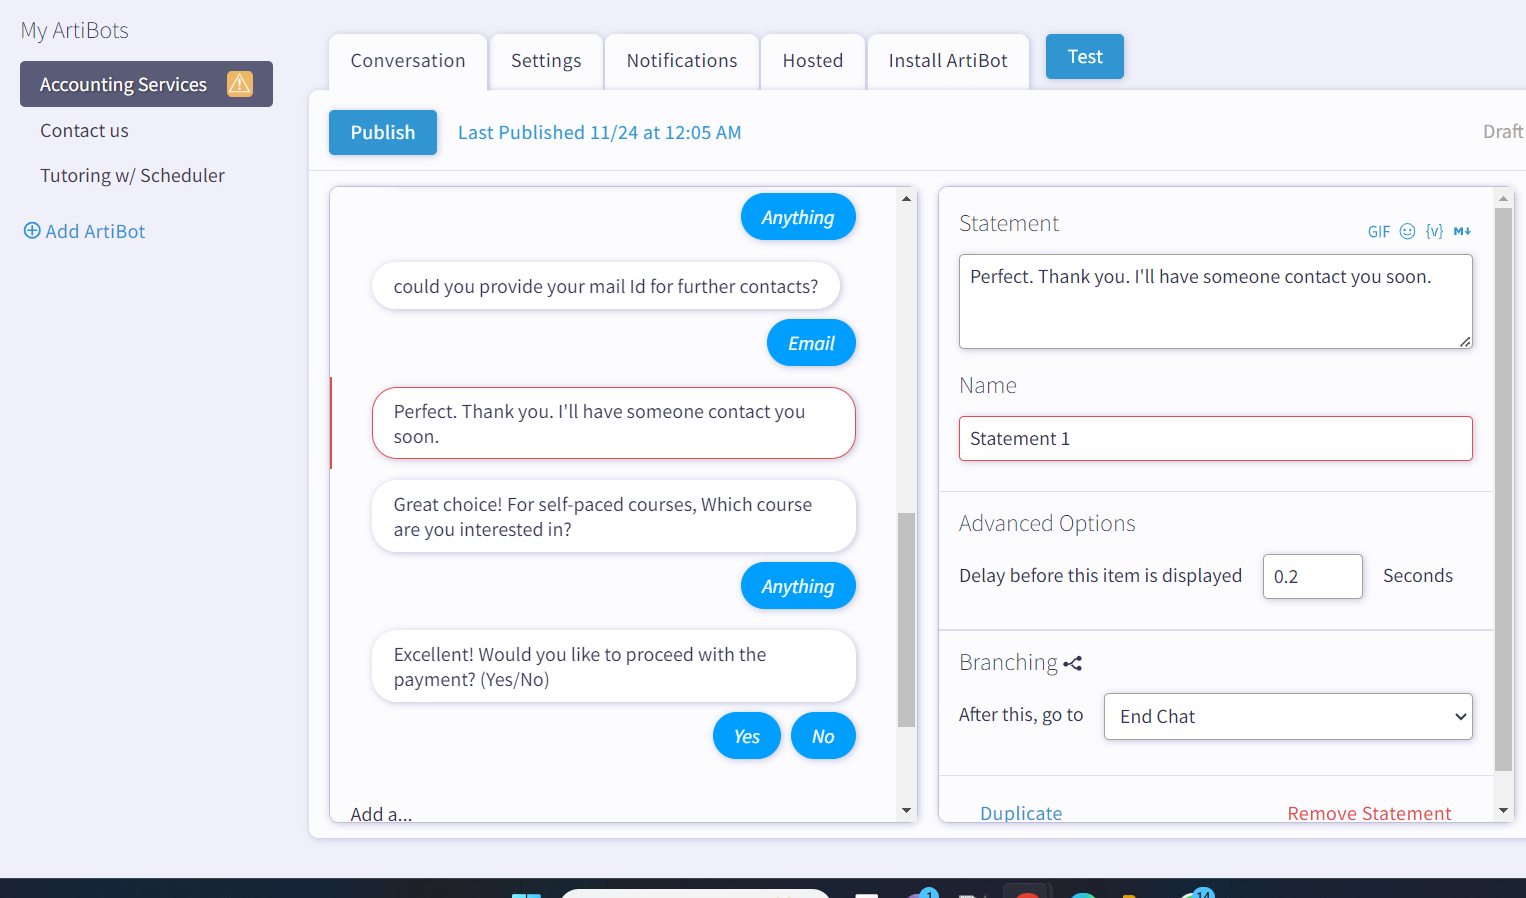
After the Email is answered it goes to the statement section here, the field type “statement” does not allow the user to reply but conveys a message to the user and after this, it goes to End chat means the end of the conversation.
(2) Conversation Between Chatbot and User When He Selects “Self-Paced”
Let's create a conversation, If the self-paced course option is selected in the multiple-choice format.
If self-paced is selected it moves to the Self-paced course of field type” question”.
There it asks for the name of the course the user wants to select…
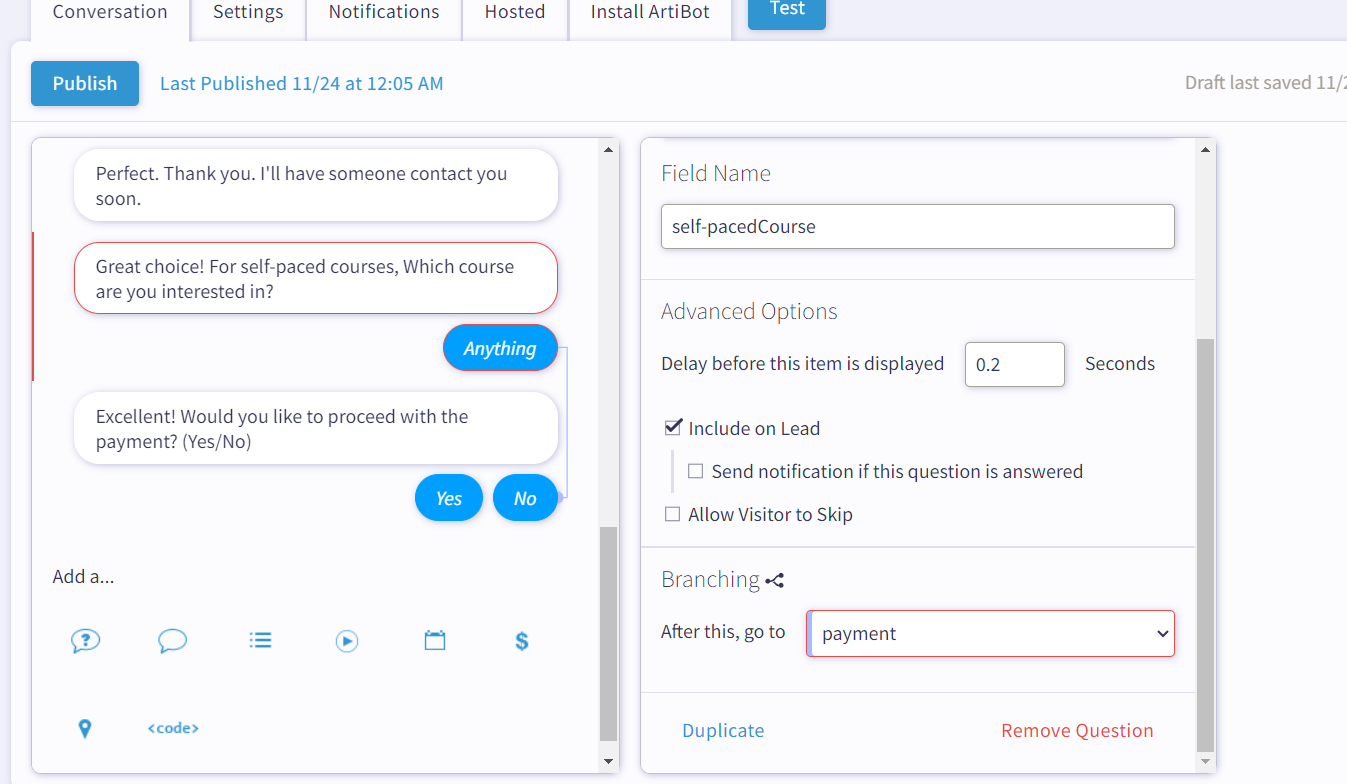
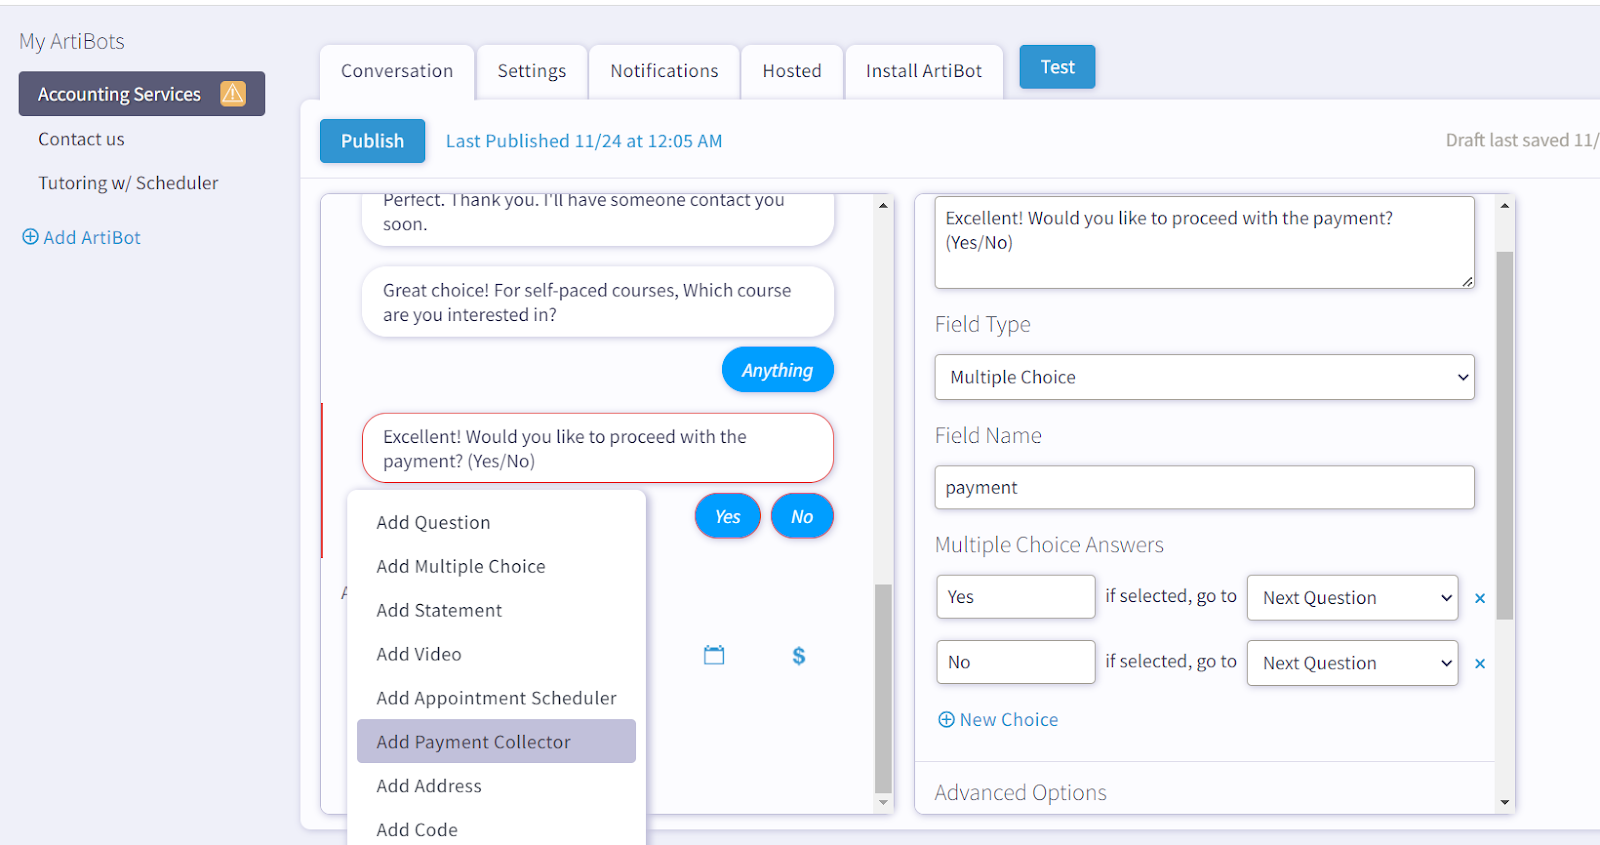
One of the field types offered by the artist is a payment collector.
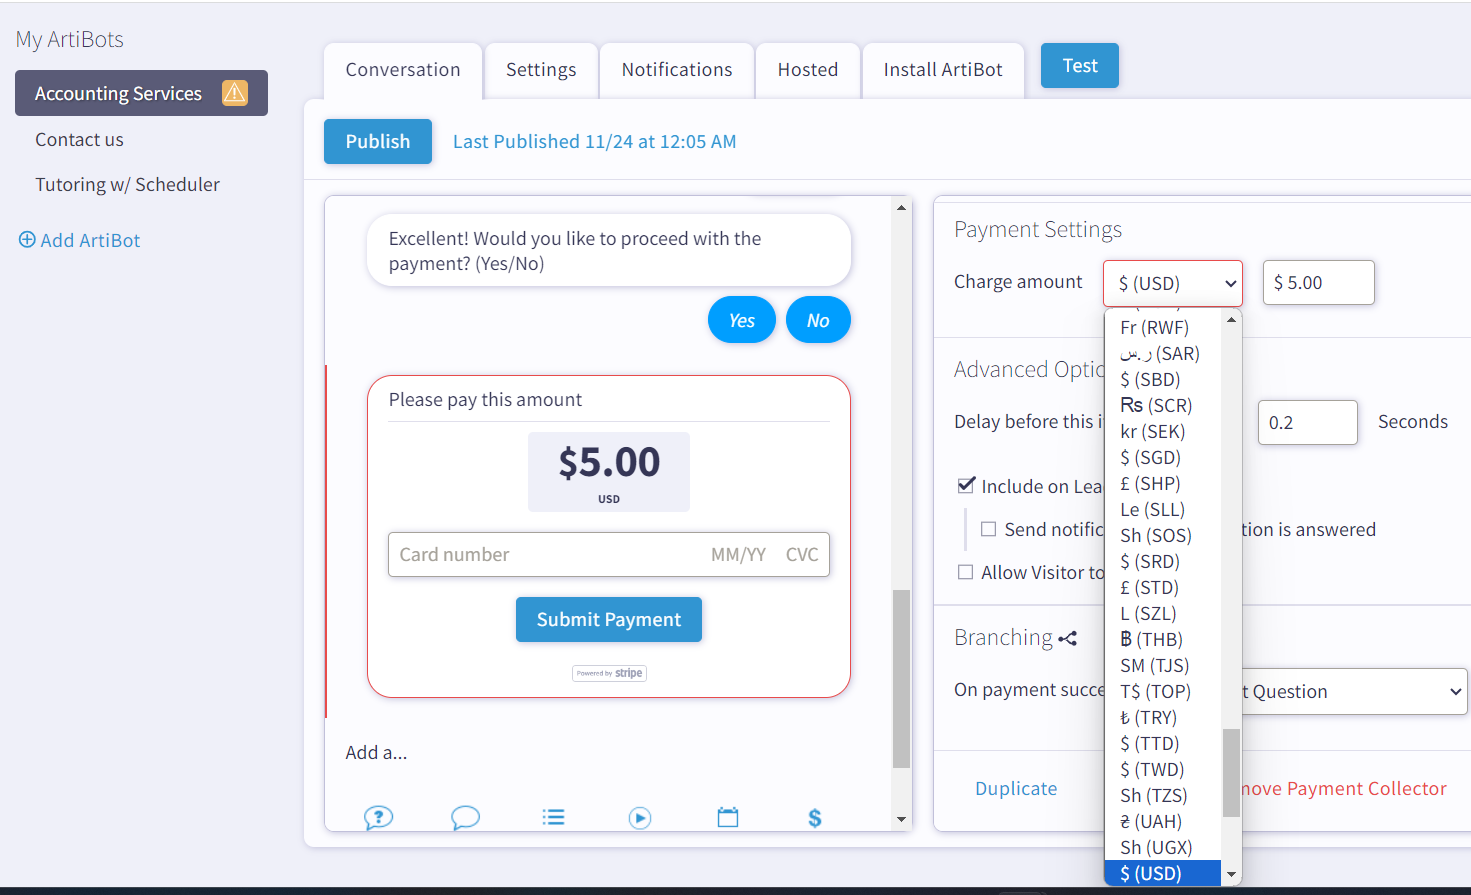
In settings, we have options to customize currencies for different countries. To process payments successfully, it is necessary to connect with Stripe; otherwise, the payment functionality will not work.
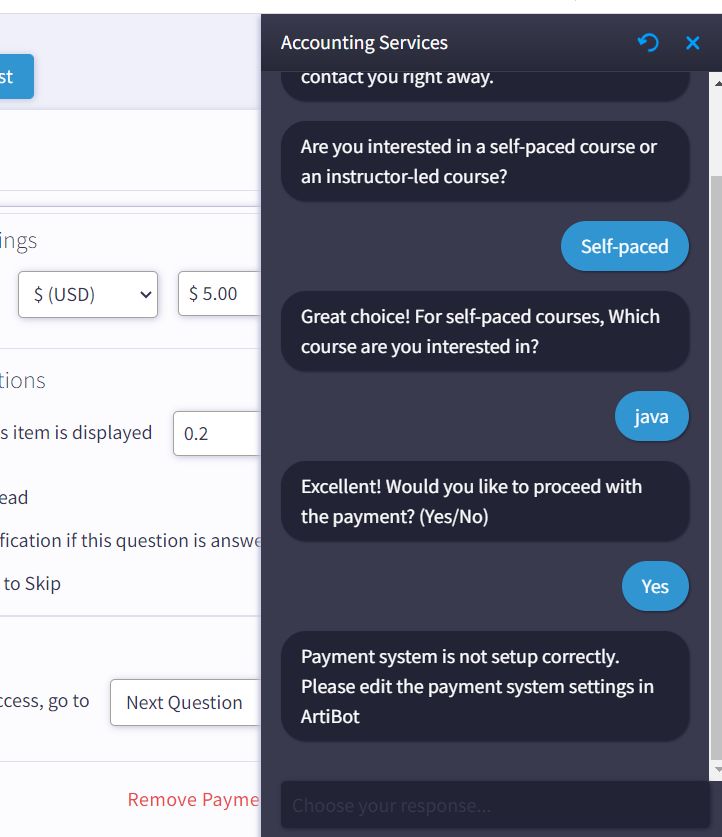
Let's connect the payment with Stripe.
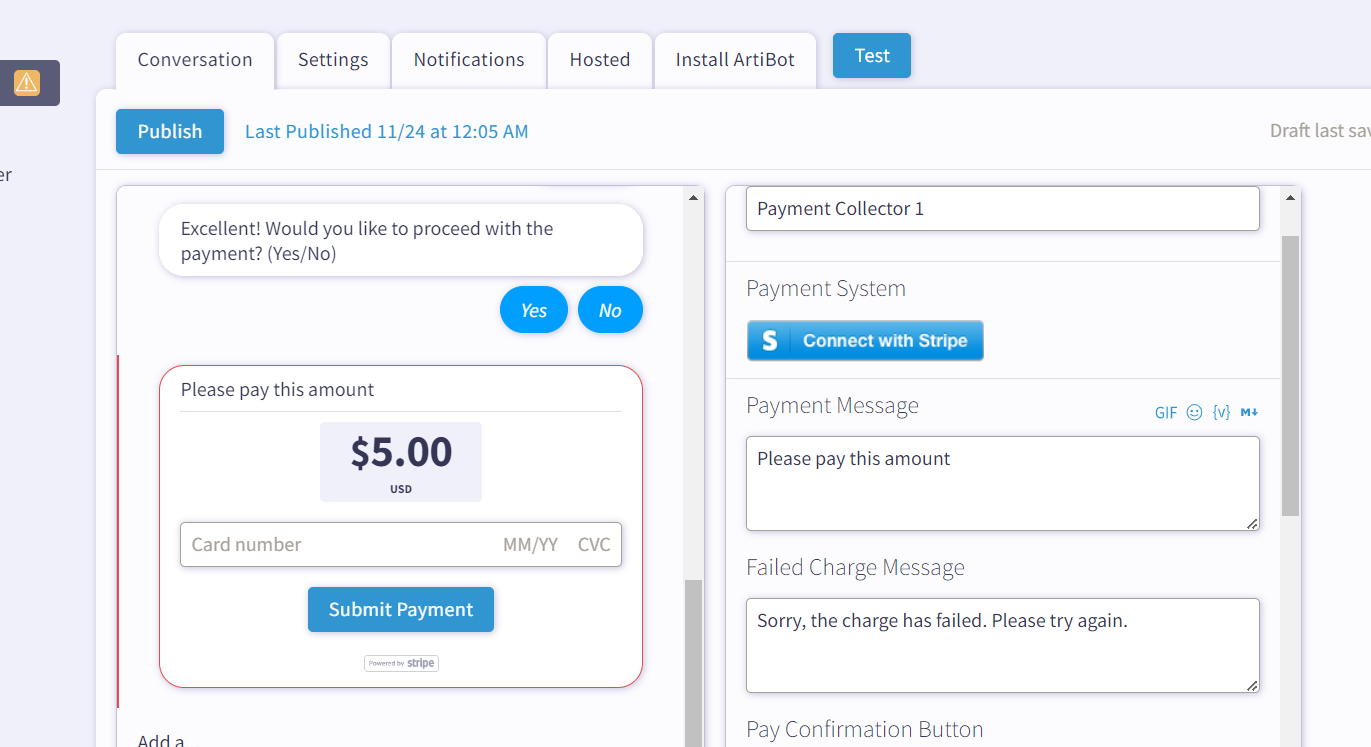
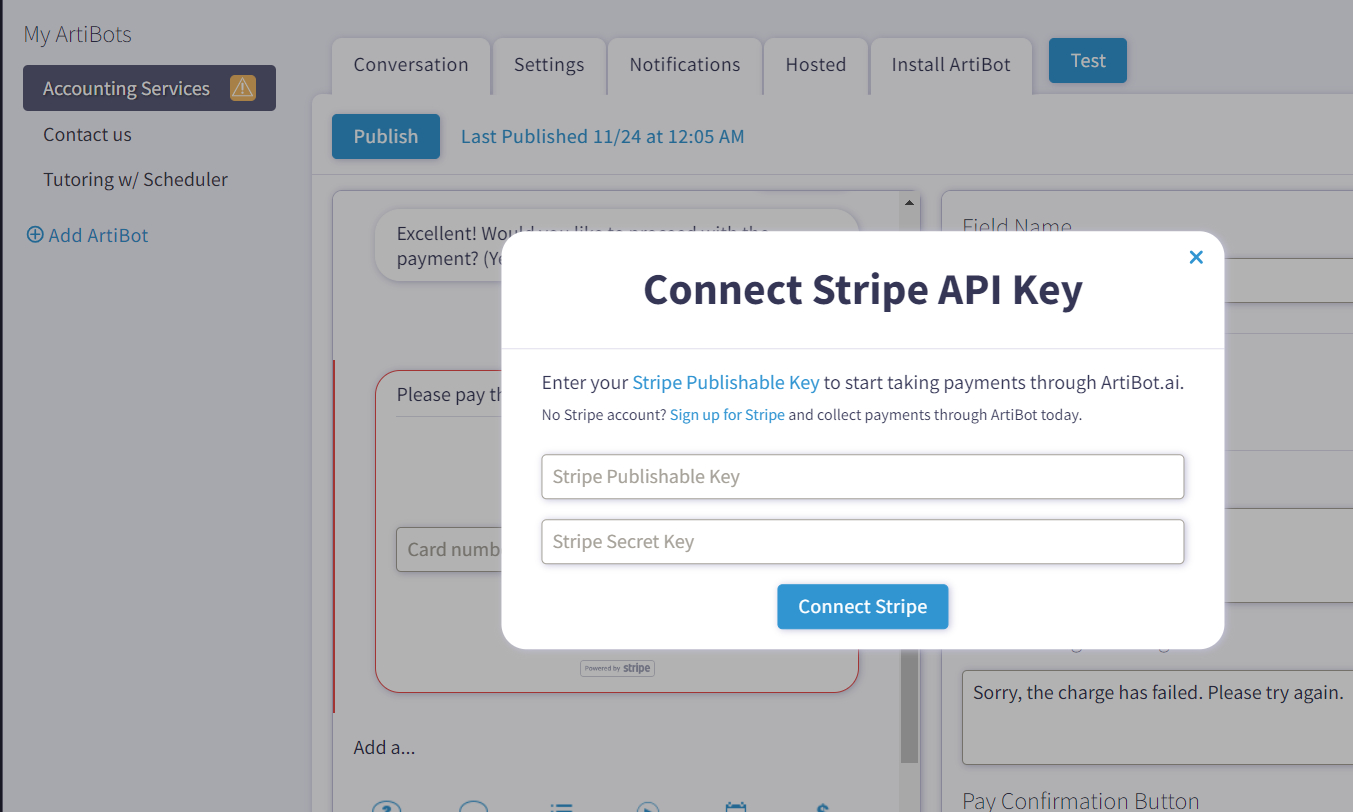
To establish a connection, we must input the necessary keys. Let's follow the steps provided by ArtiBot.
To proceed, you must sign up for Stripe, which will then redirect you to the Stripe dashboard.

First, enable the test mode for configuring payments. create a new account and fill in the essential details. Activating payments will direct you to a page outlining the steps needed to complete the connection.
Once completed the payment links are set up. Now, navigate to API Keys where you'll find both the secret and public keys. Reveal the secret key, obtain both keys, and proceed to connect with Stripe for payment integration.
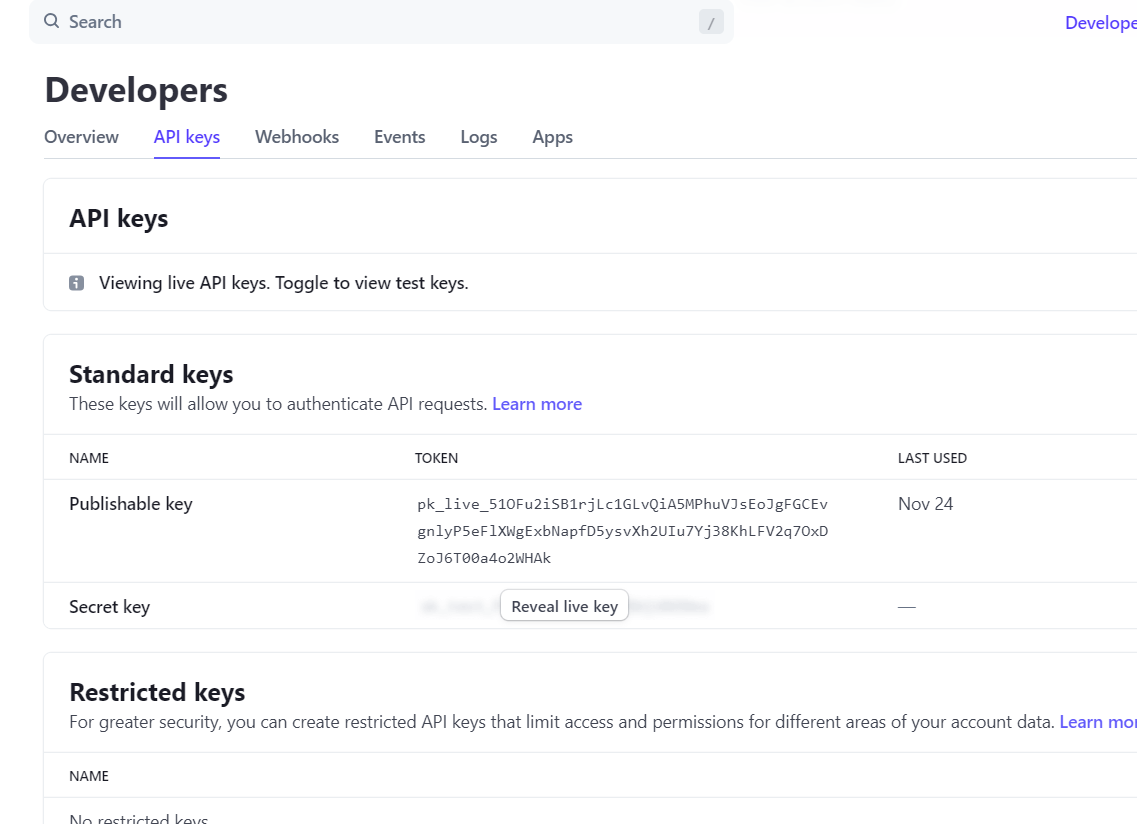
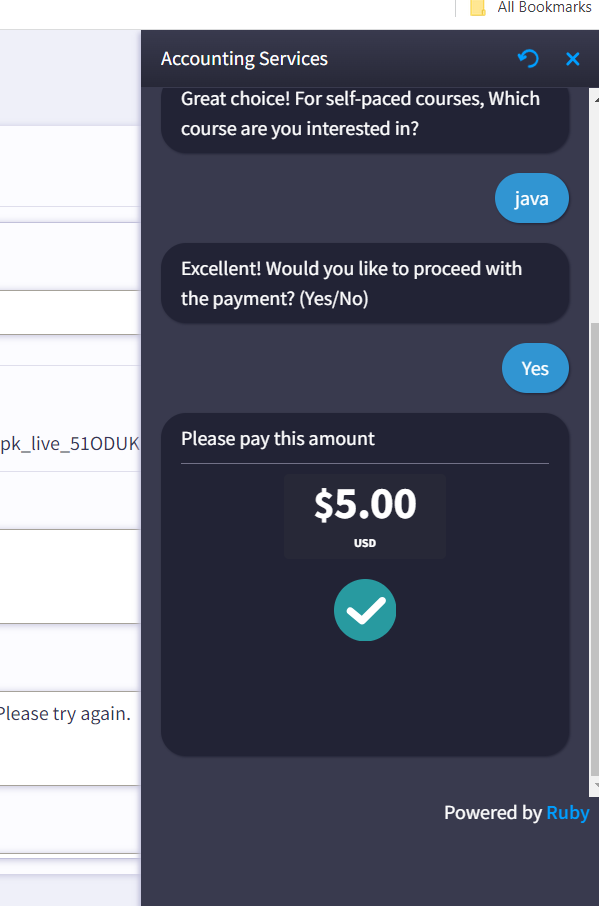
Now, attempt testing again to ensure that the payment functionality is working as intended.
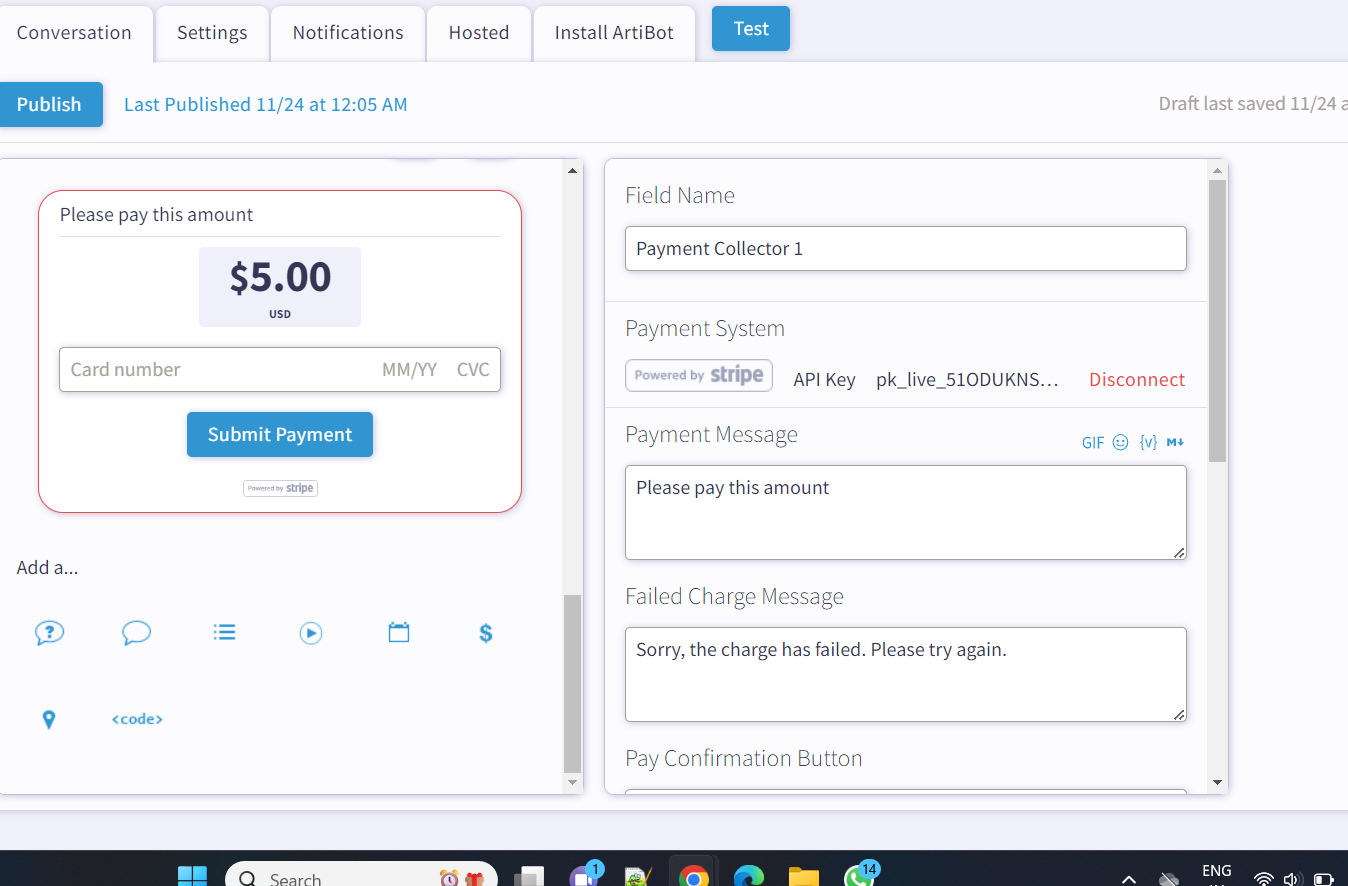
6. Testing:
Before deploying the bot on your website, test it thoroughly to make sure it responds correctly and provides a smooth user experience.
7. Deploy on Your Website:
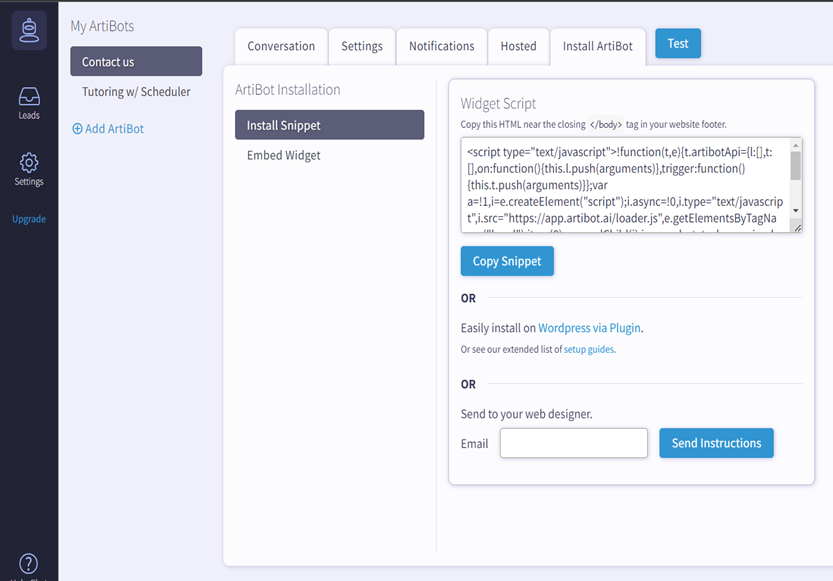
Once you are completed with your bot's configuration and testing, go to the Install ArtiBot tab, where you can get the code snippet of the customized bot. Just place the code snippet above the ending </body> tag. If you are not a developer, you can send instructions to your developers.
Opinions expressed by DZone contributors are their own.

Comments