Amazon Virtual Private Cloud (VPC) Basics
In this post, we will learn about VPC, Subnets, and some of the components like CIDR blocks, etc. We will create two subnets using an AWS web console to setup this VPC.
Join the DZone community and get the full member experience.
Join For FreeIntroduction
Amazon Virtual Private Cloud (Amazon VPC) is a service that lets you launch AWS resources in a logically isolated virtual network that you define. You have complete control over your virtual networking environment, including the selection of your own IP address range, the creation of subnets, and the configuration of route tables and network gateways.
A default VPC is created automatically by amazon inside each region for your account. This way, you don’t have to worry about it when starting with AWS services.
However, typically you will create your own VPC, and understanding of it is very important for moving forward with AWS.
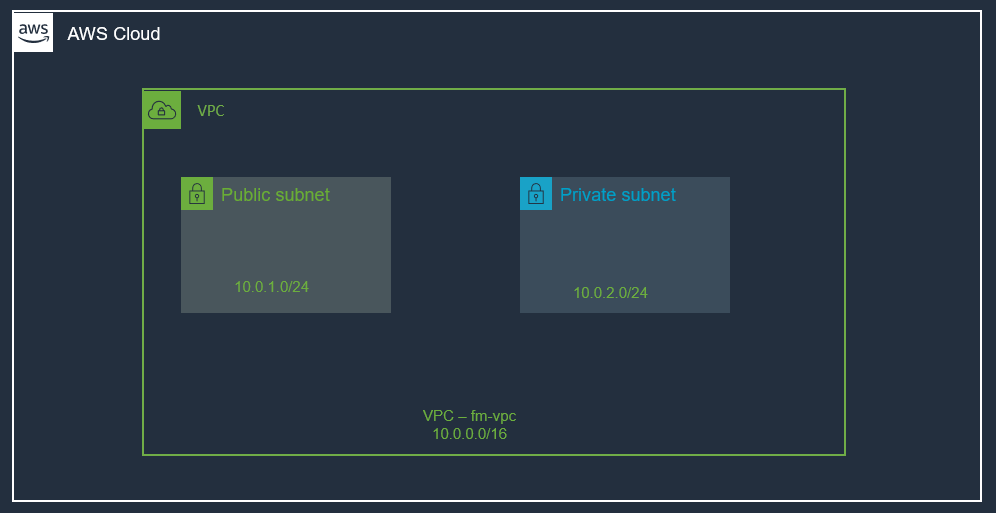
In this post, we will learn about VPC, Subnets, and some of the components like CIDR blocks, etc. We will create two subnets: one public subnet which we will configure later to connect with the internet via an internet gateway and one private subnet which will have no direct connection with the internet. We will be using an AWS web console to setup this VPC.
At the end of this post, we will have the following infrastructure setup:
Benefits of Using Amazon Virtual Private Cloud (Amazon VPC)
When you are creating a VPC, you are actually setting up a data center in the cloud, utilizing amazing AWS infrastructure, it's secure, highly available, and scalable.
- Secure and monitored network connections.
- Simple set-up and use.
- Customizable virtual network.
VPC Highlights
- A VPC is a logically isolated piece of AWS cloud dedicated to your company. This means, you can run applications on overly provisioned, highly available, and redundant infrastructure setup and it is managed by AWS. All the complexity of setting up a data center with cables, server racks, hardware, power supply, etc. all are managed by AWS.
- A VPC belongs to a region.
- A VPC spans all availability zones.
- You can have multiple VPCs per region.
- VPC contains one or more subnets.
- A Subnet is tied to a single availability zone.
- EC2 instances launch into subnets.
IP Addresses
- A big part of your VPC is your IP address.
- CIDR (Classless Inter-Domain Routing) blocks are used for these IP addresses. These IP addresses are private and are not publicly routable.
- Initially, you set a CIDR block for VPC. Then you assign portions of this CIDER block to individual subnets inside the VPC.
- CIDR blocks (Sizes between /16 and /28 are allowed):
- 10.0.0.0/16 (65,536 possible addresses) > 10.0.0.0 – 10.0.255.255
- 10.0.0.0/28 (16 possible addresses) > 10.0.0.0 – 10.0.0.15
One more very important thing to remember about the VPC CIRD block is that you should not have overlapping CIDR blocks, even in comparison to your on-prem data center. Treat your VPC as your cooperate data center. If you are not careful then you will have issues in the future when you try to do something advance with networking, e.g., setting up a VPN connection or likes. So, give yourself a favor, do not use overlapping CIRD ranges from day one.
There are Public IPs and Elastic IPs available for us as well to use. If you need a fixed static IP for example for an EC2 Instance, you can allocate one Elastic-IP and use it. More on those in the next post.
Create a VPC
We will create a VPC from the web console. We need to provide a name and IPv4 CIDR block for the VPC as shown below (/16 means that the first two octets are for network address):
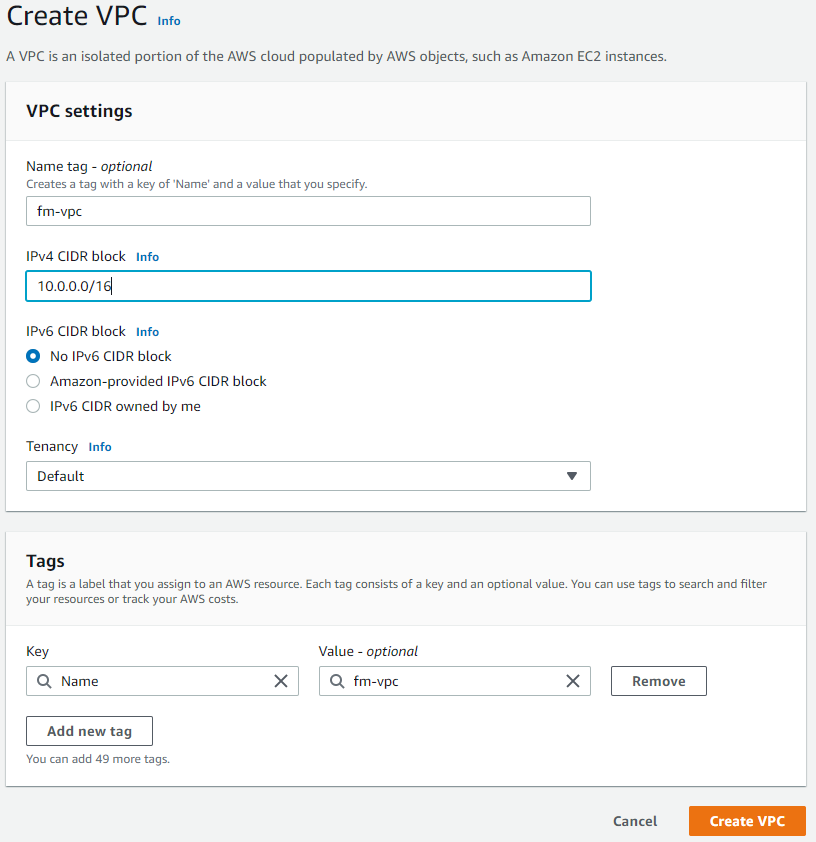
You can also check cidr.xyz to see a visualizer tool for CIDR blocks.
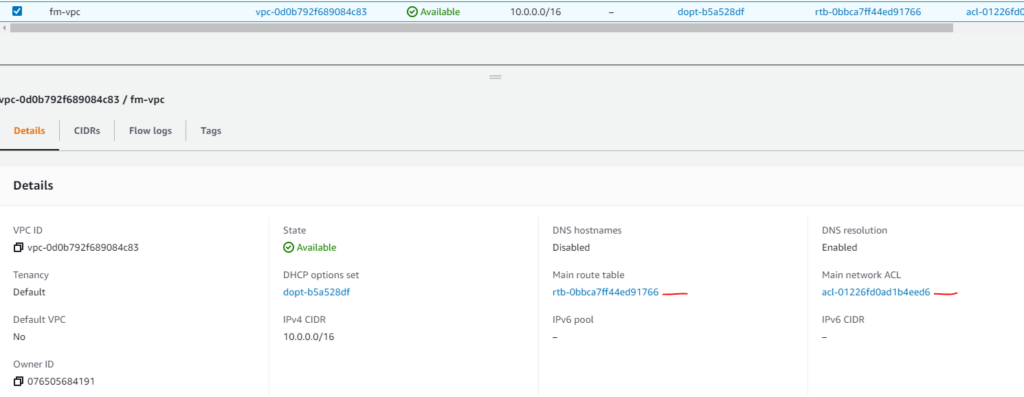
The following picture shows the created VPC. AWS also created some other items automatically for the VPC, e.g., Main route table and Main Network ACL (more on those later):
Subnets
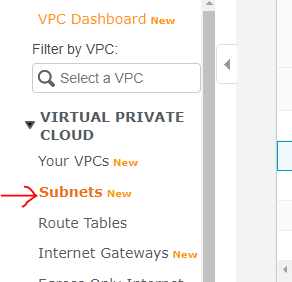
We can segment one VPC into subnets using a web console:
VPC > Subnets > Create Subnet
Create a Public Subnet
We need to select a VPC for the subnet, a name, CIDR block, etc., as shown below.
VPC CIDR info shown tells us what the available IP range is for the entire network so that we can specify only a piece of that for this subnet. Note the CIDR block for the subnet. When instances are launched, their IP address is determined by subnet CIDR.
We are naming this subnet a public subnet, it will have internet access later and this can be used for jump box (bastian server), etc. (Bastian server can be used by devs to connect to VMs inside the VPC. We will need a public-IP as well for this purpose. The public IP address can be used within the scope of the VPC. More on this in another post).
For each subnet block, AWS reserves the first 4 and last addresses of each subnet.
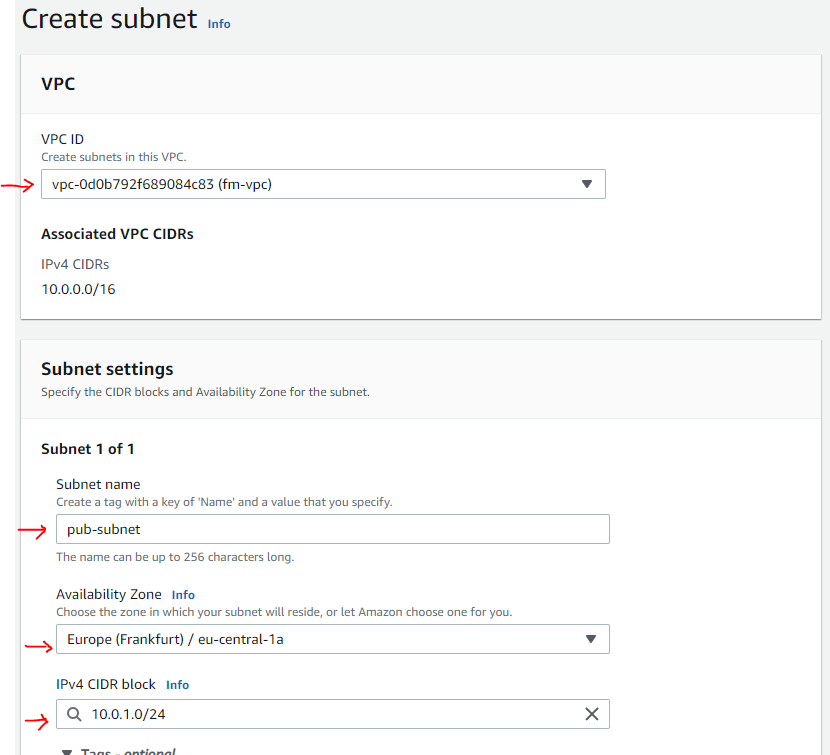
Create a Private Subnet
Similar to the above, we will create a private subnet. One difference is that this subnet will not have direct internet access:
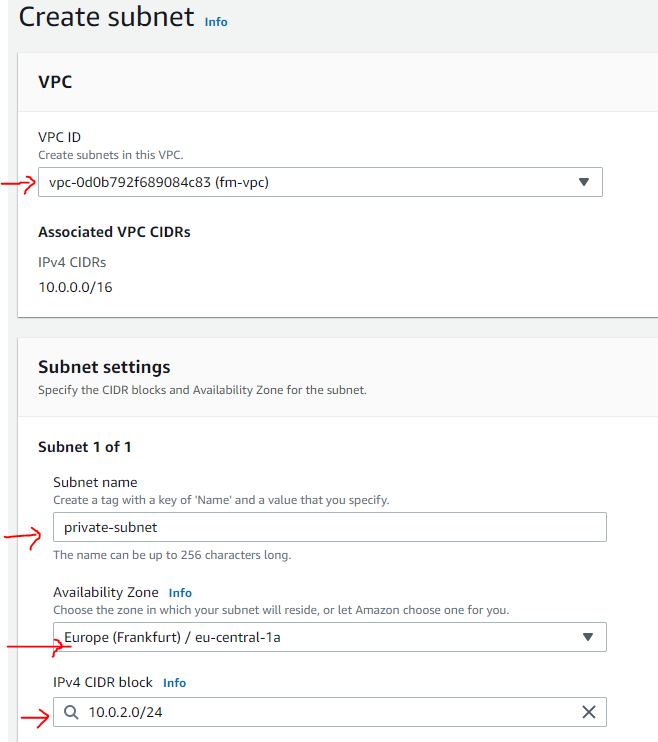
Subnets Created

Subnets for Application Tiers
If we want, we can create more subnets and use those for different tiers of our application e.g.
- > api-myApp-subnet (10.0.3.0/244) — private subnet.
- > db-myApp-subnet (10.0.4.0/244) — private subnet.
However, to keep things simple, we will have only two subnets (public and private) and we will not be creating additional subnets for application tiers.
Question
Isn’t this IP-Range going to overlap with another customer?
Answer
Absolutely Not. These VPCs are tied to your AWS account, therefore, it allows for (because this is a software-defined-networking) for each individual AWS account to leverage the same IP-range within the same region.
Naming your VPC
It will help you a lot to name your resources in AWS. You can also add tags, e.g., rg > Resource Group. Giving every single resource this tag will help you managing your resources:
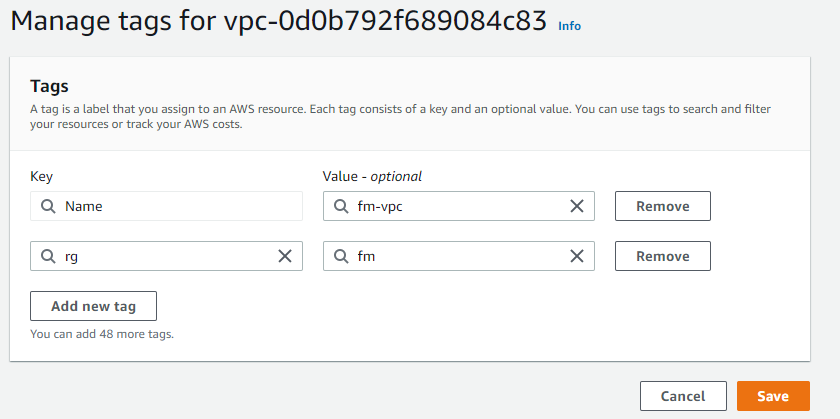
At this point, we have created our VPC with two subnets as shown below: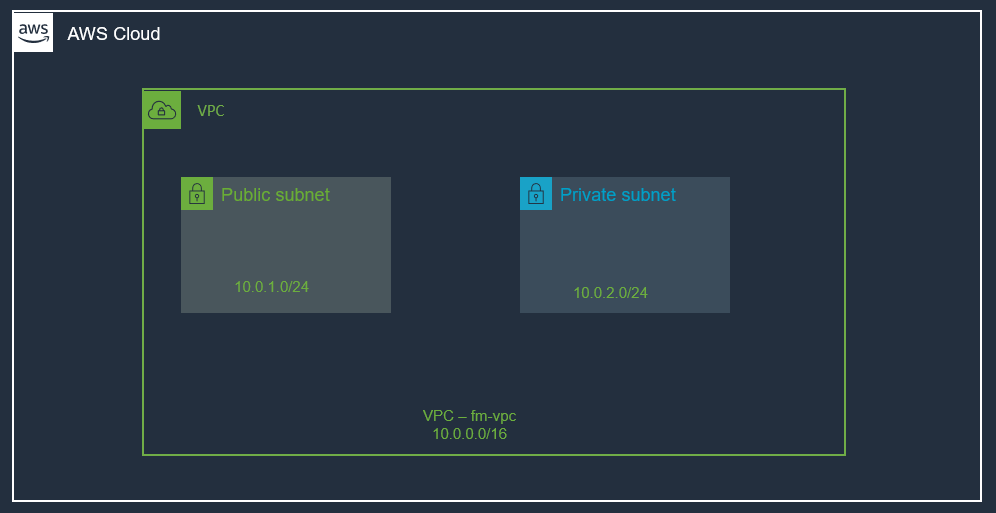
Summary
In this post, we learned the basics of VPC and saw how easy it is to set up and how much time and effort can be saved using this instead of setting up our own data center.
We set up one VPC with two subnets. Right now, this VPC is not doing much, and even we created a public subnet and a private subnet, they both are empty. No workload is running. The public subnet is only public in its name, in reality, currently, it is not different from a private subnet (meaning it does not have a connection to the internet). We will see in the next post how to move forward from this point onward.
Published at DZone with permission of Jawad Hasan Shani. See the original article here.
Opinions expressed by DZone contributors are their own.

Comments