A Comprehensive Guide To Deploy Ruby Bot Live On Heroku
Software deployment is an important part of implementing your software application after its initial phase of development.
Join the DZone community and get the full member experience.
Join For FreeSoftware deployment is an important part of implementing your software application after its initial phase of development. On the other hand, a bot is a continuous running script that performs a given task or responds to any triggered action on the occurrence of a specified event. Developers use them to carry out redundant activities. Let us find out more about these computing aspects.
What Exactly is Software Deployment?
Software Deployment encompasses all the processes, steps, and activities that make software ready to deliver from developers to users. It is the process of rolling out customized software that conforms to its client's demands in an interconnected world. Software deployment enables updates, applications, modules, and patches that optimizes the performance of the software. One of the key advantages of deployment is that testing ensures a bug-free, error-free process, and after the maintenance, the software is produced with additional updates and functions.
How to Deploy Software
The software deployment process includes three essential steps, as highlighted below:
Preparation
To prepare the software for deployment, developers compile the codes necessary for the functionality of the application and other libraries, configuration files, or resources. A single software is created by huddling all these items together. It is also necessary to validate whether the host app is correctly configured and its smooth functioning during preparation.
Testing
The probability of bug appearance in the production server is high after the deployment process. In this stage, through pre-configured automated tests of a text server, the developers identify bugs and errors that will be fixed before deploying the update.
Deployment
After confirming integral maintenance, the software is deployed to the live domain. If necessary, the developers will also include a database update before going live. Subsequently, it secures the software from all live server errors to maximize its performance.
A complete manual to deploying Ruby Bot' Live on Heroku in a step-wise manner is presented below.
Step 1:
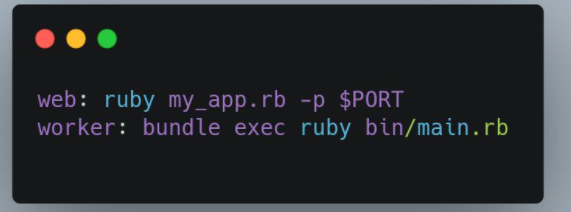
Develop a file titled Procfile on the root directory of the project and put in the following codes in the Procfile like:
xxxxxxxxxx
web: ruby my_app.rb -p $PORT
worker: bundle exec ruby bin/main.rb
 Now, build another file named
 my_app.rb within the project root directory and add the code from the following step.
Step 2:
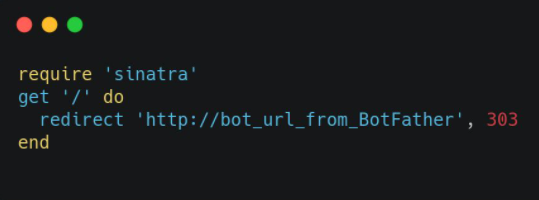
Use the following code in the next step:
xxxxxxxxxx
require 'sinatra'
get '/' do
redirect 'http://bot_url_from_BotFather', 303
end
 NB:
NB: http://bot_from_BotFather is your Telegram bot URL from Botfather.
In case you've forgotten, you can obtain your Telegram bot URL.
Step 3:
In this step you need to go to Gemfile and add the snippets below:
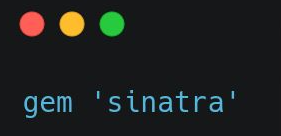
In the Gemfile, you need to include the gem sinatra,
xxxxxxxxxx
Gem 'sinatra'

Step 4:
Now run bundle install.
This command installs all dependencies that are required for deployment.
Some Important Snippets and Their Explanation:
xxxxxxxxxx
web: ruby my_app.rb. -p $PORT
This code guarantees the transformation of the app to the web. If the transformation of the app is successful, then it suggests that the app has been deployed to Heroku.
xxxxxxxxxx
worker: bundle exec ruby bin/main.rb
This code tracks the shift of the bot to the worker. If this is enabled then the bot will start automatically. Do not hesitate to replace ruby bin/main.rb with your respective command that can enable your bot to start locally.
xxxxxxxxxx
http://bot_url_from_BotFather ,303
This URL will redirect the bot to Telegram.
Step 5:
For creating an app on Heroku:
Run Heroku create <name_of_your_bot> from the terminal. Remember that <name_of_your_bot> is not compulsory, but only optional. Assign your name if you want to customize your URL on Heroku, or else Heroku will produce an automated URL. The name can be anything but hyphenate it like comic-telegram-bot.
Step 6:
Now run git and push Heroku master to move your bot to Heroku.
If you are not a master branch, then run git push Heroku master:<current_branch>. In this <current_branch> is the title of your present branch.
Step 7:
After pushing your bot to Heroku, run Heroku ps to open the app's dyno settings that will allow you to ensure whether the app is transmitted to the web, which means the deployment to Heroku is successful, and if the bot sent it to the worker, then the bot will start automatically. If all these steps are completed without any errors, then both the web and worker will be equal to 1. If the web or the bot isn't 1, then for a quick fix, run heroku ps: scale web=1 worker=1.
Step 8:
If there is any ENV variable, to add it visit the settings on the Heroku dashboard. To illustrate, if you want to login into Heroku and suppose you have Token=' my_telegram_API_key' in the ENV file, then click on Reveal Config Vars and add Token as KEY and my_telegram_API_key as the VALUE. And finally, click Add.
Step 9:
To redirect yourself to Telegram, click on Open app after successfully adding the ENV variable. Moreover, click Open only when it's prompted on the screen. Note that if your API is not encrypted, then do not add the ENV variable. Hardcoded API key will not enable you to add ENV variable in Heroku. If your bot goes to sleep after one or two hours, then do not panic. To solve this, login to Heroku and click on Open app. This will assist you to interact with your bot live without starting it locally.
Conclusion
Using these steps, you will be effortlessly able to deploy your Ruby bot live on Heroku in no time. It is best to use the service of expert programmers and coders for software deployment purposes.
Published at DZone with permission of Jack David. See the original article here.
Opinions expressed by DZone contributors are their own.

Comments