6 Lucid Steps to Move Data From Salesforce Using Talend
Learn how to use the free Talend data integration tool to transfer data from SalesForce, making data migration and integration easier than ever.
Join the DZone community and get the full member experience.
Join For FreeData transfer from Salesforce is not a very tedious and difficult job, and with Salesforce data import wizard and Salesforce Dataloader.io tools, this job has all the more become a point and click process. But when it comes to large scale data transfer, these tools become too critical to function efficiently. Keeping in mind the various shortcomings of these tools, myriad tools have been launched in the market by the integration players. Enter Talend! It is one such player with great integration and migration offerings that can be used for lucid and effective data movement to and from Salesforce.
Talend Open Studio Data Integration Tool
The Talend tool is basically a code generator tool, and for every specific task, it automatically creates a code corresponding to it which can be run either in the Open Studio tool or in any other compiler of your choice. This tool also gives you the provision to modify the job parameters and queries, thereby enhancing the flexibility in creating the codes.
Steps To Use Talend To Migrate Data
Using Talend is quite simple and it does not require an expert in coding to use it. Here are the steps you need to follow to simplify the process of data migration to and from your Salesforce org.
Installing
You can download and install Talend Open Studio Data Integration Tool from here.
However, you will require a Java Runtime Environment to run the tool.Opening Talend
The initial step involves opening Talend and creating a new project. You can either create a local project with the available default credentials, or you can access a cloud hosted project through a login and password.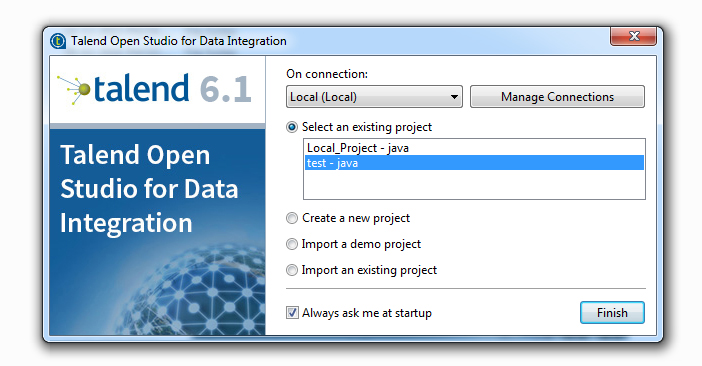 After opening a new project, the next step involves in creating a new job. You will find Job Design on the left-hand side panel that is labeled as a repository. Right click on Job Design and create a new job. It is more advisable to create folders to keep your jobs organized. Having created a new job will open the Job Designer panel.
Creating New Salesforce Metadata Elements
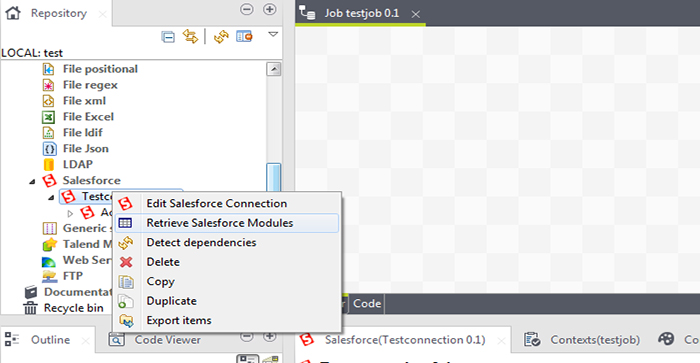
This step explicitly shows the advantages of having more than 800 connectors. Talend has an inbuilt metadata connector for Salesforce. Open the metadata section in the Repository panel, locate Salesforce in the expanded section and then right click and select create Salesforce Connection. It prompts the software to install additional modules. Post the completion of installation you have to fill in the necessary details and append your current password with the Salesforce security token for a successful connection.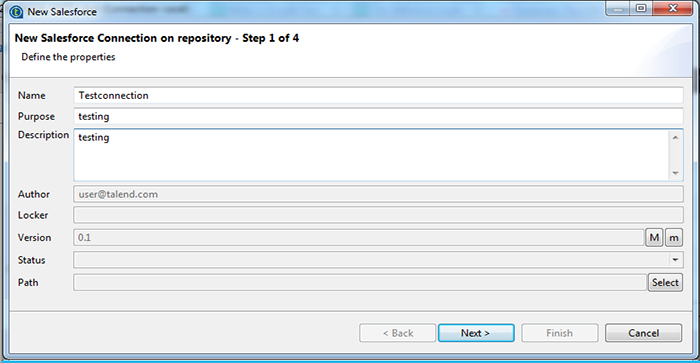 This will enable a fresh connection and you will be able to retrieve all the Salesforce modules by just right clicking the connection and selecting retrieve Salesforce module. This will help to list all the custom as well as standard Salesforce modules which can be retrieved upon selection from the list. This action will be responsible for retrieving all the columns of the module.
Establishing Connections
Once the Salesforce connection has been established, it gives you the provision to drag and drop the connection to the Job Designer Panel. On clicking the connection present in the job designer screen, you will be able to see all the imperative settings that are associated with the component on the screen present just below the job designer. These settings basically define the actions that you would be performing on the object. However, the type of connector you choose will define the input and the output operations.
You can also create a new connection by dragging a connection component from the right panel i.e Palette. Go to Cloud → Salesforce → Salesforce Output. Drag and drop the component to the job designer and then click on the component and edit the basic connection settings. Post the creation of the input and the output component you only have to click on the small red arrow on the side of the input component and drag and drop it into output component.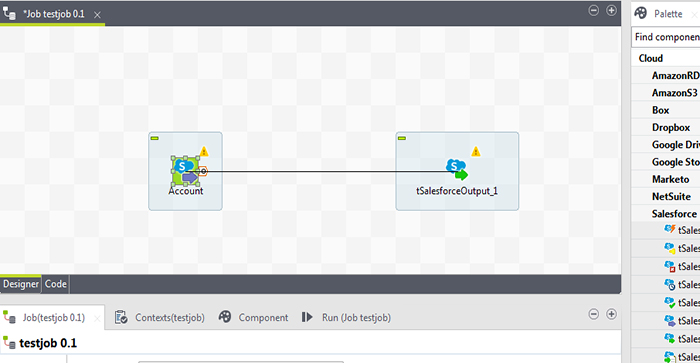
Mapping
Connecting components this way will work out perfectly when you do not have to map the data for proper transfer. When you have to transfer data of a particular custom module from one Salesforce org to another, you have to make use of the tMap component. This component is available under the Process menu in the Palette. You can easily drag and drop the component in the job designer and then connect the input component to the tMap and then eventually connect the tMap to the output component. If you double click the mapping component, it will open up the mapping screen, which again supports drag and drop features as well as auto map features.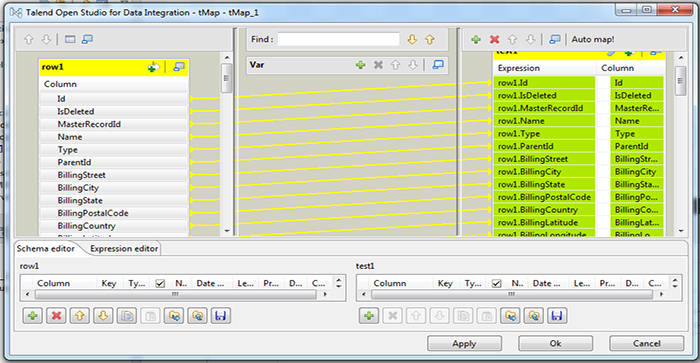
Run
The last step is to run the job. There are several ways in which you can execute your job by either right clicking the job and selecting the Run Job in the Repository panel or by clicking Run Job in the component detail panel under the job designer panel.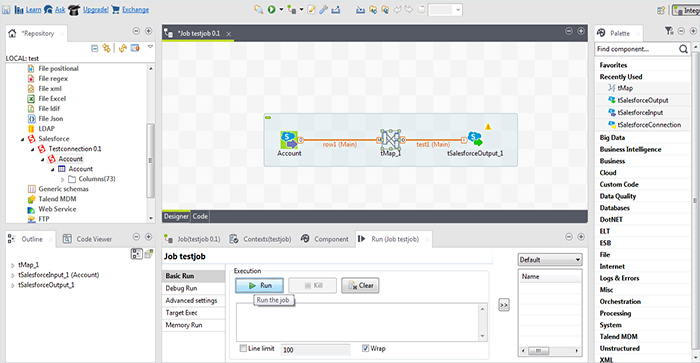
On an ending note, it is quite mandatory to say that in today’s era, Talend is a potential stand alone product. Talend is continuously evolving and giving its competitors to some serious long term goals to achieve.
Opinions expressed by DZone contributors are their own.

Comments